Aqua-Hot 600 Series Service Manual
Hide thumbs
Also See for 600 Series:
- Use and care manual (24 pages) ,
- Use & care manual (20 pages) ,
- Service manual (122 pages)
Table of Contents
Advertisement
Quick Links
Advertisement
Table of Contents

Subscribe to Our Youtube Channel
Related Manuals for Aqua-Hot 600 Series


Summary of Contents for Aqua-Hot 600 Series
- Page 1 Service Manual Series AHE-675-D04...
-
Page 2: Table Of Contents
Bearings ................65 Cold Weather Operation ............82 Diesel Burner Controller ............68 Aqua-Hot Maintenance ............. 83 Fuel Pressure ................ 70 Winterizing the Aqua-Hot ............95 Troubleshooting ............... 75 Filling the Aqua-Hot ..............96 Black Smoke ................. 75 Purging/Draining the Aqua-Hot ..........97 White Smoke .................76... -
Page 3: Introduction
Use caution when working on or near any gas systems. Figure 1 • DO NOT connect the 12-volt DC power to the Aqua-Hot if the If additional assistance is needed in diagnosing and vehicle requires welding. repairing the Aqua-Hot, please contact our Technical Service •... - Page 4 In order for the diesel-burner to be considered as a For interior heating, it is the room thermostats that trigger heating source by the Aqua-Hot, it must have an adequate fuel the Aqua-Hot’s interior heating system. When a thermostat...
-
Page 5: Maintenance Schedule
fl ow to the AC relay, which activates the relay in order to allow AC power to fl ow to the electric heating element. In order to keep the Aqua-Hot running at its full potential, When the electric heating element receives power, it becomes it’s highly recommended to have the diesel-burner tuned... -
Page 6: System Specifi Cations
Recreation Vehicle Industry Association, 1896 Preston White Drive, Hot, and provides a ready reference to specifi cations, test PO Box 2999, Reston, VA 22090-0999. Call them at (703) 620- standards, and important safety notices. 6003 or visit online at www.rvia.org. ©Aqua-Hot® 675D Service Manual p. 5... -
Page 7: Component Cut-Aways
The top and side panels have been made transparent in the view above to aid in the explanation of the heater. DO NOT remove these panels. Doing so risks irreparable damage to the Aqua-Hot. Only remove the service panels. p. 6 ©Aqua-Hot®... -
Page 8: Operational Flow Chart
Aqua-Hot to be re-heated heat into the coach interior The now cooled antifreeze and water solution is recirculated back to the boiler tank of the Aqua-Hot to be reheated. ©Aqua-Hot® 675D Service Manual p. 7... -
Page 9: Heating Solution
The following information addresses the necessary usage of a water; suppliers of premixed antifreeze are responsible for the propylene glycol based “boiler “ type antifreeze in the Aqua-Hot. use of high quality (distilled, deionized, or soft) water when Propylene glycol is a safer alternative to the more toxic ethylene preparing their antifreeze for sale. - Page 10 Aqua-Hot from allows the antifreeze to transport the heat providing adequate domestic hot water and interior heating.
-
Page 11: Measuring Antifreeze With Refractometer
Refractometer Sight Glass Application of Propylene Glycol Upper Blue Field Poor Poor Good Boundary Line Adjust to 32°F Lower White Field p. 10 ©Aqua-Hot® 675D Service Manual... -
Page 12: Interior Switch Controls
The interior switch panel is used to control the two potential (50°F or higher), and/or when there is a low demand for hot heating sources for the Aqua-Hot’s boiler tank, as well as to water. It can be activated by turning the electric switch in the ON control the engine preheat feature. - Page 13 10 to terminal 4. Connect to the coach wire that does NOT have 12V DC Pin 10 of the power present High/Low Switch Connect to Pin 4 of the High/Low Switch p. 12 ©Aqua-Hot® 675D Service Manual...
-
Page 14: Exhaust System
The exhaust must NOT vent in the awning area of the motor without deviation to ensure optimal unit operation. home or near the slide-out areas Because the Aqua-Hot’s exhaust is hot and must be kept away • The exhaust must be able to freely exit away from the... -
Page 15: Thermostat Locations
Use the Figures below for reference on the removal of the access panel and the location of the thermostats and sensors. Access Panel Figure 11 Fluid Level Sensor DC High-Limit Thermostats Control AC High-Limit Thermostat/ Thermostats ETS Module Figure 13 Figure 12 p. 14 ©Aqua-Hot® 675D Service Manual... -
Page 16: Interlock Switch
2. Release the interlock switch from the Aqua-Hot cabinet allowing the diesel-burner to operate. by pushing in on the locking tabs and pulling the interlock If the Aqua-Hot fails to operate, and shows no illuminated lights switch. or displays, it is possible that the interlock switch is faulty. -
Page 17: Fluid Level Sensor
Troubleshoot the fl uid-level sensor if the Reporter has issued a ALLOW THE HEATER TO COOL BEFORE SERVICING COULD low fl uid level fault and the Aqua-Hot is adequately fi lled. CAUSE SERIOUS DAMAGE OR PERSONAL INJURY. The fl uid-level sensor operates by relaying a continuity signal to the Reporter while it is wet. -
Page 18: Ets Module/Control Thermostat
The ETS module precisely measures the temperature of the heater, and allow approximately 2 gallons to drain from the coolant inside of the Aqua-Hot boiler tank. This allows for very unit. granular control of the unit to deliver precise heating and hot 3. -
Page 19: Ac High-Limit Thermostat (Right)
Aqua-Hot’s boiler tank. right side electric heating element fails to operate correctly. 6. Install the replacement high-limit thermostat into the port on the Aqua-Hot’s boiler tank and fi nger tighten only (15 Troubleshooting Guidelines: in-lbs). The following conditions must be met before the AC High- Connect the wires on the replacement high-limit thermostat Limit Thermostat can be diagnosed, and if necessary, repaired. -
Page 20: Ac High-Limit Thermostat (Left)
6. Install the replacement high-limit thermostat into the port Troubleshooting Guidelines: on the Aqua-Hot’s boiler tank and fi nger tighten only (15 in-lbs). The following conditions must be met before the AC High- Connect the wires on the replacement high-limit thermostat Limit Thermostat can be diagnosed, and if necessary, repaired. -
Page 21: Dc High-Limit Thermostats
4. Install the replacement high-limit thermostat into the port • Ensure that the unit is completely cool. on the Aqua-Hot’s boiler tank and fi nger tighten only (15 • Ensure that DC electrical power is supplied to the Aqua-Hot. in-lbs). -
Page 22: Check Valves
MODE to ensure that the heating zone is on. Figure 31 Replacing the Check Valve: 1. Ensure that the Aqua-Hot has been completely shut down and that all power sources have been disconnected. Be sure the boiler tank has adequately cooled. -
Page 23: Tempering Valve
Tempering Valve 10. Slide the hose back onto the replacement pump and set the constant tension clamp back into place. 11. Refi ll the Aqua-Hot’s boiler tank with the antifreeze and water heating solution. Tempering Valve Figure 35 Figure 34... -
Page 24: Circulation Pumps
fi ttings with Tefl on tape. Figure 39 Troubleshooting Procedure: 1. Verify the Low Temp Cutoff (LTCO) is showing on the Reporter, as it will be continuously on the 600 Series. Figure 37 8. Install the brass fi ttings onto the replacement tempering Figure 40 valve. - Page 25 12V DC power at the Reporter on J2 (pin # will depend on which pump is faulty - refer to the schematic 1. Ensure that the Aqua-Hot has been completely shut down on page 98). and that all power sources have been disconnected. Be sure the boiler tank has adequately cooled down.
-
Page 26: Engine Preheat Pump
Low Temp Sensor, and the Electric or Burner. Mounting Bracket Figure 51 Figure 49 • If not, make sure the boiler tank is up to temperature and the burner/electric is turned on. If they are, there ©Aqua-Hot® 675D Service Manual p. 25... - Page 27 Engine Preheat pump. If no voltage is present, the Reporter will need to be replaced. Replacement Procedure 1. Ensure that the Aqua-Hot has been completely shut down and all power sources have been disconnected. Make sure Mounting Bracket the heater is adequately cooled.
-
Page 28: Ac Electric Elements
Module. of hot domestic water and/or interior heat when the electric • If the boiler tank is above 158°F, the Aqua-Hot is at element is selected as the heating source. operating temperature and requires no heat. NOTE: For continuous domestic hot water, the diesel burner 4. - Page 29 - 9.5 ohms. If not, follow the replacement procedure to replace the element. Replacement Procedure: 1. Ensure that the Aqua-Hot has been completely shut down and that all power sources have been disconnected. Make sure the boiler tank is adequately cooled.
-
Page 30: Ac Relays
AC relay works with the left element. Replacement Procedure: Troubleshooting Guidelines: 1. Ensure that the Aqua-Hot has been completely shut down The following conditions must be met before the electric and all power sources have been disconnected. -
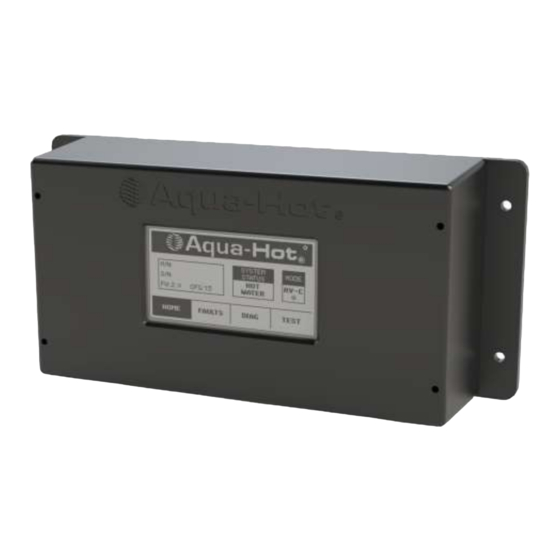
Page 31: Aqua-Hot Reporter
NOTE: For networked control of the Reporter, Aqua-Hot requires system integrators ensure that individual commands are received and processed. Aqua-Hot requires that commands be repeated or confi rmed so that if a single message were dropped, or if there is a brief network disturbance, the Reporter would get into the correct state as soon as the disruption was removed. - Page 32 Replacement Procedure: 10. Tap the Reporter screen to wake the unit. Select “NEXT”. 1. Ensure that the Aqua-Hot has been completely shut down and that all power sources have been disconnected. 2. Remove the four screws that are securing the Reporter.
-
Page 33: Reporter Testing & Manual Mode
The Reporter contains fi ve distinct categories of fault conditions pumps, and heat sources until the unit has been refi lled and which will assist in diagnosing and repairing the Aqua-Hot the Reporter has been reset. should problems arise. Low-voltage, over-temperature, and... - Page 34 Interlock Switch Manual Mode This mode can accessed under the test page of the Aqua-Hot Heating Reporter (see below). The heating tab will allow the burner, the burner indicator light, and the electric element to be activated and run for fi ve minutes to test for functionality.
-
Page 35: Diesel Burner
The fl ame is established in a combustion chamber within the Aqua-Hot’s boiler tank, and the heat from the fl ame is transferred to the antifreeze and water heating solution where it can be used for each system of the Aqua-Hot - domestic hot water, interior heat, and engine preheat. - Page 36 Interlock Switch Diesel Burner Figure 76 ©Aqua-Hot® 675D Service Manual p. 35...
- Page 37 Washer, Star, Protection Housing WPX-436-216 Protection Cap WPX-147-834 Screw, Flange, Blower Housing WPX-425-05A Motor Mounting Plate WPX-432-377 Motor Plate Screw WPX-152-269 Washer, Star, Motor Plate WPX-425-060 Motor, Combustion Air/Fuel Pump 12V DC WPX-350-516 Clutch Half, 6mm p. 36 ©Aqua-Hot® 675D Service Manual...
- Page 38 Blower Housing Gap) ) - 0.0mm STOCK WPX-373-001 Blower, Wheel with Shaft 42 (nut) WPX-378-313 Bearing Kit WPX-412-244 O-Ring Blower Casing WPX-225-67A Blower Casing WPX-298-964 Grommet, Blower Casing, Left WPX-299-995 Grommet, Blower Casing, Right ©Aqua-Hot® 675D Service Manual p. 37...
- Page 39 5 Nm - 6 Nm (44-53 lb-in) WPX-274-313 Ignition Electrode 6 ± 0.6 Nm WPX-638-78A Flame Sensor WPX-887-71A Photo Disc WPX-453-048 Clip, Retaining, Photo Disc WPX-147-699 Flame Sensor Screw WPX-503-03A Fuel Pump Kit WPX-665-49A High Pressure Fuel Tube p. 38 ©Aqua-Hot® 675D Service Manual...
- Page 40 WPX-886-41A Fuel Nozzle, 0.35 GPH tube) WPX-412-198 Manifold, Fuel Nozzle, Brass WPX-277-150 Screw, Plate, Nozzle Stand WPX-102-861 Plate, Manifold WPX-371-289 Gear, Fuel Pump, Nylon WPX-152-390 Snap, Ring, Gear FLX-421-010 Fitting, Hex Union 1.4in Tube ©Aqua-Hot® 675D Service Manual p. 39...
-
Page 41: Diesel Burner Operation
Fuel Pump, will begin to the preset temperature of operate. • The ETS Module/ approximately 160°F. Control Thermostat, NOTE: If the Aqua-Hot’s coolant which senses temperature is approximately coolant temperature, 190°F or higher, the Motor reaches the preset will not operate. Only when the... - Page 42 Diesel Burner Operation Interlock Switch NOTE: The Motor and Combustion Air Blower will begin to operate only if the ETS Module/Control thermostat is calling for heat. ©Aqua-Hot® 675D Service Manual p. 41...
- Page 43 Diesel Burner Operation Interlock Switch p. 42 ©Aqua-Hot® 675D Service Manual...
- Page 44 Diesel Burner Operation Interlock Switch NOTE: Whenever the Diesel Burner is switched OFF by the Control Thermostat/ETS Module, it will automatically be reactivated once the Aqua-Hot boiler tank’s coolant reaches the present temperature of approximately 160°F (±5°). ©Aqua-Hot® 675D Service Manual...
-
Page 45: Detaching The Diesel Burner
Be sure to clamp off the Fuel Supply and Return switch panel to the OFF position and disconnect the diesel lines at the ports on top of the Aqua-Hot prior to burner’s power supply before detaching the diesel burner beginning this replacement procedure. - Page 46 Diesel Burner Figure 80 Controller Step 4: Remove the fuel lines from the Aqua-Hot Using a 7/16 wrench, loosen the nuts securing each fuel line Locate where the fuel lines on the diesel burner connect to the Aqua-Hot bulkhead fi ttings.
- Page 47 Step 5: Remove the Diesel Burner from the Aqua-Hot The diesel burner is secured to the Aqua-Hot with two nuts that can be loosened, and swung out of the way by using a 10mm socket wrench with a 10” long extension.
-
Page 48: Reattaching The Diesel Burner
Step 1: Reattach the Diesel Burner to the Aqua-Hot The diesel burner is secured to the Aqua-Hot with two eye-bolt nuts that can be swung into place, after the diesel burner has been properly aligned and set in place. - Page 49 Step 2: Reattach the fuel lines to the Aqua-Hot Align the fuel lines on the diesel burner with the fi ttings on the Aqua-Hot, and using a 7/16 inch wrench, tighten down both the supply and return fuel fi ttings.
- Page 50 Interlock Switch Step 4: Reinstall the Access Cover Reinstall the Aqua-Hot’s access cover and securely tighten the fi ve bolts securing the access cover in place. Figure 95 NOTE: The access cover must be installed prior to operation as a safety switch (interlock) exists.
-
Page 51: Diesel Burner Components
In order to perform the following procedures, it may necessary to detach the diesel burner head. NOTE: The Aqua-Hot 600 Series is equipped with a 20A Fast Blow Fuse, located on the #20 wire, between the Reporter and diesel burner controller’s B-plug, which is the diesel... - Page 52 9. At approximately 12V DC, the RPM reading should be 4500 RPM’s (±300 RPM). If the motor’s RPM reading is not within these specifi cations, the motor must be replaced. Figure 102 Figure 104 ©Aqua-Hot® 675D Service Manual p. 51...
- Page 53 Aqua-Hot. Failure to turn off the burner and disconnect power could result in serious bodily injury. 3. Remove the three Hex-Head screws that secure the motor and fl...
- Page 54 Burner Components Interlock Switch Electrode Adjustment Gauge Protection Housing Blower Housing Blower Casing Motor Flange Figure 106 ©Aqua-Hot® 675D Service Manual p. 53...
-
Page 55: Flame Sensor
C-plug harness wires. 2. Should heavy carbon deposits be present, completely remove the fl ame sensor from the photo disc and clean with brake cleaner. Figure 107 Flame Sensor Blue Wire Green Wire Figure 108 p. 54 ©Aqua-Hot® 675D Service Manual... - Page 56 Green Wire NOTE: This screw is used to fasten the (to Diesel Burner) Flame Sensor to the Photo Disc. Remove when replacing the Flame Sensor. Blue Wire Violet Wire (to Diesel Burner) Figure 110 ©Aqua-Hot® 675D Service Manual p. 55...
-
Page 57: Ignition Electrodes
Electrode Adjustment Gauge Ignition Electrodes Fuel Nozzle Figure 111 Retaining Clamp Retaining Clamp Bolt Fuel Nozzle Manifold Figure 112 p. 56 ©Aqua-Hot® 675D Service Manual... - Page 58 Tap the punch lightly until 6. Slide the electrode into the photo disc. the retaining clamp returns to proper form. Ignition Electrodes Photo Disc Electrical Insulators Electrode Boots Ignition Cables Figure 113 ©Aqua-Hot® 675D Service Manual p. 57...
-
Page 59: Ignition Coil
Reporter. Ignition Coil Ignition Coil Ignition Cable Black Brown Wire (+) Wire (-) Brown Wire (-) Yellow Wire (+) (to Diesel Burner) (to Diesel Burner) Figure 115 Figure 114 p. 58 ©Aqua-Hot® 675D Service Manual... -
Page 60: Fuel Nozzle
Figure 116. 3. Remove both the ignition cables from the ignition electrodes, or connect a jumper wire (with alligator clips) across the metal tips of the electrodes. Fuel Line Supply Fuel Line Return Figure 116 ©Aqua-Hot® 675D Service Manual p. 59... - Page 61 ¼ turn, and then fi rmly re-tighten. This will establish a seated fi t and avoid any leaks. Figure 118 Fuel Nozzle Ignition Electrodes Fuel Nozzle Manifold Hex ⅝” Wrench Figure 117 ¾” Wrench Figure 119 p. 60 ©Aqua-Hot® 675D Service Manual...
-
Page 62: Fuel Solenoid
Fuel Solenoid Valve Assembly Ignition Cable Retaining Clamp Fuel Solenoid Positive Terminal Valve Kit Fuel Solenoid Negative Terminal Valve Coil Photo Disc Lock Nut Figure 121 Retaining Clip Figure 120 ©Aqua-Hot® 675D Service Manual p. 61... -
Page 63: Fuel Pump
• Check the motor home fuel tank for diesel fuel. If the the fuel pump for dirt particles. Clean and/or replace if fuel level is below ¼, the Aqua-Hot diesel burner will necessary. not operate. 3. To adjust the fuel pressure, refer to Page 70 - Fuel pressure •... - Page 64 NOTE: Check the ignition electrodes for proper adjustment prior to reattaching the diesel burner. Photo Disc Fuel Solenoid Fuel Pump Fuel Supply Banjo Tube Fuel Return Banjo Tube Figure 124 ©Aqua-Hot® 675D Service Manual p. 63...
- Page 65 Banjo Fuel Tube, Supply Banjo Fuel Tube, Return Mounting Screw, Fuel Pump Washer, Lock, Fuel Pump Fuel Nozzle, 0.35 GPH Fuel Nozzle Manifold, Brass Manifold Plate Screw Manifold Plate Fuel Pump Nylon Gear Snap Ring p. 64 ©Aqua-Hot® 675D Service Manual...
-
Page 66: Bearings
fl ange to the blower housing. Remove the the cast-aluminum blower casing, motor and fl ange assembly along with the clutch halves. Protection Housing Blower Housing Blower Casing Motor Flange Figure 126 ©Aqua-Hot® 675D Service Manual p. 65... - Page 67 Failure to follow the Flat correct order and direction of the dished surfaces on the Washer washers will result in a restricted rotation of the combustion air blower. Figure 127 p. 66 ©Aqua-Hot® 675D Service Manual...
- Page 68 O-Ring Screws Blower w/ Shaft Dished Surface Washer Dished Flat Retaining Snap Surface Washer Ring Washer Drive Flat Bearing Flat Gear Washer Spacer Washer (Steel) (Thick) Tube Snap Ring Bearing Bearing Kit Figure 128b ©Aqua-Hot® 675D Service Manual p. 67...
-
Page 69: Diesel Burner Controller
Support at 1 (800) 685-4298 for assistance. voltage reading does not register on the voltmeter, the Controller B-Plug & C-Plug Reporter Back Side Figure 131 Reporter Display Screen Figure 130 Burner Power (+) Figure 132 p. 68 ©Aqua-Hot® 675D Service Manual... - Page 70 C-7 location. Turn the diesel switch ON and insert the probes of a DC voltmeter into the C-2 (+) 1. Disconnect the Aqua-Hot from any and all power sources. and C-5 (-) locations. If no voltage reading registers on the voltmeter, the diesel-burner controller must be replaced.
-
Page 71: Fuel Pressure
fi tting. 3. Using a 13mm and a 9/16” wrench, install the fuel bypass fi ttings onto the diesel burner. Figure 136 p. 70 ©Aqua-Hot® 675D Service Manual... - Page 72 Step 3: Install the fuel pressure gauge 1. Using a ⅝” and ¾” wrench, remove the fuel nozzle. Figure 138 2. Using a ⅝” and ¾” wrench, install the fuel pressure gauge. Figure 139 ©Aqua-Hot® 675D Service Manual p. 71...
- Page 73 2. Turn the diesel burner ON, either on the switch panel or the coach control panel. A pressure will register on the fuel pressure gauge once the fuel solenoid opens (after approximately 10-20 seconds). Figure 141 p. 72 ©Aqua-Hot® 675D Service Manual...
- Page 74 2. Turn the diesel burner ON, either on the switch panel or the coach control panel. A pressure will register on the fuel pressure gauge once the fuel solenoid opens (after approximately 10-20 seconds). Figure 143 ©Aqua-Hot® 675D Service Manual p. 73...
- Page 75 To increase the fuel pressure turn the pressure adjustment screw clockwise, and to reduce the fuel pressure, turn the pressure adjustment screw counter clockwise. Figure 144 NOTE: If the fuel pressure cannot be adjusted, refer to the fuel pump section on Page 62 for more information and troubleshooting instructions. p. 74 ©Aqua-Hot® 675D Service Manual...
-
Page 76: Troubleshooting
Interlock Switch Troubleshooting If the Aqua-Hot is Producing Black Smoke: 1. Things to check before opening up heater: • Low Voltage - Fire up generator/plug coach into shore power • Damaged or Restricted exhaust pipe - Inspect exhaust pipe for damage 2. -
Page 77: White Smoke
Interlock Switch Troubleshooting If the Aqua-Hot is Producing Blue/White Smoke: 1. If the Heater smokes on start up or shut down: • Fuel Solenoid ○ Plunger could be worn out ○ Plastic or metal in the way of the plunger ○... -
Page 78: Lack Of Heat
• The Reporter is wired incorrectly • Not enough heat exchangers installed • Heat exchangers improperly installed 2. If the Fans and Pumps ARE running: • Stuck Check Valve • Kinked Plumbing Line • No antifreeze in the system ©Aqua-Hot® 675D Service Manual p. 77... -
Page 79: Lack Of Hot Water
They are for limited, light duty use only. 2. Things to test for with a lack of hot water issue: • Aqua-Hot heater bypassed • Outside water faucet is left on - If both the cold and hot valves are left in the ON position, the outside water faucet acts like a secondary mixing valve and the remaining hot water faucets will only produce warm water. -
Page 80: Antifreeze Leaking
Either where the brass fi ttings go into the tank, or at the copper pipe where they go through the brass fi ttings. NOTE: If no leaks are found on the Aqua-Hot, it is possible that there is a leak within the motor home. Check all heat exchangers, connections, and tubing for leaks. -
Page 81: Wire Gauge Info
Wire Gauge Information: Because all Aqua-Hot heating systems are designed to operate only when there is an adequate supply of DC (Direct Current) voltage, it is imperative that the proper wire gauge be determined and used for the DC power supply and ground wires. - Page 82 Round up to the closest amp draw listed on the left, then round up to the closest length at the top of the chart. • For example, the 675D heater with six Cozy heat exchangers with the Reporter placed 15 feet from the vehicle’s battery would require an 8-gauge wire. Wire Gauge Chart: ©Aqua-Hot® 675D Service Manual p. 81...
-
Page 83: Cold Weather Operation
When storing the motor home: not winterizing the Aqua-Hot when • Determine when the last annual service was freezing temperatures are present will result in serious damage to the Aqua-Hot’s Domestic Water Heating System. Also, be sure to use performed a FDA-Approved “GRAS” rated antifreeze for winterization. •... -
Page 84: Aqua-Hot Maintenance
Aqua-Hot is at maximum operating temperature. If additional antifreeze and water heating solution is required, To keep the Aqua-Hot running smoothly, it is recommended to fi ll the expansion tank to the “HOT” level mark. Reference Figure have the diesel burner tuned up annually or after the coach has 148. - Page 85 Burner Maintenance Interlock Switch Aqua-Hot Maintenance Procedure Step 2: Replace the Fuel Filter 1. Locate the fuel fi lter NOTE: Before performing an annual maintenance, it is 2. Using hose pinch off pliers, clamp off both fuel lines recommended to test run the diesel burner. While testing, going to the fuel fi...
- Page 86 Interlock Switch Step 2 Be sure to clamp off the fuel supply and return lines at the ports on top of the Aqua-Hot PRIOR to beginning this replacement procedure. Step 4: Remove the Diesel Burner 1. Locate the diesel burner’s controller and disconnect both plugs.
- Page 87 Failure to do so will reduce the Aqua-Hot’s heat transfer capabilities. Combustion Chamber Assembly Air Swirler...
- Page 88 NOTE: It will be necessary to replace the combustion chamber gasket any time the combustion chamber is removed. Step 6: Reinstall the Combustion Chamber 1. Reinstall the Combustion Chamber assembly and the Air Swirler into the Aqua-Hot. Combustion Chamber Assembly Air Swirler...
- Page 89 Burner Maintenance Interlock Switch Step 7: Inspect the Diesel Burner 1. Reinstall the Combustion Chamber assembly and the Air Swirler into the Aqua-Hot. Electrodes Flame Sensor Fuel Nozzle Photo Disc Fuel Pump Grommets Figure 164 Inspect the following: 5. Flame Sensor 1.
- Page 90 For light dirt, dust, and/or carbon deposits, simply wipe off the fl ame sensor with a soft cloth. • Should heavy carbon deposits be present, completely remove the fl ame sensor from the photo disc and clean with brake cleaner. Electrodes Flame Sensor Figure 165 ©Aqua-Hot® 675D Service Manual p. 89...
- Page 91 Figure 166 Figure 167 Be sure to reattach the diesel burner head prior to switching the heater ON. Failure to do so may result in ignition of the diesel burner and serious bodily injury. p. 90 ©Aqua-Hot® 675D Service Manual...
- Page 92 Electrode Adjustment Gauge Ignition Electrodes Fuel Nozzle Fuel Nozzle Manifold Figure 168 Electrical Insulators Retaining Clamp Photo Disc Retaining Clamp Bolt Electrode Boots Ignition Cables Figure 169 ©Aqua-Hot® 675D Service Manual p. 91...
- Page 93 NOTE: When reinstalling the diesel burner, be careful not to damage the photo disc or bend the electrodes. Also, be careful not to pinch any wires between the burner and the Aqua-Hot boiler tank. 1. Align the diesel burner with the Aqua-Hot, using the alignment tabs welded on the Aqua-Hot.
- Page 94 Interlock Switch Step 13: Reconnect the Fuel Lines 1. Align the fuel lines on the diesel burner with the fi ttings on the Aqua-Hot. Using a 7/16 inch wrench, tighten down both the supply and return fuel fi ttings. Figure 174...
- Page 95 Burner Maintenance Interlock Switch Step 15: Reinstall the Aqua-Hot’s Access Cover 1. Reinstall the Aqua-Hot’s access cover. NOTE: The access cover must be installed prior to operation as a safety switch (interlock) exists. It will prevent the Aqua- Hot from operating whenever the access cover is not properly installed.
-
Page 96: Winterizing The Aqua-Hot
The warranty system overview. does not cover freeze damage. NOTE: The Aqua-Hot can continue to be used for interior heat De-Winterization once the domestic hot water system has been winterized. To de-winterize the Aqua-Hot system, completely fi ll the fresh 1. -
Page 97: Filling The Aqua-Hot
3. Open the Aqua-Hot’s drain valve located at the front of the heater. Reference Figure 181. NOTE: The Aqua-Hot’s boiler tank must be fi lled with the... -
Page 98: Purging/Draining The Aqua-Hot
RVC network to perform this procedure. Purge Procedure: 1. Locate the fl uid expansion tank of the Aqua-Hot. As any air is purged, it will exit through to this expansion tank. 2. Locate a gallon of glycol antifreeze. This will be used to top-off the fl... -
Page 99: Schematics
System Schematics Interlock Switch p. 98 ©Aqua-Hot® 675D Service Manual... - Page 100 System Schematics Interlock Switch ©Aqua-Hot® 675D Service Manual p. 99...
- Page 101 System Schematics Interlock Switch p. 100 ©Aqua-Hot® 675D Service Manual...
- Page 102 System Schematics Interlock Switch ©Aqua-Hot® 675D Service Manual p. 101...
- Page 103 System Schematics Interlock Switch p. 102 ©Aqua-Hot® 675D Service Manual...
- Page 104 System Schematics Interlock Switch ©Aqua-Hot® 675D Service Manual p. 103...
- Page 105 Service Manual SERIES Aqua-Hot Heating Systems, LLC 7501 Miller Drive, Frederick, CO 80504 Visit us online at www.aquahot.com Call us at 574-AIR-XCEL (574-247-9235). ©2021 Aqua-Hot Heating Systems, LLC. Printed in the USA...
Need help?
Do you have a question about the 600 Series and is the answer not in the manual?
Questions and answers