Table of Contents
Advertisement
Advertisement
Table of Contents

Subscribe to Our Youtube Channel
Related Manuals for Aqua-Hot 400D


Summary of Contents for Aqua-Hot 400D
- Page 1 INSTALLATION MANUAL © 2011 Aqua-Hot Heating Systems Inc.
- Page 2 CAUTION: The Aqua-Hot tank and heating loop operate at 0.0 psi (zero pressure system). Air pressure applied to the tank MUST NOT exceed 20 psi. Excess pressure will result in internal damage. CAUTION: Before welding or plasma cutting on any coach;...
-
Page 3: Table Of Contents
Introduction ............................5 Section 1: Aqua-Hot Hydronic Heating System Technical Information .......................... 6 Section 2: Aqua-Hot Installation Installing the Mounting Tray and the Aqua-Hot ................10 Overall Aqua-Hot Dimensions ......................11 Installing the Expansion Tank ......................14 Section 3: Hydronic Heating System Heat Exchanger Location and Clearances .................. - Page 4 Purging the System by Grounding the Zone Thermostat Connection ......... 44 Purging the Domestic Water System....................44 Section 11: Initial Start-Up Activating the Aqua-Hot ........................46 Appendices: Appendix A: Wiring Diagram ......................47 Appendix B: Wire Gauge Information ....................48 Appendix C: Electronic Controller Features ..................
-
Page 5: Introduction
Indicates that serious damage to the heater will occur and personal injury is possible as well. The 400D uses one 120 Volt-AC, 1650 Watt electric element to heat the system when shore power is available, and a 12 Volt- WARNING DC powered diesel burner provides heat when dry camping. -
Page 6: Section 1: Aqua-Hot Hydronic Heating System
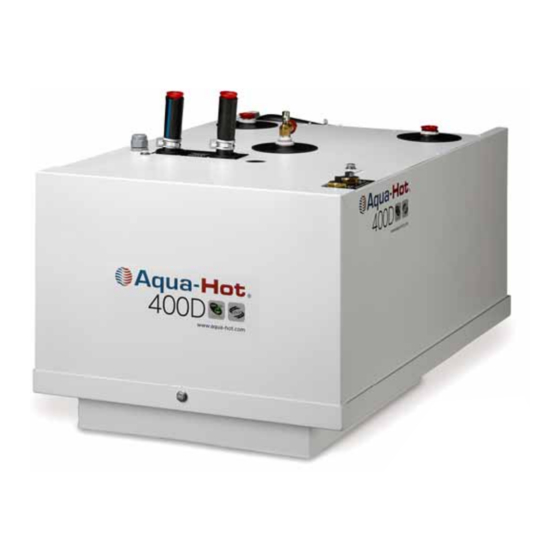
RVIA Standards, write to: Recreation Vehicle Industry Association, 1896 Preston White Drive, P.O. Box 2999, Reston, VA 22090-0999, call them at (703) 620-6003, or visit them online at www.rvia.org. — Page 6 — ® © 2011 Aqua-Hot 400-D Installation Manual... - Page 7 1: A ECTION YDRONIC EATING YSTEM Each Aqua-Hot heating system possesses an I.D. label on the heater, to what standard it has been tested, and important unit itself. This I.D. label details the specifications of the safety notices. Figure 2 —...
- Page 8 Panel Burner Product ID Label Diesel Zone 1 Zone 2 Burner Circulation Circulation Drain Valve Controller Pump Pump Figure 4 Domestic Cold Water Inlet Domestic Hot Water Outlet — Page 8 — ® © 2011 Aqua-Hot 400-D Installation Manual...
- Page 9 20 psi. Ex- cess pressure will result in internal damage. Product ID Label AC Wiring Port Wiring Harness Port Zone 1 and 2 Outlet Ports Diesel Fuel Inlet/Outlet Ports — Page 9 — ® © 2011 Aqua-Hot 400-D Installation Manual...
-
Page 10: Section 2: Aqua-Hot Installation
4. Insert a #10 machine screw into each of the embossed holes in the mounting tray (total of six required) and The Aqua-Hot must be installed in a compartment that is tighten to secure the mounting tray to the motor home. - Page 11 2: A ECTION NSTALLATION Figure 7 — Page 11 — ® © 2011 Aqua-Hot 400-D Installation Manual...
- Page 12 2: A ECTION NSTALLATION Figure 8 — Page 12 — ® © 2011 Aqua-Hot 400-D Installation Manual...
- Page 13 2: A ECTION NSTALLATION Figure 9 1/2 in. 1/2 in. — Page 13 — ® © 2011 Aqua-Hot 400-D Installation Manual...
-
Page 14: Installing The Expansion Tank
Installing the Expansion Tank: NOTE: Avoid any dips and bends in the overflow tubing from the Aqua-Hot to the expansion tank as air can become trapped in these dips and bends, preventing the expan- Select a mounting location that allows for easy access... -
Page 15: Heat Exchanger Location And Clearances
Reference Figure 14 for clearance information. NOTE: An accessory device is available for the Cozy Heat Exchanger for the purpose of redirecting the airflow from the heat exchanger. Reference Figures 17 and Figure 13 — Page 15 — ® © 2011 Aqua-Hot 400-D Installation Manual... -
Page 16: Section 3: Hydronic Heating System
EATING YSTEM Figure 15A Indicates sample mounting locations for the Cozy heat exchangers. Actual placement and quantity vary based on the individual design of the coach. For specific design assistance, contact Aqua-Hot at 303-659-8221 Figure 15B (Not included in the Aqua-Hot 400) —... - Page 17 Figure 18 Hose to direct Cozy Heat air to vent Exchanger Plenum Toe Kick Board Vent installed In toe-kick area — Page 17 — ® © 2011 Aqua-Hot 400-D Installation Manual...
- Page 18 3: H ECTION YDRONIC EATING YSTEM Figure 20 Figure 21 — Page 18 — ® © 2011 Aqua-Hot 400-D Installation Manual...
-
Page 19: Wiring The Heat Exchangers
5. Connect all electronic controller wires to the positive tain to (e.g., Living Room, Bathroom, Bedroom, etc.). and negative leads of the heat exchanger. Reference Figures 23 and 24. Figure 22 — Page 19 — ® © 2011 Aqua-Hot 400-D Installation Manual... - Page 20 When wiring the heat exchangers in-parallel, the main 18- bine with the main wire to be powered or grounded, respec- gauge wire is split to allow the heat exchanger wires to com- tively. Figure 24 — Page 20 — ® © 2011 Aqua-Hot 400-D Installation Manual...
-
Page 21: Plumbing Requirements
“Heating Loop 2.” Reference Figure 26. zone to the Aqua-Hot. Use 5/8 inch I.D. (Inside Diameter) plumbing lines for both All plumbing lines should be laid as flat as possible, and any heating loops. -
Page 22: Plumbing The Hydronic Heating System
5. Connect and tighten all interior plumbing lines, outlet mended when securing the plumbing lines. and inlet, to the Aqua-Hot’s appropriate heating loop ports. Reference Figure 29 and Figure 30. 3. Connect and clamp the outlet line from the heater to the... - Page 23 3: H ECTION YDRONIC EATING YSTEM Figure 28 Figure 29 Inlet Heating Loop Connection Examples Barbed Fittings Components Compression Fitting Components Barb Fittings Components Installed Compression Fittings Components Installed — Page 23 — ® © 2011 Aqua-Hot 400-D Installation Manual...
- Page 24 3/4” Two Constant Tension Pex Tube Heater Band Clamps Hose Pex Insert Constant Tension Clamps Straight Connection Components 90⁰ Connection Components Straight Connection Components Installed 90⁰ Connection Components Installed — Page 24 — ® © 2011 Aqua-Hot 400-D Installation Manual...
-
Page 25: Section 4: Thermostats
NOTE: It is recommended that the wire numbers in Appen- Do not mount the thermostat bulb in a drafty area or along dix A be used when installing the Aqua-Hot in order the ceiling of the bay. to assist with differentiating between the separate... -
Page 26: Room Thermostats
NOTE: It is recommended that the wire numbers in Appendix • drafts or dead spots behind doors and in corners A be used when installing the Aqua-Hot in order to • hot or cold air from ducts assist with differentiating between the separate heat- •... -
Page 27: Section 5: Domestic Water System
1. Connect a domestic water plumbing line from the domestic water demand pump/water manifold to the cold water inlet Use the RVIA-provided table below in order to determine the port on the Aqua-Hot. Reference Figures 33 and 34. proper sizing of pipe and tubing required to ensure maximum efficiency. - Page 28 5: D ECTION OMESTIC ATER YSTEM Figure 33 Tempering Domestic Cold Valve Water Inlet Domestic Hot Water Outlet Figure 34 — Page 28 — ® © 2011 Aqua-Hot 400-D Installation Manual...
-
Page 29: Section 6: Switch Panel
Appendix A be used when installing the switch panels. This will ensure installation consistency, differentiate between the separate switches and assist service personnel with trouble- shooting. Reference Appendix B for proper wire-gauge sizing. — ® © 2011 Aqua-Hot 400-D Installation Manual... - Page 30 6: S ECTION WITCH ANEL Figure 36 Aqua-Hot 400D Switch Panel, Rear View Diesel Burner Electric Element Switch Switch Switch Electronic Controller Switch Electronic Controller Pin# 5 To “Diesel-I” Pin# 5 To “Electric-O” Pin# 4 To “Electric-I” Pin# 4 To “Diesel-O”...
-
Page 31: Section 7: Fuel System
5. Install and tighten the appropriate fuel fittings onto the systems’ diesel fuel system specifications. Aqua-Hot’s fuel ports, as well as the two ports of the fuel filter. Reference Figures 41. Also, be sure to reference the ANSI/NFPA 1192 hand- book for information regarding fuel distribution sys- 6. - Page 32 7: F ECTION YSTEM Figure 39 — Page 32 — ® © 2011 Aqua-Hot 400-D Installation Manual...
- Page 33 7: F ECTION YSTEM Figure 40 Reference Reference Figure 41 Figure 38 Figure 41 1/4 NPT (F) 1/4 NPT (F) Diesel Inlet Port Diesel Outlet Port — Page 33 — ® © 2011 Aqua-Hot 400-D Installation Manual...
- Page 34 — Page 34 — ® © 2011 Aqua-Hot 400-D Installation Manual...
- Page 35 — Page 35 — ® © 2011 Aqua-Hot 400-D Installation Manual...
-
Page 36: Section 8: Exhaust System
Exhaust must not terminate beneath the vehicle or beneath an open able window or vent. The Aqua-Hot is supplied with a 3 inch and a 4 inch black pipe nipple (1½ inch diameter) along DO NOT terminate the exhaust pipe within the awn- with a 1½... - Page 37 NOTE: A maximum of 27.5 feet with three 90⁰ bends are allowed in the exhaust pipe. A minimum of 1.75” ID automo- tive type exhaust pipe may be used. Figure 45 — Page 37 — ® © 2011 Aqua-Hot 400-D Installation Manual...
- Page 38 8: E ECTION XHAUST YSTEM Figure 46 — Page 38 — ® © 2011 Aqua-Hot 400-D Installation Manual...
- Page 39 8: E ECTION XHAUST YSTEM Figure 47 3” Black Pipe Nipple Installed Black Pipe Elbow 4” Black Pipe Nipple Installed 2” Automotive Type Exhaust Pipe — Page 39 — ® © 2011 Aqua-Hot 400-D Installation Manual...
-
Page 40: Section 9: Electronic Controller Wiring
Each heating zone “FAN” circuit can supply up to 2.0 Amps of The Aqua-Hot’s electronic controller is designed to work with direct current. This 12 Volt-DC power source allows for most electronic room thermostats; however, the chosen thermo- Multiple Cozy III heat exchangers to be wired “in-parallel”. -
Page 41: Wiring Harness Connection
VI of NFPA 70, as well as the regulation of authorities having jurisdiction and CSA Standard B139 . DO NOT connect the 12 Volt-DC power to the Aqua-Hot if the vehicle requires welding. Electrical welding will cause Wiring Harness Connection: serious damage to the diesel-burner controller and the Aqua- 1. -
Page 42: Connecting The 12 Volt-Dc Power
DO NOT activate the diesel-burner until the antifreeze and water heating solution has been added to the boiler tank DO NOT connect the 12 Volt-DC power to the Aqua-Hot if and the heating system has been completely bled of air. -
Page 43: Section 10 Purging The Systems
Reference Figure 10. tion Department at 1-800-685-4298. Figure 52 1. Open the Aqua-Hot’s drain valve located at the front of the heater. Reference Figure 53. 2. Connect a piece of 1/2 inch PEX-type tubing to the drain valve. -
Page 44: Purging The System By Grounding The Zone Thermostat Connection
Look for the solution to enter the overflow tube attached to the expansion tank Check the Aqua-Hot’s expansion tank and top it off to the connection on top of the Aqua-Hot. cold level mark with the 50/50 antifreeze and water mixture, if necessary. - Page 45 10: P ECTION URGING THE YSTEMS Figure 54 Zone 1 Zone 2 Circulation Pump Circulation Pump — Page 45 — ® © 2011 Aqua-Hot 400-D Installation Manual...
-
Page 46: Section 11: Initial Start-Up
Either or both heating sources will automati- cally maintain the temperature of the boiler tank’s antifreeze and water heating solution. The Aqua-Hot is now ready for normal operation and use. — Page 46 —... -
Page 47: Appendix A: Wiring Diagram
A: W PPENDIX IRING IAGRAM — Page 47 —... -
Page 48: Appendix B: Wire Gauge Information
B: W PPENDIX AUGE NFORMATION — Page 48 —... -
Page 49: Appendix C: Electronic Controller Features
This 12 Volt-DC battery connection is a product-safety feature that should be utilized whenever the Aqua-Hot’s main 12 Volt-DC power supply is connected to a battery disconnect switch. This feature will ensure that the Aqua-Hot will be pro- tected in the event that the primary power is interrupted while the Diesel-Burner is operating (e.g., during a burn-cycle). - Page 50 “ Low Voltage Reset” Feature: Whenever the Aqua-Hot’s DC power is interrupted, the “low voltage reset” red indicator light on the electronic controller will illu- minate. Reset the electronic controller by pressing the “low voltage reset” button on the electronic controller (use a thin, straight, nonmetallic object to access the button through the faceplate) or by turning OFF the diesel-burner switch on the interior switch panel for approximately 30 seconds, then turning the switch back ON.
-
Page 51: Appendix D: Antifreeze Types
These types of propylene glycol based antifreeze products of chemical rust inhibitors. Due to their potentially hazard- are formulated specifically for “winterizing” applications ous properties, they should never be used in the Aqua-Hot’s only. Although RV & Marine antifreeze is often “Generally Hydronic Heating System. -
Page 52: Appendix F: Antifreeze Terms And Mixture Ratio
-28ºF and a boil point of approximately 222ºF. rather than utilized for the function of the heating system. NOTE: As the installer of this Aqua-Hot system, you must Therefore, a higher boiling point is desired in order to com-... - Page 53 F: A PPENDIX NTIFREEZE ERMS AND IXTURE ATIO — Page 53 —...
-
Page 54: Appendix G: Measuring Propylene Glycol Levels Using A Refractometer
G: M PPENDIX EASURING ROPYLENE LYCOL SING A EFRACTOMETER ALIBRATE THE EFRACTOMETER Aqua-Hot Part Number MSX-907-162 Figure 1 Calibration Screw Eyepiece Daylight Plate Assembly Main Prism Assembly ® © 2011 Aqua-Hot 400-D Installation Manual... - Page 55 EFRACTOMETER SING THE REFRACTOMETER TO TEST ANTIFREEZE SAMPLE Warning Use extreme caution in gathering your antifreeze sample. When draining the Aqua-Hot heating system. extremely hot liquid may be in the Boiler Tank and could cause personal injury. Basic Operation 1. Open daylight plate, and place 2.
- Page 56 15549 East Highway 52 | Fort Lupton, CO 80621 Toll free: 800.685.4298 | phone: 303.659.8221 | fax:303.857.9000 www.aquahot.com LTE-907-609...
Need help?
Do you have a question about the 400D and is the answer not in the manual?
Questions and answers