
Subscribe to Our Youtube Channel
Related Manuals for AVANT A35870


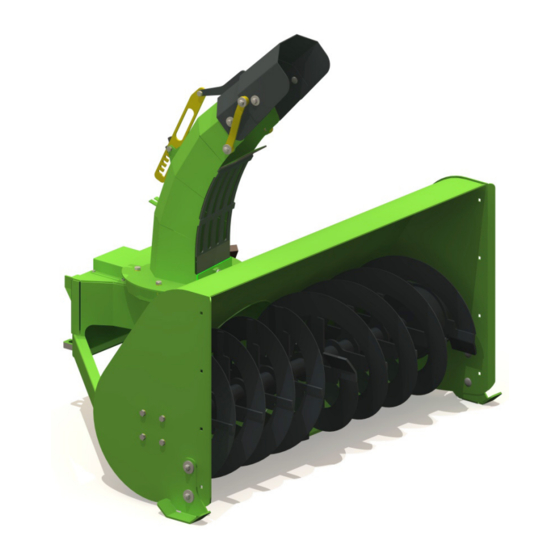
Summary of Contents for AVANT A35870
- Page 1 English Snow blower 2018 1 Operator's Manual for Attachment Snow blower Product number: Snow Blower 1100 A35870 Snow Blower 1400 A35847 www.avanttecno.com A420014 2018 1 EN 2013-...
- Page 2 Snow blower 2018 1...
-
Page 3: Table Of Contents
Snow blower 2018 1 CONTENTS 1. FOREWORD ............................4 Warning symbols used in this manual ..........................5 2. DESIGNED PURPOSE OF USE ......................6 3. SAFETY INSTRUCTIONS FOR USING THE SNOW BLOWER .............7 4. TECHNICAL SPECIFICATIONS ......................10 Safety labels and main components of the attachment.................. 10 5. -
Page 4: Foreword
If you sell or transfer the equipment, be sure to hand over this manual to the new owner. If the manual is lost or damaged, you can request a new one from your Avant dealer or from the manufacturer. -
Page 5: Warning Symbols Used In This Manual
5 (30) Warning symbols used in this manual The following warning symbols are used throughout this manual. They indicate factors that must be taken into account to reduce the risk of personal injury or damage to property: WARNING: SAFETY ALERT SYMBOL This symbol means: “Warning, be alert! Your safety is involved!”... -
Page 6: Designed Purpose Of Use
2. Designed purpose of use The AVANT Snow Blowers are attachments that are designed and manufactured to be used with AVANT multi purpose. loader models that are listed in Table 1. The snow blower is especially suitable for use when it is preferred to spread snow evenly to the sides of the area instead of piling it up. -
Page 7: Safety Instructions For Using The Snow Blower
7 (30) 3. Safety instructions for using the snow blower Please bear in mind that safety is the result of several factors. The loader-attachment combination is highly powerful and improper or careless use or maintenance may cause serious personal injury or property damage. - Page 8 8 (30) Make sure to use only an attachment that is in good condition. Perform daily inspections and read the instructions regarding service and maintenance. Never operate the attachment if the hydraulic systems of both the attachment and the loader are not completely intact.
- Page 9 9 (30) Beware of entanglement and crushing hazards especially when removing blockages. Near the snow blower the hazards of entanglement and severing are present. The snow blower must be stopped following the safe stopping procedure before WARNING going near it. Never put your hand inside the discharge chute or the auger; always use a brush or other suitable medium.
-
Page 10: Technical Specifications
22,5 MPa (225 Bar) Other dimensions: See Overview Compatible AVANT loader models: See table 1, Designed purpose of use 4.1 Safety labels and main components of the attachment Listed below are the labels and markings on the attachment. They must be visible and readable on the equipment. - Page 11 11 (30) To apply a new label: Clean the surface thoroughly to remove all grease. Allow it to dry completely. Peel off the protective film of the label and press firmly to apply. Take care not to touch the glue of the label. Table 3 - Decal locations and warning messages Decal Warning message...
-
Page 12: Assembling The Attachment
Do not stay in the area between the attachment and the loader. Mount the attachment only on level surface. WARNING Never move or lift an attachment that has not been locked. Avant quick coupling system: Step 1: Lift the quick attach plate locking pins up and turn them backwards into the slot so that they are locked in the upper position. -
Page 13: Connecting And Disconnecting Hydraulic Hoses
5.1 Connecting and disconnecting hydraulic hoses On Avant loaders the hydraulic hoses are connected using the multi connector system. If you have an Avant 300-700 series loader with the conventional quick couplers and wish to change to the multi connector system, contact your Avant dealer or service point for instructions or installation services. - Page 14 14 (30) Keep all fittings as clean as possible; use the protective caps on both the attachment and the loader. Dirt, ice, etc. may make using the fittings significantly more difficult. Never leave the hoses hanging on the ground; place the couplings onto the holder on the attachment.
-
Page 15: Electric Connection
15 (30) 5.2 Electric connection Electric functions of the attachment: As standard, the snow blower is equipped with electrically controlled chute rotation. Electrically controlled throwing height adjustment is available as an option. The electric discharge chute rotation can be controlled with the standard electric harness that is supplied with the snow blower. - Page 16 16 (30) If your loader is equipped with the attachment control switch pack, and the loader is manufactured after 2016: If the loader is equipped with the attachment control switch pack, and the the electric socket integrated in the multiconnector, the electric harness of the attachment is connected when the multiconnector coupled.
-
Page 17: Operating The Attachment
17 (30) 6. Operating the attachment Check the attachment and the operating environment once more before starting to work, and that all obstacles have been removed from the operating area. Quick inspection of the equipment and the operating area before use are parts of ensuring safety and the best performance of the equipment. -
Page 18: Checks Before Use
18 (30) 6.1 Checks before use Read all instructions before use. Make sure you have the Operator's manual of the loader available. Check the general condition of the attachment and the loader, and check for possible hydraulic oil leaks. -
Page 19: Use
19 (30) 6.2 Use Using the snow blower: Set the attachment to working position. The snow blower works in the most efficient way, when it is tilted lightly forward or kept lightly on the ground in upright position, as shown in figure below. In this way, the edge plate of the snow blower collects e.g. -
Page 20: Using The Electric Functions Of The Snow Blower
20 (30) 6.3 Using the electric functions of the Snow Blower 1. A cable harness with a 2-way switch is delivered with the attachment. Hold the switch towards either direction to turn the discharge chute. This separate electric harness with a switch can be used only to control the electric chute rotation. -
Page 21: Scraper Plate And Skids
21 (30) 6.4 Scraper plate and skids Adjust the scraper plate and side skids shown in the adjacent figures so, that the snow blower runs smoothly on the surface without the frame touching the ground. The side skids can be adjusted by loosening their bolts without removing them completely. -
Page 22: Removing A Blockage
22 (30) 6.5 Removing a blockage Clogging of the feed auger is in most cases caused by drive speed. If the auger can’t throw the snow fast enough, drive speed must be reduced. Clogging of the discharge chute is affected by the type of snow in addition to engine rpm. -
Page 23: Transport Position
23 (30) 6.6 Transport position Keep the loader stable. Always transport the attachment as low and close to the ground as possible. CAUTION Keep the telescopic boom retracted during drive. 6.7 Storing the attachment Uncouple and store the snow blower on level surface so, that it will stand firmly on its two side skids and the fixed standing support under the attachment. -
Page 24: Maintenance And Service
Finding any fault means that the hydraulic hose or component must be replaced and the equipment must not be used until it is repaired. Spare parts are available from your nearest AVANT retailer or authorised service point. Leave the repair work to professional service technicians, if you don’t have adequate knowledge and... -
Page 25: Cleaning The Attachment
25 (30) 7.2 Cleaning the attachment Clean the attachment regularly to prevent accumulation of dirt which is more difficult to remove. A pressure washer and mild detergent can be used for cleaning. Do not use strong solvents, and do not spray directly at the hydraulic components, or at the labels on the attachment. -
Page 26: Lubrication
In case of vibrations, clean and defrost the parts from ice and packed snow. Unbalanced components may lead to the failure of the hydraulic motors or bearings. If the parts are damaged or the vibration continues after cleaning the parts, contact your nearest AVANT service. 7.6 Discharge chute rotation The gear rim of the discharge chute can be oiled slightly without opening the structure. -
Page 27: Warranty Terms
27 (30) 8. Warranty terms Avant Tecno Oy grants a warranty of one year (12 months) from the date of purchase for the attachment it manufactures. The warranty covers repair costs as follows: Work costs are covered, if the repair is not performed at the factory. - Page 28 SFS-EN ISO 12100, SFS-EN ISO 4413 Mallit / Modeller / Models: Avant Hydraulitoiminen lumilinko; Avant-kuormaajan työlaite A35870 Hydraulisksnöfräs; arbetsredskap för Avant lastare A35847 Hydraulic Snow blower; attachment for Avant loaders 28.5.2018 Ylöjärvi, Finland Risto Käkelä, Toimitusjohtaja / Verkställande direktör / Managing Director Original language version...
Need help?
Do you have a question about the A35870 and is the answer not in the manual?
Questions and answers