
Related Manuals for BODY BIKE CONNECT


Summary of Contents for BODY BIKE CONNECT
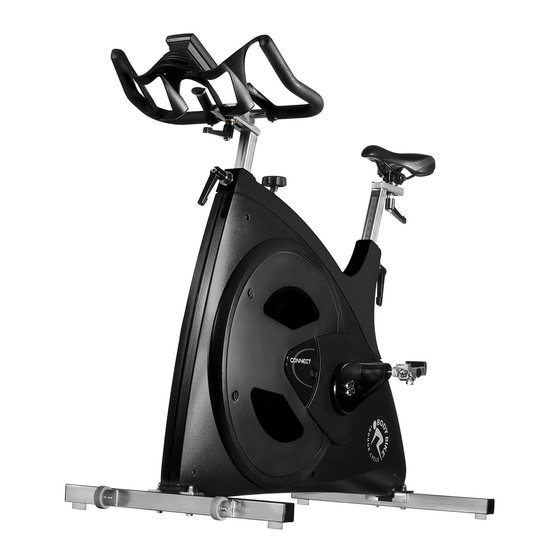
- Page 1 INSTRUCTIONS BODY BIKE INDOOR CYCLE ® BODY BIKE INDOOR CYCLING APP BODY BIKE CONNECT ® ENGLISH...
-
Page 2: Table Of Contents
TABLE OF CONTENTS Using the console Equipment required Introduction On, off and reset Certification Keys Specifications Default settings 29-30 General information Tips and information Warranty 8-10 Heart rate Age or MHR and weight Assembly Watt test 33-34 Unpacking Navigation and scan 34-35 Bottom frame 12-13... -
Page 3: Equipment Required
EQUIPMENT REQUIRED Unpacking Sidewards play in posts Drill bit A coin Drill 3mm Allen wrench 32mm wrench Bottom frame 13 mm wrench Adjustment handle 5mm Allen Wrench Saddle Screwdriver 14 mm wrench Steel brush Grease Pedals Brush 15mm pedal wrench Brake block Grease A coin... -
Page 4: Introduction
INTRODUCTION This manual provides information on the assembly and maintenance of the BODY BIKE® indoor cycle. The manual is intended for the owners and service people responsible for cleaning and maintenance. Before assembling the cycle, please read the manual and prepare the correct tools, see equipment required page 2. -
Page 5: Certification
This device is a 2.4 GHz wideband equipment and receiver. transmission system (transceiver), • Connect the equipment into an outlet intended for use in all EU member on a circuit different from that to which states and EFTA countries, except in the receiver is connected. -
Page 6: Specifications
Packed weight(5 cycles): 350kg Acrylic glass lens ANT+ wireless data transfer Length, Width, Height: Compatible with most heart rate transmitters, but BODY BIKE recommends Assembled size: ANT+ (See a list of ANT+ heart rate transmitters here: www.thisisant.com/ 105cm, 60cm, 100cm... -
Page 7: General Information
GENERAL INFORMATION Wipe off the cycle after EVERY DO NOT perform stretch exercises DO NOT add more tension than use. on the cycle, pedals or up against necessary. Over-tightening the cycle, except against the stretch tension knob to the extent that ALWAYS loosen all handles area at the rear end of the cycle. -
Page 8: Warranty
WARRANTY As information to our customers we hereby outline the warranty obligations applicable to BODY BIKE Indoor Cycles. ® The warranty comes into force the moment the unit leaves BODY BIKE International A/S. To get an overview see figure 1. - Page 9 WARRANTY The warranty does not cover any accessories used together with the BODY BIKE® Performance Console. Data transfer between the cycle and non-BODY BIKE® products is not guaranteed by any warranty. PLEASE NOTE All warranties are cancelled if the console or control box has...
- Page 10 BODY BIKE® spare parts. All warranties are cancelled if the cycle has been modified or in any way not used as intended. Warranty repairs are to be carried out by BODY BIKE In- ternational A/S in Denmark. At the expense of BODY BIKE International A/S.
-
Page 11: Assembly
ASSEMBLY Unpacking Bottom frame 12-13 Handlebar Bottle holder Console 15-16 Saddle Pedals 17-18... -
Page 12: Unpacking
UNPACKING BOTTOM FRAME 1) Open the top of the box. A fixing tool can be bought at BODY BIKE® International A/S to ease the mounting of the bottom frame. Go to 2) Remove all the unmounted parts. page 38. 3) Flatten the box on the floor next to the pallet. - Page 13 BOTTOM FRAME LIFTING SPOTS. Be sure that the saddle and handlebar are locked before lifting Tighten with no more than 12 Nm CAP NUT Figure 3 WASHER Back bottom Front bottom frame frame with wheels pointing forward Figure 4...
-
Page 14: Handlebar
HANDLEBAR BOTTLE HOLDER 1) Place the handlebar on top of the front post. Mount the bottle holder at the top of the handlebar, see figure 6. Insert the two rubber rings so the bottle holder is firmly fixed. 2) Screw an adjustment handle (size 32mm) clockwise into the socket from underneath the post, see figure 5. -
Page 15: Console
CONSOLE 1) Make sure batteries are correctly inserted into the console. Check this before you continue. 2) First mount the console bracket on the bottle holder by placing the bottom of the bracket as shown on figure 7. 2) Press the bottom of the bracket in place. - Page 16 PLEASE NOTE Tighten the screws carefully Figure 8 5mm Screw 5) Place the console on the bracket - make sure that the batteries are inserted. Screw the three black screws up into Figure 9 the bracket and console using the Allen key. Keep a hand on the console until the first screw is in to avoid it falling off, see figure 9.
-
Page 17: Saddle
SADDLE PEDALS ONLY RELAVENT IF THE SADDLE IS NOT ALREADY 1) Place the right pedal arm with the socket pointing INSTALLED. upwards, see figure 11. 1) Place the saddle in the track on the seat post. 2) Put maximum resistance on the brake, so the peda- larm is unable to rotate, see figure 12 2) Secure the saddle with the remaining adjustment handle, see figure 10. - Page 18 PEDALS Always screw on in the direction towards the handlebar Figure 13 Figure 11 Increase the resistance of the brake, before installing the pedals. Figure 12 Figure 14...
-
Page 19: Maintenance
MAINTENANCE Cleaning Sidewards play in posts Cleaning the posts Adjustment handles 22-23 Replacing the brake block 23-24 Poly-V belt Replace console box batteries Replace console batteries Resetting load cell Removal of side covers Using the console 29-35... -
Page 20: Cleaning
CLEANING After each workout, wipe the cycle down with tissue paper. If the cycle is covered in sweat or dirt, use water in a spray bottle and if necessary a tissue with some Right side washing-up liquid. cover has Remember handlebar and saddle. been removed. -
Page 21: Sidewards Play In Posts
SIDEWARDS PLAY IN POSTS 3) Remount the seat post Front post 1) Remove the service hatch. See figure 20. Re- 4) Carefully lift up the top cover as shown on figure move the right side cover by loosening the 8 bolts 17. -
Page 22: Cleaning The Posts
CLEANING THE POSTS ADJUSTMENT HANDLES Every other week the posts need cleaning to protect Every 3 months the handles need cleaning and grease to them from sweat etc. protect the parts from sweat, dust, dirt and water. Pull out the seat post and the front post and wipe 1) Remove the adjustment handle and disassemble the them clean with an oily cloth, see figure 18. -
Page 23: Replacing The Brake Block
REPLACING THE BRAKE BLOCK 2) Clean all the parts thoroughly one by one using a The Kevlar® pad on the BODY BIKE® Synthetic Brake steel brush. If the residue is extreme, a sharp object has an expected durability of a minimum of 1500 hours, so eventually the brake pad will be worn. - Page 24 REPLACING THE BRAKE BLOCK 1) Remove both service hatches by loosening Remove the locks with a coin, see figure 20. screws 2) Release tension completely on the brake. 3) Remove the two screws holding the brake block to the frame by using an 8 mm wrench, see figure 21 Figure 21 4) Take the new brake block and fasten it to...
-
Page 25: Poly-V Belt
5) The belt should be tightened to approximately 125 kg/229 Hz. To measure this, a special device can be bought at your local BODY BIKE® distributor. Go to page 28. Figure 24 6) Tighten the counter bolt (2) on both sides of the cycle again. -
Page 26: Replace Console Box Batteries
REPLACE CONTROL BOX BATTERIES REPLACE Console BATTERIES An icon lights up on the console when the control box An icon lights up on the console when the display needs needs fresh batteries. fresh batteries. 1) Remove the left side service hatch with a coin, see 1) Dismount the console from the bottleholder by removing figure 20 page 23. -
Page 27: Resetting Load Cell
RESETTING LOAD CELL BODY BIKE® Connect is able to 3) Slowly add tension without bracket if the adjustment of the set measure extremely accurate due touching the brake unit. The brake screw is not adequate. Be careful to the unique brake unit. When... -
Page 28: Removal Of Side Covers
REMOVAL OF SIDE COVERS The side covers can be removed e.g. if the belt needs to be changed. This is technician only. 1) Dismount the right pedal arm with an 8mm Allen wrench. See figure 31. Remove hatch. See figure 20. 2) Loosen all the screws holding the side cover with a 3 and 4 mm Allen wrench and remove them. -
Page 29: On, Off And Reset
ON, OFF AND RESET KEYS DEFAULT SETTINGS In the default settings it is possible The console will turn ON when you and are for navigating between to change 3 settings. are pressing on a random key. screens and for adjusting values in setting mode. - Page 30 The console will display ‘Err’ if it is not able to leave default setting the control box code is shown. For mode because it failed to connect to the control box. Make sure the reconnecting manually, continually control box code is correct and pedal a few times to activate the control press E.
-
Page 31: Tips And Information
TIPS AND INFORMATION Heart rate Age or MHR is used to determine %MAX WATT. The BODY BIKE® Performance Enter maximum heart rate if you Many instructors use the %MAX Console is able to receive data know it. Otherwise enter age and... -
Page 32: Heart Rate
HEART RATE 2) Press F to enter setting mode. 1) Put on your heart rate transmitter, see figure 35. The belt should be worn tight without causing If there heart rate PAUSE PAUSE discomfort. The electrodes must be transmitter paired, the pairing will CODE moist and be placed just below the start automatically and the display... -
Page 33: Age Or Mhr And Weight
AGE, HMR AND WEIGHT WATT TEST Press F to enter setting mode. If you already know your relative If you are wearing a heart rate VO2 max, use the arrows to enter transmitter, follow the guidance it and press F or E to accept and on page 32 to pair it. -
Page 34: Navigation And Scan
WATT TEST NAVIGATION AND SCAN The navigation line at the bottom 6) Every 2 minutes, the watt will of the screen will show you what increase by 35 watt. Adjust tension screen you are on and if you are to match again. You can follow the in scan mode. - Page 35 Screen 1 Screen 3 Screen 4 [RPM, %MAX HR, %MAX WATT] The [Km/Mi, Kcal/Hr, Kcal] [RPM AVG, HR AVG, WATT AVG] screen shows the values relative to This is a summary screen with your Screen 4 holds average values your maximum values. This is the total distance at the top and your accumulated from all data col- data you will most likely use during...
- Page 36 TROUBLESHOOTER 1) The bike is showing an uneven watt output? 4) How do I replace batteries? In most situations, an uneven watt output is due to a Over time you will have to change the batteries in dirty flywheel and brake pad. This needs to be main- both the console and control box.
- Page 37 TROUBLESHOOTER 7) How do I perform a VO2 max test? 10) Any good daily advice to keep the cycles in If you don’t know your relative VO2 MAX, it will be a a good condition? good idea to perform a test. Go to page 33-34 and It is not only important to follow the maintenance follow the instructions.
-
Page 38: Online Information
Wanna know more about your BODY BIKE Supreme, follow the link below. https://body-bike.com/indoor-bikes/body-bike-connect/ Need online support? If you have any questions, problems or anything else regarding your BODY BIKE, you are welcome to contact us on the mail below. info@body-bike.com Looking for another bike? Take a look at our collection. -
Page 39: Index
INDEX Information, general User weight Adjustment handles 7, 10,22 Wear and tear Adjustment screw Length Weight Assembly 11-18 Maintenance 19-28 Width Belt 10, 25 Manufacturer Wheel Bottom frame 12-13 Mounting 12-13 Bottle holder Patent Brake 7, 10, 23 Pedal 17-18 Cleaning 4, 20, 22 Poly V-belt... - Page 40 Edition 5.0 BODY BIKE International A/S ® Niels Bohrs Vej 2 DK-9900 Frederikshavn Denmark Phone: +45 9843 9696 www.body-bike.com...
Need help?
Do you have a question about the CONNECT and is the answer not in the manual?
Questions and answers