Table of Contents
Advertisement
Quick Links
Advertisement
Table of Contents

Related Manuals for Ozone Kona 2


Summary of Contents for Ozone Kona 2
- Page 1 Pilots Manual...
-
Page 2: Table Of Contents
Thank You Warning Team Ozone Your Kona 2 Risers Preparation Basic Flight Techniques Advanced Flying Techniques Incidents Caring and Maintenance Limitations Ozone Quality Technical Specifications Drawing/Riser lengths Line diagram Materials EN v1.1 November 2019... -
Page 3: Thank You
Confidence and belief in your paraglider is a far greater asset than any small gains in performance - ask any of the Ozone pilots on your local hills, or those who have taken our gliders on ground-breaking adventures or stood on podiums around the world. All our research and development is concentrated on the True Performance philosphy - creating the best handling/performance characteristics possible with optimum levels of security throughout the speed range. - Page 4 Flying an Ozone paraglider is undertaken with the full knowledge of the involved risks. • As the owner of an Ozone paraglider you take exclusive responsibility for all risks associated with its use. Inappropriate use and or abuse of your equipment will increase these risks.
- Page 5 TEAM OZONE Everyone at Ozone continues to be driven by our passion for flying, our love of adventure and our quest to see Ozone’s paraglider development create better, safer and more versatile paragliders. The design team consists of David Dagault, Luc Armant, Fred Pieri, Russell Ogden, Honorin Hamard, Emilia Plak and Alex Mateos.
-
Page 6: Your Kona 2
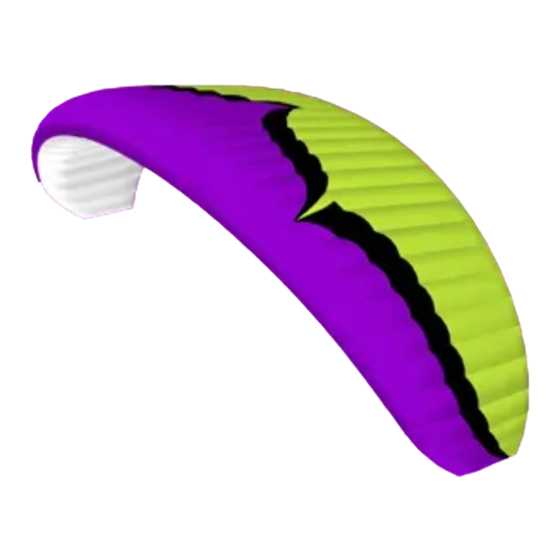
The Kona 2 is a very modern performance wing offering class leading performance, solidity and high levels of safety. Above all else, the Kona 2 is easy and comfortable to fly. The handling is intuitive, fun, and agile, with a progressive and precise feel though the brakes. It is highly compact, with perfectly coordinated roll and yaw in the climb. -
Page 7: Risers
IMPORTANT This wing has passed the Although the Kona 2 shares the same top speed as the Buzz Z6, as delivered the wing does criteria required by the not conform to the EN 926.2 standard due to the inclusion of the trimmers. Fully certified Buzz DGAC and has been load Z6 risers are available, if you require them please consult with your dealer. - Page 8 Accelerator System The risers feature an accelerator system with ball bearing pulleys for easy, comfortable high speed cruising. Using the speed system has exactly the same effect as releasing the trimmers, either can be used in any combination to accelerate the wing. Be careful, fully accelerated with trimmers released is fast and should only be used in calm conditions and sufficient altitude.
- Page 9 Tip Steering System The Tip Steering System (TST) uses ergonomic handles for control of the wing during accelerated flight. Located on the B risers, the handles are easily accessible and linked to the IMPORTANT very tips of the wing, giving high levels of precision and comfort for high speed cruising or When fully accelerated accurate low level carving.
-
Page 10: Preparation
There are many different motor units available and it is vitally important that you choose one that is suitable for your needs, weight and skill level. Due to the high performance profile of the Kona 2, a unit with a less powerful motor and low movable hang points may be advisable. - Page 11 Wing To familiarise yourself with the glider it is a good idea to perform practice inflations and ground handling both with and without the motor. As with all new equipment, only fly in conditions that you would normally fly in and on a familiar site. Fly the wing in a progressive manner and be aware that wing loading has a direct effect on the wing’s flying characteristics.
-
Page 12: Basic Flight Techniques
When the wind is favourable, move forward positively: your lines should become tight within one or two steps. The Kona 2 will immediately start to inflate. You should maintain a constant pressure on the risers until the wing is overhead. Do not pull down or push the risers forward excessively, or the leading edge will deform and possibly collapse making taking-off more difficult and potentially dangerous. - Page 13 (half a turn in each riser, and crossed in the direction you want to turn). Now you can pull up the Kona 2 by its A-risers. Once the wing is overhead, brake it gently, turn and launch.
- Page 14 The Kona 2 is well damped in roll but under certain circumstances it is possible for the pilot to induce oscillations. This is caused by a combination of the engine/propeller torque and pilot weight shift and/or brake inputs. To stop oscillations it is best to reduce the power slightly and ensure that you remain static with weight shift and brake inputs.
- Page 15 Turning To familiarize yourself with the Kona 2 your first turns should be gradual and progressive. To IMPORTANT make efficient and coordinated turns first look in the direction you want to turn and check Never initiate a turn at the airspace is clear. Your first input for directional change should be weight-shift, followed by minimum speed (i.e.
- Page 16 If the wind is very strong, and you feel you might be dragged, stall the glider with the C risers. This stalls the Kona 2 in a very quick and controllable way and will drag you less than if you use the brakes.
- Page 17 Big Ears Folding in the wing tips of the Kona 2 increases its sink rate. This is useful for staying out of cloud or descending quickly. To pull big ears on the Kona 2 take hold of the outermost A-line (Baby A) on each side whilst keeping the brake handles in your hand.
- Page 18 Spiral Dives If you turn your Kona 2 in a series of tightening 360’s it will enter a spiral dive. This will result IMPORTANT in rapid height loss. Only ever perform spiral dives with the trimmers to the slow position, Only perform spiral spirals with the trimmers released increases the chances of neutrality.
- Page 19 Active C Riser Control It is possible to pilot the wing with the C risers for improved feel and control, enabling you to fly actively without using the brakes. Using brakes whilst accelerated causes drag which is not only inefficient but it also reduces the inherent stability of the profile - using the brakes whilst fully accelerated may lead to a collapse.
-
Page 20: Incidents
INCIDENTS IN FLIGHT Deflations Due to the flexible form of a paraglider, turbulence may cause a portion of the wing suddenly to collapse. This can be anything from a small 30% (asymmetric) collapse to a complete (symmetric) collapse. If you have a collapse, the first thing to do is to control your direction. You should fly away from the ground or obstacles and other pilots, or at least not to fly into them. - Page 21 Cravats If the tip of your wing gets stuck in the lines, this is called a ‘cravat’. This can make your glider IMPORTANT go into a spiral, which is difficult to control. The first solution to get out of this situation is to A bad preparation stabilise the glider into normal flight, i.e get control of your direction and then pull down the on launch, aerobatic...
- Page 22 Ozone recommends to use the concertina packing method exactly as shown so that all of the cells rest alongside each other and the plastic reinforcements are not unnecessarily bent. Using an Ozone Saucisse or Saucisse light pack will help preserve the life of the wing and aid with the speed and ease of packing.
- Page 23 Step 4. Group together the middle/trailing edge of the wing by sorting the folds near the B, C and D tabs. If using a Saucisse pack go to Step 8. Step 5. Once the LE and rear of the wing have been sorted, turn the whole wing on its side.
- Page 24 Step 8. If using the Saucisse Pack, carefully zip it up without trapping any material. Step 9. Turn the Saucisse on its side and make the first fold just after the LE reinforcements. Do not fold the plastic reinforcements, use 3 or 4 folds around the LE. IMPORTANT: Do NOT lay the wing flat on the ground before packing the glider, this will cause abrasion damage...
- Page 25 • Your Ozone wing has an opening closed using Velcro on the trailing edge of the tip called the ‘Butt hole’. This has been designed to easily empty all the things which have been...
- Page 26 Storage and Transport Always store all your flying equipment in a dry room, protected from direct heat. Your wing should be dry before being packed away. Moisture, heat and humidity are the worst elements for damaging your glider. Storing a damp glider in your car under the sun would be terrible IMPORTANT for example.
- Page 27 You can find more information about repairing your wing on the Ozone website, including step by step instructions with pictures. If you damage a line: Any line that is visually damaged MUST be replaced. Use a reputable paragliding service centre to make the replacement lines. Alternatively you can order them from your local Ozone dealer or directly from our website http://www.flyozone.com/paragliders/en/shop/lines.php...
- Page 28 Porosity is measured with a porosity meter, the time taken by a certain volume of air to go through a certain surface of the cloth. The time in seconds is the result. A measurement is done in a several places on the top surface along the span of the glider behind the leading edge.
-
Page 29: Limitations
LIMITATIONS Pilot Suitability The Kona 2 has been designed as a solo beginner wing suitable for all levels of training. It is IMPORTANT not intended for tandem flights nor aerobatic manoeuvres. The Kona 2 is certified EN B with Certification... - Page 30 Modifications Your Ozone Kona 2 was designed and trimmed to give the optimum balance of performance, handling and safety. Any modification voids the certification and will also make the wing more IMPORTANT difficult and dangerous to fly.
- Page 31 OZONE QUALITY GUARANTEE At Ozone we take the quality of our products very seriously, all our gliders are made to the highest standards in our own manufacturing facility. Every glider manufactured goes through a stringent series of quality control procedures and all the components used to build your glider are traceable.
- Page 32 TECHNICAL SPECIFICATIONS No. of Cells Projected Area (m2) 18.7 20.3 21.8 24.5 26.5 Flat Area (m2) 22.2 24.1 25.8 27.3 31.3 Projected Span (m) 8.23 8.57 8.87 9.12 9.78 Flat Span (m) 10.69 11.14 11.52 11.85 12.22 12.71 Projected Aspect Ratio 3.62 3.62 3.62...
- Page 33 TECHNICAL DRAWINGS Trailing Lower Surface Edge Leading Upper Surface Handle Edge Riser Riser Riser Baby A Adjustable Brake Riser Pulley (Big Ears) Adjustable Magnet Brake Upper Handle Cell Accelerator Lines Openings Pulley Brake Non Accelerated Lines Butt Hole Brummel Hook Middle for Speed System Lines...
- Page 34 Kona 2 Rigging Diagram LINE DIAGRAM Individual and linked line lengths can be found online. A Riser B Riser KT 2 KT 1 KMU4 KML3 KMU3 CRU4 KMU2 KMU1 KTR U KML2 KML1 KTR L KRU1 CRL4 Tip Steering Handle...
-
Page 35: Materials
MATERIALS All Ozone gliders are made from the highest quality materials available. Cloth Upper Surface Dominico DOKDO 30D MF Lower Surface Porcher 9018 E65 Easy fly Internal Ribs Porcher 9017 E29 (hard) Leading Edge Reinforcement 2.5/1.8mm Plastic pipe Main Line Set... - Page 36 1258 Route de Grasse Le Bar sur Loup 06620 France...
Need help?
Do you have a question about the Kona 2 and is the answer not in the manual?
Questions and answers