Table of Contents
Advertisement
Available languages
Available languages
Advertisement
Chapters
Table of Contents

Related Manuals for Viper AS6690T-US


Summary of Contents for Viper AS6690T-US
- Page 1 AS6690T-US & AS7690T-US / AS7190TO-US INSTRUCTION FOR USE AS6690T-US & AS7690T-US / AS7190TO-US INSTRUCTION FOR USE 800304 AS7190TO -US AS6690T-US & AS7690T-US Model No.: 50000572/50000573/50000574 VS14002 Rev. A Nov. 2019...
- Page 2 TABLE OF CONTENTS 1-30 ENGLISH INSTRUCTION FOR USE……………………………………… 31-60 FRANÇAIS INSTRUCTIONS D’UTILISATION…………………………… 61-90 ESPAÑOL INSTRUCCIONES DE USO…………………………………….
-
Page 3: Table Of Contents
INSTRUCTION FOR USE ENGLISH TABLE OF CONTENTS INTRODUCTION ............................2 GUIDE PURPOSE AND CONTENTS ...........................2 HOW TO KEEP THIS INSTRUCTION FOR USE ......................2 DECLARATION OF CONFORMITY ...........................2 ACCESSORIES AND MAINTENANCE ........................2 CHANGE AND IMPROVEMENT ..........................2 SCOPE OF APPLICATION ............................2 MACHINE IDENTIFICATION DATA ..........................2 TRANSPORT AND UNPACKING ..........................3 SAFETY ............................... -
Page 4: Introduction
INSTRUCTION FOR USE ENGLISH INTRODUCTION NOTE The numbers in brackets refer to the components shown in Machine Description chapter. GUIDE PURPOSE AND CONTENTS The purpose of this instruction for use is to provide the operator with all basic information and technical characteristics, operation, machine inactivity, spare parts and safety conditions etc. -
Page 5: Transport And Unpacking
INSTRUCTION FOR USE ENGLISH TRANSPORT AND UNPACKING When the carrier delivers the machine, make sure the packaging and machine are both whole and undamaged. If any damage is observed, inform the carrier of the damage before accepting the goods, to reserve the right to compensation for the damage. Follow the instructions on packaging strictly when unpacking the machine. -
Page 6: General Safety Instruction
INSTRUCTION FOR USE ENGLISH GENERAL SAFETY INSTRUCTION Specific warnings and cautions to inform about potential damages to people and machine are shown below. DANGER! • This machine must be operated by trained and authorized personnel according to guidance of the manual. •... - Page 7 INSTRUCTION FOR USE ENGLISH • Do not wash the machine with direct or pressured water jets, or with corrosive substances. • Do not bump into shelves or scaffoldings, especially where there is a risk of falling objects. • Do not lean liquid containers on the machine, use the relevant can holder. •...
-
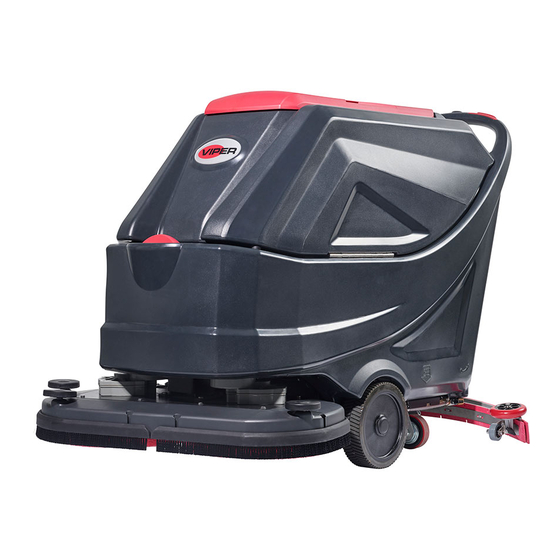
Page 8: Machine Description
INSTRUCTION FOR USE ENGLISH MACHINE DESCRIPTION MACHINE STRUCTURE (as shown in Figure 1) Recovery tank lid Hinge Can holder Recovery tank Handlebar Filter cover Control panel Filler hose holder Control box Filter support Serial number plate/technical data Tank cover gasket Outlet cover Debris collection box Squeegee knobs... - Page 9 INSTRUCTION FOR USE ENGLISH MACHINE STRUCTURE (as shown in Figure 2) Battery connector (red) Machine reverse switch Batteries (*) Recovery water drain hose Battery caps Security cover of charging jack Water level indicator tube Squeegee lifting/lowering handle Tank safety cable Solution tank side filler cap Vacuum system On-Board Charger (*)
-
Page 10: Control Panel
INSTRUCTION FOR USE ENGLISH CONTROL PANEL (as shown in Figure 3) Multifunction display Brush/pad-holder release button (only for disc Items displayed: machine) • A) Battery type Flashing LED-Releasing system activated B) Battery charge level Floor prep button (only for orbital machine) •... -
Page 11: Working Mode Description
INSTRUCTION FOR USE ENGLISH WORKING MODE DESCRIPTION HOW TO OPERATE DISPLAY DESCRIPTION Normal mode Key (42) on 1: Hour meter point does not flash. One button start (49) on 2: The brush arrow does not rotate. 3: The fan does not flash. 4: The tap water does not flash. - Page 12 INSTRUCTION FOR USE ENGLISH HOW TO OPERATE DISPLAY DESCRIPTION ECO mode Key (42) on Water flow at minimum (level 1) One button start (49)on Pressure at minimum (level 1) ECO button(43) on The vacuum in silent mode. Note: Turn on one button start (49), before turning on ECO button (43).
-
Page 13: Machine Size
INSTRUCTION FOR USE ENGLISH MACHINE SIZE AS6690T 1020mm 1490mm 830mm 730mm AS7690T 1020mm 1530mm 950mm 830mm AS7190TO 1020mm 1490mm 750mm 950mm... -
Page 14: Technical Parameters
INSTRUCTION FOR USE ENGLISH TECHNICAL PARAMETERS Model Parameter Type Units AS6690T AS7690T AS7190TO Solution tank capacity L / Gal 85 L / 22 Gal. Recovery tank capacity L / Gal 90 L / 24 Gal. 1490 mm/ 1550mm/ 1490 mm/ Machine Length mm/Inches 59 Inches... -
Page 15: Wiring Diagram
INSTRUCTION FOR USE ENGLISH WIRING DIAGRAM... -
Page 16: Operating Guide
INSTRUCTION FOR USE ENGLISH OPERATING GUIDE WARNING! On some points of the machine there are some adhesive plates indicating: -DANGER! -WARNING! -CAUTION! -CONSULTATION While reading this Manual, the operator must pay particular attention to the symbols shown on the plates. Do not cover these plates for any reason and immediately replace them if damaged. -
Page 17: Battery Installation And Battery Type Setting (Wet Or Gel/ Agm)
INSTRUCTION FOR USE ENGLISH BATTERY INSTALLATION AND BATTERY TYPE SETTING (WET OR GEL/ AGM) Battery installation Open the recovery tank lid (1, Figure. 1) and check that the recovery tank (16) is empty; otherwise empty it with the drain hose. (37, Figure. - Page 18 INSTRUCTION FOR USE ENGLISH CHARGING CURVE IUIa-ACD for Lead-acid (Wet)batteries IUIa-GEL for Gel batteries of Exide-Sonnenschein IUU0-GEL for HAZE Gel and AGM batteries of other manufacturers IUIUa-AGM for Discover AGM batteries Battery charging Fully charge the batteries (see the procedure in Maintenance chapter). Battery discharge When the batteries pattern is full (G, Figure 8), the batteries allow the machine to work normally.
-
Page 19: Brush/Pad-Holder Installation And Removal
INSTRUCTION FOR USE ENGLISH BRUSH/PAD-HOLDER INSTALLATION AND REMOVAL (only for disc machine) NOTE Install either the brush (A, Figure 9) or pad-holder (B and C, Figure 9) according to the type of floor to be cleaned. CAUTION Before installation or removal of brush or pad-holder, make sure all the switches on machine are in off posi- tion and the squeegee is lifted off the floor. -
Page 20: Adjusting The Balance Of Squeegee
INSTRUCTION FOR USE ENGLISH ADJUSTING THE BALANCE OF SQUEEGEE , Figure 11 Install the squeegee and tighten up the nuts (H ), then connect the vacuum hose (G) to the squeegee. Adjust the squeegee by squeegee adjusting handle (A, Figure 11). -
Page 21: Machine Operation (Scrubbing And Drying)
INSTRUCTION FOR USE ENGLISH NOTE To move the machine forward, press either the left or right safety switch (F, Figure 13) or both. Stopping the machine Stop the machine by releasing the safety switches (F, Figure 13) The brushes stops. The vacuum system stops after a few seconds. Lift the brush/pad-holder deck (K) by pressing the one button start (L). -
Page 22: Tank Emptying
INSTRUCTION FOR USE ENGLISH NOTE For correct scrubbing/drying of floors at the sides of the walls. It is suggested to go near the walls with the right side of the machine (A and B, Figure 15) as shown in the figure. CAUTION! To avoid any damage to the floor surface, turn off the brushes/pad-holders when the machine stops in one place. -
Page 23: After Using The Machine
INSTRUCTION FOR USE ENGLISH Recovery water tank emptying Stop the machine. Lift the brush/pad-holder deck (25, Figure 1) by pressing the one-button start (49, Figure 3) or restart the machine by Ignition key (42, Figure 3). Lift the squeegee (11, Figure 1) with the squeegee lifting/lowering handle (39, Figure 2). -
Page 24: Machine Storage During Long Inactivity
INSTRUCTION FOR USE ENGLISH MACHINE STORAGE DURING LONG INACTIVITY If the machine is not going to be used for more than 30 days, proceed as follows: Perform the procedures shown in After Using the machine paragraph. Disconnect the battery connector (29, Figure 2). FIRST PERIOD OF USE After the first 8 hours, check the machine fastening and connecting parts for proper tightening and check the visible parts for wear and leakage. -
Page 25: Battery Charging
INSTRUCTION FOR USE ENGLISH BATTERY CHARGING NOTE Charge the batteries when the battery is low. 0000.H CAUTION! Keeping the batteries charged make their life last longer. CAUTION! When the batteries are discharged, charge them as soon as possible, as that condition makes their life shorter. - Page 26 INSTRUCTION FOR USE ENGLISH Battery charging (The machine with off-board charger) Connect the battery charger cable to the electrical mains (G, Figure 21) (the electrical mains voltage and frequency must be compatible with the battery. When the battery charger is connected to the electrical mains, all machine functions are automatically cut off).
-
Page 27: Brush/Pad Cleaning
INSTRUCTION FOR USE ENGLISH BRUSH/PAD CLEANING CAUTION! It is advisable to use protective gloves when cleaning the brush/pad because there may be sharp debris. Remove the brush/pad from the machine, as shown in the Use chapter. Clean and wash the brush/pad with water and detergent. Check that the brushes/pads are in working condition and not excessively worn;... -
Page 28: Squeegee Blade Check And Replacement
INSTRUCTION FOR USE ENGLISH SQUEEGEE BLADE CHECK AND REPLACEMENT Clean the steel or aluminum squeegee, as shown in the previous paragraph. Check that the edges (E, Figure 26) of the front blade (C) and the edges (F) of the rear blade (D) lay down on the same level, along their length; if necessary adjust their height according to the following procedure: •... -
Page 29: Tank And Ball Float Cleaning, And Cover Gasket Check
INSTRUCTION FOR USE ENGLISH TANK AND BALL FLOAT CLEANING, AND COVER GASKET CHECK Drive the machine on a level floor. Ensure that the machine is off and the ignition key (42, Figure 3) has been removed. Open the recovery tank lid (A, Figure 29) to a 90degree position, and then remove the ball float filter (P) from the tank. Clean the recovery tank lid (A), recovery tank (B), and the float ball filter support frame (E). -
Page 30: Accessories/Options
INSTRUCTION FOR USE ENGLISH ACCESSORIES/OPTIONS In addition to the standard components, the machine can be equipped with the following accessories/options, according to the machine specific use: For further information concerning the above-mentioned optional accessories, contact an authorized Retailer. ACCESSORIES/OPTIONS See “Parts List” section Brush of different materials Battery tray On-board charger... -
Page 31: Error Code Of Display
INSTRUCTION FOR USE ENGLISH ERROR CODE OF DISPLAY Error# Error Description Notes Error 1 Valve Overload Valve short or overload Error 2 Brush Motor Overload Brush motor short or overload Error 3 Vacuum Motor Overload Vacuum motor short or overload Error 4 Traction Motor Overload Traction motor short or overload... -
Page 32: Scrapping
INSTRUCTION FOR USE ENGLISH SCRAPPING Scrap the machine by the qualified waste treatment institution. Before the machine is scrapped, please take away and segregate below subassembly that relevant laws and regulations request must be disposed in appropriate way. Battery Brush/Pad-holder Plastic hose and plastic parts Electrical and electronic components (*) Please contact our company service center destroying any electrical and electronic components. - Page 33 INSTRUCTIONS D’UTILISATION FRANÇAIS TABLE DES MATIÈRES INTRODUCTION ............................. 32 BUT ET CONTENU DU GUIDE ..........................32 COMMENT CONSERVER CES INSTRUCTIONS D’UTILISATION ................ 32 DÉCLARATION DE CONFORMITÉ .......................... 32 ACCESSOIRES ET ENTRETIEN ..........................32 CHANGEMENT ET AMÉLIORATION ........................32 CHAMP D'APPLICATION ............................32 DONNÉES D'IDENTIFICATION DE LA MACHINE ....................
-
Page 34: Introduction
INSTRUCTIONS D’UTILISATION FRANÇAIS INTRODUCTION REMARQUE Les chiffres entre parenthèses renvoient aux éléments présentés dans le chapitre Description de la Machine. BUT ET CONTENU DU GUIDE Le but de ces instructions d'utilisation est de fournir à l’opérateur toutes les informations de base et les caractéristiques techniques, les conditions de fonctionnement, d'inactivité, les pièces détachées et les conditions de sécurité... -
Page 35: Transport Et Déballage
INSTRUCTIONS D’UTILISATION FRANÇAIS TRANSPORT ET DÉBALLAGE Lorsque le transporteur livre la machine, s'assurer que l'emballage et la machine sont à la fois intacts et en bon état. En cas de dommages, informer le transporteur des dommages avant d'accepter les marchandises afin de se réserver le droit à la réparation des dommages. Suivre attentivement les instructions sur l'emballage, lors du déballage de la machine. -
Page 36: Consignes Générales De Sécurité
INSTRUCTIONS D’UTILISATION FRANÇAIS CONSIGNES GÉNÉRALES DE SÉCURITÉ Les avertissements et les mises en garde spécifiques, pour informer des dommages potentiels aux personnes et à la machine, sont indiqués ci-dessous. DANGER ! • Cette machine doit être exploitée par du personnel qualifié et autorisé selon les conseils du manuel. •... - Page 37 INSTRUCTIONS D’UTILISATION FRANÇAIS • Ne pas laver la machine avec des jets d'eau directs ou sous pression, ou avec des substances corrosives. • Ne pas heurter d’étagères ou d’échafaudages, en particulier lorsqu’il y a un risque de chute d'objets. • Ne pas poser de récipients de liquide sur la machine, utiliser le porte-gobelet prévu à...
-
Page 38: Description De La Machine
INSTRUCTIONS D’UTILISATION FRANÇAIS DESCRIPTION DE LA MACHINE STRUCTURE DE LA MACHINE (cf. Figure 1) Couvercle du réservoir de récupération Charnière Porte gobelet Réservoir de récupération Guidon Couvercle du filtre Panneau de commande Support de tuyau de remplissage Boîtier de commande Support du filtre Plaque signalétique/ données techniques Joint du couvercle du réservoir... - Page 39 INSTRUCTIONS D’UTILISATION FRANÇAIS STRUCTURE DE LA MACHINE (comme représenté sur la Figure 2) Connecteur de batterie (rouge) Interrupteur de marche arrière machine Batteries (*) Tuyau de vidange de l'eau de récupération Bouchons de batterie Couvercle de sécurité de la prise de chargement Tuyau d’indicateur de niveau d'eau Poignée de levage/d'abaissement de l’embouchure Câble de sécurité...
-
Page 40: Panneau De Commande
INSTRUCTIONS D’UTILISATION FRANÇAIS PANNEAU DE COMMANDE (cf. Figure 3) Affichage multifonction Bouton de déblocage de balai/support disque Éléments affichés : (uniquement pour les machines à disque) • A) Type de batterie DEL clignotante - Déblocage du système activé B) Niveau de charge de la batterie Bouton de préparation du sol (uniquement pour les C) Heures de fonctionnement machines orbitales) -
Page 41: Description De Mode De Travail
INSTRUCTIONS D’UTILISATION FRANÇAIS DESCRIPTION DE MODE DE TRAVAIL QUE FAIRE AFFICHEUR DESCRIPTION Mode normal Touche (42) allumée 1: Le point du compteur horaire ne clignote pas. Bouton un démarrage (49) allumé 2: La flèche du balai ne tourne pas 3: Le ventilateur ne clignote pas. 4: L’eau du robinet ne clignote pas. - Page 42 INSTRUCTIONS D’UTILISATION FRANÇAIS QUE FAIRE AFFICHEUR DESCRIPTION Mode ECO Touche (42) allumée Débit d’eau au minimum (niveau 1) Bouton un démarrage (49) allumé Pression au minimum (niveau 1) Bouton ECO (43) allumé L’aspiration est en mode silencieux. Remarque : Activer le bouton un démarrage (49), avant d'al- lumer le bouton ECO (43).
-
Page 43: Dimensions De La Machine
INSTRUCTIONS D’UTILISATION FRANÇAIS DIMENSIONS DE LA MACHINE AS6690T 1020mm 1490mm 830mm 730mm AS7690T 1020mm 1530mm 950mm 830mm AS7190TO 1020mm 1490mm 750mm 950mm... -
Page 44: Caracteristiques Techniques
INSTRUCTIONS D’UTILISATION FRANÇAIS CARACTERISTIQUES TECHNIQUES Modèle Type de paramètre Unités AS6690T AS7690T AS7190TO Capacité du réservoir de solution L / Gal 85 l / 22 gal. Capacité du réservoir de récupération L / Gal 90 L / 24 gal. 1490 mm/ 1550mm/ 1490 mm/ Longueur de la machine... -
Page 45: Schéma De Câblage
INSTRUCTIONS D’UTILISATION FRANÇAIS SCHÉMA DE CÂBLAGE... -
Page 46: Guide D'utilisation
INSTRUCTIONS D’UTILISATION FRANÇAIS GUIDE D'UTILISATION AVERTISSEMENT ! En certains endroits de la machine il y a des plaques adhésives indiquant : -DANGER -AVERTISSEMENT -ATTENTION -CONSULTATION En lisant ce manuel, l'opérateur doit prêter une attention particulière aux symboles figurant sur les plaques. Ne pas couvrir ces plaques pour une raison quelconque et les remplacer immédiatement en cas de détérioration. -
Page 47: Installation Des Batteries Et Réglage Du Type De Batterie (Avec Entretien Ou Gel/Agm)
INSTRUCTIONS D’UTILISATION FRANÇAIS INSTALLATION DES BATTERIES ET RÉGLAGE DU TYPE DE BATTERIE (AVEC ENTRETIEN OU GEL/AGM) Installation de la batterie Ouvrir le couvercle du réservoir de récupération (1, Figure 1) et vérifier si le réservoir de récupération (16) est vide ; sinon, le vider avec le tuyau de vidange. - Page 48 INSTRUCTIONS D’UTILISATION FRANÇAIS COURBE DE CHARGEMENT Branché Débranché IUIa-ACD pour les batteries au plomb (à liquide) Débranché Débranché IUIa-GEL pour les batteries à gel d’Exide-Sonnenschein Débranché Branché IUU0-GEL pour les batteries à gel HAZE et AGM d’autres fabricants Branché Branché IUIUa-AGM pour les batteries Discover AGM Chargement de la batterie Charger totalement les batteries (voir la procédure au chapitre d’entretien).
-
Page 49: Pose Et Dépose De Balai/Support Disque
INSTRUCTIONS D’UTILISATION FRANÇAIS POSE ET DÉPOSE DE BALAI/SUPPORT DISQUE (uniquement pour les machines à disque) REMARQUE Installer soit la brosse (A, Figure 9) ou le support de disque (B et C, Figure 9) selon le type de sol à nettoyer. ATTENTION Avant la pose ou la dépose du balai ou du support de disque, s'assurer que tous les interrupteurs de la ma- chine sont en position d'arrêt et que l’embouchure est soulevée du sol. -
Page 50: Ajustement De L'équilibre De L' Embouchure
INSTRUCTIONS D’UTILISATION FRANÇAIS AJUSTEMENT DE L'ÉQUILIBRE DE L'EMBOU- CHURE , Figure 11 Poser l’embouchure et serrer l'écrou (H ), puis raccorder le tuyau d'aspiration (G) à l’embouchure. Régler l'embouchure par la poignée de réglage (A, Figure 11). S'il y a un écart entre le sol et la section centrale de la lame arrière de l’embouchure (B), régler le bouton (A) dans le sens anti-horaire (F) jusqu'à... -
Page 51: Fonctionnement De La Machine (Brossage Et Séchage)
INSTRUCTIONS D’UTILISATION FRANÇAIS REMARQUE Pour déplacer la machine vers l'avant, appuyer soit sur le commutateur gauche soit sur le droit (F, Figure 13) ou sur les deux. Arrêt de la machine Arrêter la machine en relâchant les commutateurs de sécurité (F, Figure 13) Les balais s’arrêtent. -
Page 52: Vidange Du Réservoir
INSTRUCTIONS D’UTILISATION FRANÇAIS REMARQUE Pour un lavage/séchage corrects des sols aux pieds des murs. Il est suggéré d'aller près des murs avec le côté droit de la machine (A et B, Figure 15) comme sur la figure. ATTENTION ! Pour éviter tout dommage à la surface du sol, éteindre la brosse/le support de disque lorsque la machine s'ar- rête en un seul endroit, en particulier lorsque la fonction de pression supplémentaire est activée. -
Page 53: Après Utilisation De La Machine
INSTRUCTIONS D’UTILISATION FRANÇAIS Vidange du réservoir d'eau récupération Arrêter la machine. Lever le plateau de balai/support disque (25, Figure 1) en pressant le bouton de démarrage (49, Figure 3) ou redémarrer la machine par la clé de contact (42, Figure 3). Soulever l’embouchure (11, Figure 1) avec la poignée de levage/d'abaissement de l’embouchure (39, Figure 2). -
Page 54: Stockage De Machine Pendant Une Longue Inactivité
INSTRUCTIONS D’UTILISATION FRANÇAIS STOCKAGE DE MACHINE PENDANT UNE LONGUE INACTIVITÉ Si la machine ne sera pas utilisée pendant plus de 30 jours, procéder comme suit : Effectuer les procédures indiquées dans le paragraphe « Après utilisation de la machine ». Déconnecter le connecteur de la batterie (29, Figure 2). -
Page 55: Chargement De La Batterie
INSTRUCTIONS D’UTILISATION FRANÇAIS CHARGEMENT DE LA BATTERIE REMARQUE Charger les batteries lorsque la batterie 0000.H s’épuise. ATTENTION ! Garder les batteries chargées allonge leur vie utile. ATTENTION ! Lorsque les batteries sont déchargées, les char- ger dès que possible, puisque cette situation raccourcit leur vie utile. - Page 56 INSTRUCTIONS D’UTILISATION FRANÇAIS Chargement de batterie (la machine avec chargeur non-embarqué). Connecter le câble du chargeur de batterie au secteur (G, Figure 21) (la tension du secteur et la fréquence doivent être compatibles avec la batterie. Lorsque le chargeur de batterie est connecté au secteur, toutes les fonctions de la machine sont automatiquement coupées).
-
Page 57: Nettoyage De La Brosse/Du Disque
INSTRUCTIONS D’UTILISATION FRANÇAIS NETTOYAGE DE LA BROSSE/DU DISQUE ATTENTION ! Il est conseillé de porter des gants de protection lors du nettoyage du balai/disque, car il peut y avoir des dé- bris pointus. Retirer le balai/disque de la machine, tel qu'indique au chapitre Utilisation. Nettoyer et laver le balai/disque à... -
Page 58: Vérification Et Remplacement De La Lamelle De L'embouchure
INSTRUCTIONS D’UTILISATION FRANÇAIS VÉRIFICATION ET REMPLACEMENT DE LA LAMELLE DE L'EMBOUCHURE Nettoyer l'embouchure en acier ou aluminium, tel qu'indique au paragraphe précédent. Vérifier que les bords (E, Figure 26) de la lamelle avant (C) et les bords (F) de la lamelle arrière (D) sont posés au même niveau sur toute leur longueur ;... -
Page 59: Nettoyage Du Réservoir Et Du Flotteur, Vérification Du Joint De Couvercle
INSTRUCTIONS D’UTILISATION FRANÇAIS NETTOYAGE DU RÉSERVOIR ET DU FLOTTEUR, VÉRIFICATION DU JOINT DE COUVERCLE Conduire la machine sur un sol nivelé. Vérifier que la machine est éteinte et que la clé de contact (42, Figure 3) a été retirée. Ouvrir le couvercle du réservoir de récupération (A, Figure 29) sur une position à 90 degrés, puis enlever le filtre à flotteur (P) du réservoir. -
Page 60: Accessoires/Options
INSTRUCTIONS D’UTILISATION FRANÇAIS ACCESSOIRES/OPTIONS En plus des composants standards, la machine peut être équipée des accessoires/options suivants, selon l'utilisation spécifique de la machine : Pour de plus amples informations concernant les accessoires optionnels mentionnés ci-dessus, contacter un distributeur agréé. ACCESSOIRES/OPTIONS Voir la section «... -
Page 61: Code D'erreur De L'écran
INSTRUCTIONS D’UTILISATION FRANÇAIS CODE D’ERREUR DE L’ÉCRAN N° de Description de l’erreur Notes l’erreur Erreur 1 Surcharge de vanne Court-circuit ou surcharge de vanne Erreur 2 Surcharge du moteur de balai Court-circuit ou surcharge du moteur de balai Erreur 3 Surcharge du moteur d'aspiration Court-circuit ou surcharge du moteur d'aspiration Erreur 4... -
Page 62: Recyclage
INSTRUCTIONS D’UTILISATION FRANÇAIS RECYCLAGE Effectuer le recyclage de votre machine par un centre agréé. Avant que la machine ne soit détruite, veuillez à respecter la règlementation en vigueur pour les différents éléments qui la constituent. Batteries (option) Balai/support disque Tuyau en plastique et pièces en plastique Composants électriques et électroniques (*) Veuillez contacter notre centre d’entretien en cas de destruction de tout composant électrique et électronique. - Page 63 INSTRUCCIONES DE USO ESPAÑOL ÍNDICE INTRODUCCIÓN ............................. 62 PROPÓSITO Y CONTENIDOS DE ESTA GUÍ A ......................62 CÓMO GUARDAR EL MANUAL DE INSTRUCCIONES DE USO ................62 DECLARACIÓN DE CONFORMIDAD ........................62 ACCESORIOS Y MANTENIMIENTO ........................62 CAMBIOS Y MEJORAS ............................. 62 ÁMBITO DE APLICACIÓN ............................
-
Page 64: Introducción
INSTRUCCIONES DE USO ESPAÑOL INTRODUCCIÓN NOTA Los números entre paréntesis hacen referencia a los componentes que se muestran en la sección Descripción de la Máquina. PROPÓSITO Y CONTENIDOS DE ESTA GUÍA El propósito del presente Manual de Instrucciones de Uso es proporcionar al operador toda la información básica, los datos técnicos, el funcionamiento, el almacenamiento, las piezas de repuesto, las condiciones de seguridad etc. -
Page 65: Transporte Y Desembalaje
INSTRUCCIONES DE USO ESPAÑOL TRANSPORTE Y DESEMBALAJE Cuando el transportista entrega la máquina, asegúrese de que el embalaje y la máquina se encuentran enteros y sin daños. Si se observaran desperfectos, avise al transportista sobre el daño, antes de aceptar las mercancías, para reservarse el derecho de indemnización. Al desembalar la máquina siga estrictamente las instrucciones en el embalaje. -
Page 66: Instrucciones Generales De Seguridad
INSTRUCCIONES DE USO ESPAÑOL INSTRUCCIONES GENERALES DE SEGURIDAD Advertencias y precauciones específicas para informar acerca de los posibles daños a las personas y a la máquina se muestran a continuación. ¡PELIGRO! • Esta máquina debe ser operada por personal capacitado y autorizado de acuerdo con las instrucciones del manual. •... - Page 67 INSTRUCCIONES DE USO ESPAÑOL • No lave la máquina con chorros directos o presurizados de agua, o con sustancias corrosivas. • No chocar contra estanterías o andamios de los que puedan caer objetos. • No apoyar contenedores de líquidos sobre la máquina, usar el portabebidas. •...
-
Page 68: Descripción De La Máquina
INSTRUCCIONES DE USO ESPAÑOL DESCRIPCIÓN DE LA MÁQUINA CONSTRUCCIÓN DE LA MÁQUINA (como se indica en Figura 1) Tapa del depósito de recuperación: Bisagra Portaobjetos Depósito de recuperación Manillar Tapa del filtro Panel de control Soporte del tubo de llenado Caja de control Soporte del filtro Placa número de serie/datos técnicos... - Page 69 INSTRUCCIONES DE USO ESPAÑOL CONSTRUCCIÓN DE LA MÁQUINA (como se indica en Figura 2) Conector (rojo) de las baterías Interruptor de marcha atrás Baterías (*) Tubo de descarga del agua de recuperación Tapones de las baterías Tapa de seguridad del conector de carga Tubo indicador de nivel de agua Palanca de subida/bajada de la boquilla Cable de soporte del depósito abierto...
-
Page 70: Panel De Control
INSTRUCCIONES DE USO ESPAÑOL PANEL DE CONTROL (como se indica en la Figura 3) Pantalla multifunción Botón de desbloqueo cepillo/portafieltro (solo para Visualizaciones: máquina de disco) • A) Tipo de baterías LED intermitente - sistema desenganche acti- B) Nivel de carga de las baterías vado C) Horas de trabajo Botón preparación suelo (solo para máquina orbital) -
Page 71: Descripción Modo De Trabajo
INSTRUCCIONES DE USO ESPAÑOL DESCRIPCIÓN MODO DE TRABAJO CÓMO FUNCIONA DESCRIPCIÓN DE LA PANTALLA Modalidad normal Llave (42) encendida 1: Cronómetro no parpadea. Botón de arranque (49) encendido 2: La flecha del cepillo no gira. 3: El ventilador no parpadea. 4: El grifo de agua no parpadea. - Page 72 INSTRUCCIONES DE USO ESPAÑOL CÓMO FUNCIONA DESCRIPCIÓN DE LA PANTALLA Modo ECO Llave (42) encendida Flujo del agua al mínimo (nivel 1) Botón de arranque (49) encendido Presión al mínimo (nivel 1) Botón ECO (43) encendido La aspiradora está en modalidad silenciosa. Nota: Conecte el botón de arranque (49), antes de conectar el botón ECO (43).
-
Page 73: Dimensiones De La Máquina
INSTRUCCIONES DE USO ESPAÑOL DIMENSIONES DE LA MÁQUINA AS6690T 1020mm 1490mm 830mm 730mm AS7690T 1020mm 1530mm 830mm 950mm AS7190TO 1020mm 1490mm 950mm 750mm... -
Page 74: Parámetros Técnicos
INSTRUCCIONES DE USO ESPAÑOL PARÁMETROS TÉCNICOS Modelo Tipos de parámetros Unidades AS6690T AS7690T AS7190TO Capacidad del depósito de la solución L / Gal 85 L / 22 Gal. detergente Capacidad del depósito de L / Gal 90 L / 24 Gal. recuperación 1490 mm/ 1550mm/... -
Page 75: Esquema Eléctrico
INSTRUCCIONES DE USO ESPAÑOL ESQUEMA ELÉCTRICO... -
Page 76: Guía De Funcionamiento
INSTRUCCIONES DE USO ESPAÑOL GUÍA DE FUNCIONAMIENTO ¡ADVERTENCIA! En algunos lugares de la máquina se encuentran algunas placas adhesivas que indican: -¡PELIGRO -¡ADVERTENCIA -¡ATENCIÓN -CONSULTA Durante la lectura de este manual, el operario debe prestar especial atención a los símbolos que aparecen en las placas. No cubra estas placas por cualquier motivo y reemplácelas inmediatamente si están dañadas. -
Page 77: Instalación De La Batería Y Configuración Del Tipo De Batería (Húmeda O De Gel/Agm)
INSTRUCCIONES DE USO ESPAÑOL INSTALACIÓN DE LA BATERÍA Y CONFIGURACIÓN DEL TIPO DE BATERÍA (HÚMEDA O DE GEL/AGM) Instalación de las baterías Abra la tapa del depósito de recuperación (1, Figura 1) y controle que el depósito de recuperación (16) esté vacío, si no vacíelo mediante el tubo de descarga. - Page 78 INSTRUCCIONES DE USO ESPAÑOL CURVA DE CARGA IUIa ACD para baterías de plomo-ácido (Wet) IUIa-GEL para baterías de gel de Exide-Sonnenschein IUU0-GEL para baterías HAZE Gel y AGM de otros fabricantes IUIUa-AGM para baterías Discover AGM Carga de la batería Efectuar un ciclo de carga completa de las baterías (véase procedimiento en el capítulo Mantenimiento).
-
Page 79: Instalación Y Remoción Cepillo/Portafieltro
INSTRUCCIONES DE USO ESPAÑOL INSTALACIÓN Y REMOCIÓN CEPILLO/PORTAFIELTRO (solo para máquina de disco) NOTA Instale el cepillo (A, Figura 9) o el portafieltro (B y C, Figura 9) según el tipo de suelo a limpiar. ¡ATENCIÓN Antes de la instalación o remoción del cepillo o portafieltro, asegúrese de que todos los interruptores de la máquina están en posición de apagado y la boquilla levantada del suelo. -
Page 80: Ajuste De La Estabilidad De La Boquilla
INSTRUCCIONES DE USO ESPAÑOL AJUSTE DE LA ESTABILIDAD DE LA BOQUILLA , Figura 11 Instale la boquilla y enrosque las tuercas (H ), luego conecte el tubo de aspiración (G) con la boquilla. Ajuste la posición de la boquilla mediante la palanca de ajuste de la boquilla (A, Figura 11). -
Page 81: Conducción De La Máquina (Fregar Y Secar)
INSTRUCCIONES DE USO ESPAÑOL NOTA Para la marcha adelante, pulse el interruptor de seguridad (F, Figura 13) derecho o izquierdo, o ambos. Parada de la máquina Pare la máquina soltando los interruptores de seguridad (F, Figura 13) Los cepillos se paran. El sistema de aspiración se detiene al cabo de algunos segundos. -
Page 82: Vaciar Los Depósitos
INSTRUCCIONES DE USO ESPAÑOL NOTA Para un correcto lavado/secado de los suelos en los bordes de las paredes. Se aconseja acercarse a las paredes con la parte derecha de la máquina (A y B, Figura 15) como se indica en la figura. ¡ATENCIÓN! Para evitar cualquier daño a la superficie del suelo, apague los cepillos/porta-fieltro cuando la máquina se detiene en un lugar, especialmente cuando la función de presión extra está... -
Page 83: Después Del Uso De La Máquina
INSTRUCCIONES DE USO ESPAÑOL Vaciado del depósito de recuperación Parar la máquina. Levante el cabezal portacepillos/portafieltros (25, Figura 1) presionando el botón de arranque (49, Figura 3) o vuelva a arrancar la máquina con la llave de encendido (42, Figura 3). Levante la boquilla (11 Figura 1) con la palanca de subida/bajada de la boquilla (39, Figura 2). -
Page 84: Almacenamiento De La Máquina Durante Largos Periodos De Inactividad
INSTRUCCIONES DE USO ESPAÑOL ALMACENAMIENTO DE LA MÁQUINA DURANTE LARGOS PERIODOS DE INACTIVIDAD Si la máquina no va a ser utilizado durante más de 30 días, proceda de la siguiente manera: Realice los procedimientos que se muestran en el párrafo Después del uso de la máquina. Desconecte el conector de la batería (29, Figura 2). -
Page 85: Carga De La Batería
INSTRUCCIONES DE USO ESPAÑOL CARGA DE LA BATERÍA NOTA Cargue las baterías cuando el nivel de la 0000.H batería está bajo. ¡ATENCIÓN! Si se mantienen las baterías cargadas, su durabilidad aumenta. ¡ATENCIÓN! No dejar las baterías descargadas durante mucho tiempo, porque su durabilidad podría reducirse. - Page 86 INSTRUCCIONES DE USO ESPAÑOL Carga de la batería (Máquina con batería externa) Conecte el cable del cargador de la batería a la red eléctrica (G, Figura 21) (la tensión y la frecuencia de la red eléctrica deben ser compatibles con la batería. Cuando el cargador de baterías está conectado a la red eléctrica, todas las funciones de la máquina se paran automáticamente.
-
Page 87: Limpieza De Los Cepillos/Fieltros
INSTRUCCIONES DE USO ESPAÑOL LIMPIEZA DE LOS CEPILLOS/FIELTROS ¡ATENCIÓN! Durante estas operaciones se recomienda usar guantes de trabajo, porque residuos cortantes podrían estar en el cepillo/fieltro. Quite el cepillo/fieltro de la máquina como indicado en el capítulo Uso. Limpie y lave el cepillo/fieltro con agua y detergente. Controle que los cepillos/fieltros están en buenas condiciones de funcionamiento y no excesivamente desgastados;... -
Page 88: Control Y Sustitución De Los Cauchos De La Boquilla
INSTRUCCIONES DE USO ESPAÑOL CONTROL Y SUSTITUCIÓN DE LOS CAUCHOS DE LA BOQUILLA Limpie la boquilla de acero o de aluminio, tal y como se indica en el párrafo anterior. Compruebe si los bordes (E, Figura 26) del caucho delantero (C) y los bordes (F) del caucho trasero (D) están en el mismo nivel, en su longitud;... -
Page 89: Limpieza Del Depósito Y Del Flotador De Bola Y Control De La Guarnición De La Tapa
INSTRUCCIONES DE USO ESPAÑOL LIMPIEZA DEL DEPÓSITO Y DEL FLOTADOR DE BOLA Y CONTROL DE LA GUARNICIÓN DE LA TAPA Conduzca la máquina a una superficie nivelada. Asegúrese que la máquina está apagada y la llave de encendido (42, Figura 3) ha sido retirada. Abra la tapa del depósito de recuperación (A, Figura 29) a una posición de 90º, y luego quite el filtro del flotador de bola (P) del depósito. -
Page 90: Accesorios/Opciones
INSTRUCCIONES DE USO ESPAÑOL ACCESORIOS/OPCIONES Además de los componentes instalados en la versión estándar, la máquina puede equiparse con los siguientes accesorios/opciones, según el uso específico: Para más información sobre los accesorios opcionales mencionados anteriormente, póngase en contacto con un Revendedor autorizado. ACCESORIOS/OPCIONES Consulte la sección «Catálogo de piezas de repuestos». -
Page 91: Código De Error De La Pantalla
INSTRUCCIONES DE USO ESPAÑOL CÓDIGO DE ERROR DE LA PANTALLA Error # Descripción del error Notes Error 1 Sobrecarga de la válvula Cortocircuito o sobrecarga de la válvula Error 2 Sobrecarga del motor de cepillo. Cortocircuito o sobrecarga del motor del cepillo Error 3 Sobrecarga del motor de aspiración Cortocircuito o sobrecarga del motor de aspiración... -
Page 92: Desguace
INSTRUCCIONES DE USO ESPAÑOL DESGUACE Deseche la máquina mediante una institución de tratamiento de residuos calificada. Antes de desechar máquina, por favor lleve y separe el subconjunto a continuación que debe eliminarse en forma adecuada según las leyes y reglamentos pertinentes. Batería Cepillo/portafieltro Tubo de plástico y piezas de plástico... - Page 93 Nilfisk Inc. 9435 Winnetka Avenue North Minneapolis, MN 55445 www.usviper.com Nilfisk Canada Mississauga, ON, Canada 800.668.8400...
Need help?
Do you have a question about the AS6690T-US and is the answer not in the manual?
Questions and answers