Table of Contents
Advertisement
Quick Links
Advertisement
Table of Contents

Related Manuals for Nexo MSUB12


Summary of Contents for Nexo MSUB12
- Page 1 DP5252-01-DI MSUB12-I User Manual...
-
Page 2: Table Of Contents
TABLE OF CONTENTS ___________________________________________________________________ 2 WARNINGS ____________________________________________________________________________ 3 DESCRIPTION __________________________________________________________________________ 4 SETTING RANGE _______________________________________________________________________ 5 MSUB12 RIGGING ______________________________________________________________________ 9 MSUB12 - ACCESSORIES _______________________________________________________________ 12 ARRAY EQ ____________________________________________________________________________ 14 MAINTENANCE ________________________________________________________________________ 15 TECHNICAL SPECIFICATIONS ___________________________________________________________ 17 USER NOTES _________________________________________________________________________ 18 EU Conformity declaration... -
Page 3: Warnings
If the system seems to be malfunctioning or damaged, stop using it at once and have it repaired by a NEXO qualified technician. Do not expose the system directly to the sun or to the rain, do not immerse it into fluids, do not place objects filled with liquid on the system. -
Page 4: Description
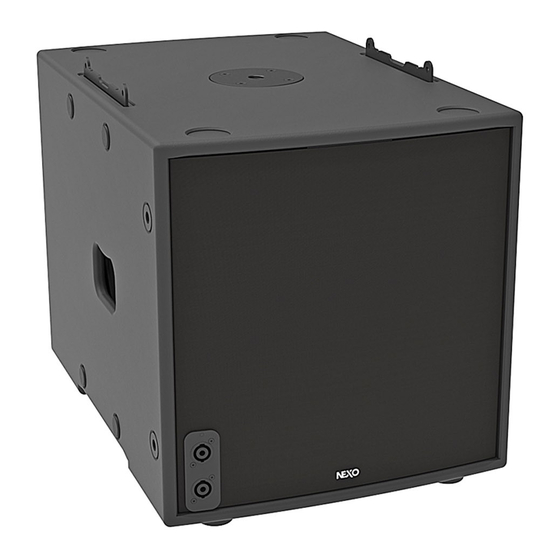
DESCRIPTION DESCRIPTION → The MSUB12 is a compact high technology arrayable sub, the ideal companion for the GEOM6 line array element, sharing same aesthetic design and arrayable in the same flown or stacked cluster. → Versions: • MSUB12-I: for fix applications; Black •... -
Page 5: Setting Range
55 – 150 Hz • The ideal ratio for a directional use is 2 x MSUB12 in CARDIO FRONT mode on top of 1x Reversed MSUB12 in CARDIO BACK mode. From 1:1 to 4:1 ratio can be used OMNI Assembly... - Page 6 For stack configuration using MSUB12 in OMNI or CARDIO mode with 1 Back and 2 Front and GEOM6 on top of them, MSUB12 should use the 55-85 Hz setup (85 Hz crossover should be used for GEOM6 as well). A small overlap could have impact if needed, for example use MSUB12 with 55-120 Hz setup.
- Page 7 With 4 to 6 GEOM6 For long throw application, MSUB12 should use the 55-120 Hz setup (120 Hz crossover should be used for GEOM6 as well). If a larger stacked Sub is used all together, MSUB12 should use the 63-120 Hz setup.
- Page 8 SETTING RANGE With 7 to 12 GEOM6 For very long throw application, MSUB12 should be deployed using the 550-120 Hz setup (120 Hz crossover should be used for GEOM6). Ground Stack Sub design Page 8 / 20 MSUB12-I...
-
Page 9: Msub12 Rigging
MSUB12 RIGGING MSUB12 RIGGING Place MSUB12 on the top of a second MSUB12. Insert 4 pins (2 on both sides), provided with MSUB12-I. Secure with the provided plates and the screws. MSUB12-I Page 9 / 20... - Page 10 MSUB12 CABLING MSUB12 CABLING MSUB12-I is packaged with the connection plate on the back. You can place a connection plate on the front. Remove the connection plate with the cable glands. Place the Remove the cable glands. provided plate. Place the front plate on the grille. Pass the cable before closing Assemble the cable glands on the front plate the front grille.
- Page 11 MSUB12 CABLING How to connect a second cable? Remove the driver. Wire the provided connector WAGO 4pt. Plug it to the free connector. Pass the cable through the cable-gland. Tight the cable-gland. Close MSUB12. MSUB12-I Page 11 / 20...
-
Page 12: Msub12 - Accessories
All MSUB12 accessories are specifically rated in agreement with structural computations. Never use other accessories – including push-pins – when assembling MSUB12 cabinets than the ones provided by NEXO: NEXO will decline responsibility over the entire MSUB12 accessory range if any component is purchased from different supplier. - Page 13 MSUB12 - ACCESSORIES VNT-MNSTKM6 Stacking option for GEOM6 on top of MSUB12 (with GMT-BUMPER). VNI-FIXBUMPM6 Fixing kit for VNT-BUMPM6 – MSUB12. MST-2CASEMSUB12 For 2xMSUB12 and VNT-BUMPM6 / VNT-EXBARM6 MSUB12-I Page 13 / 20...
-
Page 14: Array Eq
ARRAY EQ ARRAY EQ The ArrayEQ allows to adjust the system frequency response in its lower range (see curves below, with different ArrayEq values): Page 14 / 20 MSUB12-I... -
Page 15: Maintenance
MAINTENANCE MAINTENANCE Grille changing Remove 4 screws (Tx25). Remove the grille. 12’’ Driver Remove 8 screws (Tx25) to remove the Driver. Remove the driver. Red / Brown (+) / Black / Blue (-) MSUB12-I Page 15 / 20... - Page 16 Complete grille Installation White (with fasteners) 05FTCC38x15 Pad 15/38 (x10) 05LEXSUB12I Lexan MSUB12-I 05LEXSUB12I-PW Lexan MSUB12-I White 12’’ Driver (6 ohms) 05HPB12ND Recone Kit 12’’ (6 ohms) 05N12ND-4R/K NOTE: Speakers and Grills can be sent back to NEXO for recycling Page 16 / 20 MSUB12-I...
-
Page 17: Technical Specifications
TECHNICAL SPECIFICATIONS TECHNICAL SPECIFICATIONS MSUB12 WITH NEXO ELECTRONICS 55Hz – 150Hz Frequency range (±6dB) Sensibility (1W / 1m) 102dB SPL Nominal Peak SPL Level (1m) 130 dB Operating voltage 35 Vrms Crossover Frequency 55-85; 55-120; 55-150 Hz / 63-120; 63-150 Hz Nominal Impedance 6Ω... -
Page 18: User Notes
USER NOTES USER NOTES Page 18 / 20 MSUB12-I... - Page 19 USER NOTES MSUB12-I Page 19 / 20...
- Page 20 USER NOTES NEXO S.A. Tel: +33 3 44 99 00 70 Fax: +33 3 44 99 00 30 E-mail: info@nexo.fr arc d’activité de la Dame Jeanne F-60128 PLAILLY nexo-sa.com Page 20 / 20 MSUB12-I...
Need help?
Do you have a question about the MSUB12 and is the answer not in the manual?
Questions and answers