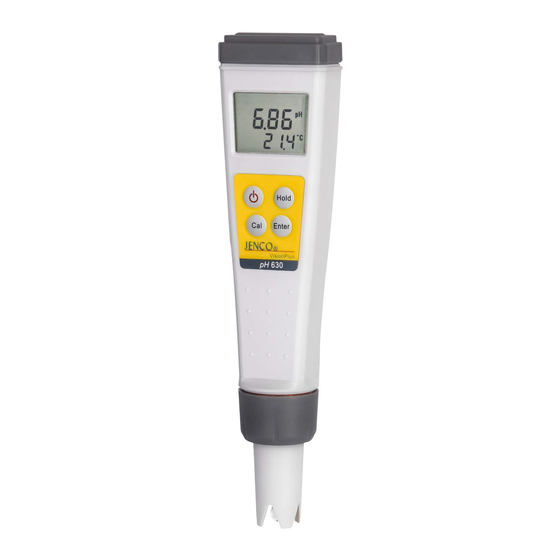
Summary of Contents for JENCO VisionPlus pH630FA
- Page 1 Operation Manual MODEL pH630FA Microcomputer Based pH&Temperature Pocket Meter pH630FA...
-
Page 2: Table Of Contents
INITIAL INSPECTION AND ASSEMBLY .....2 BEFORE YOUR FIRST USE ......…………2 ..........2 Replace the Batteries ..........2 Soak the Electrode ....2 Setup and Calibrate the Electrode and Meter VISIONPLUS pH630FA OVERVIEW......3 ...........3 Meter Description ............3 B. LCD Display OPERATION MODES AND KEYPAD OPERATIONS...4 ............4 Operation Modes ..........4... -
Page 3: Initial Inspection And Assembly
Soak the electrode in a 4 pH buffer solution for 10 minutes before first use or after storage. C. Setup and Calibrate the Electrode and Meter VisionPlus pH630FA must be setup and calibrated before your first use. Please follow the instructions detailed in section USING VISIONPLUS pH630FA... -
Page 4: Visionplus Ph630Fa Overview
VISIONPLUS pH630FA OVERVIEW A. Meter Description Battery cap LCD screen Keypad Hold Electrode collar Enter Germany Electrode & ATC assembly PT-70 (Electrode cap is not shown.) B. LCD Display 6.86 4.00 9.18 7.00 4.01 10.01 HOLD 1. Calibration buffer(s) and number of calibration point 2. -
Page 5: Operation Modes And Keypad Operations
OPERATION MODES AND KEYPAD OPERATIONS A. Operation Modes VisionPlus pH630FA meter has 4 operation modes: Measure Mode. Measure Mode is used to make all pH and temperature measurements. Calibration Mode. Calibration Mode is used to perform 1, 2 or 3 point calibration. -
Page 6: Using Visionplus Ph630Fa
USING VISIONPLUS pH630FA A. Power On/Off Press the “On/Off ” key to turn the unit on. If the unit is running then you can press the “On/Off” key to turn the unit off. The unit will automatically turn off after 30 minutes of no key activity. -
Page 7: Measure
reading is reached, the “HOLD” icon will be on. Press the “Enter” key to save the calibration, wait a second, the second point has been calibrated and the unit is ready to be sloped at the third buffer. [Note: At this moment, Press the “Hold” key, the unit will exit the calibration mode. -
Page 8: Replace Electrode
REPLACE ELECTRODE Unscrew the electrode collar to remove the electrode & ATC assembly as shown in the right figure. Remove the old electrode from the electrode collar. Insert a new electrode, make sure the electrode fit back into the meter correctly. Screw back the electrode collar. -
Page 9: Error Displays And Troubleshooting
ERROR DISPLAYS AND TROUBLESHOOTING DISPLAY Possible cause(s) Display Mode [Action(s)] Displa Temperature > 212 °F range. [Bring solution to a lower temperature.] "ovr" "ovr" Measure electrode & [Replace ATC assembly Temperature < 14.2 °F range. [Bring solution to a "udr" "udr"... -
Page 10: Specifications
SPECIFICATIONS Range Resolution Accuracy 0.00 to 14.00 pH 0.01 pH ±0.02 pH ± 1 LSD Temperature Range Resolution Accuracy 14.2 to 99.9 °F 0.2 °F ±0.6 °F 100 to 212 °F 1 °F ±1 °F pH buffer recognition 7.00, 4.01, 10.01 pH or 6.86, 4.00, 9.18 pH pH Temperature compensation AUTO 14.2°F to 212°F... -
Page 11: Warranty
If you purchased the item from our Jenco distributors and it is under warranty, please contact them to notify us of the situation. Jenco Service Department alone will determine if the product problem is due to deviations or customer misuse.


Need help?
Do you have a question about the VisionPlus pH630FA and is the answer not in the manual?
Questions and answers