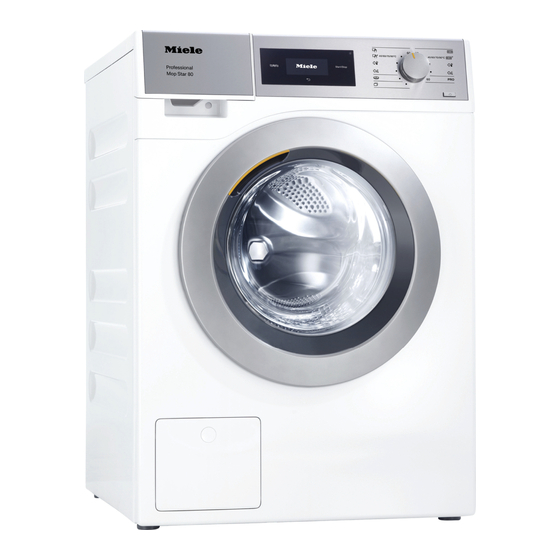
Miele PWM 508 Mop Star 80 Operating And Installation Instructions
Hide thumbs
Also See for PWM 508 Mop Star 80:
- Operating and installation instructions (84 pages) ,
- Operating and installation instructions (96 pages)
Table of Contents

Related Manuals for Miele PWM 508 Mop Star 80


Summary of Contents for Miele PWM 508 Mop Star 80
- Page 1 Operating and installation Instructions Washing machine To avoid the risk of accidents or damage to the appliance, it is essential to read these instructions before it is installed and used for the first time. en-AU, NZ M.-Nr. 11 213 010...
-
Page 2: Table Of Contents
Contents Caring for the environment .................. 6 Warning and Safety instructions................ 7 Operating the washing machine ................ 15 Control panel ......................15 Symbols on the control panel ................16 Symbols in the display ..................17 Sensor controls and touch display with sensor controls ........18 Main menu...................... - Page 3 Contents Cancelling a programme ..................44 Switching on the washing machine after an interruption to the power supply ..44 Adding or removing laundry .................. 45 Cleaning and care .................... 46 Cleaning the external casing and fascia panel............46 Cleaning the detergent dispenser drawer ............. 46 Cleaning the drum, suds container and drainage system........
- Page 4 Contents Technical data...................... 70 Supervisor level .................... 71 Code-based access ....................71 Changing the code ....................71 Opening the Supervisor level ................71 Exiting the Supervisor level ................... 71 Language....................... 72 Brightness ......................72 Clock display......................72 Finish tone volume ....................72 Keypad tone ......................
- Page 5 Contents Wash time pre-wash....................78 Wash time Cottons....................78 Wash time Minimum iron..................78 Pre-rinse Cottons ....................78 Pre-rinse Minimum iron ..................78 Pre-wash Cottons/Min. iron .................. 78 Cottons rinses ....................... 79 Minimum iron rinses ....................79 Disinfection rinse ....................79 Temperature reduction ..................
-
Page 6: Caring For The Environment
Caring for the environment Disposal of the packing Disposing of your old material appliance The transport and protective packaging Electrical and electronic appliances has been selected from materials which often contain valuable materials. They are environmentally friendly for also contain specific materials, disposal, and can normally be recycled. -
Page 7: Warning And Safety Instructions
“Installation”, as well as in the “Warning and Safety instructions”. Miele cannot be held liable for injury or damage caused by non- compliance with these instructions. Keep these operating instructions in a safe place and pass them on to any future owner. - Page 8 Warning and Safety instructions This washing machine is intended for commercial use in small businesses, care homes, sports clubs, hospitals and other similar commercial environments. This machine may also be operated by lay persons in public areas such as laundrettes, communal laundry rooms or similar.
- Page 9 It is most important that this basic safety requirement is present and regularly tested and, when there is any doubt, the on-site wiring system should be inspected by a qualified electrician. Miele cannot be held liable for the consequences of an inadequate earthing system (e.g. electric shock). ...
- Page 10 Warning and Safety instructions If the electrical connection cable is faulty, it must only be replaced by a Miele authorised service technician to protect the user from danger. The washing machine must be connected to the water supply using the new hose set supplied with the appliance.
- Page 11 Warning and Safety instructions If the appliance is hard wired, an on-site dual circuit breaker must be accessible at all times in order to disconnect the washing machine from the mains supply. The means of disconnection must be incorporated in the fixed wiring in accordance with the wiring rules.
- Page 12 If, however, you do wish to descale it, only use special non-corrosive descaling agents and strictly observe the instructions on the packaging. Special descaling agent is available from your Miele dealer or from Miele. Strictly observe the instructions for the packaging. ...
- Page 13 Warning and Safety instructions Only use dyes suitable for use in a washing machine. Always observe the manufacturer's instructions carefully. Dye removers contain sulphur compounds which can cause damage such as corrosion. Dye removers must not be used in the washing machine.
- Page 14 Miele tumble dryer and your Miele washing machine. If installing the machine on a Miele plinth (available as an optional accessory), please make sure you order the correct one for this washing machine.
-
Page 15: Operating The Washing Machine
Operating the washing machine Control panel a Language sensor control e Programme selector For selecting the current user For selecting the wash programme. language. The programme selector can be The operating language is displayed turned clockwise or anti-clockwise. again at the end of the programme. f Button ... -
Page 16: Symbols On The Control Panel
Operating the washing machine Symbols on the control panel Right side: Mops Mops plus Mops thermal disinfection Mops chemo-thermal disinfection Cottons PRO Left side: Cloths Cloths plus Cleaning cloths thermal disinfection Cleaning cloths chemo-thermal disinfection ... -
Page 17: Symbols In The Display
Operating the washing machine Symbols in the display Temperature: Use the Temperature sensor control to set the temperature of the wash programme. Spin speed: Use the Spin speed sensor control to set the spin speed of the wash programme. Extras: Use the Extras sensor control to add Extras to a wash ... -
Page 18: Sensor Controls And Touch Display With Sensor Controls
Operating the washing machine Sensor controls and touch display with sensor controls 0:42 New mops The , and Start/Stop sensor controls and the sensor controls in the 60°C 1400 display react to finger contact. Every touch of a sensor is confirmed by an –... -
Page 19: Examples On How To Operate The Appliance
Operating the washing machine Setting numerical values Examples on how to operate the appliance To change a numerical value, use the and arrows above or below the Selection lists numbers you want to change. The and arrows on the right of the display indicate that further choices are ... -
Page 20: Using For The First Time
Please observe the instructions in process. After that, they must be “Installation and connection”. changed by Miele. Complete the initial commissioning Emptying the drum process. A swivel elbow for the drain hose and/... - Page 21 Using for the first time Setting the display brightness Setting the time of day Brightness Time – Set the desired brightness with the – Use the and sensor controls to and + sensors and confirm your enter the time and confirm your entry selection with the OK sensor.
- Page 22 Using for the first time The programmes are activated (framed) Selecting pre-wash water or deactivated (no frame). Confirm with the OK sensor. The display switches back to the Cold Pre-wash programme packages. water Disinfection Touch the Cold sensor if the washing ...
- Page 23 Using for the first time Removing the transit bars Completing the commissioning process The display will remind you to remove the transit bars. To complete commissioning, the Cleaning cloths thermal Damage resulting from failure to disinfection programme must be run remove the transit bars.
-
Page 24: Preparing The Laundry
1. Preparing the laundry Sorting the washing items Damage due to foreign objects. Foreign objects (e.g. nails, coins, Separate the mops, cleaning cloths paper clips etc.) can cause damage and pads. to garments and to components in Shake mops, cleaning cloths and the machine. -
Page 25: Loading The Washing Machine
2. Loading the washing machine Opening the door Closing the door Reach under the door grip and pull Make sure that no items are caught the door open. between the door and the seal. Check the drum for pets or foreign objects before loading it with laundry. -
Page 26: Selecting A Programme
3. Selecting a programme Selecting further programmes with Switching on the washing the programme selector turned to machine Press the button. Selecting a programme Selecting standard programmes with the programme selector Turn the programme selector to the position. -
Page 27: Selecting Programme Settings
4. Selecting programme settings Selecting the temperature Selecting the spin speed You can alter the preset temperature of You can alter the preset spin speed. certain programmes. Touch the Spin speed sensor. Touch the Temperature sensor. The following will appear in the display: The following will appear in the display: ... - Page 28 4. Selecting programme settings Selecting Extras Selecting further options You can select Extras for the wash You can select a delay start time or programmes. change the settings of the washing machine. For some programmes, an Extra is Touch the Further selections offered directly in the main menu.
-
Page 29: Adding Detergent
5. Adding detergent There are several options for adding Adding detergent detergent. Detergent dispenser drawer Any detergent suitable for automatic front loading washing machines can be used with this appliance. Detergent dispensing Please follow the detergent manufacturer's instructions in relation to dosage. -
Page 30: Adding Fabric Softener Or Liquid Starch Separately
compartment. Do not conversion kit for external dispensing exceed the maximum level mark. systems is required. This must be fitted by a Miele authorised service Touch the Start/Stop sensor. technician. This will be automatically dispensed in the final rinse. At the end of the wash programme a small amount of water remains in the ... -
Page 31: Starting The Programme - The End Of The Programme
6. Starting the programme - the end of the programme Starting a programme The programme can be started once the Start/Stop sensor is flashing on and off. Touch the Start/Stop sensor. The door will lock ( symbol) and the wash programme will start. -
Page 32: Delay Start
Delay start The Delay start function can be used to Cancelling or changing Delay set the time until the programme starts start or the programme finish time (see Touch the Start/Stop sensor. “Supervisor level - Delay start”). The following will appear in the display: Selecting Delay start ... -
Page 33: Programme Chart
Programme chart Mop programmes – A pre-spin* and a pre-rinse cycle are carried out before the main wash. Mops 60°C Max. load 8.0 kg Items Cotton, mixed fibre or microfibre mops Notes Use specialist detergents. Extras: 2nd Pre-rinse , Microfibre 1400 rpm Rinse cycles: 2-5* Mops plus 40°C to 90°C... - Page 34 Programme chart Cloths programmes – A pre-rinse cycle is carried out before the main wash. Cloths 60°C Max. load 4.0 kg Items Cotton, mixed fibre or microfibre cloths Notes Use specialist detergents. Extras: Pre-wash 1400 rpm Rinse cycles: 2-5* Cloths plus 40°C to 90°C Max.
-
Page 35: Programme Packages
Programme chart Cottons PRO 60°C Max. load 8.0 kg Items Mixed fibre textiles (50% cotton and 50% polyester) Notes – Extra energy-efficient wash programme for commercial cotton or cotton/synthetic blend textiles with moderate levels of soiling, e.g. workwear. Extras: Pre-wash 1400 rpm Rinse cycles: 2 Pads 40°C Max. - Page 36 Programme chart Curtains cold to 40°C Max. load 3.0 kg Items Curtains specified as machine-washable by the manufacturer Notes – A pre-rinse cycle is carried out before the main wash. – For curtains which crease easily, deselect the spin speed. Extras: Pre-wash ...
- Page 37 Programme chart Pre-treat mops programmes (ready to use - rtu) – Mops are washed and pre-treated in one cycle. – A pre-spin* and a pre-rinse cycle are carried out before the main wash. – There is no water intake via the fabric softener compartment during the disinfection process.
- Page 38 Programme chart Pre-treat cloths programmes (ready to use - rtu) – Cleaning cloths are washed and pre-treated in one cycle. – A pre-rinse cycle is carried out before the main wash. – There is no water intake via the fabric softener compartment during the disinfection process.
- Page 39 Programme chart Ready to use (rtu) – The residual moisture after pre-treatment is selected with the sensor control. Mops + rtu 40°C to 90°C Max. load 8.0 kg Items Cotton, mixed fibre or microfibre mops Notes – Mops are washed and finished in one cycle. –...
- Page 40 Programme chart Workwear Oil/fat special 60°C to 90°C Max. load 8.0 kg Items Work coats, work jackets, hats, cleaning cloths made from cotton or mixed fibres Notes – Activate Pre-wash for heavy soiling. – Use liquid detergent. Extras: Pre-wash 1400 rpm Rinse cycles: 3 Dust/flour special 40°C to 90°C...
-
Page 41: Standard Programmes
Programme chart Standard programmes White items 90°C Max. load 8.0 kg Items Cotton, linen, and mixed fibre textiles Notes An additional pre-rinse can be programmed.* Extras: Pre-wash 1400 rpm Rinse cycles: 2-5* Coloured items 30°C to 60°C Max. load 8.0 kg Items Cotton, linen, and mixed fibre textiles Notes... -
Page 42: Extra Options
Extra options You can supplement the wash Pre-wash programmes with Extras. A pre-wash can be added for heavily Not all Extras can be selected with soiled laundry. Coarse soiling is every programme. If an Extra is not loosened and removed before the main listed, it is not permitted for use with wash. -
Page 43: Special Features In The Programme Sequence
Special features in the programme sequence Spinning for mop and cleaning cloth Spinning programmes Final spin speed In pre-treat programmes for mops and When a programme is selected, the cleaning cloths, the residual moisture of maximum spin speed for this wash the load can be set using either the programme is shown in the display. -
Page 44: Changing The Programme Sequence
Changing the programme sequence If you want to select a different Changing a programme programme: After the start of a programme, it is no Close the door. longer possible to select a different programme. Select the required programme. You will need to cancel the current ... -
Page 45: Adding Or Removing Laundry
Changing the programme sequence Adding or removing laundry Once a programme has started successfully, the washing machine You can add or remove items during the cannot recognise any adjustment to first few minutes after the programme the load. has started. For this reason, if laundry is added or ... -
Page 46: Cleaning And Care
Cleaning and care Cleaning the detergent Risk of electric shock! dispenser drawer Only ever perform cleaning and maintenance work when the Washing at low temperatures and the appliance is disconnected from the use of liquid detergent can lead to a power. - Page 47 Cleaning and care Cleaning the siphon and the channel Cleaning the detergent dispenser drawer housing Pull the siphon out of the Use a bottle brush to remove compartment. Clean the siphon under warm running detergent residues and limescale water.
-
Page 48: Cleaning The Drum, Suds Container And Drainage System
Cleaning and care Cleaning the drum, suds Cleaning the filters in the water container and drainage system inlet The drum, suds container, and drainage The washing machine has filters to system can be cleaned if necessary. protect the water inlet valves. Check these filters about every 6 months or ... - Page 49 Cleaning and care Withdraw the filter at the bar with pointed pliers and rinse it clean under running water. Reassemble the filter and seal in the reverse order and reconnect the hose. Replace the filters after cleaning.
-
Page 50: Problem Solving Guide
With the help of the following guide, minor faults in the performance of the appliance, some of which may result from incorrect operation, can be remedied without contacting Miele. This will save you time and money because you will not need a service call. -
Page 51: Programme Cancellations And Fault Messages
Miele. electricity supply. Wait at least 2 minutes before reconnecting the washing machine to the electricity. Then switch the washing machine on again. Start the programme again. If the fault message appears again, contact Miele. -
Page 52: A Fault Message Appears In The Display
The washing machine or the drain valve is leaking. Machine is leaking Turn off the tap. Call Miele. The messages will appear at the end of the programme and when the washing machine is switched on and need to be confirmed with the OK sensor. -
Page 53: An Unsatisfactory Wash Result
Problem solving guide An unsatisfactory wash result Problem Possible cause and remedy Liquid detergent does Liquid detergents usually contain no bleaching not give the required agents. They do not remove fruit, coffee and tea result. stains. Use a general purpose powder detergent containing a bleaching agent. -
Page 54: General Problems With The Washing Machine
Problem solving guide General problems with the washing machine Problem Possible cause and remedy The machine shakes The machine feet are not level. during the spin cycle. Level the machine and adjust the feet correctly. Large amounts of The water pressure is too low. detergent residue ... -
Page 55: The Door Will Not Open
The following appears The door lock has jammed. in the display: Call Miele. The door lock is jammed. Call Miele. -
Page 56: Opening The Door In The Event Of A Blocked Drain Outlet And/Or Power Cut
Problem solving guide Blocked drain outlet Opening the door in the event of a blocked drain outlet and/ If the drain outlet is blocked, a larger quantity of water (max. 30 l) can remain or power cut in the washing machine. ... - Page 57 Problem solving guide Opening the door Danger of injury due to rotating drum! Reaching into a moving drum is extremely dangerous. Danger of injury! Always make sure that the drum is stationary before reaching in to remove laundry. Use a screwdriver to unlock the door of the washing machine as shown.
-
Page 58: After Sales Service
Miele. from Miele. Contact information for Miele can be found at the end of this booklet. Please quote the model and serial number of your appliance when contacting Miele. This information can be found on the data plate. -
Page 59: Installation
*INSTALLATION* Installation Front view a Cold water inlet hose e Detergent dispenser drawer b Hot water inlet hose f Door c Electrical connection g Access to drain valve and emergency release d Control panel h Height-adjustable feet... -
Page 60: Rear View
*INSTALLATION* Installation Rear view a Electrical connection h Drain pipe b Interface for communicating with i Module slot (for external external devices communication module) c Socket for external dispensing j Holder for removed transit bars system d Inlet hose (cold water) e Inlet hose (hot water), if fitted f Safety caps for transit bars g Transport clips for hoses... -
Page 61: Installation Locations
The washing machine must not be connected to devices such as timers which would switch it off automatically. This washing machine can be installed with a Miele tumble dryer on top of it. A stacking kit (APCL001, optional accessory) is required for this. -
Page 62: Transporting The Washing Machine To Its Installation Site
*INSTALLATION* Installation Transporting the washing machine to Transporting the washing its installation site machine to its installation site The protruding lid can be used for Danger of injury from incorrect holding the machine during transport. transport. Danger of injury due to If the washing maching tips over, there is a danger of injury to people unsecured lid. -
Page 63: Installation Surface
*INSTALLATION* Installation Installation surface Removing the transit bars A concrete floor is the most suitable installation surface. It is far less prone to vibration during the spin cycle than wooden floorboards or a carpeted surface. The machine must be level and securely positioned. - Page 64 *INSTALLATION* Installation Then pull the transit bar out. Then pull the transit bar out. Risk of injury from sharp edges! There is a risk of injury when reaching into holes that are not covered. The holes for the transit bars must be covered after the transit bars have been removed.
-
Page 65: Refitting The Transit Bars
*INSTALLATION* Installation Aligning the washing machine The washing machine must stand perfectly level on all four feet to ensure safe and proper operation. Incorrect installation may increase electricity and water consumption and may cause the machine to move about. Screwing out and adjusting the feet The four adjustable screw feet are used for levelling the washing machine. -
Page 66: Securing The Washing Machine To The Plinth
(optional accessory). housing. Please also check this for the feet which did not need The necessary reprogramming must be adjustment. carried out by Miele. Coins/tokens must be removed from the coin box regularly. Otherwise, the payment system will become blocked. -
Page 67: Water Connection
100 kPa (1 bar) and must not exceed an overpressure of Maintenance 1000 kPa (10 bar). If it is higher than Only use a genuine Miele hose should 1000 kPa, a pressure reduction valve you ever need a replacement. must be installed. A filter is located in the open end of... -
Page 68: Hot Water Connection
*INSTALLATION* Installation Screw on the hot water hose. Hot water connection* The hot water temperature must not IMPORTANT Australia and New exceed 70°C. Zealand To minimise energy consumption during This appliance must be installed operation with hot water, the washing according to AS/NZS 3500.1 and AS/ machine should be connected to a NZS 3500.2. -
Page 69: Electrical Connection
Observe the instructions in safety of the appliance (e.g. danger of the wiring diagram. Conversion may overheating). only be performed by Miele or a Miele authorised service technician. If the appliance is hard wired, a dual circuit breaker must be provided on The washing machine must not be site. -
Page 70: Technical Data
Technical data Height 850 mm Width 596 mm Width (machines with a stainless steel lid) 605 mm Depth 714 mm Depth with door open 1,132 mm Weight Approx. 100 kg Maximum floor load in operation 3,000 Newton Capacity 8.0 kg dry laundry Supply voltage See data plate on back of machine Rated load See data plate on back of machine Fuse rating... -
Page 71: Supervisor Level
Select the desired setting. machine from unauthorised access. Some settings are only visible if Please inform Miele if you have external devices are connected via the forgotten your new code. Miele will XCI box. -
Page 72: Language
Supervisor level Language Keypad tone The display can be set to appear in The volume of the tone that sounds one of several different languages. You when a sensor is touched can also be can selected the permanent operator changed. language via the Language submenu. -
Page 73: Anti-Crease
Supervisor level Anti-crease "Display" switch-off status The anti-crease function helps prevent To save energy, the display goes out creasing if laundry is not going to be and the Start/Stop sensor flashes removed immediately after the end of slowly. the programme. Changing this setting leads to increased The drum continues to turn at intervals energy consumption. -
Page 74: Machine" Switch-Off Status
Supervisor level "Machine" switch-off status Programme name The washing machine switches itself When selecting a standard off automatically. It is switched off programme, the name of the selected after the end of the programme/anti- programme is shown in the display. crease phase, or after being switched –... -
Page 75: Main Wash Water
Supervisor level Main wash water Final rinse water You can select the type of water for You can select the water type for the the main wash. final rinse in some programmes. – Cold – Cold (factory setting) Only cold water is used for the main Only cold water is used for the final wash. -
Page 76: Mops Temp. Std Plus
Supervisor level Mops temp. Std plus Microfibre mops The pre-set temperature can be The Microfibre Extra can be selected altered in the Mops plus and Mops for the mop programmes. plus + rtu programmes. – inactive, not visible – 40°C (factory setting) –... -
Page 77: Clean. Cloths Ch.-Th. Dis
Supervisor level Clean. cloths Ch.-th. dis. Early warning counter The pre-set disinfection process can An internal counter reports when an be altered in the Cloths chemo- external dispenser container is almost thermal disinfection programme. empty. The counter in question then has to be reset. –... -
Page 78: Pre-Wash Temp. Cottons
Supervisor level Pre-wash temp. Cottons Wash time Minimum iron In the Cottons programme, you can In the Minimum iron programme, you select the temperature for the pre- can extend the duration of the main wash. wash. – 30°C (factory setting) – + 0 min (factory setting) –... -
Page 79: Cottons Rinses
Supervisor level Cottons rinses Temperature reduction You can alter the number of rinses The suds temperature can be reduced carried out in the Cottons and the to prevent the suds from boiling too standard mop programmes. early in high-altitude locations. – 2 rinse cycles (factory setting) Factory setting: Off –... -
Page 80: Programme Packages
The code is: 0 0 0 washing machine via the Miele XCI box. Useful tip: Make a note of your new code if you ever change it. – No function (factory setting) –... -
Page 81: Peak Load Prevention
Payment system The peak-load cut-off function can be External hardware is connected via the deactivated for disinfection Miele XCI box. programmes. When a signal is If you wish to change the settings later, registered, the washing machine's please contact Miele. -
Page 82: Feedback Signal To Pay System
Supervisor level Feedback signal to pay system FOC programmes Setting the feedback signal for the In payment system mode, you can payment system. decide whether the Drain/Spin programme can be used for free. – Factory setting: Off Factory setting: Off –... - Page 83 Miele Australia Pty. Ltd. ACN 005 635 398 ABN 96 005 635 398 Melbourne: 1 Gilbert Park Drive Knoxfield, VIC 3180 Telephone: 1300 731 411 service.prof@miele.com.au www.miele-professional.com.au sales@miele-professional.com.au Miele New Zealand Limited IRD 98 463 631 Level 2, 10 College Hill...
- Page 84 PWM 508 Mop Star 80 en-AU, NZ M.-Nr. 11 213 010 / 00...
Need help?
Do you have a question about the PWM 508 Mop Star 80 and is the answer not in the manual?
Questions and answers