
Related Manuals for Still EXH-SF 20


Summary of Contents for Still EXH-SF 20
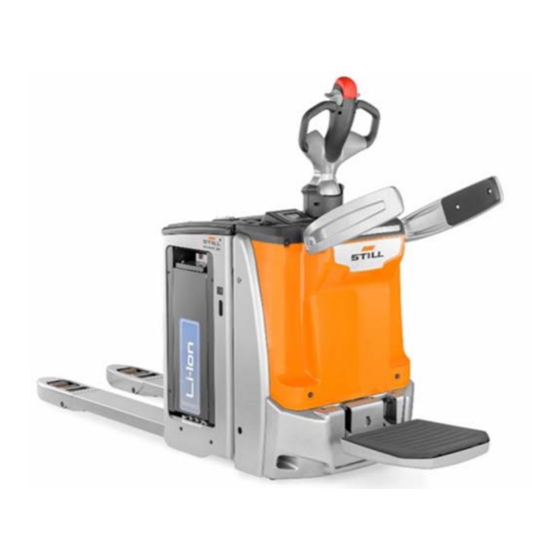
- Page 1 Original instructions Pallet truck EXH-SF 20 EXH-SF 25 0185 0186 1192 1193 11538011651 EN - 09/2019...
- Page 3 Preface Address of manufacturer and contact details STILL GmbH Berzeliusstraße 10 22113 Hamburg, Germany Tel. +49 (0) 40 7339-0 Fax: +49 (0) 40 7339-1622 Email: info@still.de Website: http://www.still.de 11538011651 EN - 09/2019...
-
Page 5: Table Of Contents
Table of contents Introduction Your industrial truck ........... 2 General . - Page 6 Table of contents Overviews Overview ............22 General view of the truck .
- Page 7 Table of contents Commissioning a truck equipped with the FleetManager™ option ....59 FleetManager™ option: Colour code for the LEDs ......60 Disconnecting a truck equipped with the FleetManager™...
- Page 8 EXH-SF 20 and EXH-SF 25 datasheet ........
-
Page 9: Introduction
Introduction... -
Page 10: Your Industrial Truck
Introduction Your industrial truck Your industrial truck General The truck described in these operating instruc- tions corresponds to the applicable standards and safety regulations. If the truck is to be operated on public roads, it must conform to the existing national regula- tions for the country in which it is being used. -
Page 11: Ce Labelling
Introduction Your industrial truck CE labelling The manufacturer uses CE labelling to indi- cate that the truck complies with the standards and regulations valid at the time of marketing. The supplied EC declaration of conformity confirms this. The CE labelling is attached to the nameplate. -
Page 12: Ec Declaration Of Conformity
Introduction EC declaration of conformity EC declaration of conformity Declaration STILL GmbH Berzeliusstrasse 10 22113 Hamburg GERMANY We declare that the machine according to these operating instructions Industrial truck according to these operating instructions Model conforms to the latest version of the Machinery Directive 2006/42/EC. -
Page 13: Identification Label
Introduction Identification label Identification label NOTE Indicate the serial number for all technical enquiries. Model Manufacturer Serial number Year of manufacture Unladen weight (without battery) in kg Battery maximum weight Battery minimum weight Additional weight (ballast) in kg Nominal motor power (kW) Battery voltage V Rated capacity in kg EC conformity symbol... - Page 14 Rules for the operating company of industrial trucks Internet address and QR code The information can be accessed at any time by pasting the address https://m.still.de/vdma in a web browser or by scanning the QR code. 11538011651 EN - 09/2019...
- Page 15 Introduction Rules for the operating company of industrial trucks 11538011651 EN - 09/2019...
-
Page 16: Permissible Use
Introduction Permissible use Permissible use The truck described in these operating in- If the truck needs to be used for purposes other structions is suitable for lifting and transporting than those specified in these instructions, you loads. should first: • Obtain permission from the manufacturer The truck should only be used for the purposes •... -
Page 17: Unauthorised Use
Introduction Unauthorised use Unauthorised use Any danger caused as a result of unauthorised The forklift truck should not be used in areas use becomes the responsibility of the operator where there is a risk of fire, explosion or or driver and not that of the manufacturer. corrosion, or in areas that are particularly dusty. - Page 18 Introduction Disposing of components and batteries 11538011651 EN - 09/2019...
-
Page 19: Safety
Safety... -
Page 20: Safety Regulations
Safety Safety regulations Safety regulations These operating instructions, which come • Regular checks and technical inspections with the truck, must be communicated to all • Recycling of lubricants, oils and batteries those concerned and in particular to personnel • Residual risks. responsible for maintenance and driving. -
Page 21: Safety Regulations For Handling Consumables
Safety Safety regulations for handling consumables Safety regulations for handling consumables Permissible consumables WARNING Refer to the maintenance data table for the permissible substances necessary for Consumables can be dangerous. operation. It is necessary to follow the safety regulations when handling these substances. -
Page 22: Hydraulic Fluid
Safety Safety regulations for handling consumables Hydraulic fluid WARNING Hydraulic fluid is a water-polluting substance! During operation of the forklift truck, Always store hydraulic fluid in containers hydraulic fluids are pressurised and complying with the regulations. are hazardous to your health. Avoid spilling. -
Page 23: Disposal Of Consumables
Safety Safety regulations for handling consumables – Dispose of used battery acid in line with the applicable regulations. Disposal of consumables • Any spillage of fluids such as hydraulic oil, ENVIRONMENT NOTE brake fluid or gear lubricant oil must be Materials that have to be disposed of following immediately soaked up with an oil-binding maintenance, repair and cleaning must be... -
Page 24: Emissions
Safety Emissions Emissions Noise emission values Calculated during the test cycle performed in NOTE accordance with standard EN 12053. Lower or higher noise values may occur when Acoustic pressure level in the driver's com- using industrial trucks, e.g. due to the mode partment of operation, environmental factors and other sources of noise. -
Page 25: Residual Dangers, Residual Risks
Safety Residual dangers, residual risks Residual dangers, residual risks Despite all operational precautions and • Falling, tripping etc. when moving on the compliance with standards and rules, the industrial truck, especially in the wet, with possibility of additional risks when using the leaking consumables or icy surfaces. -
Page 26: Specialist
Safety Definition of responsible persons The operating company must ensure that The operating company is responsible for the all users read and understand the safety scheduling and correct performance of regular information in these instructions. safety checks. It is recommended that these checks comply with national performance specifications. -
Page 27: Safety Tests
Safety inspection based on time and extraordinary incidents The operating company (see chapter entitled "Definition of responsible persons") must STILL GmbH Hamburg ensure that the truck is checked by a specialist at least once a year or after noteworthy Regelmäßige Prüfung incidents. - Page 28 Safety Safety tests 11538011651 EN - 09/2019...
-
Page 29: Overviews
Overviews... -
Page 30: Overview
Overviews Overview Overview General view of the truck Emergency off switch Platform Key switch or electronic key Stabiliser wheel Display Load arms Stabilisers Load wheels or bogies Drive wheel 11538011651 EN - 09/2019... -
Page 31: General View Of The Technical Compartment
Overviews Overview General view of the technical compartment Pump unit Traction motor Pump unit tank Servo stabilisers tank Stabilisers Horn ES30–24 steering unit 11538011651 EN - 09/2019... -
Page 32: Control And Display Components
Overviews Control and display components Control and display components Driver's compartment Handle Anti-crush safety device Lowering the load arms Display Lifting the load arms Emergency off switch Horn Key switch or electronic key Drive switch 11538011651 EN - 09/2019... -
Page 33: Display-Operating Unit
Overviews Control and display components Display-operating unit Operator present indicator light (depending Activity indicator light on the model of the truck) Error Code menu Battery indicator light Settings menu Temperature indicator light Truck status menu Settings indicator light Display of the operating time of the truck Warning indicator light Display of the battery charge Drive programme indicator light... -
Page 34: Battery Charging Indicator
Overviews Control and display components Battery charging indicator COMMENTS/SCREEN DESCRIPTION EXPLANATION MESSAGES 91% - 100%: 10 bars 1% - 10%: 1 bar Full charge: 100% 0%: 1 flashing bar (lift Battery charge level Low charge: 10% Dis- function not permitted). represented by 10 bars charged: 0% NB: To protect the battery,... - Page 35 Overviews Control and display components COMMENTS/SCREEN DESCRIPTION EXPLANATION MESSAGES Switched off: truck switched Green indicator light Switched on: truck switched These codes will help the service department to decide Error code E3 294 on the appropriate response from the service engineer. Fault or brake wear (air gap) Do not operate the truck - The meter starts running...
-
Page 36: Electronic Key (Option)
Overviews Control and display components Electronic key (option) Switch ON (operating mode) Switch OFF and awaiting code Programming mode active Key fault or incorrect code Time delay of automatic switch-off Operation Enter Status of LEDs Comments ○ red off ● continuous green (1) (correct PIN) * 1 2 3 4 5 # default PIN... - Page 37 Overviews Control and display components PROGRAMMING (truck switch OFF only (2)) To reactivate the default Restoring administrator code the initial (00000000), please administrator contact your agent or code nearest dealer. Power switches off ● red flashing ● green Activating the automatically after 10 flashing (5) (5 seconds automatic...
-
Page 38: Markings
Overviews Markings Markings Labels Identification label Label to indicate the pressure of the com- Brand label pressor (platform) Model label Label to indicate the recommended pres- Slinging label. Consult the operating instruc- sure of the compressor (platform) tions Next inspection label Danger instructions label for the battery lock Cold store label Danger instructions label. -
Page 39: Serial Number
Overviews Markings Serial number xx xxxx x xxxxx NOTE Indicate the serial number for all technical enquiries. The serial number contains the following information: 1 Production location 2 Type 3 Year of production 4 Count number 7090_921-004 11538011651 EN - 09/2019... - Page 40 Overviews Markings 11538011651 EN - 09/2019...
-
Page 42: Technical Description
Technical description Technical description Trucks EXH-SF 20 and EXH-SF 25 allow you The types of battery removal that are available to transfer loads from one place to another and are as follows: to pick orders. • Vertical access • Side access Available models: •... - Page 43 Technical description Equipment available as standard or as • Central refilling system additional options: • Cold store (-35°C) • Side protection guardrails That can be added to the truck: • Load wheels: single wheels or bogies • Lithium-ion battery 11538011651 EN - 09/2019...
-
Page 44: List Of Checks Prior To Start-Up
List of checks prior to start-up List of checks prior to start-up WARNING – Damaged or missing stickers must be replaced in compliance with the marking Damage or other defects on the truck or attach- position table. ments (special equipment) can result in accidents. If damage or other faults are noticed on the truck –... -
Page 45: Starting Up
Starting up Starting up NOTE Check that the battery hood is closed. • Check that the battery is locked. • – Check that the battery is connected. – Check that the battery compartment hood is closed and locked correctly. – Release the emergency off switch (1) if it has been pressed. - Page 46 Starting up – Tilt the tiller in the driving area (3). NOTE In areas (1) and (2), the electromagnetic brake is applied and it is not possible to drive the truck. 11538011651 EN - 09/2019...
-
Page 47: Checks And Actions Prior To Commissioning
Checks and actions prior to commissioning Checks and actions prior to commissioning Checking the emergency shutdown To check the operation of the emergency off switch, proceed as follows: – Start up the truck. – Drive the truck. – Press the emergency off switch (1). •... -
Page 48: Checking The Anti-Crush Safety Device
Checks and actions prior to commissioning Checking the anti-crush safety device Anti-crush safety function The machine moves in the opposite direction when the anti-crush button (2) is pressed. If the truck is being operated in narrow areas (such as in a lift for example), the operator may get stuck against the wall if care is not taken. -
Page 49: Checking The Horn
Checks and actions prior to commissioning Checking the horn – Press the horn button (5) located on the upper part of the tiller. – The horn sounds. 11538011651 EN - 09/2019... -
Page 50: Truck Operating Instructions
Truck operating instructions Truck operating instructions The trucks are designed for indoor and Speed must be reduced when moving over outdoor use in non-hazardous atmospheres. obstacles to prevent the truck from becoming The temperature should be between -10°C unbalanced and vibrations in the forklift and +45°C and the relative humidity of the air operator's arms. -
Page 51: Using The Display-Operating Unit
Using the display-operating unit Using the display-operating unit Selection buttons The operator selects the menus using the four selection buttons: • The Blue Q button (1) to select Blue Q mode, hare mode or tortoise mode • The left arrow button (2) to scroll left through the drop-down menu •... - Page 52 Using the display-operating unit flashes and the (4) icon remains on with a new warning message Operator presence The Operator present(1) indicator light comes on when the operator steps onto the detection platform. It turns off immediately afterwards. Temperature, settings and warning lights The temperature light (1) comes on in the event of overheating of the traction motor or the controller.
- Page 53 Using the display-operating unit Drive program The drive program light (1) is permanently illuminated when a travel mode is selected. There are three different drive modes: • Tortoise mode (2) • Hare mode (3) • Blue Q mode (4) The icon of the drive mode selected appears on the display.
- Page 54 Using the display-operating unit Settings menu It is possible to access different settings through the Settings menu. – Select the Settings menu (1) This menu allows access to a drop-down menu (2) consisting of: • Language • Unit • Date format •...
- Page 55 Using the display-operating unit Start-up screen In addition to the various menus and lights mentioned above, additional data is available: • The truck status menu (1) displays the truck menu • The hourglass icon (2) indicates the operat- ing time of the truck •...
-
Page 56: Driving Safety Guidelines
Driving safety guidelines Driving safety guidelines Behaviour when driving • Never sit on the dashboard to drive the truck • The truck must not be used as a stepladder Operators must obey the same rules within • The truck is not designed to transport the plant as on the road. -
Page 57: Driving
Driving Driving Defining directions The drive directions on a ride-on pallet truck are as follows: • Forward travel: Direction of load arms (1) • Reverse travel: Opposite direction to load arms (2) The load is positioned at the front. NOTE The drive directions are modified when the truck is used in pedestrian mode. -
Page 58: Horn
Driving – Press the upper part (2) of the drive switch (3) with your thumb. – The speed increases with the movement of the drive switch. – When the drive switch is released, the truck brakes electrically. Reverse travel – Press the lower part (1) of the drive switch (3) with your thumb. -
Page 59: Drive Program
Driving Drive program The indicator light (1) is on during operation of the truck. The shape of the indicator light indicates the selected program. The truck is equipped with three different drive programs: • Hare mode (3) • BlueQ mode (4) •... -
Page 60: Ride-On Driving
Driving The different speeds can be adjusted. Contact the After-Sales Service Centre to change these. Ride-on driving WARNING Risk of the operator falling The side protection guardrails (1) prevent the operator from falling while driving. Do not climb or sit on the side protection guardrails (1). -
Page 61: Pedestrian Driving
Driving Pedestrian driving This pallet truck can be used in pedestrian mode to facilitate manoeuvring in narrow spaces. – Raise the platform (1). – Push on the tab (2) to unlock the side protection guardrails (3). – Fold down the side protection guardrails (3). –... - Page 62 Driving Unfolding the combi tiller – Pull on the lock (1) to unlock the tiller. – Pull the handle of the tiller (2) towards you to unfold it. 11538011651 EN - 09/2019...
-
Page 63: Using The Truck On A Slope
Driving – Press one of the controls. The forklift operator can use the truck with an increased safety distance. The combi tiller controls are operated in the same way as the standard tiller controls. Folding the combi tiller – Push on the tiller handles (3) to fold it. The forklift operator uses the truck in a more standard configuration. - Page 64 Driving Slopes must always be approached with great caution: • Never attempt a slope whose gradient is greater than that specified in the truck's datasheet • Make sure that the ground is clean, has a non-slip surface and that the route is clear Travelling up slopes Always travel forwards when going up a slope.
- Page 65 Driving WARNING Risk of serious injury and/or serious damage to equipment Driving on slopes steeper than 10% is prohibited due to braking capacity and stability. The load being transported could tip over. Starting on a slope Proceed as follows: – Move the drive switch in the required direction.
-
Page 66: Operating The Fleetmanager™ Option
Operating the FleetManager™ option Operating the FleetManager™ option Description of the FleetManager option The FleetManager option allows you to control GSM: Global System for Mobile Communi- access to the truck. The option is a fleet cation management system. Shock sensor You can access the system: •... -
Page 67: Commissioning A Truck Equipped With The Fleetmanager™ Option
Operating the FleetManager™ option Commissioning a truck equipped with the FleetManager™ option Commissioning a truck equipped with a keypad or an electronic key – Turn the switch key to start the truck. – Enter the PIN code on the keypad. The PIN code consists of five to eight digits. -
Page 68: Fleetmanager™ Option: Colour Code For The Leds
Operating the FleetManager™ option FleetManager™ option: Colour code for the LEDs The LEDs can have different statuses and different colours. Below is the list of the most common messages and their meanings. Malfunction Cause Solution LED status Signal transmitter LED 1 LED 2 Reading device variant: no... - Page 69 Operating the FleetManager™ option Malfunction Cause Solution LED status Signal transmitter LED 1 LED 2 Flashes quickly Lit continuously A shock has Reset the shock Red colour Green colour occurred The truck is The truck is switched on but connected via a is not moving.
-
Page 70: Disconnecting A Truck Equipped With The Fleetmanager™ Option
Operating the FleetManager™ option Disconnecting a truck equipped with the FleetManager™ option NOTE Operators must not log off intentionally while driving. WARNING Access to the truck must be disabled. Unauthorised users are not allowed to use the truck. Disconnecting a truck equipped with a keypad or electronic key –... - Page 71 Operating the FleetManager™ option Disconnecting a truck equipped with an RFID reading device – Park the truck in a safe place. – Briefly place the RFID card or the RFID transponder (4) in front of the reading device (3). The LED (1) lights up for a second (red colour). The LED (2) is not lit.
-
Page 72: Using The On-Board Compressor Option
Using the on-board compressor option Using the on-board compres- sor option The on-board compressor option allows you to automatically pressurise the shock-absorbing platform bellows. This shock-absorbing platform reduces the vibrations felt within the truck while driving. It can be adjusted in accordance with the weight of the forklift operator. -
Page 73: Transporting Loads
Transporting loads Transporting loads Load handling safety rules WARNING Closely follow the following instructions before picking up loads. Never touch or stand on moving parts of the truck (e.g. lifting device, pushing devices, work installations or devices for picking up loads). WARNING Take care not to trap hands or feet when operating the truck. -
Page 74: Transporting Pallets Or Other Containers
Transporting loads Transporting pallets or other contain- As a general rule, loading units must be trans- ported one by one (e.g. pallets). Transporting several loading units at a time is only autho- rised: • when the safety preconditions are fulfilled. •... -
Page 75: Lifting And Lowering The Load Arms
Transporting loads Lifting and lowering the load arms NOTE Keep your hands on the tiller when lifting or lowering the load arms. Lifting the load arms: – Press the control button (1). The load arms are raised. Lowering the load arms: –... - Page 76 Transporting loads Before picking up a load – Ensure that the load weight does not exceed the truck's capacity. – Also ensure that the load is stable and balanced, to avoid dropping any part of the load. – Check that the width of the load is compati- ble with the width of the load arms.
- Page 77 Transporting loads Transporting a load Observe the following recommendations: • Always drive forwards for optimum visibility • Always travel up or down slopes with the load uphill Never travel across the slope or make a U-turn • Reverse travel is used for depositing the load As visibility in reverse travel is restricted, drive at creep speed •...
-
Page 78: Cold Store Usage (Optional)
Cold store usage (optional) Cold store usage (optional) CAUTION Standard trucks risk being subject to significant damage if used in extreme conditions. Only trucks with the Cold Store option may be used inside cold storage. Specific oil designed for cold stores must be used. - Page 79 Cold store usage (optional) DANGER If the condensation freezes in the cold store, it is prohibited to operate the jammed parts. This could cause permanent damage to the truck. Parking The truck must be parked outside of the cold store. Parking inside the cold store could cause seri- ous damage to the electrical and mechanical equipment (seals, hoses, rubber and synthetic...
-
Page 80: Before Leaving The Truck
Before leaving the truck Before leaving the truck – Choose a safe and level location. – Remove the switch key. – Set down the load and fully lower the load DANGER arms. Risk of injury! The load arms must touch the ground. It is prohibited to park the truck with the load lift system in the raised position. -
Page 81: Handling The Battery
Handling the battery Handling the battery Battery type Trucks can be fitted with different types of battery. Comply with the information indicated on your battery's type plate, as well as with its features. WARNING The weight and size of the battery influence the stability of the truck. -
Page 82: Opening And Closing The Battery Hood
Handling the battery restarted when the covers and connectors have been put back in the operating position. Opening and closing the battery hood Opening the battery hood To open the battery hood: – Immobilise the truck. – Lower the forks. –... -
Page 83: Charging The Battery Using An External Charger
Handling the battery Charging the battery using an external charger CAUTION Deep discharging may damage the battery. – Charge the battery immediately. The fixed socket on the truck (1) is located above the battery and under the battery hood. – Park the truck safely. –... - Page 84 Handling the battery WARNING Explosive gases are generated during battery charging. – Make sure that the area is well-ventilated. – Make sure that the battery hood remains open for the entire time the battery is charging. 11538011651 EN - 09/2019...
-
Page 85: On-Board Charger
Handling the battery On-board charger Precautions for installation and use expelled air is 25°C maximum. Wait 10 minutes after stopping the charger before The on-board charger means you no longer touching the unit. have to use a charging room. This charger •... -
Page 86: Using The On-Board Charger
Handling the battery If the charger stays connected to the mains, If the cut-off period is longer than 13 minutes it restarts a charging cycle every 48 hours (the truck could have been used), a complete after the end of the previous charge in order to charging cycle is initialised. - Page 87 Handling the battery Do not pull the emergency stop handle. This operation cuts off the circuits and stops the battery from charging. – Connect the charger plug (1) to a mains socket. Phase Green LED Red LED Mains socket disconnected Charging Flashing phases...
-
Page 88: Adjusting The On-Board Charger
Handling the battery CAUTION Risk of damage to the mains cable due to frequent operator handling. Risk of electric shock and/or burns! The mains cable must be checked regularly as part of periodic statutory checks and maintenance operations. NOTE The on-board charger is not compatible with the Cold Store option. -
Page 89: Changing The Vertical Access Battery
Handling the battery Changing the vertical access battery To change the battery, proceed as follows: – Immobilise the truck. – Lower the load arms. – Switch off the ignition and remove the key. – Press in the emergency off switch. –... - Page 90 Handling the battery To change the battery, proceed as follows: – Immobilise the truck. – Lower the load arms. – Switch off the ignition and remove the key. – Press in the emergency off switch. – Open the battery hood. –...
- Page 91 Handling the battery – Operate and pull the locking handle (2) in the direction indicated by the arrow. – Lift the locking bar (3) until the battery is freed. 11538011651 EN - 09/2019...
- Page 92 Handling the battery – Pull the battery onto the truck with extraction rollers or the roller frame – Replace the battery. Remove the dis- charged battery and position a charged battery on the roller frame. – Position the truck with extraction rollers or the roller frame (4) in the upright position next to the battery compartment.
- Page 93 Handling the battery – Push until a click is heard. The battery is correctly installed. WARNING Risk of injury Ensure that the battery is in the end position and that the hook is correctly holding the battery. DANGER Risk of injury The battery is correctly positioned but is not yet locked.
- Page 94 Handling the battery – Lower the latch of the battery compartment door (if this option is selected). The door that is not attached to the side of the battery must be correctly locked. – Refit the battery hood. – Return the truck to service. WARNING Risk of injury Before restarting the truck, ensure that the battery is...
-
Page 95: Handling The Truck In An Emergency
Handling the truck in an emergency Handling the truck in an emergency Truck towing procedure It is not possible to tow the truck with no electrical function. The electromagnetic brake remains in the closed position. Truck towing is authorised with a rigid connec- tion (tow bar) if the truck to be towed can no longer be braked. - Page 96 Handling the truck in an emergency – After towing, chock the truck to prevent it from moving. – To re-establish brake operation, unscrew and remove the two screws (1). – Refit the covers. WARNING It is essential that the covers are correctly refitted before the machine is used.
-
Page 97: Handling The Truck In Specific Situations
Handling the truck in specific situations Handling the truck in specific situations Slinging the truck DANGER Danger of truck falling. Only use slings and a hoist of sufficient quality. Check the weight of the machine (including battery) to choose a suitable device. Refer to the technical features. -
Page 98: Lifting The Truck
Handling the truck in specific situations Lifting the truck DANGER Danger of swinging Truck lifting must be performed carefully. For some work, it is necessary to lift the truck. – Lift the load arms. – Switch off the ignition and disconnect the battery connector. -
Page 99: Transporting The Machine
Handling the truck in specific situations The truck must be suitably protected from the DANGER effects of the weather during transport and Danger of death. storage. Do not stand within the hoist's operating radius or below the lifted truck. To load or unload the truck, use an inclined plane or a mobile ramp. - Page 100 Handling the truck in specific situations 11538011651 EN - 09/2019...
-
Page 101: Maintenance
Maintenance... -
Page 102: General Maintenance Information
Maintenance General maintenance information General maintenance information General The following instructions contain all the information required for maintenance of your truck. Carry out the various maintenance work in compliance with the maintenance plan. This will ensure that your truck is reliable and in good working order and that the warranty remains valid. -
Page 103: Servicing And Maintenance Personnel Training And Qualification
Maintenance General maintenance information Servicing and maintenance personnel training and qualification Truck maintenance must only be carried out The person responsible for carrying out the by qualified and authorised personnel. inspection must have sufficient knowledge and experience to be able to assess the The annual inspection for prevention of condition of the truck and the efficiency of accidents at work must be carried out by a... -
Page 104: Safety Guidelines For Maintenance
Maintenance Safety guidelines for maintenance Safety guidelines for maintenance Servicing and maintenance measures To avoid accidents during servicing and – Ensure that there is no risk of the truck maintenance operations, take all necessary moving or starting up unexpectedly. For safety measures. -
Page 105: Recommended Lubricants
Maintenance Recommended lubricants Recommended lubricants CAUTION SAE 85W 90 API GL4 Damage to equipment if non-recommended lubri- Aerosol can for chains cants are used. Only use recommended lubricants. Only the lu- Standard chain spray bricants listed below are approved by the manu- facturer. -
Page 106: Technical Data For Inspection And Maintenance
Hydraulic oil Transmission gear Transmission gear oil 1.1 l Traction motor Power: 300 A, quantity: 1 2.3 kW for EXH-SF 20 1F1 fuse 3 kW for EXH-SF 25 Steering unit ES30–24 (0.185 kW Power: 40 A, quantity: 1 3F1 fuse... -
Page 107: Accessing The Technical Compartment
Maintenance Accessing the technical compartment Accessing the technical compartment WARNING Risk of injury Before removing anything, turn the ignition off and press the emergency off switch. To access the technical compartment, it is necessary to lift the top hood (1) and remove the front hood (2). - Page 108 Maintenance Accessing the technical compartment – Remove the front hood. The technical compartment must be closed once the operation is finished. – Reposition the front hood (2). – Tighten the two screws (4) of the front hood. – Reposition the top hood (1). –...
-
Page 109: 1000-Hour Service Plan
Maintenance 1000-hour service plan 1000-hour service plan Depending on the application, environmental conditions and driving style, the following proce- dures should be carried out every 1000, 2000, 3000, 4000, 6000, 7000, 8000 and 9000 hours Preparation Clean the truck Check the error codes using the diagnostic tool Chassis and equipment Check the condition of the load arms Check the electromagnetic brake and ensure that it is working correctly... -
Page 110: 5000-Hour Maintenance Plan
Maintenance 5000-hour maintenance plan 5000-hour maintenance plan Depending on the application, environmental conditions and driving style, the following proce- dures should be carried out every 5000 and 10,000 hours Information Carry out all 1000-hour maintenance work Hydraulics Drain the hydraulic oil 10,000-hour service plan Depending on the application, environmental conditions and driving style, the following proce- dures should be carried out every 10,000 hours... -
Page 111: Chassis, Bodywork And Fittings
Maintenance Chassis, bodywork and fittings Chassis, bodywork and fittings Cleaning the truck Cleaning instructions – Park the truck. – Press the emergency off switch. CAUTION Electrical hazards The battery must always be disconnected during cleaning procedures. Washing the outside of the truck WARNING Risk of damage to the truck –... - Page 112 Maintenance Chassis, bodywork and fittings NOTE Only use dry cleaning products. • Do not remove the cowlings. • – Clean the electrical installations with a non-metal brush and dry with lightly compressed air. After washing – Carefully dry the truck (e.g. with com- pressed air).
-
Page 113: General Information On Battery Maintenance
Maintenance Chassis, bodywork and fittings General information on battery maintenance DANGER CAUTION Risk of injury Gel batteries are subject to specific charging, maintenance and treatment instructions. A non- Before carrying out any operations on the electric compatible charger may result in a battery failure. installation, turn the truck power supply off. -
Page 114: Checking The Condition Of The Load Arms
Maintenance Chassis, bodywork and fittings Checking the condition of the load arms – Check that the load arms (1) show no signs of deformation, splits, heavy wear or cracks. CAUTION Truck damage If the carriage is damaged, have it changed by the After-Sales Service Centre. -
Page 115: Steering And Wheels
Maintenance Steering and wheels Steering and wheels Cleaning the pinion gear of the steering geared motor – Immobilise the truck. – Lower the load arms. – Switch off the ignition and remove the key. – Press in the emergency off switch. –... -
Page 116: Checking The Condition Of The Wheels
Maintenance Steering and wheels Checking the condition of the wheels – Raise the truck until the wheels are off the ground. – Check that the wheels rotate freely and remove any objects that may obstruct them or prevent them from turning. CAUTION Risk of damaging the wheels In order to avoid any risk of damaging the wheel... -
Page 117: Electrical Equipment
Maintenance Electrical equipment Electrical equipment Cleaning and blowing air through the electrical components CAUTION Electrical hazards Always disconnect the battery connector before working on an electrical component. – Press the emergency off switch. – Disconnect the battery connector. – Open the technical compartment. –... -
Page 118: Checking The Battery Acid Level And Electrolyte Density
Maintenance Electrical equipment Checking the battery acid level and electrolyte density WARNING The electrolyte (diluted sulphuric acid) is poisonous and caustic! – Always wear suitable protective equipment (industrial goggles, safety gloves) when working on a battery. – Never wear a watch or jewellery when handling battery acid. -
Page 119: Checking The Condition Of The Cables, Terminals And Battery Connector
Maintenance Electrical equipment Checking the condition of the cables, terminals and battery connector – Check that the cable insulation is undam- aged. – Check that there are no signs of heat build-up in the connections. – Check that the "+" and "-" output terminals are not sulphated (presence of white salt). -
Page 120: Hydraulic Systems
Maintenance Hydraulic systems Hydraulic systems Checking the hydraulic system for leaks – Switch off the truck and disconnect the battery connector. – Remove the hood of the technical compart- ment. – Inspect the hydraulic system: pipes, hoses and connections between the pump unit and the cylinders. -
Page 121: Checking The Controlled Stabiliser Hydraulic System For Leaks
Maintenance Hydraulic systems – Remove the hood of the technical compart- ment. To ensure correct operation of the truck functions, the oil level must be between the minimum mark (3) and maximum mark (2) on the tank. – Remove the plug (1). If necessary, top up via the opening. -
Page 122: Checking The Oil Level In The Controlled Stabiliser Circuit
Maintenance Hydraulic systems In the event of leakage, please contact the After-Sales Service Centre. Checking the oil level in the con- trolled stabiliser circuit – Switch off the truck and disconnect the battery connector. – Remove the hood of the technical compart- ment. -
Page 123: Storage And Decommissioning
Maintenance Storage and decommissioning Storage and decommissioning Storage of truck Precautions should be taken if the truck must CAUTION not be used for a reasonably long period. The We recommend that you do not use a plastic sheet operations depend on the length of time it is as this encourages condensation to form. -
Page 124: Permanent Putting Out Of Commission (Destruction)
Maintenance Storage and decommissioning Permanent Putting Out of Commis- sion (Destruction) When scrapping the truck, it is necessary to: – Remove the various parts of the truck (covers, battery, chains, motors etc.) – Sort out the components depending on their type: pipes, rubber components, lubricants, aluminium, iron etc. -
Page 125: Technical Specifications
Technical specifications... -
Page 126: Exh-Sf 20 And Exh-Sf 25 Datasheet
Technical specifications EXH-SF 20 and EXH-SF 25 datasheet EXH-SF 20 and EXH-SF 25 datasheet 11538011651 EN - 09/2019... - Page 127 Technical specifications EXH-SF 20 and EXH-SF 25 datasheet DESCRIPTION 1.1 Manufacturer STILL 1.2 Model type EXH-SF 20 EXH-SF 25 Drive type: battery, diesel, petrol, LPG, Battery mains power Driving mode: manual, pedestrian, Standing standing, seated, order picking 1.5 Nominal capacity...
- Page 128 Technical specifications EXH-SF 20 and EXH-SF 25 datasheet 4.19 Total length (+5 mm) (mm) 4.20 Length to the load support face (±5 mm) 2338 (mm) 4.21 Total width (±5 mm) (mm) s/e/L 4.22 Load arm dimensions 55/165/1150 (mm) 4.25 Outside load arm spread (± 5 mm)
- Page 129 Technical specifications EXH-SF 20 and EXH-SF 25 datasheet Energy consumption according to kWh/h 0.42 0.51 standardised VDI cycle 6.7 Turnover output 177.5 Energy consumption at turnover kWh/h 0.91 1.68 output MISCELLANEOUS EXH-SF 20 EXH-SF 25 8.1 Speed monitor (AC controller)
- Page 130 Technical specifications EXH-SF 20 and EXH-SF 25 datasheet 11538011651 EN - 09/2019...
- Page 131 Index Checks prior to start-up ... . . 36 Cleaning the truck ....103 Accessing the technical compartment . . . 99 Climatic conditions .
- Page 132 Lifting and lowering the load arms ..67 EXH-SF 20 and EXH-SF 25 datasheet . 118 Lifting the truck ....90 Load handling .
- Page 133 Index Ride-on driving ....52 Technical data for inspection and maintenance ....98 Technical description .
- Page 136 STILL GmbH 11538011651 EN – 09/2019...
Need help?
Do you have a question about the EXH-SF 20 and is the answer not in the manual?
Questions and answers