Johnson Controls LN Series Installation Instructions Manual
Free programmable controllers
Hide thumbs
Also See for LN Series:
- Installation instructions manual (18 pages) ,
- Installation instructions manual (9 pages) ,
- Installation instructions manual (26 pages)
Table of Contents
Advertisement
Quick Links
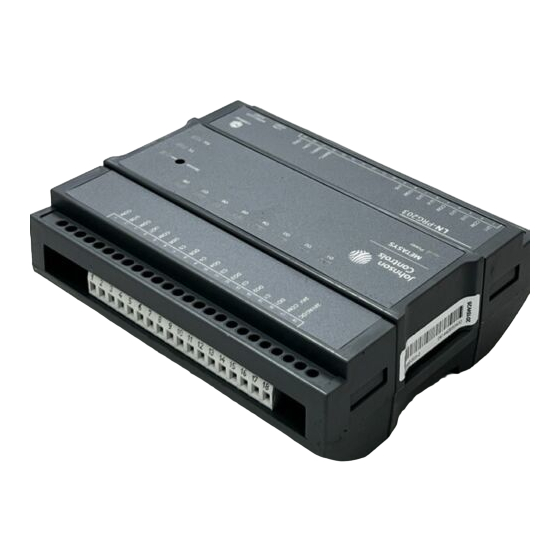
LN Series Free Programmable LN-PRGxxx-12 Controllers
Installation Instructions
LN-PRG203-12, LN-PRG300-12,
LN-PRG4x0-12, LN-PRG6x0-12
Applications
The LN Series Free Programmable LN-PRGxxx-12
Controllers are microprocessor-based and designed to
control various building automation systems, such as
multi-zone air handing units, lighting control, central
plant applications, and power measurement
applications.
The LN Free Programmable Controllers are built on a
similar platform, but have different numbers of inputs
and outputs. The LN PRG6x0-12 controllers are
compatible with the LN Input/Output (I/O) Extension
Module 400 Series models. For more information on
LN I/O Extension Modules, refer to LN Series Input/
Output (I/O) Extension Modules Installation Instructions
(LIT-12011693).
The LN Free Programmable Controllers use the
L
W
® communication protocol.
ON
ORKS
Follow these recommendations for proper installation
and subsequent operation of each controller:
•
Inspect the controller for shipping damages. Do not
install damaged controllers.
•
Keep the controller at room temperature for at least
24 hours prior to installation to allow any
condensation that may have accumulated during
shipping to evaporate.
•
If the controller is used in a manner not specified
by Johnson Controls, the functionality and the
protection provided by the controller may become
impaired.
•
Record the 12-digit Neuron® ID located on either
end of the device (shown on the sticker below the
barcode) for commissioning.
Note: The controller's plastic enclosure has a
back plate that is separate from the front plate
allowing the back plates to be shipped directly to
the installation site while all the engineering is done
elsewhere.
IMPORTANT: Prevent any static electric discharge
to the controller. Static discharge can damage the
controller and void the warranties.
LN Series Free Programmable LN-PRGxxx-12 Controllers Installation Instructions
Supersedes January 30, 3013
North American Emissions Compliance
Canada
Industry Canada Statement
The term IC before the certification/registration
number only signifies that the Industry Canada
technical specifications were met.
Le terme « IC » précédant le numéro d'accréditation/
inscription signifie simplement que le produit est
conforme aux spécifications techniques d'Industry
Canada.
United States
This equipment has been tested and found to
comply with the limits for a Class A digital device
pursuant to Part 15 of the FCC Rules. These limits
are designed to provide reasonable protection
against harmful interference when this equipment is
operated in a commercial environment. This
equipment generates, uses, and can radiate radio
frequency energy and, if not installed and used in
accordance with the instruction manual, may cause
harmful interference to radio communications.
Operation of this equipment in a residential area
may cause harmful interference, in which case the
users will be required to correct the interference at
their own expense.
Installation
Observe these guidelines when installing an LN Free
Programmable Controller:
•
Transport the controller in the original container to
minimize vibration and shock damage.
•
Verify that all parts shipped with the controller.
•
Do not drop the controller or subject it to physical
shock.
Code No. LIT-12011796
Issued April 24, 2014
1
Advertisement
Table of Contents

Related Manuals for Johnson Controls LN Series


Summary of Contents for Johnson Controls LN Series
- Page 1 LN Input/Output (I/O) Extension Canada. Module 400 Series models. For more information on LN I/O Extension Modules, refer to LN Series Input/ United States Output (I/O) Extension Modules Installation Instructions (LIT-12011693). This equipment has been tested and found to...
- Page 2 Dimensions Figure 1: LN-PRG203-12 and LN-PRG300-12 Controller Dimensions, mm (in.) Figure 2: LN-PRG4x0-12 and LN-PRG6x0-12 Controller Dimensions, mm (in.) LN Series Free Programmable LN-PRGxxx-12 Controllers Installation Instructions...
-
Page 3: Location Considerations
2. Use the holes on the back plate to mark the wall location. 3. Drill the holes. Clean the surface and mount the controller using the appropriate screws. LN Series Free Programmable LN-PRGxxx-12 Controllers Installation Instructions... -
Page 4: Power Wiring
Disabled* Figure 4: Power Wiring - AC IMPORTANT: Maintain consistent polarity when you connect the controllers and devices to the Subnet transformer. Port * Factory-default position Figure 5: LN-PRG203-12 Controller Jumper Locations LN Series Free Programmable LN-PRGxxx-12 Controllers Installation Instructions... - Page 5 Enabled Disabled* EOL Off EOL On (Disabled)* (Enabled) Universal Inputs (UI) 0-20mA Enable / Disable 0-20mA 0-20mA Disable* Enable Subnet Port * Factory-default positions Figure 7: LN-PRG4x0-12 and 6x0-12 Controller Jumper Location LN Series Free Programmable LN-PRGxxx-12 Controllers Installation Instructions...
- Page 6 * 249 ohm Resistor built-in for inputs configured as 4-20mA EOL Enabled at the last sensor at the end of the Bus LN SVSENx Figure 8: Typical Power and Network Connections with an LN-SVSENx-0 Input LN Series Free Programmable LN-PRGxxx-12 Controllers Installation Instructions...
-
Page 7: Input Wiring
Use this input configuration to monitor digital dry Figure 13: Current Input – 2-Wire contacts, as well as pulsed contacts. Transducer, Externally Powered Figure 9: Digital Input – Digital Dry Contact (N.O. and N.C.) LN Series Free Programmable LN-PRGxxx-12 Controllers Installation Instructions... - Page 8 Figure 17 if you are using a 3-wire 0 to 10 V or 0 to 5 V Supply, 2-wire Pulse Meter for LN-PRG300, LN- transducer. PRG4x0-12, and LN-PRG6x0-12 Controllers Figure 17: Voltage Input – 3-Wire Transducer LN Series Free Programmable LN-PRGxxx-12 Controllers Installation Instructions...
-
Page 9: Output Wiring
For jumper location, see Configuration Jumper Location and Identification. Note: Before you connect output equipment to the controller, refer to the installation instructions from the equipment manufacturer. Figure 23: Pins on RJ-45 Jack Face LN Series Free Programmable LN-PRGxxx-12 Controllers Installation Instructions... - Page 10 Transformer Electrical System Electrical System Ground Ground Figure 28: 0 to 20 mA Universal Output and Figure 25: Digital Triac Output, Line Jumper Configuration Switching – Relay Using an External Power Source LN Series Free Programmable LN-PRGxxx-12 Controllers Installation Instructions...
-
Page 11: Communications Wiring
Output - Analog Actuator topology network configuration. You can put the network terminator anywhere on the channel. Communications Wiring When used with an LN Series Communicating Sensor, the network can be accessed at the sensor’s audio The recommended cable type for L ®... -
Page 12: Wireless Installation
3. Use the cap to tighten the Wireless Receiver onto information and requirements to implement the the enclosure. subnetwork for LN Input/Output (I/O) Extension Module 400 series models, refer to the LN Series Input/Output (I/O) Extension Modules Installation Instructions (LIT-12011693). Wireless Installation... - Page 13 Strain reliefs and terminal block covers are optional and are sold separately. Figure 34: Telephone Socket Location Figure 35: Large Enclosure Strain Relief and Terminal Block Cover Installation LN Series Free Programmable LN-PRGxxx-12 Controllers Installation Instructions...
-
Page 14: Troubleshooting
The number of controllers on a channel should never exceed 64. Use a router or Exceeded a repeater in accordance with L LN-Series Network Communications ORKS Technical Bulletin and Interface Guide (LIT-1201253) or Junction Box and Wiring Guideline for Twisted Pair L Networks. ORKS LN Series Free Programmable LN-PRGxxx-12 Controllers Installation Instructions... - Page 15 Device too far from the Wireless Reposition the device to be within the range of the Wireless Receiver. For Receiver information on typical transmission ranges, refer to the LN Series Wireless Solution Technical Bulletin (LIT-12011628). Configuration Problem Check the configuration of the input using the device configuration plug-in or wizard.
-
Page 16: Status Led Operation
Wink: The wink function identifies a device. For further information on the LN Series Repair Information Communicating Sensors, refer to the LN Series If the LN Series Controller fails to operate within its Communicating Sensors Installation Instructions specifications, replace the unit. For a replacement (LIT-12011795). -
Page 17: Technical Specifications
RTD Ni1000 (1k ohm at 0°C [32°F]) RTD Ni1000 (1k ohm at 21°C [69.8°F]) Input Resolution: 16-bit analog/digital converter Power Supply Output: 15 VDC; maximum 200 mA (6 inputs x 20 mA each) LN Series Free Programmable LN-PRGxxx-12 Controllers Installation Instructions... - Page 18 Under UL 916, Energy Management Equipment Material : UL94-5VA Europe: CE Mark – Johnson Controls, Inc., declares that the products are in compliance with the essential requirements and other relevant provisions of the EMC Directive 2004/108/EC. Available when an optional external Wireless Receiver is connected to the controller. Some wireless inputs may use more than one wireless input from the controller.
- Page 19 RTD Ni1000 (1k ohm at 0°C [32°F]) RTD Ni1000 (1k ohm at 21°C [69.8°F]) Input Resolution: 16-bit analog/digital converter Power Supply Output: 15 VDC; maximum 200 mA (10 inputs x 20 mA each) LN Series Free Programmable LN-PRGxxx-12 Controllers Installation Instructions...
- Page 20 Industry Canada, ICES-003 Europe CE Mark – Johnson Controls, Inc., declares that the products are in compliance with the essential requirements and other relevant provisions of the EMC Directive 2004/108/EC. Available when an optional external Wireless Receiver is connected to the controller. Some wireless inputs may use more than one wireless input from the controller.
- Page 21 RTD Ni1000 (1k ohm at 0°C [32°F]) RTD Ni1000 (1k ohm at 21°C [69.8°F]) Input Resolution: 16-bit analog/digital converter Power Supply Output: 15 VDC; maximum 200 mA (16 inputs x 20 mA each) LN Series Free Programmable LN-PRGxxx-12 Controllers Installation Instructions...
- Page 22 Industry Canada, ICES-003 Europe CE Mark – Johnson Controls, Inc., declares that the products are in compliance with the essential requirements and other relevant provisions of the EMC Directive 2004/108/EC. Available when an optional external Wireless Receiver is connected to the controller. Some wireless inputs may use more than one wireless input from the controller.
- Page 23 RTD Ni1000 (1k ohm at 0°C [32°F]) RTD Ni1000 (1k ohm at 21°C [69.8°F]) Input Resolution: 16-bit analog/digital converter Power Supply Output: 15 VDC; maximum 320 mA (16 inputs x 20 mA each) LN Series Free Programmable LN-PRGxxx-12 Controllers Installation Instructions...
- Page 24 The performance specifications are nominal and conform to acceptable industry standard. For application at conditions beyond these specifications, consult the local Johnson Controls® office. Johnson Controls, Inc. shall not be liable for damages resulting from misapplication or misuse of its products.
Need help?
Do you have a question about the LN Series and is the answer not in the manual?
Questions and answers