Vertiv Cybex SC920DP Quick Installation Manual
Sc displayport kvm switches
Hide thumbs
Also See for Cybex SC920DP:
- Installer/user manual (46 pages) ,
- Installer/user manual (40 pages)
Table of Contents
Advertisement
Quick Links
Cybex™ SC DisplayPort KVM Switches
Cybex™ SC920DP, SC920XP, SC940DP, SC945DP, SC945XP, SC985DP KVM Switches
Quick Installation Guide
2/4/8 Ports High Security Dual-Head DP-DP KVM Switches
Objectives
• This guide includes instructions for installing Vertiv™ Cybex™ SC920DP, SC920XP, SC940DP, SC945DP, SC945XP, SC985DP DP to DP KVM switches.
• A KVM switch allows sharing keyboard, video, mouse, audio and USB peripherals between multiple computers.
• For further assistance, please refer to the Vertiv website: http://www.VertivCo.com.
General
• Verify that all peripherals and computers are turned OFF prior to
connecting them to the product.
• The switch's back panel is divided into sections of Console ports
and computer ports.
– Connect the peripherals to be shared by the switch to the
Console ports.
– Connect each computer that needs access to shared
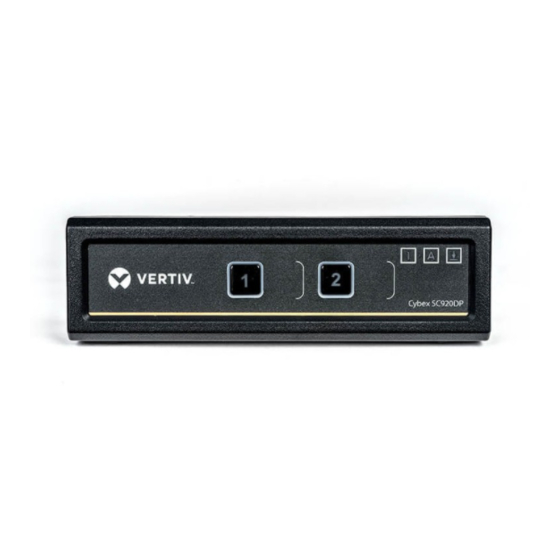
SC945DP Model Shown
Connect peripherals to the switch
Console orts:
• Keyboard: Connect either a USB or PS/2
keyboard to the corresponding switch
Console keyboard port.
• Video: Connect two monitors to the switch
Console video port.
• Mouse: Connect either a USB or PS/2
mouse to the corresponding switch
Console mouse port.
• Audio peripherals: Connect
headphones / speakers to the switch
Console audio-out port.
• USB peripherals: Connect USB
peripherals to the switch console
DPP port.
Note: Authentication devices such as
smartcard and biometric readers are enabled
by default.
Connect computers to the switch
omputer ports:
• Computer keyboard and mouse
connection: Connect each computer to
the switch keyboard and mouse computer
port using a USB A to USB B cable.
Connect the USB A end to the computer
and the USB B end to the switch.
• Computer video connection: Connect
both computers' display cards to the switch
computer video ports using the
corresponding video cable
(DVI / DP).
• Computer audio connection:
Connect each computer to the switch
peripherals to a specific computer port section.
– Make sure that every computer is connected to a separate
computer port section.
– The push buttons on the product's front panel indicate
which computer has currently access to shared peripherals.
– To switch peripherals between computers, press the
appropriate push button on the product's front panel.
1
audio-in port using an audio cable.
Connect one end of the cable to the
computer's audio-out port using the
1/8" (3.5mm) stereo plug. Connect the
other end of the audio cable to the switch
audio-in computer port.
• Connect USB peripherals: Connect
each computer to the switch USB
computer port using a USB A to USB B
cable. Connect the USB A end to the
computer and the USB B end to switch.
Connect the Console DPP port to a USB
peripheral as required
(e.g. smart card reader).
2
Power ON your system:
• Power ON the monitor: Make sure
that the monitor is turned ON prior to
powering ON the switch.
• Power ON the system: Connect all
peripherals and computers to the switch
prior to powering it up. Power ON the switch
by plugging it to the AC wall outlet.
By default, after product power-up,
the active channel will be computer #1 as
indicated by the applicable front panel
push button LED being lit.
3
HDC16045 Rev. 1.1
Advertisement
Table of Contents

Subscribe to Our Youtube Channel
Related Manuals for Vertiv Cybex SC920DP


Summary of Contents for Vertiv Cybex SC920DP
- Page 1 Cybex™ SC920DP, SC920XP, SC940DP, SC945DP, SC945XP, SC985DP KVM Switches Quick Installation Guide 2/4/8 Ports High Security Dual-Head DP-DP KVM Switches Objectives • This guide includes instructions for installing Vertiv™ Cybex™ SC920DP, SC920XP, SC940DP, SC945DP, SC945XP, SC985DP DP to DP KVM switches. • A KVM switch allows sharing keyboard, video, mouse, audio and USB peripherals between multiple computers. • For further assistance, please refer to the Vertiv website: http://www.VertivCo.com. General • Verify that all peripherals and computers are turned OFF prior to...
- Page 2 Cybex™ SC DisplayPort KVM Switches Cybex™ SC920DP, SC920XP, SC940DP, SC945DP, SC945XP, SC985DP KVM Switches Switching DPP between scenarios (for instance, when an Important Notes: authentication device must remain computers: mapped to a certain computer). 1. Anti-Tampering System: This high security • Once switching between computers, The DPP association will be indicated by product is equipped with analways-on active the DPP devices are automatically the LED positioned to the left of every anti-tampering system. If mechanical intrusion switched accordingly. is detected, the product will be permanently channel's front panel push button. To disabled and abnormal LED behavior will be • When switching to a computer that is release DPP from freeze status, press the activated (all LEDs blinking continuously).
- Page 3 Certified by a Nationally Recognized Testing Laboratory (NRTL). @2018 Vertiv Co. All Rights reserved. Vertiv and the Vertiv logo are trademarks or registered trademarks of Vertiv Co. Cybex is a trademark of Avocent Corporation. All other names and logos referred to are trade names, trademarks or registered trademarks of their respective owners.
Need help?
Do you have a question about the Cybex SC920DP and is the answer not in the manual?
Questions and answers