Page 1
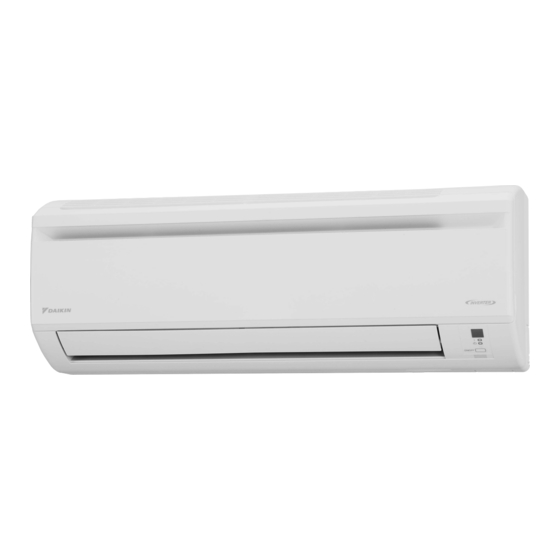
Si041051 REMOVAL PROCEDURE S E R V I C E M A N U A L 1.5/2.0/2.5/3.2/3.5/4.6 kW Class 9000/12000 Btu/h Class Indoor Unit Inverter Wall Mounted Type...
Si041051 Table of Contents 1. Removal of Air Filters................2 2. Removal of Horizontal Blade..............4 3. Removal of Front Panel ................6 4. Removal of Front Grille ................7 5. Removal of Electrical Box / Vertical Blades (Pattern 1) ......8 6. Removal of Electrical Box / Vertical Blades (Pattern 2) ......12 7.
Removal of Air Filters Si041051 1. Removal of Air Filters Procedure Warning Be sure to wait for 10 minutes or more after turning off all power supplies before disassembling work. Step Procedure Points 1. Appearance features Warning Dangerous: High voltage A high voltage is applied to all the electric circuits of this product including...
Page 5
Si041051 Removal of Air Filters Step Procedure Points Pull out the air filter downward and remove (R11620) 3. Remove the Titanium apatite photocatalytic air-purifying filters. Air filter The Titanium apatite photocatalytic air- Titanium apatite purifying filter is photocatalytic attached to the back of air-purifying filter the air filter.
Removal of Horizontal Blade Si041051 2. Removal of Horizontal Blade Procedure Warning Be sure to wait for 10 minutes or more after turning off all power supplies before disassembling work. Step Procedure Points Open the horizontal blade. Horizontal blade (R17293) Unfasten the center The center shaft can be shaft while bending the...
Page 7
Si041051 Removal of Horizontal Blade Step Procedure Points Remove the horizontal blade. (R17333) Removal Procedure...
Removal of Front Panel Si041051 3. Removal of Front Panel Procedure Warning Be sure to wait for 10 minutes or more after turning off all power supplies before disassembling work. Step Procedure Points Open the front panel Right side over the position where it stops.
Si041051 Removal of Front Grille 4. Removal of Front Grille Procedure Warning Be sure to wait for 10 minutes or more after turning off all power supplies before disassembling work. Step Procedure Points Remove the 2 screws, Preparation Front grille which fix the front grille Remove the front panel to the main body.
Removal of Electrical Box / Vertical Blades (Pattern 1) Si041051 5. Removal of Electrical Box / Vertical Blades (Pattern 1) Procedure Warning Be sure to wait for 10 minutes or more after turning off all power supplies before disassembling work. Step Procedure Points...
Page 11
Si041051 Removal of Electrical Box / Vertical Blades (Pattern 1) Step Procedure Points Remove the screw of the wire retaining plate. (R12044) Remove the screws of Connecting wires Terminal board the terminal board and black (1) ----- power supply disconnect the white (2) ----- power supply connecting wires.
Page 12
Removal of Electrical Box / Vertical Blades (Pattern 1) Si041051 Step Procedure Points Disconnect the [S200] connector for the fan motor [S200]. Hook Release the fan motor harnesses from the hook. (R14602) (R15844) Remove the screw of the electrical box. (R12048) Slide the electrical box to the right first and...
Page 13
Si041051 Removal of Electrical Box / Vertical Blades (Pattern 1) Step Procedure Points 3. Remove the vertical blade A vertical blade ASSY has 6 Hook ASSY. fins. It is impossible to replace only one fin. Unfasten the hooks at The vertical blade ASSY is the upper 2 positions.
Removal of Electrical Box / Vertical Blades (Pattern 2) Si041051 6. Removal of Electrical Box / Vertical Blades (Pattern 2) Procedure Warning Be sure to wait for 10 minutes or more after turning off all power supplies before disassembling work. Step Procedure Points...
Page 15
Si041051 Removal of Electrical Box / Vertical Blades (Pattern 2) Step Procedure Points Loosen the screws of Connecting wires Terminal board the terminal board and black (1) ----- power supply disconnect the white (2) ----- power supply connecting wires. red (3) ----- transmission yellow / green ( ----- earth / ground Connecting...
Page 16
Removal of Electrical Box / Vertical Blades (Pattern 2) Si041051 Step Procedure Points Disconnect the [S7] connectors for the fan motor [S1] [S7]. Hook Release the fan motor harnesses from the hook. [S1] (R14602) (R14601) Remove the screw of the electrical box. (R12048) Slide the electrical box to the right first and...
Page 17
Si041051 Removal of Electrical Box / Vertical Blades (Pattern 2) Step Procedure Points 3. Remove the fan guard. Some models have no fan Hook guard. Unfasten the right and Narrow the edges of the left hooks of the fan hook to unfasten it. guard with pliers.
Page 18
Removal of Electrical Box / Vertical Blades (Pattern 2) Si041051 Step Procedure Points Unfasten the 3 hooks at the shaft mounting part by pressing them with a flat screwdriver. Hook (R8022) Remove the vertical Repeat the same procedure blade ASSY. to remove the vertical blade ASSY on the other side.
Si041051 Removal of Swing Motor / PCBs 7. Removal of Swing Motor / PCBs Procedure Warning Be sure to wait for 10 minutes or more after turning off all power supplies before disassembling work. Step Procedure Points 1. Remove the shield plate Preparation Shield plate (2) (2).
Page 20
Removal of Swing Motor / PCBs Si041051 Step Procedure Points Unfasten the hook, and The connector of the swing disconnect the motor has a hook. connector. Press the hook with a flat screwdriver to unfasten it. (R8037) (R14847) 3. Remove the display PCB. Unfasten the hook, and Display PCB ASSY release the display PCB...
Page 21
Si041051 Removal of Swing Motor / PCBs Step Procedure Points 4. Remove the control PCB. Lift the shield plate (1) and unfasten the 2 hooks. Hook Slide the shield plate (1) and remove it. Shield plate (1) (R12061) Release the harnesses from the hooks.
Page 22
Removal of Swing Motor / PCBs Si041051 Step Procedure Points Unfasten the 4 hooks. Hook Lift up the upper part of the control PCB and remove it. Control Hook (R11943) The figures show the Pattern 1 [S5]: thermal fuse control PCB. [S6]: swing motor [S26] [S26]: display PCB...
Si041051 Removal of Indoor Heat Exchanger 8. Removal of Indoor Heat Exchanger Procedure Warning Be sure to wait for 10 minutes or more after turning off all power supplies before disassembling work. Step Procedure Points 1. Disconnect the refrigerant Preparation piping.
Page 24
Removal of Indoor Heat Exchanger Si041051 Step Procedure Points Disconnect the flare nut for liquid piping. (R17302) 2. Remove the indoor heat exchanger. Remove the indoor unit from the installation plate. Liquid piping Gas piping (R17303) Unfasten the hook of the piping fixture on the Auxiliary piping Piping fixture...
Page 25
Si041051 Removal of Indoor Heat Exchanger Step Procedure Points Slightly widen the auxiliary piping. Auxiliary piping (R8040) Remove the screw on the left side and Caution Hook unfasten the hook on Hook When removing or the rear side. reassembling the indoor heat exchanger, be sure to wear gloves or wrap it with cloth before proceeding to the...
Removal of Fan Rotor / Fan Motor (Pattern 1) Si041051 9. Removal of Fan Rotor / Fan Motor (Pattern 1) Procedure Warning Be sure to wait for 10 minutes or more after turning off all power supplies before disassembling work. Step Procedure Points...
Page 27
Si041051 Removal of Fan Rotor / Fan Motor (Pattern 1) Step Procedure Points 2. Remove the fan rotor and the fan motor. Fan rotor The fan motor has 3 projections on the right side. Fan motor The fan rotor has a rotating shaft on the left side.
Page 28
Removal of Fan Rotor / Fan Motor (Pattern 1) Si041051 Step Procedure Points Unfasten the 2 hooks of the motor cover. Hook Motor cover (R8051) Pull out the fan motor The magnet of the fan motor from the fan rotor to is united with the fan rotor.
Si041051 Removal of Fan Rotor / Fan Motor (Pattern 2) 10.Removal of Fan Rotor / Fan Motor (Pattern 2) Procedure Warning Be sure to wait for 10 minutes or more after turning off all power supplies before disassembling work. Step Procedure Points 1.
Page 30
Removal of Fan Rotor / Fan Motor (Pattern 2) Si041051 Step Procedure Points 2. Remove the fan rotor and the fan motor. Fan rotor The fan motor has 3 projections. The fan rotor has a rotating shaft on the left Fan motor side.
Page 31
Si041051 Removal of Fan Rotor / Fan Motor (Pattern 2) Step Procedure Points Loosen the lock screw When reassembling the fan and remove the fan rotor, provide as much as Lock screw motor. 5 mm of play between the side face of the rotor and the bottom frame.
Exchange of Piping Direction (Drain Hose) Si041051 11.Exchange of Piping Direction (Drain Hose) Procedure Warning Be sure to wait for 10 minutes or more after turning off all power supplies before disassembling work. Step Procedure Points Remove the heat insulation fixing screw Drain hose on the right side and remove the drain hose.
Page 33
Revision History Month / Year Version Revised contents 01 / 2013 Si041051 First edition...
Page 34
Improper installation can result in water or refrigerant leakage, electrical shock, fire or explosion. Use only those parts and accessories supplied or specified by Daikin. Ask a qualified installer or contractor to install those parts and accessories. Use of unauthorised parts and accessories or improper installation of parts and accessories can result in water or refrigerant leakage, electrical shock, fire or explosion.
Need help?
Do you have a question about the FTK15JEVM and is the answer not in the manual?
Questions and answers