Daikin FTK12NMVJU Operation Manual
Hide thumbs
Also See for FTK12NMVJU:
- Engineering data (176 pages) ,
- Service manual (133 pages) ,
- Operation manual (92 pages)
Table of Contents
Advertisement
Quick Links
Advertisement
Table of Contents

Related Manuals for Daikin FTK12NMVJU


Summary of Contents for Daikin FTK12NMVJU
- Page 1 DAIKIN ROOM AIR CONDITIONER OPERATION MANUAL Enjoy year-round comfort. Enjoy year-round comfort. Enjoy year-round comfort. Enjoy year-round comfort. Enjoy year-round comfort. MODELS FTK09NMVJU FTK12NMVJU FTK18NMVJU FTK24NMVJU FTKN09NMVJU FTKN12NMVJU FTKN18NMVJU FTKN24NMVJU...
- Page 2 Features Enhanced comfort and energy savings COMFORT AIRFLOW The airfl ow direction is upward while in COOL operation. This function prevents cold air from blowing directly on your body. Page 15 ECONO This function enables effi cient operation by limiting the maximum power consumption. It is useful when using the air conditioner and other electrical devices simultaneously on a shared electrical circuit. Page 16...
-
Page 3: Table Of Contents
Contents „ Read Before Operation Safety Considerations ........Names of Parts ... FTK09NMVJU / FTK12NMVJU / FTKN09NMVJU / FTKN12NMVJU Names of Parts ... FTK18NMVJU / FTK24NMVJU / FTKN18NMVJU / FTKN24NMVJU Preparation Before Operation ...... „ Basic Operation COOL · DRY · FAN ONLY Operation ........... Adjusting the Airflow Rate ....Adjusting the Airflow Direction ... -
Page 4: Read Before Operation
WARNING carefully before installing air conditioning equipment. • Do not put your finger or other objects into the air outlet After completing the installation, make sure that the unit or inlet as the fan is rotating at high speed and could operates properly during the startup operation. Instruct the cause injury. Always keep small children away from the customer on how to operate and maintain the unit. unit during operation. Inform customers that they should store this operation manual with the installation manual for future reference. • Do not attempt to repair, relocate, modify or reinstall the Meanings of DANGER, WARNING, and CAUTION air conditioner by yourself. Incorrect work or modifications Symbols: could cause electric shocks, fire or other damage. For repairs and reinstallation, consult your Daikin dealer DANGER ����������� for advice and information. Indicates an imminently hazardous situation which, if not avoided, will • Do not use a refrigerant other than the one indicated result in death or serious injury. on the outdoor unit (R410A) when installing, moving or WARNING ��������� repairing. Using other refrigerants may cause trouble or Indicates a potentially hazardous damage to the unit, and personal injury. situation which, if not avoided, could result in death or serious • Do not operate the air conditioner with wet hands. injury. CAUTION ����������... - Page 5 Make sure that there are no obstacles close to the death. outside unit. Obstacles close to the outside unit may • It is recommended to install a ground fault circuit drop the performance of the outside unit or increase interrupter if one is not already available. the operating sound of the outside unit. This helps prevent electrical shocks or fire. Consult your dealer if the air conditioner in operation generates unusual sounds. • Arrange the drain hose to ensure smooth drainage. Improper drainage may cause water damage to the Electrical work building, or its furnishing. • For power supply, be sure to use a separate power • Depending on the usage environment, water may leak circuit dedicated to the air conditioner. from the air conditioner. If this happens, contact your Daikin dealer. System relocation • The remote controller should be installed in such away „ Relocating the air conditioner requires specialized that children cannot play with it. knowledge and skills. Please consult the dealer if • Do not place objects in direct proximity of the outdoor unit relocation is necessary for moving or remodeling. and do not let leaves and other debris accumulate around the unit. Leaves attract small animals which can enter the unit. Once in the unit, such animals can cause malfunctions, smoke or fire when making contact with electrical parts.
-
Page 6: Names Of Parts
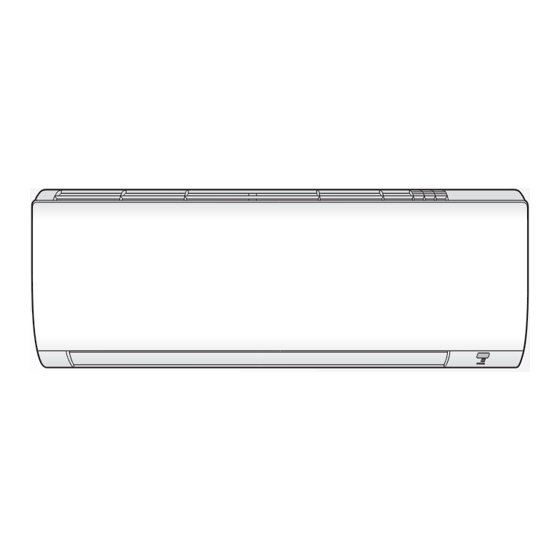
Read Before Operation Names of Parts FTK09NMVJU / FTK12NMVJU / FTKN09NMVJU / FTKN12NMVJU Indoor Unit Air inlet Front panel Air outlet Flap (horizontal blade) Model name plate Indoor temperature Page 14 sensor • Detects the air temperature Louvers (vertical blades) around the unit. • The louvers are inside of the air outlet. - Page 7 Read Before Operation „ Open the front panel Titanium apatite photocatalytic air-purifying fi lter (without frame)* *FTKN09/12NMVJU: Sold separately. Air fi lter Outdoor Unit • The appearance of the outdoor unit may differ between different models. Air inlet Outdoor temperature sensor (back) (back and side) Refrigerant piping and inter-unit wiring Model name plate Earth terminal (inside) Air outlet Drain hose...
-
Page 8: Names Of Parts
Read Before Operation Names of Parts FTK18NMVJU / FTK24NMVJU / FTKN18NMVJU / FTKN24NMVJU Indoor Unit Air inlet Front panel Air outlet Flaps (horizontal blades) Page 14 Model name plate Louvers (vertical blades) Indoor temperature sensor • The louvers are inside of the air • Detects the air temperature around the unit. outlet. - Page 9 Read Before Operation „ Open the front panel Air fi lter Titanium apatite photocatalytic air-purifying fi lter (with frame)* *FTKN18/24NMVJU: Sold separately. Outdoor Unit • The appearance of the outdoor unit may differ between different models. Air inlet Outdoor temperature sensor (back) (back and side) Refrigerant piping and inter-unit wiring Earth terminal (inside) Model name plate Air outlet Drain hose...
- Page 10 Read Before Operation Names of Parts Remote Controller Display (LCD) Signal transmitter • Displays the current settings. (In this illustration, each section is shown with its displays on for the purpose of explanation.) Receiver Direct operation buttons • To use the remote controller, aim the transmitter at the indoor unit. If there is • Starts the COOL, DRY or FAN ONLY anything blocking the signals between operation. Page 11 the unit and the remote controller, such as a curtain, the unit may not operate. • The maximum transmission distance is about 23ft (7m). TEMPERATURE adjustment button • Changes the temperature setting. OFF button Page 12 • Stops the operation.
-
Page 11: Preparation Before Operation
Read Before Operation Preparation Before Operation To insert the batteries Remove the back cover by sliding and then slightly lifting it� Insert 2 dry batteries AAA�LR03 (alkaline)� Replace the back cover� Position correctly! To fix the remote controller holder to a wall Remote controller Choose a place where the signals reach the unit�... -
Page 12: Basic Operation
Basic Operation COOL · DRY · FAN ONLY Operation The air conditioner operates with the operation mode of your choice. To start operation COOL operation • To lower the temperature. Press � DRY operation • To lower the humidity. Press � FAN ONLY operation • To circulate air in the room. Press � • The OPERATION lamp lights green. Display NOTE Note on DRY operation • Eliminates humidity while maintaining the indoor temperature as much as possible. It automatically controls temperature and airflow rate, so manual adjustment of these functions is unavailable. - Page 13 Basic Operation To stop operation Press � • The OPERATION lamp goes off. To change the temperature setting Press � • Press to raise the temperature and press to lower the temperature. COOL operation DRY or FAN ONLY operation The temperature setting cannot be changed. 64-90°F (18-32°C) Tips for saving energy Keeping the temperature setting at a moderate level helps save energy� • Recommended temperature setting − For cooling: 78-82°F (26-28°C) Cover windows with a blind or a curtain�...
-
Page 14: Adjusting The Airflow Rate
Basic Operation Adjusting the Airfl ow Rate You can adjust the airfl ow rate to increase your comfort. To adjust the airfl ow rate setting Press � • Each pressing of changes the airfl ow rate setting in sequence. AUTO Indoor unit quiet Airflow rate 1-5 (Low to High) • When the airfl ow is set to “ ”, quiet operation starts and noise from the indoor unit will become quieter. • In the quiet operation mode, the airfl ow rate is set to a weak level. COOL and FAN ONLY operation DRY operation The airfl ow rate setting... -
Page 15: Adjusting The Airflow Direction
Press when the flap reaches the desired position� • “ ” disappears from the LCD. To adjust the louvers at desired position Hold the knobs and move the louvers (vertical blades)� FTK09NMVJU / FTK12NMVJU FTK18NMVJU / FTK24NMVJU FTKN09NMVJU / FTKN12NMVJU FTKN18NMVJU / FTKN24NMVJU Knobs Knobs... -
Page 16: Useful Functions
Useful Functions COMFORT AIRFLOW Operation The air direction and flow rate are adjusted so that the air will not blow directly at people in the room. To start COMFORT AIRFLOW operation Press � • “ ” is displayed on the LCD. COOL and DRY operation Flap direction Goes up Airflow rate AUTO • Not available in FAN ONLY mode. To cancel COMFORT AIRFLOW operation Press again� • “ ” disappears from the LCD. • The flap will return to the memory position from before COMFORT AIRFLOW operation. POWERFUL Operation POWERFUL operation quickly maximizes the cooling effect in any operation mode. In this mode, the air conditioner operates at maximum capacity. -
Page 17: Econo Operation
Useful Functions ECONO Operation ECONO operation enables efficient operation by limiting the maximum power consumption. This function is useful to prevent the circuit breaker from tripping when the unit operates alongside other appliances on the same circuit. To start ECONO operation Press � • “ ” is displayed on the LCD. • Not available in FAN ONLY mode. To cancel ECONO operation Press again� • “ ” disappears from the LCD. NOTE Note on COMFORT AIRFLOW operation • If the up and down airflow direction is selected, the COMFORT AIRFLOW operation will be canceled. Notes on POWERFUL operation • Pressing causes the settings to be canceled, and “ ” disappears from the LCD. • POWERFUL operation will not increase the capacity of the air conditioner if the air conditioner is already in operation with its maximum capacity demonstrated. -
Page 18: Timer Operation
TIMER Operation ON/OFF TIMER Operation Timer functions are useful for automatically switching the air conditioner on or off at night or in the morning. You can also use the ON TIMER and OFF TIMER together. To use ON TIMER operation Press � “ ” is displayed on the LCD. • Each pressing of advances the time setting by 1 hour. The time can be set between 1 and 12 hours. • The TIMER lamp lights orange. Display To cancel ON TIMER operation Press � • “ ” disappears from the LCD. • The TIMER lamp goes off. NOTE In the following cases, set the timer again� • After the circuit breaker has turned off. - Page 19 TIMER Operation To use OFF TIMER operation Press � “ ” is displayed on the LCD. • Each pressing of advances the time setting by 1 hour. The time can be set between 1 and 12 hours. • The TIMER lamp lights orange. Display To cancel OFF TIMER operation Press � • “ ” disappears from the LCD. • The TIMER lamp goes off. To combine ON TIMER and OFF TIMER operation • A sample setting for combining the 2 timers is shown below. • “ ” and “ ” are displayed on the LCD. [Example] When setting while the unit is operating • Stops the unit 1 hour later and starts it 7 hours after that.
-
Page 20: Care
Care Care and Cleaning FTK09NMVJU / FTK12NMVJU / FTKN09NMVJU / FTKN12NMVJU CAUTION • Before cleaning, be sure to stop the operation and turn off the circuit breaker. • Do not touch the aluminium fi ns of the indoor unit. If you touch those parts, this may cause an injury. „ Quick reference Cleaning parts Front panel • Wipe it with a soft damp cloth. • Only neutral detergent may be used. If dirty Air fi lter • Vacuum dust or wash the fi lter. Once every 2 weeks Page 20... - Page 21 Care „ Air fi lter Open the front panel� Wash the air fi lters with water or clean them with • Hold the front panel by the sides and open it. vacuum cleaner� • It is recommended to clean the air fi lters every 2 weeks. Pull out the air fi lters. • Push the fi lter tab at the center of each air fi lter a little upwards, then pull it down. If the dust does not come off easily • Wash the air fi lters with neutral detergent thinned with lukewarm water, then dry them up in the shade.
-
Page 22: Care And Cleaning
Care Care and Cleaning FTK09NMVJU / FTK12NMVJU / FTKN09NMVJU / FTKN12NMVJU „ Titanium apatite photocatalytic air-purifying fi lter [Replacement] Open the front panel and Remove the fi lter from the tabs pull out the air fi lters. Page 20 and prepare a new one�... -
Page 23: Ftk18Nmvju / Ftk24Nmvju / Ftkn18Nmvju / Ftkn24Nmvju
Care Care and Cleaning FTK18NMVJU / FTK24NMVJU / FTKN18NMVJU / FTKN24NMVJU CAUTION • Before cleaning, be sure to stop the operation and turn off the circuit breaker. • Do not touch the aluminium fi ns of the indoor unit. If you touch those parts, this may cause an injury. „ Quick reference Cleaning parts Front panel • Wipe it with a soft damp cloth. • Only neutral detergent may be used. If dirty Air fi lter • Vacuum dust or wash the fi lter. Once every 2 weeks Page 23 Titanium apatite photocatalytic air-purifying fi lter (with frame)* Indoor unit, outdoor unit... - Page 24 Care Care and Cleaning FTK18NMVJU / FTK24NMVJU / FTKN18NMVJU / FTKN24NMVJU „ Air fi lter Open the front panel� Wash the air fi lters with water or clean them with • Hold the front panel by the sides and open it. vacuum cleaner� • It is recommended to clean the air fi lters every 2 weeks. Pull out the air fi lters. • Push the fi lter tab at the center of each air fi lter a little upwards, then pull it down.
- Page 25 Care „ Titanium apatite photocatalytic air-purifying fi lter [Replacement] Open the front panel and Remove the fi lter from the fi lter pull out the air fi lters. Page 23 frame and prepare a new one� • Do not throw away the fi lter frame. Reuse the fi lter Take off the titanium apatite frame when replacing the titanium apatite photocatalytic air-purifying fi lter.
-
Page 26: All Models
Care Care and Cleaning All models „ Prior to a long period of non-use Operate the FAN ONLY mode for several hours to dry out the inside� • Press After operation stops, turn off the circuit breaker for the room air conditioner� Take out the batteries from the remote controller�... -
Page 27: When The Need Arises
When the Need Arises Indoor unit The flap does not start swinging immediately� • T he air conditioner is adjusting the position of the flap. The flap will start moving soon. Operation does not start soon� Different sounds are heard� „ When any direct operation button was pressed „ A sound like flowing water soon after operation was stopped�... -
Page 28: Troubleshooting
When the Need Arises Troubleshooting Before making an inquiry or a request for repair, please check the following. If the problem persists, consult your dealer. Not a problem Check This case is not a problem. Please check again before requesting repairs. The air conditioner does not operate Case Description / what to check • Has the circuit breaker been tripped or the fuse blown? OPERATION lamp is off� • Is there a power failure? • Are batteries set in the remote controller? • Turn off the power with the circuit breaker and restart operation with the remote controller. OPERATION lamp is blinking� If the OPERATION lamp is still blinking, check the error code and consult your dealer. - Page 29 When the Need Arises Mist comes out Case Description / what to check • This happens when the air in the room is cooled into mist by the cold airfl ow during COOL Mist comes out of the indoor unit� or other operation. Remote controller Case Description / what to check • The batteries may be exhausted. Replace both batteries with new dry batteries AAA.LR03 (alkaline). The unit does not receive signals Page 10 For details, refer to “Preparation Before Operation”.
- Page 30 When the Need Arises Troubleshooting „ Call your dealer immediately WARNING When an abnormality (such as a burning smell) occurs, stop operation and turn off the circuit breaker� • Continued operation in an abnormal condition may result in troubles, electric shocks or fire. • Consult the dealer where you bought the air conditioner. Do not attempt to repair or modify the air conditioner by yourself� • Incorrect work may result in electric shocks or fire.
- Page 31 When the Need Arises „ Fault diagnosis by remote controller • The remote controller can receive relevant error codes from the indoor unit. When is held down for about 5 seconds, “ ” blinks in the temperature display section� Press repeatedly until a continuous beep is produced� • The code indication changes as shown below, and notifies you with a long beep. CODE MEANING NORMAL INDOOR-OUTDOOR UNIT COMBINATION FAULT SYSTEM REFRIGERANT SHORTAGE DROP VOLTAGE OR MAIN CIRCUIT OVERVOLTAGE...
Need help?
Do you have a question about the FTK12NMVJU and is the answer not in the manual?
Questions and answers