Fortinet FortiGate FortiGate-3016B Install Manual
Fortios 3.0 mr5
Hide thumbs
Also See for FortiGate FortiGate-3016B:
- Install manual (62 pages) ,
- Quick start manual (2 pages)

Related Manuals for Fortinet FortiGate FortiGate-3016B


Summary of Contents for Fortinet FortiGate FortiGate-3016B
- Page 1 I N S T A L L G U I D E FortiGate-3016B, FortiGate-3600A and FortiGate-3810A FortiOS 3.0 MR5 www.fortinet.com...
- Page 2 FortiOS 3.0 MR5 13 November 2007 01-30005-0343-20071113 © Copyright 2007 Fortinet, Inc. All rights reserved. No part of this publication including text, examples, diagrams or illustrations may be reproduced, transmitted, or translated in any form or by any means, electronic, mechanical, manual, optical or otherwise, for any purpose, without prior written permission of Fortinet, Inc.
-
Page 3: Table Of Contents
About this document... 10 Document conventions... 11 FortiGate documentation ... 11 Fortinet Knowledge Center ... 13 Comments on Fortinet technical documentation ... 13 Customer service and technical support ... 13 Installing the FortiGate unit ... 15 Environmental specifications... 15 Installing AMC fillers on the FortiGate-3810A ... 15 Rack mount instructions ... - Page 4 Factory defaults ... 25 Configuring... 29 NAT/Route mode default network configuration... 25 Transparent mode default network configuration... 26 Default protection profiles... 27 Restoring the default settings... 27 Restoring the default settings using the web-based manager ... 28 Restoring the default settings using the CLI ... 28 Planning the FortiGate configuration ...
- Page 5 Contents Next Steps ... 45 firewall policy configuration ... 45 Set the date and time ... 46 Updating antivirus and IPS signatures ... 47 FortiGate Firmware ... 51 Upgrading to a new firmware version... 51 Using the web-based manager ... 51 Using the CLI ...
- Page 6 Contents FortiGate-3016B, FortiGate-3600A and FortiGate-3810A FortiOS 3.0 MR5 Install Guide 01-30005-0343-20071113...
-
Page 7: Introduction
Introduction Introduction Welcome and thank you for selecting Fortinet products for your real-time network protection. The FortiGate™ Unified Threat Management System improves network security, reduces network misuse and abuse, and helps you use communications resources more efficiently without compromising the performance of your network. -
Page 8: About The Fortigate Unit
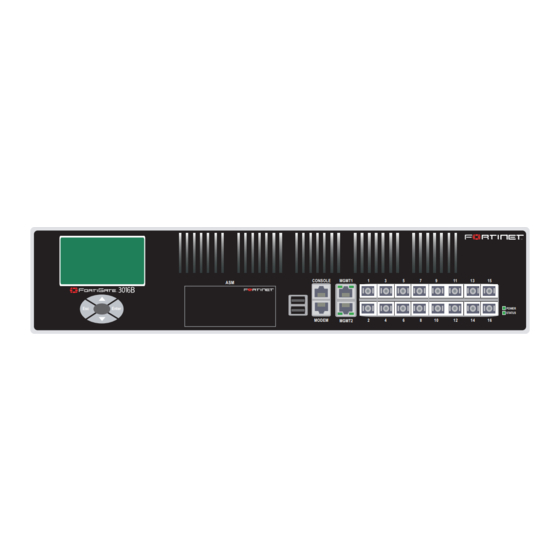
About the FortiGate unit About the FortiGate unit FortiGate-3016B FortiGate-3600A FortiGate-3810A The FortiGate-3016B provides the carrier-class levels of performance and Enter reliability demanded by large enterprises and service providers. The unit uses a 64-bit, dual core processor and FortiASIC chips to deliver a throughput meeting the needs of the most demanding applications. -
Page 9: Fortinet Family Products
Introduction Fortinet Family Products Fortinet offers a family of products that includes both software and hardware appliances, for a complete network security solution including mail, logging, reporting, network management, and security along with FortiGate Unified Threat Management Systems. For more information on the Fortinet product family, visit the Fortinet web site at www.fortinet.com/products. -
Page 10: Fortianalyzer
About this document FortiAnalyzer FortiReporter FortiBridge FortiManager About this document FortiAnalyzer™ provides network administrators with the information they need to enable the best protection and security for their networks against attacks and vulnerabilities. The FortiAnalyzer unit features include: • collects logs from FortiGate devices and syslog devices •... -
Page 11: Document Conventions
Menu commands Program output Variables FortiGate documentation The most up-to-date publications and previous releases of Fortinet product documentation are available from the Fortinet Technical Documentation web site at http://docs.forticare.com. The following FortiGate-3016B, FortiGate-3600A and FortiGate-3810A FortiOS 3.0 MR5 Install Guide 01-30005-0343-20071113 –... - Page 12 Describes how to use the FortiGate CLI and contains a reference to all FortiGate CLI commands. • FortiGate Log Message Reference Available exclusively from the Fortinet Knowledge Message Reference describes the structure of FortiGate log messages and provides information about the log messages that are generated by FortiGate units. •...
-
Page 13: Fortinet Knowledge Center
Please send information about any errors or omissions in this document, or any Fortinet technical documentation, to techdoc@fortinet.com. Customer service and technical support Fortinet Technical Support provides services designed to make sure that your Fortinet systems install quickly, configure easily, and operate reliably in your network. - Page 14 Customer service and technical support Introduction FortiGate-3016B, FortiGate-3600A and FortiGate-3810A FortiOS 3.0 MR5 Install Guide 01-30005-0343-20071113...
-
Page 15: Installing The Fortigate Unit
Installing the FortiGate unit Installing the FortiGate unit This section provides information on installing and setting up the FortiGate unit on your network. This section includes the following topics: • Environmental specifications • Powering on the FortiGate unit • Powering off the FortiGate unit •... -
Page 16: Rack Mount Instructions
Powering on the FortiGate unit Rack mount instructions Powering on the FortiGate unit To install the filler module Pull the latch on the filler module to the extended position. Insert the module by applying moderate force to the front faceplate to slide the module into the slot. - Page 17 Installing the FortiGate unit The FortiGate unit starts and the Power and Status LEDs light up. The Status LEDs flash while the FortiGate unit starts up, and remain lit when the system is running. Note: If only one power supply is connected, an audible alarm sounds to indicate a failed power supply.
-
Page 18: Powering Off The Fortigate Unit
Powering off the FortiGate unit Powering off the FortiGate unit Connecting the FortiGate unit Web-based manager Front control buttons and LCD Command line interface Always shut down the FortiGate operating system properly before turning off the power switch to avoid potential hardware problems. To power off the FortiGate unit From the web-based manager, go to System >... -
Page 19: Connecting To The Web-Based Manager
Installing the FortiGate unit Connecting to the web-based manager Configuration changes made with the web-based manager are effective immediately, without resetting the firewall or interrupting service. To connect to the web-based manager, you require: • a computer with an Ethernet connection •... -
Page 20: System Dashboard
Connecting to the CLI Connecting to the CLI Figure 1: FortiGate login Type admin in the Name field and select Login. System Dashboard After logging into the web-based manager, the web browser displays the system dashboard. The dashboard provides you with all system status information in one location. -
Page 21: Lcd Front Control Buttons
Installing the FortiGate unit Select the following port settings and select OK: Bits per second 9600 Data bits Parity Stop bits Flow control Press Enter to connect to the FortiGate CLI. The login prompt appears. Type admin and press Enter twice. The following prompt is displayed: Welcome! Type ? to list available commands. -
Page 22: Using The Front Control Buttons And Lcd
LCD front control buttons Using the front control buttons and LCD The front control buttons control how you enter and exit the different menus when configuring the different ports and interfaces. The front control buttons also enables you to increase or decrease each number for configuring IP addresses, default gateway addresses, or netmasks. - Page 23 Installing the FortiGate unit To reset to factory defaults Make sure the LCD displays the main menu setting. Press Enter to go to the interfaces. Press the up and down arrows to highlight the menu Restore Defaults. Press Enter. The FortiGate unit resets to factory default settings. This may take a few minutes. For more information on restoring your factory default settings, see default settings”...
- Page 24 LCD front control buttons Installing the FortiGate unit FortiGate-3016B, FortiGate-3600A and FortiGate-3810A FortiOS 3.0 MR5 Install Guide 01-30005-0343-20071113...
-
Page 25: Factory Defaults
Factory defaults Factory defaults The FortiGate unit ships with a factory default configuration. The default configuration enables you to connect to and use the FortiGate web-based manager to configure the FortiGate unit onto the network. To configure the FortiGate unit on to the network you add an administrator password, change the network interface IP addresses, add DNS server IP addresses, and, if required, configure basic routing. -
Page 26: Transparent Mode Default Network Configuration
Transparent mode default network configuration Transparent mode default network configuration Table 5: Factory default NAT/Route mode network configuration Administrative User name: account Password: Port 1 Netmask: Administrative Access: Port 2 Netmask: Administrative Access: Ports 3-10 Netmask: Ports 3-18 (FortiGate-3016B) Administrative Access: Default Gateway (for default route) Interface connected to external network (for default route) -
Page 27: Default Protection Profiles
Factory defaults Default protection profiles Use protection profiles to apply different protection settings for traffic controlled by firewall policies. You can use protection profiles to: • configure antivirus protection for HTTP, FTP, IMAP, POP3, and SMTP firewall policies • configure Web filtering for HTTP firewall policies •... -
Page 28: Restoring The Default Settings Using The Web-Based Manager
Restoring the default settings Restoring the default settings using the web-based manager Restoring the default settings using the CLI To reset the default settings Go to System > Status. In the Unit Information area, select Reset to factory default. To reset the default settings enter the following command: execute factoryreset Note: If you want to restore factory default settings using the front control buttons and LCD, “LCD front control buttons”... -
Page 29: Configuring
You can also configure the FortiGate unit and the network it protects using the default settings. NAT/Route mode In NAT/Route mode, the FortiGate unit is visible to the network. Like a router, all its interfaces are on different subnets. You can add firewall policies to control whether communications through the FortiGate unit operates in NAT or Route mode. -
Page 30: Nat/Route Mode With Multiple External Network Connections
Planning the FortiGate configuration NAT/Route mode with multiple external network connections Figure 4: Example NAT/Route mode configuration. Port2 Port1 Internet FortiGate-3600A Port 3 NAT policies controlling traffic between internal and external networks. In NAT/Route mode, you can configure the FortiGate unit with multiple redundant connections to the external network (usually the Internet). -
Page 31: Transparent Mode
You typically use the FortiGate unit in Transparent mode on a private network behind an existing firewall or behind a router. The FortiGate unit performs firewall functions, IPSec VPN, virus scanning, IPS web content filtering, and Spam filtering. -
Page 32: Nat/Route Mode Installation
NAT/Route mode installation NAT/Route mode installation Preparing to configure the FortiGate unit in NAT/Route mode For the most secure operation, you should change the configuration of the external interface so that it does not respond to ping requests. Not responding to ping requests makes it more difficult for a potential attacker to detect your FortiGate unit from the Internet. - Page 33 Configuring Table 7: NAT/Route mode settings Administrator Password: Port 1 Port 2 Port 3 Port 4 Port 5 Port 6 Port 7 Port 8 Port 9 Port 10 Port 11 Port 12 Port 13 Port 14 Port 15 FortiGate-3016B, FortiGate-3600A and FortiGate-3810A FortiOS 3.0 MR5 Install Guide 01-30005-0343-20071113 _____._____._____._____ Netmask:...
-
Page 34: Dhcp Or Pppope Configuration
NAT/Route mode installation DHCP or PPPoPE configuration Using the web-based manager Port 16 Netmask: Port 17 Netmask: Port 18 Netmask: Default Gateway: (Interface connected to external network) A default route consists of a default gateway and the name of the Network settings interface connected to the external network (usually the Internet). -
Page 35: Adding A Default Route
DHCP or PPPoE. To add a default route Go to Router > Static. If the Static Route table contains a default route (IP and Mask set to 0.0.0.0), select the Delete icon to delete this route. -
Page 36: Verifying The Web-Based Manager Configuration
Verify the connection To verify your connection, try the following: • browse to www.fortinet.com • retrieve or send email from your email account If you cannot browse to the web site or retrieve/send email from your account, review the previous steps to ensure all information was entered correctly and try again. - Page 37 Configuring Example config system interface Set the IP address and netmask of the external interface to the external IP address and netmask you recorded in config system interface Example config system interface To set the external interface to use DHCP, enter: config system interface To set the external interface to use PPPoE, enter: config system interface...
-
Page 38: Adding A Default Route
DHCP or PPPoE. To add a default route Set the default route to the Default Gateway IP address. Enter: config router static edit <seq_num> set dst <class_ip&net_netmask> set gateway <gateway_IP>... -
Page 39: Using The Front Control Buttons And Lcd
System > Network > Interface. Verify the connection To verify your connection, try the following: • browse to www.fortinet.com • retrieve or send email from your email account FortiGate-3016B, FortiGate-3600A and FortiGate-3810A FortiOS 3.0 MR5 Install Guide 01-30005-0343-20071113 to complete the following procedure. -
Page 40: Connecting The Fortigate Unit To The Network(S)
Figure 7: FortiGate-3600A NAT/Route mode connections Internet Router (or public switch) If you are running the FortiGate unit in NAT/Route mode, your networks must be configured to route all Internet traffic to the IP address of the interface where the networks are connected. -
Page 41: Transparent Mode Installation
The management IP address and netmask must be valid for the network from which you will manage the FortiGate unit. Add a default gateway if the FortiGate unit must connect to a router to reach the management computer. Primary DNS Server: _____._____._____._____... -
Page 42: Using The Command Line Interface
Transparent mode installation Using the command line interface Select Transparent. Enter the Management IP/Netmask address and the Default Gateway address you gathered in Table 9 on page Select Apply. You do not have to reconnect to the web-based manager at this time. Once you select Apply, the changes are immediate, and you can go to the system dashboard to verify the FortiGate unit has changed to Transparent mode. -
Page 43: Using The Front Lcd
Configuring config system dns To configure DNS server settings Set the primary and secondary DNS server IP addresses. Enter: config system dns Using the front LCD Use the information you recorded in procedure. Starting with the main menu setting displayed on the LCD, use the front control buttons and LCD to complete the following procedure. -
Page 44: Verifying The Front Control Buttons And Lcd
System > Network > Interface. Verify the connection To verify your connection, try the following: • browse to www.fortinet.com • retrieve or send email from your email account If you cannot browse to the web site or retrieve/send email from your account, review the previous steps to ensure all information was entered correctly and try again. -
Page 45: Verify The Connection
Configuring Verify the connection To verify the connection, try the following: • ping the FortiGate unit • browse to the web-based manager GUI • retrieve or send email from your email account If you cannot browse to the web site or retrieve/send email from your account, review the previous steps to ensure all information was entered correctly and try again. -
Page 46: Set The Date And Time
Next Steps Set the date and time Set the following and select OK. Source Interface Select the port connected to the Internet. Source Address Destination Interface Select the port connected to the network. Destination Address All Schedule always Service Action Accept Firewall policy configuration is the same in NAT/Route mode and Transparent mode. -
Page 47: Updating Antivirus And Ips Signatures
You can update your antivirus and IPS signatures using the web-based manager or the CLI. Before you can begin receiving updates, you must register your FortiGate unit on the Fortinet Customer Service site at https://support.fortinet.com. Note: Update AV and IPS signatures on a regular basis. If you do not update AV and IPS signatures regularly, the FortiGate unit can become vulnerable to new viruses. -
Page 48: Updating From The Cli
Next Steps Updating from the CLI You can update IPS signatures using the CLI interface. Note: You can only update antivirus definitions from the web-based manager. To update IPS signatures using the CLI Log into the CLI. Enter the following CLI command: configure system autoupdate ips set accept-recommended-settings enable Scheduling antivirus and IPS updates from the CLI... -
Page 49: Adding An Override Server
Configuring Example config system autoupdate schedule Adding an override server If you cannot connect to the FDN, or if your organization provides updates using their own FortiGuard server, you can add the IP address of an override FortiGuard server in either the web-based manager or the CLI. To add an override server from the web-based manager Go to System >... - Page 50 Next Steps Configuring FortiGate-3016B, FortiGate-3600A and FortiGate-3810A FortiOS 3.0 MR5 Install Guide 01-30005-0343-20071113...
-
Page 51: Fortigate Firmware
FortiGate Firmware FortiGate Firmware Fortinet periodically updates the FortiGate firmware to include enhancements and address issues. After you have registered your FortiGate unit, FortiGate firmware is available for download at the support web site, http://support.fortinet.com. Only FortiGate administrators (whose access profiles contain system read and write privileges) and the FortiGate admin user can change the FortiGate firmware. -
Page 52: Using The Cli
Reverting to a previous firmware version Using the CLI Reverting to a previous firmware version Note: Installing firmware replaces your current antivirus and attack definitions, along with the definitions included with the firmware release you are installing. After you install new firmware, make sure that antivirus and attack definitions are up to date. -
Page 53: Using The Web-Based Manager
FortiGate Firmware Using the web-based manager The following procedures revert the FortiGate unit to its factory default configuration and deletes IPS custom signatures, web content lists, email filtering lists, and changes to replacement messages. Before beginning this procedures, it is recommended that you: •... -
Page 54: Using The Cli
Reverting to a previous firmware version Using the CLI This procedure reverts the FortiGate unit to its factory default configuration and deletes IPS custom signatures, web content lists, email filtering lists, and changes to replacement messages. Before beginning this procedure, it is recommended that you: •... -
Page 55: Installing Firmware From A System Reboot Using The Cli
FortiGate Firmware Type y. The FortiGate unit uploads the firmware image file. After the file uploads, a message similar to the following appears: Get image from tftp server OK. Check image OK. This operation will downgrade the current firmware version! Do you want to continue? (y/n) Type y. - Page 56 Installing firmware from a system reboot using the CLI Make sure the internal interface is connected to the same network as the TFTP server. To confirm the FortiGate unit can connect to the TFTP server, use the following command to ping the computer running the TFTP server. For example, if the IP address of the TFTP server is 192.168.1.168: execute ping 192.168.1.168 Enter the following command to restart the FortiGate unit.
-
Page 57: Restoring The Previous Configuration
FortiGate Firmware Enter the firmware image filename and press Enter. The TFTP server uploads the firmware image file to the FortiGate unit and a message similar to the following appears: Save as Default firmware/Backup firmware/Run image without saving: [D/B/R] Type D. The FortiGate unit installs the new firmware image and restarts. -
Page 58: Using The Usb Auto-Install Feature
Using a USB key Using the USB Auto-Install feature Note: You can only save VPN certificates if you encrypt the file. Make sure the configuration encryption is enabled so you can save the VPN certificates with the configuration file. However, an encrypted file is ineffective if selected for the USB Auto-Install feature. -
Page 59: Additional Cli Commands For A Usb Key
FortiGate Firmware Note: You need an unencrypted configuration file for this feature. Also the default files, image.out and fgt_system.conf, must be in the root directory. To configure the USB Auto-Install using the web-based manager Go to System > Maintenance > Backup and Restore. Select the blue arrow to expand the Advanced options. -
Page 60: Testing A New Firmware Image Before Installing It
Testing a new firmware image before installing it Testing a new firmware image before installing it You can test a new firmware image by installing the firmware image from a system reboot and saving it to system memory. After completing this procedure, the FortiGate unit operates using the new firmware image with the current configuration. - Page 61 FortiGate Firmware Type G to get the new firmware image from the TFTP server. The following message appears: Enter TFTP server address [192.168.1.168]: Type the address of the TFTP server and press Enter: The following message appears: Enter Local Address [192.168.1.188]: Type an IP address of the FortiGate unit to connect to the TFTP server.
- Page 62 Testing a new firmware image before installing it FortiGate Firmware FortiGate-3016B, FortiGate-3600A and FortiGate-3810A FortiOS 3.0 MR5 Install Guide 01-30005-0343-20071113...
-
Page 63: Index
NTP server synchronize 46 operating temperature 15 ping requests, preventing public FortiGate interface re- sponding to ping requests 31 products, fortinet family 9 protection profiles, default 27 reconnecting to web-based manager 43 registering FortiGate unit 7 restoring default settings 27... - Page 64 using LCD, front control buttons 43 using the CLI 42 using web-based manager 41 updating adding override server 49 antivirus and IPS, web-based manager 47 IPS using CLI 48 scheduling updates 48 updating antivirus and IPS signatures 47 upgrading firmware using the CLI 52 firmware using the web-based manager 51 USB Auto-Install 58 USB key 57...
- Page 65 www.fortinet.com...
- Page 66 www.fortinet.com...
Need help?
Do you have a question about the FortiGate FortiGate-3016B and is the answer not in the manual?
Questions and answers