
Subscribe to Our Youtube Channel
Related Manuals for Toro 07280


Summary of Contents for Toro 07280
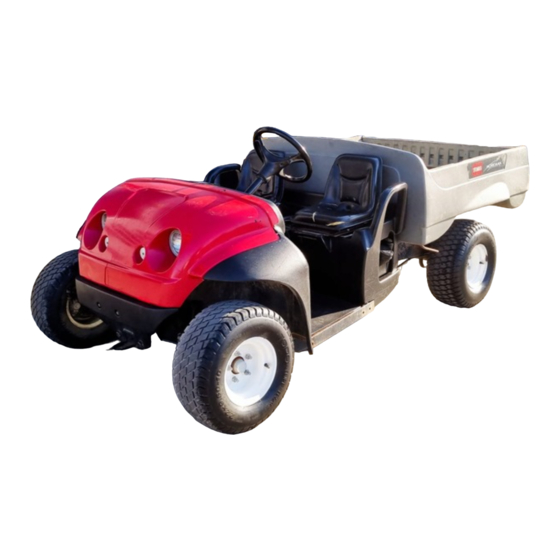
- Page 1 Form No. 3355-948 Rev A Workman® e2050 Utility Vehicle Model No. 07280—Serial No. 250000001 and Up Register your product at www.Toro.com Original Instructions (EN)
-
Page 2: Introduction
finding a dealer, or to register your product. Whenever you need service, genuine Toro parts, or additional information, contact an Authorized Service Dealer or Toro Customer Service and have the model and serial numbers of your product ready. Figure 1 identifies the location of the model and serial numbers on the product. -
Page 3: Table Of Contents
Contents Checking the Transaxle Oil Level ......... 30 Brake Maintenance ........31 Introduction ............2 Inspecting the Brakes......31 Safety ..............4 Adjusting the Brake Pedal ....31 Safe Operating Practices ...... 4 Cleaning ............ 31 Before Operating......... 4 Washing the Vehicle......31 Operation.......... -
Page 4: Safety
Safety • Never allow other adults to operate the vehicle without first reading and understanding the Operator’s Manual. Only trained and authorized Improper use or maintenance by the operator persons should operate this vehicle. Make sure or owner can result in injury. To reduce the that all operators are physically and mentally potential for injury, comply with these safety capable of operating the vehicle. - Page 5 The operator should keep both hands on the way to pedestrians and other vehicles. This steering wheel whenever possible, and the vehicle is not designed for use on streets or passenger should use the hand holds provided. highways. Always signal your turns or stop Keep your arms and legs within the vehicle early enough so that other people know body at all times.
- Page 6 make sure they work properly. If they do not, longer than stopping on level ground. If the drive slowly while putting light pressure on the vehicle must be stopped, avoid sudden speed brake pedal. This will dry the brakes out. changes, which may initiate tipping or rolling of the vehicle.
-
Page 7: Handling And Servicing
Handling and Servicing • Position the weight of the load evenly from Batteries side to side. If you position the load toward one of the sides, the vehicle is more likely to • To reduce the potential for fire, keep the tip over while turning. -
Page 8: General Maintenance
• If major repairs are ever needed or assistance or damaged. is required, contact an Authorized Toro • When removing or installing the batteries, do Distributor. not allow the battery terminals to touch any •... -
Page 9: Safety And Instructional Decals
Safety and Instructional Decals Safety decals and instructions are easily visible to the operator and are located near any area of potential danger. Replace any decal that is damaged or lost. 104-7214 1. Horn 4. Light on, OK 7. Rear lift 2. - Page 10 107-0356 1. Warning—do not touch moving objects, fan; do not touch the hot surfaces; read the Operator’s Manual. 104-7131 1. Read the Operator’s Manual. 2. The maximum combined operator and passenger weight is 400 lb. (181 kg.). 3. The maximum cargo weight is 800 lb. (362 kg). 4.
- Page 11 Battery Symbols Some or all of these symbols are on your battery 1. Explosion hazard 6. Keep bystanders a safe distance from the battery. 2. No re, open ame, or 7. Wear eye protection; smoking. explosive gases can cause blindness and other injuries 3.
-
Page 12: Setup
Setup Loose Parts Use the chart below to verify that all parts have been shipped. Step Description Qty. – No parts required Check the tire pressure. Operator’s Manual Engine Operator’s Manual Parts Catalog Read the Operator’s Manual and Safety Video watch the video before operating the machine. -
Page 13: Product Overview
Product Overview Figure 3 1. Steering wheel 3. Towing tongue 5. Operator’s position 2. Cargo box 4. Cargo box release lever Controls Brake Pedal The brake pedal is used to stop or slow the vehicle Accelerator Pedal (Figure 4). The accelerator pedal (Figure 4) gives the operator the ability to vary ground speed of the vehicle. - Page 14 position to allow operation of the vehicle and computer communicates the status of the vehicle accessories. After stopping the vehicle, rotate the to you through the vehicle status light. Always key counterclockwise to the Off position. Remove check this light when you turn the On/Off switch the key before leaving the vehicle.
- Page 15 Passenger Hand Holds The passenger hand holds are located on the right side of the dash panel and at the outside of each seat (Figure 7). Figure 7 1. Passenger hand hold 2. Hip restraint...
-
Page 16: Specifications
(36 kg) and capacities are decreased by the same amount. Attachments/Accessories A selection of Toro approved attachments and accessories are available for use with the machine to enhance and expand its capabilities. Contact your Authorized Service Dealer or Distributor or go to... -
Page 17: Operation
Operation 2. Sit in the Operator’s seat, insert the key into the On/Off switch, and rotate the key clockwise to the On position. Note: Determine the left and right sides of the 3. Move the vehicle direction switch button to machine from the normal operating position. - Page 18 Lead acid batteries produce electricity through a chemical reaction between coated lead plates and sulfuric acid. Charging a battery reverses the chemical reaction, allowing the battery to once again produce electricity. A battery is a perishable item that has a limited life time (Figure 8).
-
Page 19: Operating The Cargo Box
Important: To obtain maximum battery life, always charge the batteries when there are 2 or more bars visible on the screen. Depleting the batteries lower than 2 bars, especially on a regular basis, will reduce the life of the batteries. Figure 12 1. -
Page 20: Breaking In A New Vehicle
Breaking in a New Vehicle To provide proper performance and long vehicle life, follow these guidelines for the first 100 operating hours: • Avoid hard braking situations for the first several hours of new vehicle break-in operation. New brake linings may not be at optimum performance until several hours of use has caused the brakes to become burnished (broken-in). -
Page 21: Towing The Vehicle
Figure 16 depending on your application. Contact your Authorized Toro Distributor for details. 1. Tie down points When hauling cargo or towing a trailer, do not overload your vehicle or trailer. Overloading can... -
Page 22: Maintenance
Maintenance Note: Determine the left and right sides of the machine from the normal operating position. Recommended Maintenance Schedule(s) Maintenance Service Maintenance Procedure Interval After the rst 25 • Check the front wheel toe-in and front suspension. operating hours • Check the tire pressure. Before each use or daily •... -
Page 23: Daily Maintenance Checklist
Daily Maintenance Checklist Duplicate this page for routine use. Maintenance Check For the week of: Item Mon. Tues. Wed. Thurs. Fri. Sat. Sun. Check brake and parking brake operation. Check gear shift/neutral operation. Check fuel level. Check engine oil level. Check transaxle oil level. -
Page 24: Premaintenance Procedures
Premaintenance Procedures Heavy Duty Operation Important: If the vehicle is subjected to any of the conditions listed below, maintenance should be performed twice as frequently: Figure 18 • Desert operation 1. Front jacking point • Cold climate operation (below 32 degrees F) •... -
Page 25: Electrical System Maintenance
Also, clean the posts and cable clamps with a post and clamp cleaner. Figure 21 The posts and clamps should have a bright metallic shine. 4. Apply a light coating of Toro battery terminal Electrical System protector. Maintenance Charging the Batteries A charger is supplied with the vehicle. - Page 26 2. Connect the charger cord to the charging receptacle on the vehicle (located on the panel between the seats). 3. Plug the charger power cord into a 115 vac, 15 amp power outlet. While the batteries are charging, the green light on the charger will blink on and off.
-
Page 27: Replacing The Fuses
13. Coat the battery terminals with Toro battery terminal protector. 14. Ensure that the rubber boots on each battery cable are securely seated over the battery terminals. Storing the Batteries Charge the batteries fully before placing the vehicle into storage. Plug the charger into a wall outlet while the vehicle and batteries are in storage. -
Page 28: Drive System Maintenance
1. Set the parking brake, turn the vehicle off, and curbs, can damage a tire or rim and also disrupt remove the key. wheel alignment, so inspect tire condition after an accident. 2. Reach beneath the dash and push the headlight out of the hood. -
Page 29: Adjusting Front Wheel Toe-In
Figure 26 1. Travel limiting bolt 3. Ride height adjustment Figure 27 bolt 2. Centering bolt 1. Left-hand A-arm 5. Rotate the front A-arm to the desired position 6. Torque the ride height adjustment bolt to (refer to the note below) and replace the ride 135-165 ft-lb (183-224 N⋅m). -
Page 30: Level
Note: The driver should drive up to the measurement area and stay seated in the vehicle while the measurement is being taken. If the vehicle will be run with medium to heavy loads most of the time, set the toe-in on the high side of the recommended amount. -
Page 31: Brake Maintenance
Brake Maintenance 4. Disconnect the spring from the end of the brake rod (Figure 31). Inspecting the Brakes 5. Press the brake pedal down fully to raise the brake lever. Brakes are a critical safety component of the 6. Thread the brake rod in or out of the brake vehicle. -
Page 32: Storage
Storage 1. Position the machine on a level surface, set the parking brake, turn the machine Off, and remove the key. 2. Clean dirt and grime from the entire machine, including the outside of the engine’s cylinder head fins and blower housing. Important: You can wash the machine with mild detergent and water. -
Page 33: Troubleshooting
Troubleshooting Vehicle Status Light Flash Pattern Problem Possible Cause Corrective Action Always on 1. The system is functioning 1. None properly. 1 ash 1. The computer 1. Turn the On/Off key to programming the Off position, wait personality is out of a few seconds, and range. - Page 34 Problem Possible Cause Corrective Action 4 ashes 1. The line contactor is 1. Turn the On/Off key to not responding to the Off position, wait commands. a few seconds, and turn the On/Off key to the On position. If the condition continues, refer to your Authorized Service Dealer.
-
Page 35: Schematics
Schematics Electrical Schematic (Rev. A) - Page 36 (Dealer) to obtain guarantee policies for your country, province, or state. If for any reason you are dissatised with your Distributor’s service or have difculty obtaining guarantee information, contact the Toro importer. If all other remedies fail, you may contact us at Toro Warranty Company.
Need help?
Do you have a question about the 07280 and is the answer not in the manual?
Questions and answers