Table of Contents

Advertisement

Form No. 3370-258 Rev A
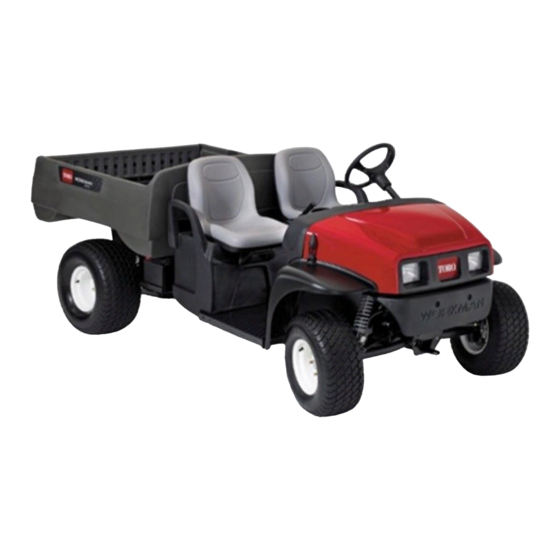
Workman
®
MD and MDX Utility
Vehicle
Model No. 07266—Serial No. 310000001 and Up
Model No. 07266TC—Serial No. 310000001 and Up
Model No. 07273—Serial No. 310000001 and Up
Model No. 07273TC—Serial No. 310000001 and Up
Model No. 07279—Serial No. 310000001 and Up
To register your product or download an Operator's Manual or Parts Catalog at no charge, go to www.Toro.com.
Original Instructions (EN)

Advertisement

Table of Contents
loading
Need help?

Need help?

Do you have a question about the 07266 and is the answer not in the manual?

Questions and answers

Summary of Contents for Toro 07266

  • Page 1 Model No. 07273—Serial No. 310000001 and Up Model No. 07273TC—Serial No. 310000001 and Up Model No. 07279—Serial No. 310000001 and Up To register your product or download an Operator's Manual or Parts Catalog at no charge, go to www.Toro.com. Original Instructions (EN)
  • Page 2: Introduction

    Whenever you need service, genuine Toro parts, or additional information, contact an Authorized Service Dealer or Toro Customer Service and have the model and serial numbers of your product ready. Figure 1 identifies the location of the model and serial numbers ©...
  • Page 3: Table Of Contents

    Contents Servicing the Spark Plug (Models 07266/TC and 07279 only) ..........27 Servicing the Spark Plugs (Models 07273/TC Introduction..............2 only)............... 28 Safety ................4 Fuel System Maintenance ........29 Safe Operating Practices ........4 Inspecting Fuel Lines and Connections ....29 Before Operating ..........
  • Page 4: Safety

    Before Operating Safety • Operate the machine only after reading and Improper use or maintenance by the operator or owner understanding the contents of this manual. can result in injury. To reduce the potential for injury, • Never allow children to operate the vehicle. Anyone comply with these safety instructions and always pay who operates the vehicle should have a motor attention to the safety alert symbol, which means...
  • Page 5: Operation

    – Do not remove the cap from the fuel tank when – When dumping, do not let anyone stand behind the engine is hot or running. the vehicle and do not dump the load on anyone’s feet. Release the tailgate latches from the side of –...
  • Page 6 attachments make a vehicle harder to stop or turn. to prevent it from shifting and take extra care when The heavier the load, the longer it takes to stop. hauling loads that shift easily (liquid, rock, sand, etc.). • Decrease the vehicle speed if the cargo box has been •...
  • Page 7: Maintenance

    Authorized Toro Distributor. • To be sure of optimum performance and safety, WARNING always purchase genuine Toro replacement parts and The weight of the box may be heavy. Hands or accessories. Replacement parts and accessories made other body parts could be crushed.
  • Page 8: Model 07273/Tc

    Sound Pressure Measured values were determined according to the procedures outlined in EN 1032. This unit has a sound pressure level at the operator’s ear of 81 dBA, which includes an Uncertainty Value (K) Whole Body Vibration of 1 dBA. Measured vibration level = 0.42 m/s Sound pressure level was determined according to the procedures outlined in EN ISO 11201.
  • Page 9 104-6581 1. Warning—read the Operator’s Manual. 2. Fire hazard—before fueling, stop the engine. 3. Warning—do not operate this machine unless you are trained. 4. Tipping hazard—use caution and drive slowly while on slopes; drive slowly when turning, keep the vehicle speed under 19 MPH (31 km/h) when carrying a full or heavy load and when driving on rough terrain.
  • Page 10 99-7350 1. Maximum tongue weight is 50 lb (23 kg); maximum trailer weight is 400 lb (181 kg).
  • Page 11: Setup

    Setup Loose Parts Use the chart below to verify that all parts have been shipped. Procedure Description Qty. Install the steering wheel (Model Steering wheel 07266TC and 07273TC only). Activate the battery (Model 07266TC – No parts required and 07273TC only). Operator’s Manual Engine Operator’s Manual Parts Catalog...
  • Page 12: Reading The Manual And Viewing The Safety Training Material

    Note: This procedure is only necessary for batteries in Model No. 07266TC and 07273TC. If the battery is not filled with electrolyte or activated, it must be removed from the vehicle, filled with electrolyte, Reading the Manual and and charged. Bulk electrolyte with 1.260 specific gravity Viewing the Safety Training must be purchased from a local battery supply outlet.
  • Page 13: Product Overview

    Product Overview G014967 Figure 4 1. Hood strap 3. Cargo box 5. Fuel cap 7. Towing tongue 2. Parking brake 4. Cargo box release lever 6. Gear shift selector Controls the vehicle and the engine will stop running. Maximum forward speed is 16 mph (26 km/h). Brake Pedal The brake pedal is used to stop or slow the vehicle (Figure 5).
  • Page 14: Hour Meter

    Hour Meter control outward (Figure 6). After the engine starts, regulate the choke to keep the engine running smoothly. The hour meter (Figure 7) indicates the total number As soon as possible, push the control in to the Off of hours the engine has run. The hour meter starts to position.
  • Page 15: Specifications

    10 inches (25.4 cm) inside Attachments/Accessories A selection of Toro approved attachments and accessories are available for use with the machine to enhance and expand its capabilities. Contact your Authorized Service Dealer or Distributor or go to www.Toro.com for a list of...
  • Page 16: Operation

    1. Position the machine on a level surface. Level 2. Clean around the oil dipstick (Figure 10 for model numbers 07266/TC andFigure 11 for model Check the brake fluid level before the engine is first numbers 07273/TC) so dirt cannot fall into the started;...
  • Page 17: Checking The Tire Pressure

    Checking the Tire Pressure DANGER In certain conditions during fueling, static Service Interval: Before each use or daily electricity can be released causing a spark which Check the tire pressure every 8 hours or daily to ensure can ignite the gasoline vapors. A fire or explosion proper levels.
  • Page 18: Checking The Transmission Oil Level

    Note: Stopping distance may vary depending on the 4. Fill the tank to about 1 inch (25 mm) below the top of tank, (bottom of the filler neck). This space in vehicle load and speed. the tank allows gasoline to expand. Do not overfill. Parking the Vehicle 5.
  • Page 19: Breaking In A New Vehicle

    Lowering the Box WARNING The weight of the box may be heavy. Hands or other body parts could be crushed. Keep hands and other body parts clear when lowering the box. Pull the prop rod out of the detent slot and lower the box until it latches into place.
  • Page 20: Transporting The Vehicle

    Contact your Authorized Toro Distributor for details. Remove the seats or make sure that the seats are securely fastened in the detents.
  • Page 21: Maintenance

    • Inspect and clean the air filter element (twice as often in special operating conditions; refer to Maintaining the Vehicle under Special Operating Conditions). • Change the engine oil (07266/TC). (twice as often in special operating conditions; refer to Maintaining the Vehicle under Special Operating Conditions) •...
  • Page 22: Daily Maintenance Checklist

    Daily Maintenance Checklist Duplicate this page for routine use. Maintenance Check Item For the week of: Mon. Tues. Wed. Thurs. Fri. Sat. Sun. Check brake and parking brake operation. Check gear shift/neutral operation. Check fuel level. Check engine oil level. Check transaxle oil level.
  • Page 23: Premaintenance Procedures

    Premaintenance Procedures Maintaining the Vehicle under Special Operating Conditions If the vehicle is subjected to any of the conditions Figure 19 listed below, maintenance should be performed twice 1. Front jacking point as frequently. • Desert operation • Cold climate operation (below 50° F [10 degrees C]) •...
  • Page 24: Lubrication

    Lubrication Engine Maintenance Lubricate all of the bearings and bushings every 100 Servicing the Air Cleaner hours or once a year, whichever occurs first. Grease them more frequently when using the vehicle for Check the air cleaner body for damage which could heavy-duty operations.
  • Page 25: Servicing The Engine Oil (Models 07266/Tc And 07279 Only)

    100 psi (689 kPa) air pressure. Servicing the Engine Oil 2. Inspect the filter element for holes and tears by (Models 07266/TC and 07279 looking through the filter toward a bright light. only) Installing the Filter Element Check the oil level before each use.
  • Page 26: Servicing The Engine Oil (Models 07273/Tc Only)

    Note: Dispose of the used oil at a certified recycling center. 6. Clean around the oil dipstick and unscrew the cap. 7. Slowly pour approximately 80% of the specified amount of oil into the filler tube and check the oil level; refer to Checking the Crankcase Oil in Operation.
  • Page 27: Servicing The Spark Plug (Models 07266/Tc And 07279 Only)

    Servicing the Spark Plug 2. Park the machine on a level surface, set the parking brake, turn the ignition off, and remove the key. (Models 07266/TC and 07279 3. Raise the bed and secure it with the prop rod. only) 4.
  • Page 28: Servicing The Spark Plugs (Models 07273/Tc Only)

    Figure 30 Figure 31 1. Center electrode insulator 3. Air gap (not to scale) 1. Center electrode insulator 3. Air gap (not to scale) 2. Side electrode 2. Side electrode 4. Set the air gap between the center and side of the Important: A cracked, fouled, dirty, or electrodes at 0.030 inch (0.762 mm) (Figure 30).
  • Page 29: Fuel System Maintenance

    Fuel System Electrical System Maintenance Maintenance Replacing the Fuses Inspecting Fuel Lines and Connections There are 3 fuses in the electrical system. They are located beneath the dash on the driver’s side (Figure 33). Service Interval: Every 400 hours Auxillary (Open) 30 A Check the fuel lines and connections every 400 operating Ignition System/Horn...
  • Page 30: Servicing The Battery

    3. Install the new headlight through the opening in the CAUTION bumper (Figure 34). Ensure the adjustment posts Any surface contamination can damage the are lined up with the holes in the mounting bracket headlight bulb and leading to its failure or explosion in the bumper.
  • Page 31: Adding Water To The Battery

    Checking the Electrolyte Level 3. Disconnect the negative (black) ground cable from the battery post. Service Interval: Every 50 hours WARNING Note: This procedure is only necessary for batteries in Model No. 07266TC and 07273TC. Incorrect battery cable routing could damage the vehicle and cables, causing sparks.
  • Page 32: Drive System Maintenance

    Drive System WARNING Charging the battery produces gasses that can Maintenance explode. Never smoke near the battery and keep sparks Checking and Adjusting and flames away from battery. Neutral 3. Install the battery in the chassis; refer to Installing Service Interval: Every 100 hours the Battery.
  • Page 33: Inspecting The Tires

    Every 100 hours for the proper procedures and tools used to perform Check the tire condition at least every 100 hours the adjustments or contact your local Authorized Toro of operation. Operating accidents, such as hitting Dealer for service. curbs, can damage a tire or rim and also disrupt wheel alignment, so inspect tire condition after an accident.
  • Page 34: Maintaining The Primary Drive Clutch

    G009235 Figure 38 1. Tire center line-back 3. Axle center line 2. Tire center line-front Figure 40 2. If the measurement does not fall within the specified 1. Cover 2. Bolts range (refer to the dimensions and parameters at the beginning of this procedure), loosen the jam nuts at 4.
  • Page 35: Cooling System Maintenance

    Cooling System Maintenance Cleaning the Engine Cooling Areas Service Interval: Every 100 hours Figure 41 Clean the rotating screen, cooling fins, and external 1. Drain plug 2. Level indicator hole surfaces of the engine every 100 operating hours or more often under extremely dusty and dirty conditions. 3.
  • Page 36: Brake Maintenance

    Brake Maintenance Inspecting the Brakes Service Interval: Every 100 hours Brakes are a critical safety component of the vehicle. As with all safety components, they should be closely inspected at regular intervals to ensure optimum performance and safety. The following inspections Figure 43 should be done every 100 hours: 1.
  • Page 37: Belt Maintenance

    Belt Maintenance Servicing the Drive Belt Checking the Drive Belt Service Interval: After the first 8 hours Every 200 hours Check the condition and tension of the drive belt after the first day of operation and every 200 operating hours Figure 46 thereafter.
  • Page 38: Cleaning

    Cleaning Storage 1. Position the machine on a level surface, set the Washing the Vehicle parking brake, stop the engine, and remove the ignition key. The vehicle should be washed as needed. Use water alone or with a mild detergent. A rag may be used, 2.
  • Page 39 Important: Do not store stabilizer/conditioned gasoline over 90 days 9. Remove the spark plugs and check their condition; refer to Changing Spark Plugs in the Engine Maintenance section in Maintenance. 10. With the spark plugs removed from the engine, pour two tablespoons of engine oil into the spark plug hole.
  • Page 40: Schematics

    Schematics G009199 Electrical Schematic (Rev. A)
  • Page 41 Notes:...
  • Page 42 Notes:...
  • Page 43 Notes:...
  • Page 44 Countries Other than the United States or Canada Customers should contact their Toro Distributor (Dealer) to obtain guarantee policies for your country, province, or state. If for any reason you are dissatisfied with your Distributor’s service or have difficulty obtaining guarantee information, contact the Toro importer. If all other remedies fail, you may contact us at Toro Warranty Company.

This manual is also suitable for:

07266tc0727307273tc07279Workman mdWorkman mdx

Table of Contents