Table of Contents
Advertisement
Quick Links
Advertisement
Table of Contents

Subscribe to Our Youtube Channel
Related Manuals for Cozy N Safe GaLaHaD


Summary of Contents for Cozy N Safe GaLaHaD
- Page 1 G a L a H a D...
- Page 2 Child Safety Car Seat Instruction Manual Type: EST-L001 Group: 0+1/2 Weight: 0-25kg (Approx. Birth-6years) Please read this manual carefully before use C O Z Y S A F E G a L a H a D C N S...
-
Page 3: Table Of Contents
Content 1. General information 1.1 Suitable weight and installation method summary 1.2 Safety information 1.3 Parts indication 2. Prepare for use 2.1 Style for every group 2.2 Soft pad 2.3 Seat angle adjustment 2.4 Headrest height adjustment 2.5 Use of harness 2.6 Crotch belt adjustment 2.7 Fit your child 3. - Page 4 Content 3.2 Installation for Group 1 9-18kg (approx 9 months - 4 years ) 3.2.1 Install seat using 3 point vehicle belt 3.2.2 Install seat using ISOFIX and Top tether 3.2.2.1 ISOFIX installation 3.2.2.2 Top tether installation 3.3 Installation for Group 2 15 -25kg (approx 3 - 6 years) 3.3.1 Remove harness 3.3.2 Seat installation 3.3.3 Fit your child...
- Page 5 Thank you for purchasing Galahad Group 0+, 1,2 car seat. Please take the time to read and understand these instructions fully. Failure to follow these instructions may affect your child's safety. If you have any questions concerning the use of this child seat, please do not hesitate to contact us.
- Page 6 NOTICE(1) 1. This is a "Universal" child restraint. It is approved to Regulation No. 44, 04 series of amendments, for general use in vehicles and it will fit most, but not all, car seats. 2. A correct fit is likely if the vehicle manufacturer has declared in the vehicle handbook that the vehicle is capable of accepting a "Universal"...
- Page 7 NOTICE(2) 1. This is an ISOFIX CHILD RESTRAINT SYSTEM. It is approved to Regulation No. 44, 04 series of amendments for general use in vehicles fitted with ISOFIX anchorages systems. 2. It will fit vehicles with positions approved as ISOFIX positions (as detailed in the vehicle handbook), depending on the category of the child seat and of the fixture.
-
Page 8: General Information
1. General information EST-L001 Galahad child seat has been approved in accordance with regulation ECE R44/04. It is suitable for 0-25kg (approx. Birth -6 years) children use. 0 - 13kg as Group 0+, It is suitable for children approximately Birth to 15 months old. - Page 9 1.1 suitable weight and installation methods summary Direction of Child fit Seat angle Fit method Fit method Group Weight installation method for seat -1 for seat -2 Rearward 5 point Position 4 Vehicle 3 facing harness (most recline) point belt 0-13kg Birth- 15 months...
-
Page 10: Safety Information
1.2 Safety information Only suitable for use in the listed vehicles fitted with 3 point with retractor safety-belts, approved to ECE Regulation No. 16 or other equivalent standards. And must not at any time be fitted using only a 2 point lap belt. It is approved to Regulation No. - Page 11 1.2 Safety information Do not install the car seat here if there is a frontal airbag fitted. If you need to install here ensure that the airbag is disabled. Contact vehicle manufacturer or distributor to close the airbag . It can only be installed here when it is equipped with ISOFIX and TOPTETHER anchors that have been approved, compliant with the UN/ECE R16 or other equivalent standards.
- Page 12 1.2 Safety Information Please read this instruction manual carefully before use. It is most important that these instructions remain with the car seat at all times. You can store these instructions in the compartment provided on the rear of the backrest of your seat, push the button down and pull back and the box will open.
- Page 13 child's body. Straps should not be twisted. It is very important to ensure that any lap strap is worn low down, so that the pelvis is firmly engaged. It should be changed when it has been subject to violent stresses in an accident. Toxic cleaning fluids can cause illness.
- Page 14 The child restraint must not be used without the cover . The seat cover should not be replaced with any other than the one recommended by the manufacturer, because the cover constitutes an integral part of the restraint performance. The adult seat belt buckle should be lower than the armrest and lap belt.
-
Page 15: Parts Indication
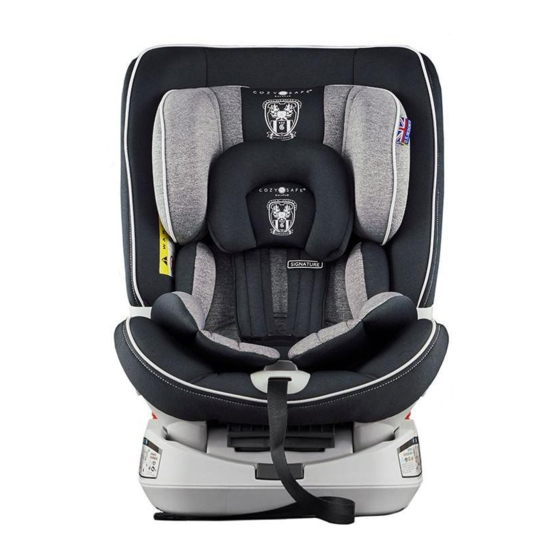
1.3 parts indication Z34handle Z1headrest Z32red Z31seat shell Z33blue belt lockoff guide(G0+) Z2red belt guide(G2) Z30top tether Z3pad Z29rearbox Z4shoulder pad button Z5shoulder belt Z28 adjuster Z6waist belt of top tether Z7buckle Z27rear box Z8crotch pad Z9crotch belt Z26Y-shape metal Z10central Z25hook for adjuster... -
Page 16: Prepare For Use
2. Prepare for use 2.1 style for every group The 5 point harness on the Galahad is suitable for 0-18kg child, If your child is more than 18kg, we suggest you use chapter 3.3 to use the seat with vehicle 3 point belt. -
Page 17: Soft Pad
2.2 Use of soft pad It is only suitable if your child’s weight is less than 13kg, when the child's weight is more than 13kg you must remove the soft pad. Operate step by step : To assemble open the carton and pull the pad out to remove it. To reassemble operate the reverse. - Page 18 2.3 Seat angle adjust The Galahad child seat can be adjust to different angles as below. a. Using one hand, press on the front of the seat and pull back the angle adjust handle. b. Push back and forward towards the direction of the arrow to adjust the angle.
- Page 19 This can provide the effective protection for your child in the event of a collision. The Galahad child seat's harness and headrest height can be adjusted as below; a. Relax the harness before adjusting the height, with one hand press down the center adjuster, at the same time use the other hand to hold the shoulder belt and pull back.
-
Page 20: Use Of Harness
2.5 Use of 5 point harness When your child’s weight is between 0-18kg. Fit your child into the car seat using the 5 point harness. Follow the below steps : a. Relax the harness before adjusting the height, use one hand to press down on the center adjuster, at the same time, us the other hand to hold the shoulder belt and pull back. - Page 21 2.6 Crotch belt adjust The crotch belt is at the rear of the backrest slot. When you feel that the crotch belt is too tight for your child, please adjust as follows: a. Pull up the cover at the front of your seat, Pinch the crotch belt and twist it through to the I shape slot then to the front slot.
- Page 22 d. Adjust the harness and headrest height refer to chaper 2.4. The top of the shoulder belt must be parallel or a little higher than the child’s shoulders. Too high or too low is not permitted. e. Reassemble the buckle until you hear a “click”. f.
-
Page 23: Installation For Group 0+ 0-13Kg (Approx 0-15 Months)
3 Seat installation Important: Check if the vehicle buckle has interference with child seat then try another seat. If this is the case it will not fit well. Please contact our customer service department if you are in any doubt. Always give preference to using the rear seats of your vehicle even if your highway code permits the use on the front seat. - Page 24 "IMPORTANT - DO NOT USE FORWARD FACING BEFORE THE CHILD'S WEIGHT EXCEEDS 9KG. 3.1.1 Seat angle adjust: Refer to chapter 2.3 to adjust the seat to the most reclined position as a.b.c(The 4th position). 3.1.2 Seat installation: d.place the child seat to the rear seat in the vehicle, ensure the bottom of the seat is against the vehicle seat surface, and the front of the seat touches the vehicle seat backrest...
- Page 25 e1. Extend the vehicle belt to it's fullest. Insert it into the slot at the side of the seat, then through to the other side. e2. f. Insert the buckle tongue into the vehicle buckle, and hear a “click’. g1 Insert the diagonal belt into the red belt lock off at the vehicle buckle side,then feed it through the blue belt guide.
- Page 26 h. Pull the diagonal belt at the top of the vehicle buckle to make the belt tight. j1. Then pull the diagonal belt at the top of the seat as indicated. As tight as you can. (Ensure the lock off is unlocked when pulling).
-
Page 27: Installation For Group 1 9-18Kg (Approx 9 Months - 4 Years )
3.2 Installation for Group 1 9-18kg (approx 9month-4years ) "IMPORTANT - DO NOT USE FORWARD FACING BEFORE THE CHILD'S WEIGHT EXCEEDS 9KG. Seat angle adjust: Use as Group 1 at forward facing, The seat angle must at position 1,2,3 see a.b. 3.2.1 Install child seat using vehicle 3 point belt. - Page 28 d1. Extend the vehicle belt to it's fullest. Insert it into the slot at the side of the seat, then through to the other side. d2. Insert the buckle tongue into the vehicle buckle, and hear a “click’. e. Insert the lap belt into the red belt guide on both sides of the seat base.
- Page 29 f. Insert the diagonal belt into the red belt lock off at the vehicle retractor side. g. Pull the diagonal belt at the top of the vehicle buckle to make sure belt is tight. h.Then pull the diagonal belt at the top of the seat as indicated, as tight as you can.
-
Page 30: Install Seat Using Isofix And Top Tether
3.2.2 Install the seat using ISOFIX and Top tether 3.2.2.1 ISOFIX installation a. If your car is not equipped with ISOFIX guides, please use the ISOFIX guides provided. Fix the guide onto the ISOFIX anchorage on the vehicle. Information: ISOFIX anchor is positioned at the interface line between seat surface and backrest surface. - Page 31 d. Hold the child seat by both hands, then put the two ISOFIX connecter slides into the ISOFIX guides, until you hear a 'click' at both sides, then push the seat toward to the vehicle seat backrest. Notice: Only when the ISOFIX lock indicator appears in the green colour, that means it is locked in place.
-
Page 32: Top Tether Installation
3.2.2.2 Top tether installation a. Push down the rear cover button, pick up the top tether and put it in front of the child seat. b. Push down the button on the top tether adjuster and at the same time pull the belt at anchor point side near the child seat to extend the top tether strap. - Page 33 e. Finally check the child seat is fitted stable on the vehicle seat. If you find any shaking, ensure that you tighten the belt again. f. Installation of child: Refer to chapter 2.5-2.7 to fit your child carefully to finish the installation. g1.
-
Page 34: Installation For Group 2 15 -25Kg (Approx 3 - 6 Years)
3.3 Installation for Group 2 15-25kg (approx. 3 - 6 years) Important: Use the 5 point harness to fit your child until the child's weight is greater than 15kg.When your child’s weight is more than 15kg,you can use the vehicle 3 point belt to assemble your child. - Page 35 d.1 Lift out the metal axis and at the same time pull it to the side to get enough space. e. Pull out the shoulder pad rings. f. Same method to pull out the other shoulder pad g. Take out the fabric cover at the front of the seat. h.
-
Page 36: Seat Installation
3.3.2 Seat installation a. It can be used in forward facing position only at Group 2. The seat angle must at posion 1 (most upright). Refer to chapter 2.3 to adjust the seat angle to the right position. b. Put the child seat on to the vehicle seat, make sure the backrest is against the vehicle seat backrest. - Page 37 e. Insert the diagonal belt into the red belt guide on the bottom of the headrest. g. Adjust the vehicle belt’s lab section. it is most important to ensure that any lap strap is worn low down, so that the pelvis is firmly engaged.
-
Page 38: Remove Fabric And Reassemble
4. Remove fabric and reassemble The fabric cover on this seat can be emoved for washing, simply pull out the fringe of the seat. .After washing you can assemble it to the seat again. The seat coveris an integral part of the child car seat, it must not be used without the cover. -
Page 39: Washing And Maintenance
5. Washing and maintenance Check if there is any part missing or broken, if this is the case DO NOT use the seat again. Fabric: Fabric can be washed at less then 30, then dried naturally. Belt and plastic: Wash fabric with warm water and mild soap, do not use solvents or high-potency soap: Do not remove ,move or change fabric and original fabric or any part of the harness. - Page 40 Thank you for purchasing the Galahad car seat. Please take the time to read and understand these instructions fully. Failure to follow these instructions may affect your child's safety. If you are not completely satisfied with the car seat or you...
Need help?
Do you have a question about the GaLaHaD and is the answer not in the manual?
Questions and answers