Advertisement
Table of Contents
- 1 Table of Contents
- 2 Warnings
- 3 Product Composition
- 4 Installation Positions Within the Vehicle
- 5 Setup Within the Vehicle
- 6 Installation in the Vehicle / Group
- 7 Installing the Child Seat
- 8 Installation in the Vehicle / Group 0
- 9 Installation in the Vehicle / Group 1
- 10 Installation in the Vehicle / Group 1
- 11 Adjusting the Seat
- 12 Child Seat Care and Maintenance
- 13 Warranty
- Download this manual
ECE R16 No44/04 Group 0+/1
EST-01A
IsoFix Classification: B1
Euro Stock Traders Ltd
Cozy N Safe
Oxford Street, Wolverhampton, West Midlands, WV14 7DP, U.K.
Tel: +44 (0) 1902 494905
Fax: +44 (0) 1902 490211
Email: info@eurostocktraders.com
Website: www.cozynsafe.com
INSTRUCTION MANUAL
Please read carefully before use.
Advertisement
Table of Contents

Subscribe to Our Youtube Channel
Related Manuals for Cozy N Safe Apollo


Summary of Contents for Cozy N Safe Apollo
- Page 1 ECE R16 No44/04 Group 0+/1 EST-01A IsoFix Classification: B1 Euro Stock Traders Ltd Cozy N Safe Oxford Street, Wolverhampton, West Midlands, WV14 7DP, U.K. Tel: +44 (0) 1902 494905 Fax: +44 (0) 1902 490211 Email: info@eurostocktraders.com Website: www.cozynsafe.com INSTRUCTION MANUAL...
-
Page 2: Table Of Contents
CONTENTS COZY N SAFE GROUP 0+/1 CAR SEAT INSTRUCTION MANUAL From Birth to 18kg ( Birth - 4 years approx.) Warnings 03-04 Product composition 05-06 Installation positions within the vehicle Setup within the vehicle Installation in the vehicle / Group 0+ 09-12 5.1. -
Page 3: Warnings
1. WARNINGS 1. WARNINGS Please read carefully before installing the child seat in the vehicle. Ensure that no part of the child seat is caught in the door of the vehicle or in a reclining seat. In addition, ensure that the safety This child safety seat is suitable for use as group 0+/1 seat is correctly installed and secured. -
Page 4: Product Composition
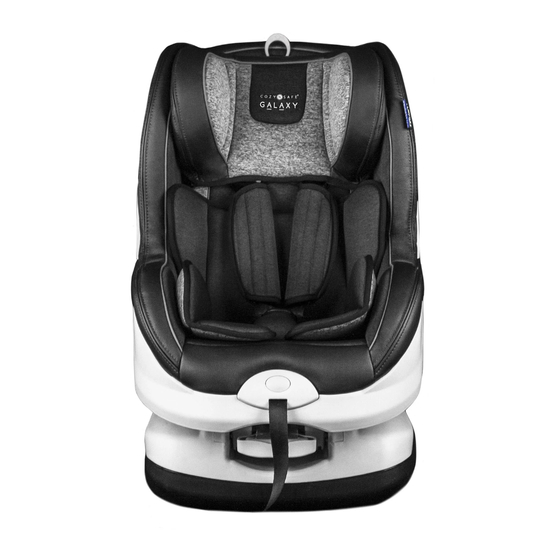
2. PRODUCT COMPOSITION 2. PRODUCT COMPOSITION Top tether hook Upper belt guider Headrest height adjuster Shoulder pads Top tether adjuster 5-point harness buckle Lock-off Center adjuster device Headrest Harness adjustment strap ISOFIX connector Seat Shaft recline Below belt guider lever ISOFIX connector release button 0+ base... -
Page 5: Installation Positions Within The Vehicle
3. INSTALLATION POSITIONS WITHIN THE VEHICLE 4. SETUP WITHIN THE VEHICLE Place the child seat in the rear of the vehicle, facing away from the direction of travel(group 0) or facing forward(group1). Facing the direction of travel (group 1) Facing away from the direction of travel (group 0+) The child seat must be as closely attched to the vehicle's seat as possible. -
Page 6: Installation In The Vehicle / Group
5. INSTALLATION IN THE VEHICLE / GROUP 0+ 5. INSTALLATION IN THE VEHICLE / GROUP 0+ Pull away the seat shell away from the seat base, insert 5.1 INSTALLING THE CHILD SEAT 3-point seatbelt through seat shell and seat base.(fig.5) ONLY GROUP 0+ From Birth to 13kg (9 months to 13kg approx.) Abdomen part of the 3-point seatbelt go through two below... - Page 7 5. INSTALLATION IN THE VEHICLE / GROUP 0+ 5. INSTALLATION IN THE VEHICLE / GROUP 0+ 5.2 FASTENING THE CHILD INTO THE CHILD SEAT The correct adjustment of the headrest ensures that the child is properly fastened into the car seat. The headrest must be adjusted so that the harness(which moves with the headrest) is at shoulder height on the child or slightly above, but never behind the back or at the ear level (fig1)
-
Page 8: Installation In The Vehicle / Group 0
6. INSTALLATION IN THE VEHICLE / GROUP 1 6. INSTALLATION IN THE VEHICLE / GROUP 1 6.1 ONLY GROUP 1 6.1.3 INSTALLING THE TOP TETHER From 9kg to 18kg (9 months to 4 years approx.) Take the top tether and if required, lengthen the belt by 6.1.1 CHILD SEAT INSTALLATION(USE ISOFIX SYSTEM) pressing the top tether brake button to release the strap, pulling to adjust as necessary(fig6) -
Page 9: Installation In The Vehicle / Group 1
6. INSTALLATION IN THE VEHICLE / GROUP 1 6. INSTALLATION IN THE VEHICLE / GROUP 1 6.3 FASTENING THE CHILD INTO THE CHILD SEAT 6.2 CHILD SEAT INSTALLATION (USE 3-POINT SEATBELT) Only group 1 from approx. 9 months to 4 years of age (9-18kg) The correct adjustment of the headrest ensures that the child is properly fastened into the car seat. -
Page 10: Adjusting The Seat
6. INSTALLATION IN THE VEHICLE / GROUP 1 8. CHILD SEAT CARE AND MAINTENANCE 8.1 REMOVE THE COVER FOR CLEANING The car seat cover is removable and washable. In case of light staining, clean using a damp cloth or soapy water. -
Page 11: Warranty
9. WARRANTY We guarantee our products against any manufacturer defect for a period of 1 year, starting from the day of purchase. The warranty does not cover defects or failures caused by inappropriate use or non-compliance with the installation and maintenance safety standards described in the instruction guides provided with our products.
Need help?
Do you have a question about the Apollo and is the answer not in the manual?
Questions and answers