
Related Manuals for Cozy N Safe EST-229


Summary of Contents for Cozy N Safe EST-229
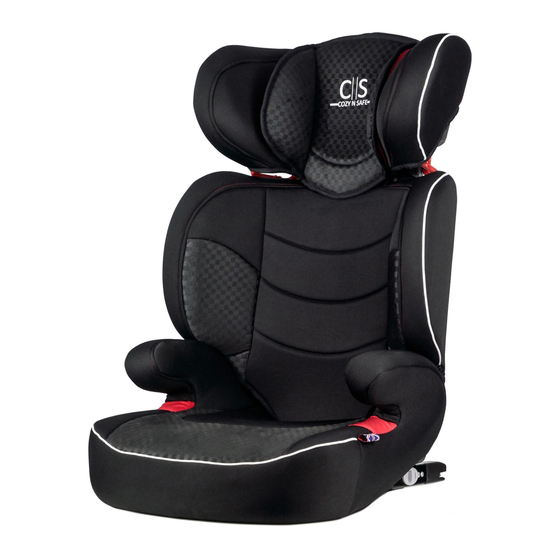
- Page 1 E S T - 2 2 9 G r o u p 2 / 3 1 5 k g t o 3 6 k g ( A p p r o x i m a t e l y 4 y e a r s - 1 1 y e a r s )
-
Page 2: Table Of Contents
E S T - 2 2 9 C a r S e a t Contents 1. Vital information-READ NOW.........4-5 Group 2, 3 2. Safety instruction............6 3. Using car seat in this way..........6-7 4. Parts and interior equipment..........8 Thank you for purchasing this group 2, 3 car seat. If you 5. -
Page 3: Vital Information-Read Now
1. Vital information-READ NOW Notice For your child’s safety,please read these instructions carefully before use and keep 1. This is a universal”and semi-universal child restraint,it is approved to “ “ ” them for future reference.Failure to follow the instructions contained in this manual Regulation NO.44,04 series of amendments,for general use in vehicles and could result in serious injury to your child. -
Page 4: Safety Instruction
10.Any luggage or other objects liable to cause injuries in the event of a collision 2. Safety instruction should be properly secured. 11.The rigid items and plastic parts of a child restraint must be so located and installed Only suitable if the approved vehicles are that they are not liable,during everyday use of the vehicle to become trapped by a fitted with 3 point safety-belts,approved moveable seat or in a door of the vehicle. -
Page 5: Parts And Interior Equipment
4. Parts and interior equipment 3.1 Please carefully implement the Country Traffic Safety Regulations ● Do not install the child safety seat on a front seat with an airbag. ● Please read the vehicle instruc�on manual carefully on how to use the airbag. Headrest Height adjuster NO T IC E... -
Page 6: Assembling The Seat
5. Assembling the seat Step 3: Gently keep pressure on hooks as you lift backrest up. Step 1: Align base and backrest in a straight line. WARNING: DO NOT FORCE MAY CAUSE DAMAGE. Step 2: Place the hooks inside the base securely. -
Page 7: Installation Of The Seat
6. Installation of the seat Suitable for the child from 15 to 36kgs(4-11years) Step 2: Place the child car seat on 6.1 3-point car seat belt installation the vehicle's seat. Step1: Press the button on the bottom and turn EZFix connector to hide. Step 3: Follow the B4 routine to install the child car seat. - Page 8 Step 4: Put the child in the seat and follow B4 routine. Too high Right Too low Step 6: Fasten car seat belt and make sure,it is tight enough. Step 5: Adjust the height of headrest and belt slot to suitable height of child(B6、...
-
Page 9: Ezfix Installation
6 . 2 E Z F ix in s t a lla t io n Step 2: Turn EZFix connector to Step 1: Turn the seat to the 180 degrees.(C3) bottom and pull out EZFfix connector.(C1、 C2) Step 3: Find out EZFix connections in the car. - Page 10 Step 4: Insert ix guide into Step 6: Ensure that the EZFix locking EZFix connection system turns green to confirm that the child seat is firmly connected. Step 5: Place the child car seat on the vehicle seat and push back in Step 7: Put the child onto the child the direction of the EZFix guides.
- Page 11 Step 8: Pull car seat belt following the belt route and lock. Too high Right Too low Step 10: Fasten car seat belt and make sure, it is tight enough. Step 9: Adjust the height of headrest and belt slot to a suitable height for the child.(C10,C11) Notice: If car seat belt is too long, it is NOT suitable to tighten the...
-
Page 12: Remove The Cover
7. R emove the cover Step 11: To release the child car seat pull on the locking mechanism.when you hear a “Click”and the indicator Step 1: Turn the seat to the back turns red and the EZFix connector has and unlock the snap fastener. been released.Then pull your child car seat forward. - Page 13 Step 5: Take off the fabric cover. Step 3:Remove the elastic loops Follow in reverse order and attaching the fabric cover. repeat the procedure to put the fabric cover back on. Pull all directions to take Step 4: out the cover (D4).
-
Page 14: Maintenance And Cleaning
8. M aintenance and cleaning 8.1 Daily maintenance 1. Ensure to periodically check the child seat during daily use.The child seat should be replaced after an accident. 2. Please keep this child seat in a dry and ventilated place to avoid damp mold. 3.
Need help?
Do you have a question about the EST-229 and is the answer not in the manual?
Questions and answers