Advertisement
Available languages
Available languages
Quick Links
IB519101EN
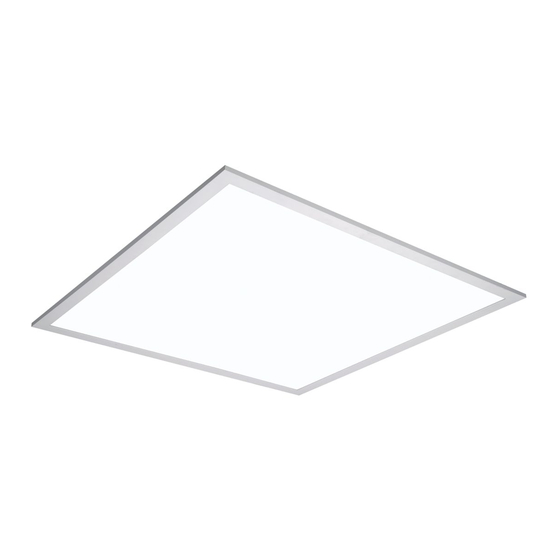
Installation Instructions – FPX Surface Kit
Instructions d'installation – Trousse de panneau plat à montage en
surface
Instrucciones de instalación – Kit de superficie de panel FPX
Risk of Fire, Electrical Shock, Cuts or other Casualty Hazards- Installation and maintenance of this
product must be performed by a qualified electrician. This product must be installed in accordance
with the applicable installation code by a person familiar with the construction and operation of
the product and hazards involved.
Risk of Fire and Electric Shock- Make certain power is OFF before starting installation or
attempting any maintenance. Disconnect power at fuse or circuit breaker.
Risk of Fire- Minimum 90°C supply conductors.
Risk of Burn- Disconnect power and allow fixture to cool before handling or servicing.
Risk of Personal Injury- Due to sharp edges, handle with care.
Failure to comply with these instructions may result in death, serious bodily injury and property
damage.
DISCLAIMER OF LIABILITY: Eaton assumes no liability for damages or losses of any kind that may arise from the
improper, careless, or negligent installation, handling or use of this product.
IMPORTANT: Read carefully before installing fixture. Retain for future reference.
NOTICE: Green ground screw provided in proper location. Do not relocate.
NOTICE: Fixture may become damaged and/or unstable if not installed properly.
Specifications and dimensions subject to change without notice.
N
ote:
ATTENTION Receiving Department: Note actual fixture description of any shortage or noticeable damage on
delivery receipt. File claim for common carrier (LTL) directly with carrier. Claims for concealed damage must be
filed within 15 days of delivery. All damaged material, complete with original packing must be retained.
WARNING
Brand Logo
reversed out of
black
Metalux
INS #
INS #
Advertisement

Related Manuals for Eaton Metalux FPX


Summary of Contents for Eaton Metalux FPX
- Page 1 Failure to comply with these instructions may result in death, serious bodily injury and property damage. DISCLAIMER OF LIABILITY: Eaton assumes no liability for damages or losses of any kind that may arise from the improper, careless, or negligent installation, handling or use of this product.
- Page 2 (sold separately). Ensure the box is kept Use included screw to fasten frame pieces together to square when mounting. form a corner. (Figures 3 & 4.) The spacing for the mounting holes is 16” center-to- center. (Figure 6.) Figure 3. Figure 6. EATON IB519101EN Installation instructions...
-
Page 3: Install Fixture
Slide adjacent frame into place so that the clearance holes line up with those in the L - bracket. (Figure 11.) Figure 8. Reinstall the removed frame piece with the retained screws to complete the installation. (Figure 9.) Figure 11. EATON IB519101EN Installation instructions... - Page 4 Slide fixture into channel of surface box and use included screws to fasten final frame piece into place. ote: Fastening frame pieces varies slightly, depending on which piece you are installing. Reference the figures 14 & 15 below for details on installment. Figure 16. EATON IB519101EN Installation instructions...
- Page 5 Clip carabiners to slots in surface mount box. (Figure 17 .) Refer to instructions included with the suspension kit for adjusting vertically and laterally. Refer to Flat Panel instruction sheet for wiring the fixture. Figure 17. EATON IB519101EN Installation instructions...
-
Page 6: Assemblage Du Cadre
La désobéissance aux instructions suivantes représente un risque de blessures graves ou mortelles et de dommages matériels. EXONÉRATION DE RESPONSABILITÉ : Eaton n’assume aucune responsabilité pour les dommages ou pertes de toute nature pouvant découler d’une installation inappropriée, imprudente ou négligente et d’une mauvaise manipulation ou utilisation de ce produit. - Page 7 L ’espace des trous de montage est de 40,6 cm (16 po), de centre à centre. (Figure 6.) Figure 3. Figure 4. Figure 6. Répétez ces étapes pour former les trois (3) autres coins du cadre à monter en surface. (Figure 5.) Figure 5. EATON IB519101EN Instructions d’installation...
- Page 8 Glissez le cadre adjacent en place de manière à ce que les espaces de trous s’alignent avec ceux du support en L. (Figure 11.) Figure 8. Réinstallez la pièce du cadre retirée avec les vis conservées pour terminer l’installation. (Figure 9.) Figure 11. EATON IB519101EN Instructions d’installation...
- Page 9 Le nombre de pièces du cadre à installer peut varier légèrement compte tenu de la pièce que vous installez. Consultez les figures 14 et 15 ci-dessous pour voir les détails de réinsertion. Figure 16. EATON IB519101EN Instructions d’installation...
- Page 10 (Figure 17 .) Consultez les instructions fournies avec la trousse de montage en suspension pour effectuer l’alignement vertical et latéral. Consultez la feuille d’instructions du panneau plat pour effectuer le câblage du luminaire. Figure 17. EATON IB519101EN Instructions d’installation...
- Page 11 El incumplimiento de estas instrucciones puede ocasionar la muerte, lesiones corporales graves y daños a la propiedad. RENUNCIA DE RESPONSABILIDAD: Eaton no asume ninguna responsabilidad por daños o pérdidas de ningún tipo que puedan surgir por la instalación, manipulación o uso inadecuado, descuidado o negligente de este producto.
- Page 12 Montaje de la caja en el cielo raso: IMPORTANTE: Asegúrese de que el cielo raso pueda soportar hasta 10 libras para 2x2/1x4 y 20 libras para 2x4. Figura 7. Ubique la caja en la superficie y marque los orificios de montaje. EATON IB519101EN Instrucciones de instalación...
- Page 13 (Figura 9.) Figura 10. Deslice el marco adyacente en su lugar para que los orificios de separación se alineen con los del soporte en L. (Figura 11.) Figura 9. Figura 11. EATON IB519101EN Instrucciones de instalación...
- Page 14 Las piezas del marco de fijación varían ligeramente, según la pieza que esté instalando. Consulte las figuras 14 y 15 a continuación para obtener detalles sobre la instalación. Figura 16. EATON IB519101EN Instrucciones de instalación...
- Page 15 Sujete los mosquetones a las ranuras en la caja de montaje en superficie. (Figura 17 .) Consulte las instrucciones incluidas con el kit de suspensión para ajustar verticalmente y lateralmente. Consulte la hoja de instrucciones del panel plano para cablear la luminaria. Figura 17. EATON IB519101EN Instrucciones de instalación...
- Page 16 Warranties and Limitation of Liability Please refer to www.eaton.com/LightingWarrantyTerms for our terms and conditions. Garanties et limitation de responsabilité Veuillez consulter le site www.eaton.com/LightingWarrantyTerms pour obtenir les conditions générales. Garantías y Limitación de Responsabilidad Visite www.eaton.com/LightingWarrantyTerms para conocer nuestros términos y condiciones.
Need help?
Do you have a question about the Metalux FPX and is the answer not in the manual?
Questions and answers