Table of Contents
Advertisement
Quick Links
Advertisement
Table of Contents

Subscribe to Our Youtube Channel
Related Manuals for Summit SP7D2


Summary of Contents for Summit SP7D2
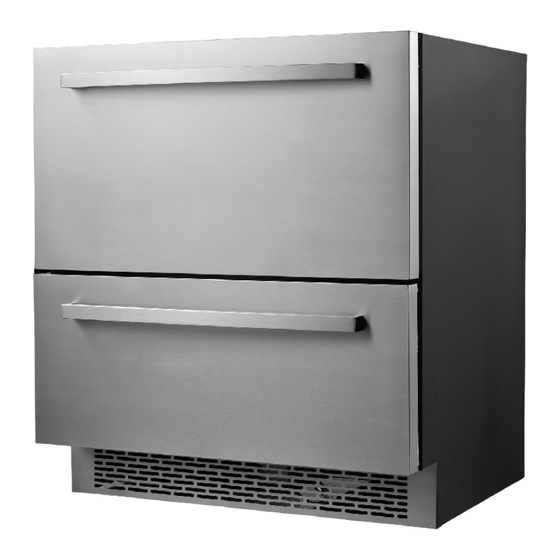
- Page 1 DRAWER REFRIGERATOR Model: SP7D2 Owner’s Manual BEFORE US E, PLEAS E READ AND FOLLOW ALL SAFETY RULES AND OP ERATING INSTRUCTIONS FELIX STORCH, INC. Summit Appliance Division Write the Serial Number here: 770 Garrison Avenue _______________________ Bronx, NY 10474 www.summitappliance.com...
-
Page 2: Table Of Contents
TABLE OF CONTENTS Important Safeguards ................2 - 3 Technical Information ..................4 Location of Parts ....................4 Installation Instructions ................5 - 12 Before Using Your Refrigerator ..............5 Installation of Your Refrigerator ............5 - 6 Cutout Dimensions ..................7 Drawers .................... -
Page 3: Important Safeguards
IMPORTANT SAFEGUARDS Before the appliance is used, it must be properly positioned and installed as described in this manual, so read the manual carefully. To reduce the risk of fire, electrical shock or injury when using the appliance, follow basic prec autions, including the following: •... - Page 4 • Replacing component parts and servicing shall be done by factory authorized service personnel so as to minimize the risk of possible ignition due to incorrect parts or improper service. DANGER: Risk of child entrapment! Child entrapment and suffocation are not problems of the past. Junked or abandoned appliances are still dangerous…even if they will “just sit in the garage a few days”.
-
Page 5: Technical Information
TECHNICAL INFORMATION Model SP7D2 Type Drawer refrigerator Color Black with SS drawers Rated Voltage 115V / 60Hz Rated Current 1.6A Power Input 100W Power of Heater 160W Refrigerant R600a (1.52 oz.) Defrost Type Automatic Net Weight 117 lbs. Unit Dimensions 29.5”W x 22.8”D x 33.5”H... -
Page 6: Installation Instructions
INSTALLATION INSTRUCTIONS Before Using Your Refrigerator 1. Remove the exterior and interior packing. CAUTION: After unpacking and before connecting the appliance to the power source, you MUST allow this appliance to stand upright for at least 2 hours to allow the lubricant and refrigerant to drain back into the compressor and stabilize. - Page 7 c. Push the appliance into its place of installation. d. If the unit is not stable, pull out the appliance and repeat the previous step until the unit is stable.
-
Page 8: Cutout Dimensions
Cutout Dimensions PREPARE SITE Your product has been designed exclusively for a built-in installation. When built-in, your unit does not require additional air space for top, sides, or rear. However, the front grille (ventilator slits at base) must NOT be obstructed. The unit is engineered with a variety of adjustment features to help ensure a seamless installation. -
Page 9: Drawers
Drawers Checking Drawer Alignment The unit’s drawers are aligned at the factory before shipment. However, their alignment could have been disturbed during shipment or during overlay panel installation. Check each drawer to confirm that it is aligned: • Side-to-Side — When viewed from the top, the drawer front should be square with the sides of the cabinet. - Page 10 Notice: Drawer adjustments are made by moving the slide that carries the drawer’s rail. Minor adjustments may be made by loosening one of the slide’s mounting screws, adjusting the slide and retightening the screw. Major adjustments may be made by removing the slides’ mounting screws, drilling new mounting holes and remounting the slide.
- Page 11 1. Remove the slide’s mounting screws. 2. Reposition the slide so it is the same distance from the front of the liner as the other slide. Measure to confirm. 3. Mark new drilling holes using different sets of mounting holes on the slide. Note: Front location holes are shown.
- Page 12 Major Adjustment: Note: The slides have extra mounting holes that may be used. 1. Loosen one slide’s rear mounting screws. 2. Remove the slide’s front mounting screws. 3. Reposition the slide so it is level. 4. Mark new front drilling holes using a different set of mounting holes on the slide. 5.
- Page 13 Major Adjustment: Note: The slides have extra mounting holes that may be used. 1. Remove one slide’s mounting screws. 2. Reposition the slide so it is the same distance from the bottom of the liner as the other slide. Measure to confirm.
-
Page 14: Operating Your Appliance
OPERATING YOUR APPLIANCE Control Panel The appliance should be placed where the ambient temperature is between 41 and 90°F (5 to 32°C). If the ambient temperature is above or below this range, the performance of the unit may be affected. For example, placing your unit in extremely cold or hot conditions may cause interior temperature to fluctuate. -
Page 15: Defrosting
Defrosting The appliance’s refrigeration system is equipped with an automatic defroster. During the process of defrosting, the temperature display may be higher than the set temperature. NOTES: • If the unit is unplugged, turned off or if there is a power failure, you must wait 3 to 5 minutes before restarting the unit. -
Page 16: Care And Maintenance
CARE AND MAINTENANCE Cleaning Your Appliance For hygienic reasons the appliance’s interior, including interior accessories, should be cleaned regularly. Warning! • The appliance must not be connected to the power supply during cleaning. Danger of electrical shock! Before cleaning switch the appliance off and disconnect the plug, or switch off or turn off the circuit breaker or fuse. -
Page 17: Energy-Saving Tips
Energy-Saving Tips • Do not install the appliance near ovens, radiators or other sources of high heat. High ambient temperatures cause longer, more frequent operation of the compressor. • Ensure sufficient air circulation and exhaust at the appliance base and at the back wall of the appliance. -
Page 18: Problems With Your Appliance
PROBLEMS WITH YOUR APPLIANCE You can solve many common drawer refrigerator problems easily, saving you the cost of a possible service call. Try the suggestions below to see if you can solve the problem before calling the servicer. TROUBLESHOOTING GUIDE PROBLEM POSSIBLE CAUSE Not plugged in. - Page 19 NOTES...
-
Page 20: Limited Warranty
LIMITED WARRANTY ONE-YEAR LIMITED WARRANTY Within the 48 contiguous United States, for one year from the date of purchase, when this appliance is operated and maintained according to instructions attached to or furnished with the product, warrantor will pay for factory-specified parts and repair labor to correct defects in materials or workmanship.
Need help?
Do you have a question about the SP7D2 and is the answer not in the manual?
Questions and answers