Table of Contents
Advertisement
Quick Links
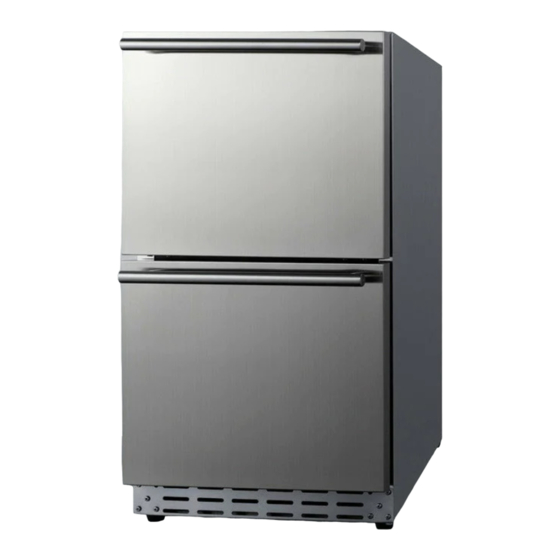
FROST-FREE DRAWER REFRIGERATOR
BEFORE USE, PLEASE READ AND FOLLOW ALL SAFETY RULES AND OPERATING INSTRUCTIONS.
Write Model and Serial Numbers here:
Model No.:
Serial No.:
ADRD18
ADRD18OS
FF182D
User Manual
SPR182DOS
LX182D
LX182DADA
LX182DOS
Felix Storch, Inc.
An ISO 9001:2015 registered company
770 Garrison Ave
Bronx, New York 10474
www.summitappliance.com
Advertisement
Table of Contents

Summary of Contents for Summit ADRD18
- Page 1 FROST-FREE DRAWER REFRIGERATOR ADRD18 SPR182DOS LX182D ADRD18OS FF182D LX182DADA LX182DOS User Manual BEFORE USE, PLEASE READ AND FOLLOW ALL SAFETY RULES AND OPERATING INSTRUCTIONS. Write Model and Serial Numbers here: Felix Storch, Inc. An ISO 9001:2015 registered company Model No.:...
-
Page 2: Table Of Contents
TABLE OF CONTENTS Appliance Safety Important Safeguards Location of Parts Installation Instructions Before Using the Appliance Installation of your Appliance Electrical Connection Anti-tip Bracket Installation Installation of the Handle Panel Ready Installation Operating your Appliance 9-11 Control Panel ON/OFF Power / Mute Setting the Temperature Temperature Alarm Function 9-10... -
Page 3: Appliance Safety
APPLIANCE SAFETY Your safety and the safety of others are very important. We have provided many important safety messages in this manual and on your appliance. Always read and obey all safety messages. This is the Safety Alert Symbol. The symbol alerts you to potential hazards that can kill or injure you and others. - Page 4 Air the room in which the appliance is located for several minutes, and Contact the Service Department for advice. • The more coolant there is in an appliance, the larger the room in which it should be installed. In the event of a leakage, if the appliance is in a small room, there is the danger of combustible gases building up.
-
Page 5: Location Of Parts
LOCATION OF PARTS CALIFORNIA CARB/SNAP DISCLOSURE This product uses eco-friendly hydrocarbon refrigerant and fully complies with California CARB regulations. However, we are required by California law to provide the following disclosure statement in every product sold in California: "This equipment is prohibited from use in California with any refrigerants on the 'List of Prohibited Substances' for that specific end-use, in accordance with California Code of Regulations, title 17, section 95374. -
Page 6: Installation Instructions
INSTALLATION INSTRUCTIONS Before Using Your Appliance • Remove the exterior and interior packing. • Before connecting the appliance to the power source, let it stand upright for approximately 2 hours. This will reduce the possibility of a malfunction in the cooling system from handling during transportation. -
Page 7: Anti-Tip Bracket Installation
The appliance should always be plugged into its own individual electrical outlet, which has a voltage rating that matches the rating label on the appliance. This provides the best performance and prevents overloading house wiring circuits, which could cause a fire hazard from overheating. Never unplug the appliance by pulling on the power cord. -
Page 8: Installation Of The Handle
Installation of the Handle To install the handle, please follow these instructions: 1. Carefully pull the door gasket (seal) away from the door in the area where the handle will be attached. 2. Place the handle over the screw holes on the outside of the door. The screws will attach through the back of the drawer front. -
Page 9: Operating Your Appliance
4. Set the panel against the drawer front, and secure it to the bottom of the drawer, with screws. Then, install the handle onto the drawer, through the panel. OPERATING YOUR APPLIANCE The appliance should be placed where the ambient temperature is between 10~38°C (50~100°F). If the ambient temperature is above or below this range, the performance of the appliance may be affected. -
Page 10: Setting The Temperature
Setting the Temperature • Adjustable temperature: 1°C to 18°C (34°F to 65°F) • Set the desired temperature by pressing the corresponding buttons, to increase or decrease. Each press is a 1-degree increment. Once released, the set temperature will flash for approximately 5 seconds then revert back to display the internal temperature. -
Page 11: Eco Mode
ECO Mode • Press and hold the button for 3 seconds, it can enter or exit ECO mode. • In this mode, the interior LED light, the compressor indicator and the temperature value on the display panel will be turned off and the ° will illuminate on the upper left corner of °C / °F. Demo Mode •... -
Page 12: Care And Maintenance
CARE AND MAINTENANCE Cleaning Your Appliance • Turn off the power, unplug the appliance, and remove all items. • Wash the inside surfaces with a warm water and baking soda solution. The solution should consist of about 2 tablespoons of baking soda to a quart of water. •... -
Page 13: Troubleshooting
TROUBLESHOOTING You can solve many common problems easily, saving you the cost of a possible service call. Try the suggestions below to see if you can solve the problem before calling the servicer. PROBLEM POSSIBLE CAUSE REMEDY Appliance does The appliance defrosts automatically in Connect the appliance. -
Page 14: Limited Warranty
LIMITED WARRANTY ONE-YEAR LIMITED WARRANTY Within the 48 contiguous United States, for one year from the date of purchase, when this appliance is operated and maintained according to instructions attached to or furnished with the product, warrantor will pay for factory-specified parts and repair labor to correct defects in materials or workmanship. Service must be provided by a designated service company.


Need help?
Do you have a question about the ADRD18 and is the answer not in the manual?
Questions and answers