Table of Contents
Advertisement
Advertisement
Table of Contents

Related Manuals for Summit SPR625OS


Summary of Contents for Summit SPR625OS
-
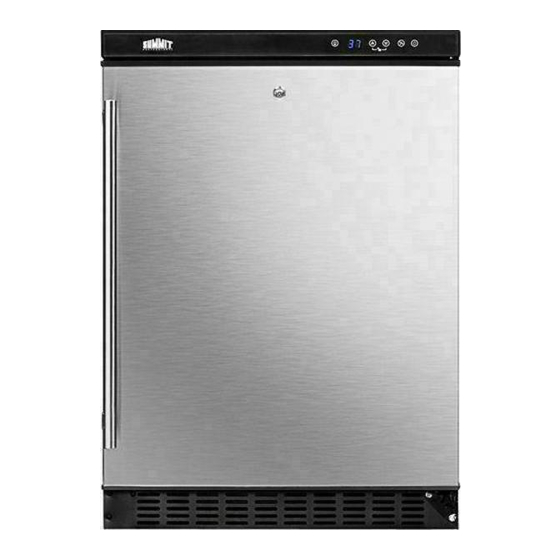
Page 1: Outdoor Refrigerator
OUTDOOR REFRIGERATOR Models SPR625OS/SPR625OSCSS Owner's Manual BEFORE USE, PLEASE READ AND FOLLOW ALL SAFETY RULES AND OPERATING INSTRUCTIONS. Felix Storch, Inc. Write Serial No. (on back of unit) here: 770 Garrison Avenue Bronx, NY 10474 ________________________________ www.summitappliance.com... -
Page 2: Table Of Contents
TABLE OF CONTENTS Appliance Safety Important Safeguards Location of Parts Installation Instructions Before Using Your Appliance Installation of Your Appliance Electrical Connection Extension Cord Reversing the Door Swing of Your Appliance Installing the Stainless Steel Handle Operating Your Appliance Control Panel ON/OFF Power Key Lock Setting the Temperature Control... -
Page 3: Appliance Safety
APPLIANCE SAFETY Your safety and the safety of others are very important. We have provided many important safety messages in this manual and on your appliance. Always read and obey all safety messages. This is the Safety Alert Symbol. The symbol alerts you to potential hazards that can kill or injure you and others. -
Page 4: Risk Of Child Entrapment
Do not attempt to repair or replace any part of your appliance unless it is specifically recommended in this manual. All other servicing should be referred to a qualified technician. FOLLOW WARNING CALLOUTS BELOW ONLY WHEN APPLICABLE TO YOUR MODEL ... -
Page 5: Location Of Parts
LOCATION OF PARTS LED Light Led Light Digital Control Panel Security Lock Shelf Door Stainless Steel Door Bottom Grille Stainless Steel Handle Handle Adjustable Legs INSTALLATION INSTRUCTIONS BEFORE USING YOUR APPLIANCE Remove the exterior and interior packing. Before connecting the appliance to the power source, let it stand upright for approximately 2 hours. This will reduce the possibility of a malfunction in the cooling system from handling during transportation. -
Page 6: Electrical Connection
For free standing installation, 5 inches (127mm) of space between the back and sides of the unit are suggested, which allows the proper air circulation to cool the compressor and condenser. Even for built-in installation, it is a must to keep ¼” (6.35mm) space on each side and at the top. Take care that the air vent at the front of the appliance is never covered or blocked in any way. -
Page 7: Reversing The Door Swing Of Your Appliance
REVERSING THE DOOR SWING OF YOUR APPLIANCE This unit has the capability of the door opening from either the left or right side. The unit is delivered to you with the door opening from the left side. Should you desire to reverse the opening direction, please follow the reversal instructions shown below. -
Page 8: Installing The Stainless Steel Handle
INSTALLING THE STAINLESS STEEL HANDLE This appliance includes a stainless steel handle that is not required to operate the unit. To install the handle, follow the instructions below: 1. Using a screwdriver to remove the screws on the side of door where the handle is to be installed. -
Page 9: Interior Light
The range of the temperature control is from 34°F to 43°F. To view the set temperature at any time, touch the UP or DOWN symbol. The set temperature will flash in the display window for 5 seconds. After 5 seconds, the temperature inside the unit will reappear in blue in the display window. -
Page 10: Care And Maintenance
CARE AND MAINTENANCE CLEANING YOUR APPLIANCE Turn off the power, unplug the appliance, and remove all items, including shelves. Wash the inside surfaces with a solution of warm water and baking soda (about 2 tablespoons of baking soda to a quart of water). ... -
Page 11: Troubleshooting
TROUBLESHOOTING You can solve many common problems easily, saving you the cost of a possible service call. Try the suggestions below to see if you can solve the problem before calling a service technician. Troubleshooting Guide PROBLEM POSSIBLE CAUSE Not plugged in. The unit does not operate. -
Page 12: Limited Warranty
LIMITED WARRANTY ONE-YEAR LIMITED WARRANTY Within the 48 contiguous United States, for one year from the date of purchase, when this appliance is operated and maintained according to instructions attached to or furnished with the product, warrantor will pay for factory-specified parts and repair labor to correct defects in materials or workmanship. Service must be provided by a designated service company.
Need help?
Do you have a question about the SPR625OS and is the answer not in the manual?
Questions and answers