
Related Manuals for Jensen JBS-215


Summary of Contents for Jensen JBS-215
- Page 1 Wall Mountable Bluetooth Music System with CD MODEL: JBS-215 USER MANUAL PLEASE READ THIS USER MANUAL COMPLETELY BEFORE OPERATING THIS UNIT AND RETAIN THIS BOOKLET FOR FUTURE REFERENCE...
-
Page 2: Important Safety Instructions
WARNING TO PREVENT FIRE OR SHOCK HAZARD, DO NOT USE THIS PLUG WITH AN EXTENSION CORD, RECEPTACLE OR OTHER OUTLET UNLESS THE BLADES CAN BE FULLY INSERTED TO PREVENT BLADE EXPOSURE. TO PREVENT FIRE OR SHOCK HAZARD, DO NOT EXPOSE THIS APPLIANCE TO RAIN OR MOISTURE. The Rating plate is located at the back enclosure of the apparatus IMPORTANT SAFETY INSTRUCTIONS Read these instructions. - Page 3 16. Use replacement part as specified by the manufacturer. 17. Upon completion of any service or repairs to this product, ask the service technician to perform safety checks. 18. Power Sources - This product should be operated only from the type of power source indicated on the marking label.
-
Page 4: Compliance With Fcc Regulations
COMPLIANCE WITH FCC REGULATIONS FCC ID: 2AYB7696812B This device complies with Part 15 of the FCC Rules. Operation is subject to the following two conditions: (1) This device may not cause harmful interference, and (2) This device must accept any interference received, including interference that may cause undesired operation. -
Page 5: Protect Your Furniture
The serial number of this product is found on its back cover. You should note the serial number of this unit in the space provided as a permanent record of your purchase to aid in identification in the event of theft of loss. Model Number: JBS-215 Serial Number:... -
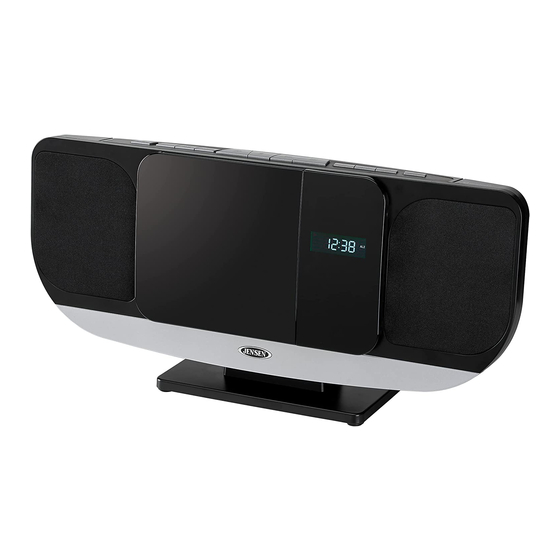
Page 6: Location Of Controls
LOCATION OF CONTROLS Top View Rear View MEM/ SLEEP/ AL1/ AL 2/ CLK SET/ DIMMER PLAY MODE PAIR/SCAN VOLUME VOLUME PROG OPEN/CLOSE SOURCE CHARGING DC IN ANT. 9 10 11 12 Front View 18 19 20 21 22 MP 3 MP 3 USB WMA REP1ALL FOLDER USB WMA REP1ALL FOLDER... -
Page 7: Installation Options
INSTALLATION OPTIONS ATTACHING THE STAND Align the brackets located on top of the stand with the 2 mounting rails located on the bottom of the main unit. The notch in the stand will be facing the back of the unit. Slide the stand on the 2 mounting rails forward until it locks in place. -
Page 8: Getting Started
GETTING STARTED AC POWER OPERATION The JBS-215 operates on 120V~ 60Hz AC power using the included AC-DC Adaptor with the output of DC 5V Firmly and securely insert the DC plug of the adaptor into the DC Jack on the back of the unit. -
Page 9: Standby Mode
STANDBY MODE Standby Mode is when the unit is first plugged into an AC power source (display flashing), or after all the settings have been made and the time is showing on the display. The radio, CD player, Bluetooth and Aux-in modes are all off, no buttons are pressed and no alarms are sounding. -
Page 10: Alarm Operation
ALARM OPERATION The JBS-215 features a dual alarm clock. Make sure the clock is set prior to setting the alarms. Setting the alarms In standby mode, press and hold the ALARM 1 BUTTON (#10), the AL1 icon will light and the hour of the alarm time will flash. - Page 11 Wake to CD Music • The CD Player will automatically turn on at the preset volume level when the alarm time is reached. The corresponding AL1 or AL2 icon will flash. • The unit will play the first track of CD disc in the CD compartment. •...
-
Page 12: Radio Operation
RADIO OPERATION Tap the POWER/ SOURCE BUTTON (#1) to turn on the unit. Tap the POWER/ SOURCE BUTTON (#1) repeatedly to select FM mode, the frequency will show on the LCD DISPLAY (#15) instead of the time. Manual tuning: Repeatedly tap the TUN- BUTTON (#5)/TUN+ BUTTON (#8) to manually adjust the frequency. -
Page 13: Bluetooth Operation
Turn on the Bluetooth function of your device and enable the search or scan function to find the JBS-215. Select JBS-215 from the device list when it appears on your device screen. If required, enter the pass code “0000” to pair (link) JBS-215 with your device. - Page 14 Tap the POWER/ SOURCE BUTTON (#1) to turn on the unit. Tap the POWER/ SOURCE BUTTON (#1) repeatedly to select the CD mode. Press OPEN/CLOSE BUTTON (#12) to open the CD door and carefully place an audio CD / MP3 CD with its label side upward in the CD compartment and press OPEN/CLOSE BUTTON (#12) to close the CD door.
-
Page 15: Aux In Operation
Notes: • If you connect the JBS-215 to the Line-Out Jack of your external device, you only need to adjust the VOLUME CONTROL of your JBS-215. If you connect to the Headphone Jack of your external device, you may need to adjust both the volume controls of your external device and the JBS-215 to obtain the desirable listening level. -
Page 16: Dimmer Operation
PRESET EQ This unit provides 5 different EQ modes to enhance your listening experience. You can select the desired effect by tapping the EQ Button (#9) on the top of the main unit or on the remote repeatedly. FLAT ROCK CLASSIC JAZZ Note: There is no indication on the display when the EQ set to FLAT. -
Page 17: Resetting The Unit
RESETTING THE UNIT If the system does not respond or has erratic operation, you may have experienced an electrostatic discharge (ESD) or a power surge that triggered the internal computer to shut down automatically. If this occurs, unplug the AC adaptor from power source, wait for 10 minutes, then plug the AC adaptor to power source again. -
Page 18: Troubleshooting Guide
TROUBLE SHOOTING GUIDE If you experience difficulties in the use of this CD radio, please check the following or call 1-800-777-5331 for Customer Service and support Symptom Possible Cause Solution The unit is disconnected from Reconnect to the AC outlet. The unit does not the AC outlet. - Page 19 90 DAY LIMITED WARRANTY AND SERVICE VALID IN THE U.S.A. ONLY SPECTRA MERCHANDISING INTERNATIONAL, INC. warrants this unit to be free from defective materials or factory workmanship for a period of 90 days from the date of original customer purchase and provided the product is utilized within the U.S.A. This warranty is not assignable or transferable.
Need help?
Do you have a question about the JBS-215 and is the answer not in the manual?
Questions and answers