Table of Contents
Advertisement
Quick Links
Advertisement
Table of Contents

Related Manuals for Dacor Pro-Range HDPR30 Series


Summary of Contents for Dacor Pro-Range HDPR30 Series
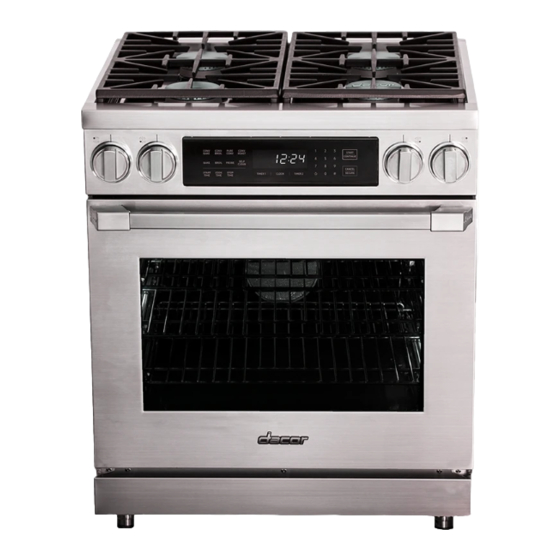
- Page 1 User Manual Pro-Range HDPR30*, HDPR36*, HDPR48* Part No.115332 Rev B...
-
Page 2: Table Of Contents
Table of Contents Before You Begin Important Notes To the Owner Energy-Saving Tips About the Oven Vent Regulatory Notice Important Safety Instructions Safety Symbols and Cautionary Information Use and Care Safety Instructions Product Overview Included Accessories for 30" model Included Accessories for 36" and 48" models External Features Internal Features Control Panel... - Page 3 Table of Contents Operating the Oven, cont. Using the Timers Using Time-Delay Cooking Using the Meat-Temperature Probe Dehydrating/Defrosting Foods Using Proof Mode Using Sabbath Mode Adjusting the Oven-Temperature Offset Maintaining the Range General External Maintenance Maintaining the Cooktop Using Self-Clean Mode Steam-Cleaning the Oven Cleaning the Oven Accessories Replacing the Oven Lights...
-
Page 4: Before You Begin
Before You Begin Important Notes to the Owner • Electrical and gas equipment with moving parts can be Rating Label dangerous. Read and follow closely the Important Safety Instructions section (Pgs. 6 – 10) to minimize risk of prop- Model/Serial Number erty damage, personal injury, and death. -
Page 5: Regulatory Notice
Regulatory Notice 1. FCC (Federal Communications Commission) Notice authority to operate the equipment. This device complies with Part 15 of FCC Rules. Operation is subject to two conditions: 1) This device may not cause harmful interference; and 2) this device must accept any interference received, including that which causes undesired operation. -
Page 6: Important Safety Instructions
Important Safety Instructions Safety Symbols and Cautionary Information Electrical and gas equipment can be dangerous if not handled properly. The Important Safety Instructions in this manual are intended to minimize the risk of property damage, personal injury, and death. Carefully follow the instructions in this manual. -
Page 7: Use And Care Safety Instructions
Important Safety Instructions Use and Care Safety Instructions to ensure proper installation. General Safety • Do not touch any part of the range during or immediately after cooking. • Learn where the gas-supply valve is and how to open/close it. •... - Page 8 Important Safety Instructions Use and Care Safety Instructions to ensure proper installation. Gas Safety If you smell gas: • close the range's gas-supply valve and evacuate the building • • do not turn on any gas or electric appliances • do not plug in a power cord or touch an electrical switch •...
- Page 9 Important Safety Instructions Use and Care Safety Instructions to ensure proper installation. Cooktop Safety • Burners should only be on when in use and should never be unattended. • Do not line the grates or any part of the cooktop with foil. •...
- Page 10 Important Safety Instructions Use and Care Safety Instructions to ensure proper installation. Oven Safety • Do not use the oven for non-cooking purposes (e.g., drying clothes, storage). • Do not spray water on the oven glass while the oven is on or still hot. •...
-
Page 11: Product Overview
Product Overview Included Accessories for 30” model *The range comes with brass and porcelain burner caps to suit customer preference. Brass Brass Porcelain Porcelain Grates (2) Standard Burner Caps*: SimmerSear Burner Caps*: Standard Burner Rings (3) Porcelain (3), Brass (3) Porcelain (1), Brass (1) HDPR SimmerSear Burner Ring (1),... -
Page 12: Included Accessories For 36" And 48" Models
Product Overview Included Accessories for 36” and 48” models *The range comes with brass and porcelain burner caps to suit customer preference. Brass Brass Porcelain Porcelain Grates (3) Standard Burner Caps*: SimmerSear Burner Caps*: Standard Burner Rings (4) Porcelain (4), Brass (4) Porcelain (2), Brass (2) SimmerSear Burner Rings (2), GlideRack... -
Page 13: External Features
Product Overview External Features 30" 36" EXTERNAL FEATURES Callout Description SimmerSear Burner (800* – 15,000 BTU); left-/right-front (36", 48"); left-front (30") Spill Tray Burner-Control Knob Control Panel Removable Oven Door Standard Burner (800* – 18,000 BTU); left-/right-rear, center-front/ rear (36", 48"); left-/right-rear, right-front (30") *Effective 48"... -
Page 14: Internal Features
Product Overview Internal Features K L M CONTROL PANEL FEATURES Callout Name Description Air is drawn through horizontal slot (not shown) below door and up within door, then out grill at top Air Intake Grill of door through this grill to cool internal cooktop parts; keep slot and grills clear. Calrod Element Inside oven ceiling;... -
Page 15: Control Panel
Product Overview Control Panel 30" and 36" Models 48" Model CONTROL PANEL FEATURES Callout Name Description Operation-Mode Keys ovens: one op-mode keypad per oven with all above modes and temperature-probe mode. Time-Delay Cooking Keys Set oven to turn on/off automatically; 48" model: one set of keys per oven (see Pg. 28). Clock: Sets Clock ( see Pg. -
Page 16: Control Panel Display
Product Overview Control Panel Display 30" and 36" Models 48" Model CONTROL PANEL FEATURES Callout Name Description From left: Convection, Bake, Broil, Roast; these appear, sometimes in combination, Cook-Mode Icons according to selected cook mode. Oven-On Indicator Appears when oven is in use. AM-PM Indicator One of these appears according to time of day. -
Page 17: Operating The Cooktop
Operating the Cooktop Assembling the Burners Assembling a Standard Burner around the burner head, and rotate the ring until it drops into place. 2. Place the burner cap so the ridge on the bottom of the Assembling a SimmerSear Burner 1. -
Page 18: Using The Griddle
Operating the Cooktop Using the Griddle • • For best results, preheat the griddle for 10 minutes. • Orient the griddle's grease trap at the rear of the cooktop. 1. With all burners off and the range cool to the touch, place the griddle on the cooktop's center-front/rear grates. -
Page 19: Before Using The Cooktop
Operating the Cooktop Before Using the Cooktop • • See Page 14 for the heat ranges of the different burners. • Food cooks just as quickly at a gentle boil as at a vigorous boil. Maintain a gentle boil to conserve energy •... -
Page 20: Operating The Oven
Operating the Oven Control Panel Settings Setting the Clock 1. On the control panel, tap CLOCK. The colon between the minutes and seconds blinks. 2. On the numeric keypad, enter the current time. 3. Tap #, and set AM or PM. 4. -
Page 21: About The Control Panel "Beep
Operating the Oven About the Control Panel "Beep" The control panel beeps: 1) when you tap a key, 2) when a timer reaches zero, 3) when there is an error, and 4) 1. On the control panel, tap-hold START TIME for 6 seconds. "Beep"... -
Page 22: Running A Cook Cycle
Operating the Oven Positioning the Oven Racks The oven comes with a set of GlideRack oven racks. These racks can be pulled out further than a standard rack and still support pots and pans. Inserting a GlideRack Oven Rack 1. Align the left and right safety clips on the back of the rack guides with the rack supports (see left). -
Page 23: About The Cook Modes
Operating the Oven About Cook Modes The oven operates in three basic cook modes: Baking—Gentle cooking of dry foods (e.g., cookies, cakes, souf- OVEN COOK MODES Cook Mode Description • Convection fan with bottom heat source; for single-rack cooking in a deep pan. •... -
Page 24: Cooking Tips
Operating the Oven Cooking Tips This section provides suggestions and information that will help with various aspects of oven cooking, includ- ing baking, broiling, and roasting, proper cookware, and high-altitude cooking. COMMON ISSUES—STANDARD BAKE MODE Issue Possible Cause Solution Set timer to shortest suggested cook time, and check food when Oven door opened to often timer beeps;... - Page 25 • Dacor’s optional roasting pan offers excellent results. • Dacor’s optional “V” shaped rack (placed in the roast pan) allow air circulation around food. • Insert temperature probe halfway into center of thickest part of meat; (poultry) Insert probe between body and leg into thickest part of inner thigh;...
-
Page 26: About Oven Temperatures
Operating the Oven About Oven Temperatures About Cook-Mode Temperature Presets Default cook-mode temperatures are set at the factory so COOK-MODE TEMP PRESETS you do not need to enter the temperature manually. Mode Temperature Changing the Oven Temperature While Cooking Convection Bake 325°F (163°C) Pure Convection the cook cycle. -
Page 27: Using The Timers
Operating the Oven Using the Timers Enabling the 12-Hr. Oven Shut-Off Timer The oven has a factory-programmed timer that automatically turns the oven off after 12 hours of continuous use. This timer automatically resets if you change the cook temperature or mode, and is automatically disabled when you activate Sabbath mode. -
Page 28: Using Time-Delay Cooking
Operating the Oven Using Time-Delay Cooking About Time-Delay Cooking • • Time-delay can be used for all but Broil and Convection Broil modes. • • CANCEL/SECURE. • Time-delay cooking cannot be used if Sabbath mode is active. • When the oven is in Time-Delay mode, you can tap: –... -
Page 29: Using The Meat-Temperature Probe
Operating the Oven Using Time-Delay Cooking Setting a Time-Delay-Cooking Cycle 1. Adjust the racks as needed, and place the food in the oven. 2. Select a cook mode (except BROIL or CONVECTION BROIL). 3. Enter a cook temperature. If you want the oven to turn on immediately and turn off automatically later, skip to Step 6. 4. - Page 30 Operating the Oven Using the Meat-Temperature Probe 1. (With the meat read to cook) Insert the probe skewer in the thickest part of the meat away from fat and bone. With fowl, hold the skewer parallel to the pan, and insert it into the deepest part of the breast until the tip is ¾...
-
Page 31: Dehydrating/Defrosting Foods
Operating the Oven Dehydrating/Defrosting Foods Cook meats immediately after defrosting. 1. Position the racks, and center the food on the rack. (If dehydrating) Place prepared food on a drying rack. 2. Tap PURE CONV. FOOD TYPE DEHYDRATIMG TEMP 3. (If defrosting) Enter a temperature up to 150°F (66°C). Fruit 100°F (38°C) (If dehydrating) Use the table at left to set the temp, and... -
Page 32: Adjusting The Oven-Temperature Offset
Operating the Oven Using Sabbath Mode Activating Sabbath Mode • Double ovens: perform this procedure for one oven, then use Steps 2 – 4 to activate Sabbath mode on the other oven. • Tap each successive key within 6 seconds of the previous, or the process cancels itself. 1. -
Page 33: Maintaining The Range
To prevent scratching, wipe stainless steel “with” the grain, and do not clean with abrasive cleaners/scrubbers. 1. Apply (per bottle instructions) the provided Dacor stainless-steel cleaner to a cloth or paper towel. 2. Clean one small area then another, rubbing with the grain. - Page 34 Maintaining the Range Maintaining the Cooktop About Burner Caps and Heads • Burner parts are not dishwasher-safe. Clean them in hot, soapy water with a sponge or plastic scouring pad. (Do not use steel wool or scouring powders.) • Use a pin to unclog the holes in the burner heads if needed. •...
-
Page 35: Using Self-Clean Mode
Maintaining the Range Turn off power, and let all surfaces cool before cleaning the cooktop. Wear rubber gloves, and be mindful of sharp edges. Clean the cooktop as instructed in this manual. Using Self-Clean Mode About Self-Clean Mode • For best results, clean the oven chamber regularly. Self-cleaning, which takes about 2 ½ hours, heats the oven to very high temperatures to burn off surface deposits in the oven chamber. - Page 36 Maintaining the Range Using Self-Cleaning Mode Self-Cleaning the Oven, cont. • When self-cleaning is done: – ON indicator disappear from the display. The oven is still hot. – – residue with a damp cloth or sponge; run another cycle as needed to remove any residue that cannot be wiped away with a cloth.
-
Page 37: Steam-Cleaning The Oven
Maintaining the Range Steam-Cleaning the Oven This is a convenient way to clean light soil from the oven. (For 48” model: both ovens may be steam cleaned at once.) Run a steam-clean cycle when you see soil accumulating in the oven chamber. •... - Page 38 Maintaining the Range Cleaning the Oven Accessories Cleaning the Oven-Door Gasket This gasket helps trap hot air in the oven by sealing the seam around the front of the oven chamber when the door is closed. The gasket needs occasional cleaning to remove cooking residue that may compromise the seal •...
-
Page 39: Replacing The Oven Lights
Maintaining the Range Replacing the Oven Lights If no lights work, see Troubleshooting, Pg. 41, before replacing them. • To prevent electric shock, turn off power to the oven, and ensure the oven and bulbs are cool. • Use the oven only with the lens covers installed. The covers protect the bulbs from high temperatures and mechanical shock. -
Page 40: Troubleshooting
Troubleshooting This section offers solutions to various operational and maintenance issues, which may help you avoid a service call. Gas Safety Issue Possible Cause Solution Burner is on but is not lit. Turner burner-control knob off. • Evacuate building. You smell gas •... -
Page 41: Oven
Troubleshooting Oven Issue Possible Cause Solution Oven not fully plugged in. Verify that plug is properly inserted in outlet. Bad fuse/tripped circuit breaker. Replace fuse/reset circuit breaker. Oven not turning on Oven too hot. Let oven cool. Incomplete service wiring. Call for service. -
Page 42: Warranty
3. If none of these tips or suggestions resolves your roads, or other travel expenses. loss, time away from work, or visit dacor.com or call our Customer Service center at: restaurant meals. (833) 353-5483 (United States) Failure of the product caused Commercial, business, or rental by improper product installation. - Page 43 This Limited Warranty does not cover any defect, malfunction, We warrant to the original purchaser (“Purchaser”) that your failure or damage caused by or resulting from any of the Dacor Pro-Range purchased from an authorized reseller or following: distributor in Canada (the “Products”) is free from defects in...
- Page 44 LIMITED WARRANTY IS GOVERNED BY THE LAWS OF THE directed to deliver the Product to a Dacor Authorized PROVINCE OF QUEBEC. Service Center for warranty service. The cost of transportation...
- Page 45 (G) THIS WARRANTY GIVES YOU SPECIFIC LEGAL RIGHTS, AND YOU MAY ALSO HAVE OTHER RIGHTS, WHICH VARY If your Dacor product fails to function within one year of the FROM PROVINCE TO PROVINCE. THIS LIMITED WARRANTY original date of purchase due to a defect in material or workman- STATES THE PURCHASER’S EXCLUSIVE REMEDY.
- Page 46 Notes English...
- Page 47 Notes English...
- Page 48 Contact Dacor If you have any questions or comments relating to Dacor appliances, please contact the Dacor Customer Service Center. Country Contact Center Web Site U.S.A 1-833-353-5483 www.dacor.com CANADA 1-844-509-4659 www.dacor.com...
Need help?
Do you have a question about the Pro-Range HDPR30 Series and is the answer not in the manual?
Questions and answers