
Related Manuals for CommScope SURFboard SBV3202


Summary of Contents for CommScope SURFboard SBV3202
- Page 1 SURFboard SBV3202 DOCSIS 3.0 telephony modem ® for Xfinity customers ® User Guide, STANDARD Revision x.3 P/N 365-095-32810...
- Page 2 CommScope to provide notification of such revision or change. ARRIS and the ARRIS Logo are trademarks of CommScope, Inc. and/or its affiliates. All other trademarks are the property of their respective owners.
- Page 3 ■ Read all the instructions listed here and/or in the user manual before you operate this device. Give attention to all safety precautions. Retain the instructions for future reference. ■ This device must be installed and used in strict accordance with manufacturer’s instructions, as described in the user documentation that is included with the device.
- Page 4 ■ Avoid using a telephone (other than a cordless type) during an electrical storm. There is a remote risk of electric shock from lightning. For added protection, unplug the device from the wall outlet and disconnect the cables to avoid damage to this device from lightning and power surges.
- Page 5 FCC Declaration of Conformity CommScope, Inc, 3871 Lakefield Drive, Suwanee, GA 30024, declares that the SURFboard device complies with 47 CFR Parts 2 and 15 of the FCC rules as a Class B digital device.
- Page 6 Wireless LAN information Note: This applies to devices that provide Wi-Fi capability. This device is a wireless network product that uses Direct Sequence Spread Spectrum (DSSS) and Orthogonal Frequency-Division Multiple Access (OFDMA) radio technologies. The device is designed to be interoperable with any other wireless DSSS and OFDMA products that comply with: ■...
- Page 7 Caring for the environment by recycling your ARRIS equipment Please do not dispose of this product with your residential or commercial waste. Contact your local authorities for information about practices established for your region. If collection systems are not available, call ARRIS Technical Support at 1-877-466-8646 for assistance.
- Page 8 ® ® SURFboard SBV3202 DOCSIS 3.0 telephony modem for Xfinity customers User Guide STANDARD Revision x.3...
-
Page 9: Table Of Contents
Table of contents Chapter 1: Getting started..............11 Contact information..................... 12 In the box........................12 Additional items needed (not included)..............12 Set up your service.......................13 System requirements....................14 About this manual......................14 Enhance system security....................14 Ethernet connection..................... 15 Chapter 2: Battery installation and removal..........16 Basic battery installation and replacement..............17 Extended battery installation and replacement............19 Maximum battery installation and replacement............20... - Page 10 Web Manager menu links.................... 33 Status screen...................... 34 HW/FW versions screen..................34 Event Log screen....................35 Registration status (CM state)................36 CM Feature screen..................... 37 Logging settings....................38 Logout.........................39 Chapter 6: Troubleshooting..............40 Your telephony modem is plugged in, but the power light is off.........40 Cannot access Internet....................40 Cannot access Internet (Ethernet)................
-
Page 11: Chapter 1: Getting Started
Get ready to experience the Internet's express lane. Whether you are checking out streaming media, downloading new software, checking your email, or talking to friends over the phone, your SURFboard SBV3202 telephony modem provides faster and high-quality Voice over IP telephone service. It also provides lithium-ion battery backup capability to provide continued telephone service during power outages. -
Page 12: Contact Information
Chapter 1: Getting started Contact information For technical support, FAQs, product documentation, and additional ARRIS product information: ■ Visit the ARRIS Support website: http://www.arris.com/selfhelp ■ Call ARRIS Technical Support: 1-877-466-8646 In the box Before installing your telephony modem, check that the following items are included in the product box. -
Page 13: Set Up Your Service
Chapter 1: Getting started ■ Ethernet cable:This is a network cable used for wired connections to the Internet. The the connectors look like wide telephone connectors. You can purchase this cable at a computer retailer. If you are connecting your telephony modem directly to a computer or to a wireless router (with the Ethernet connection from your telephony modem connected to the WAN input on the router), ask for Category 5e (CAT5e) straight-through cable. -
Page 14: System Requirements
● UNIX ● Linux About this manual This manual covers about the SURFboard SBV3202 telephony modem. The model number is on the label affixed to the bottom of your telephony modem. Enhance system security Having a high-speed, always-on connection to the Internet requires a certain amount of responsibility to other Internet users—including the need to maintain a reasonably secure... -
Page 15: Ethernet Connection
Chapter 1: Getting started ■ Avoid providing web or file-sharing services over your telephony modem. Besides certain vulnerability problems, most cable companies prohibit running servers on consumer- level accounts and may suspend your account for violating your terms of service. ■... -
Page 16: Chapter 2: Battery Installation And Removal
Chapter 2 Battery installation and removal Your service provider may include a backup battery with your telephony modem. If you wish, you can purchase an additional battery at shop.surfboard.com. The website will list the recommended battery type for your telephony modem. Your telephony modem supports a Lithium-Ion backup battery to provide continued telephone service during power outages. -
Page 17: Basic Battery Installation And Replacement
Chapter 2: Battery installation and removal ■ Maximum backup battery: provides up to 18 hours (6-cell) or 24 hours (8-cell) of backup time, depending on model and usage. It replaces the battery door and increases the height of your telephony modem by about 5/8" (16 mm). Maximum backup battery Refer to Maximum battery installation and replacement... - Page 18 Chapter 2: Battery installation and removal 1 - Battery Slots 2 - Battery Guides Note: Batteries will not insert completely into your telephony modem, if not oriented correctly. The battery should slide into the bay without significant force. Line up the guides on the battery with the slots in the battery bay. 3.
-
Page 19: Extended Battery Installation And Replacement
Chapter 2: Battery installation and removal Extended battery installation and replacement Your telephony modem provides continued telephone service during power outages. The battery backup is not intended to take the place of AC power. Use this procedure to install or replace the backup battery. 1. -
Page 20: Maximum Battery Installation And Replacement
Chapter 2: Battery installation and removal WRONG WRONG RIGHT 4. Push the battery pack into the bay until it latches into place. If you are taking the battery out of your telephony modem2, use the battery pull strap to dislodge the battery. Note: Your telephony modem will not begin operating until you apply AC power. - Page 21 Chapter 2: Battery installation and removal 2. Set the door aside in a safe place. 1 - Latch end 3. Place the battery on a firm horizontal surface. 4. Position your telephony modem over the battery, aligning the slots on the battery bay with the tabs on the battery.
-
Page 22: Battery Usage And Storage Conditions
Chapter 2: Battery installation and removal Battery usage and storage conditions ■ The life expectancy of your battery should be several years, provided that it was purchased from an approved source. ■ Your battery goes through a calibration procedure when it is first installed or replaced. This procedure can take up to 72 hours to complete and is repeated every six months. -
Page 23: Chapter 3: Install And Connect Your Telephony Modem
Chapter 3 Install and connect your telephony modem Before you start, make sure of the following: ■ You have all the Additional items needed (not included) (page 12) . ■ You have Set up your service (page 13) ■ Cable, phone, and power outlets are available near the computer. If a cable outlet is not conveniently located, your service provider can install a new one. -
Page 24: Rear Panel
Chapter 3: Install and connect your telephony modem Rear panel The rear panel of your telephony modem has the following connectors and controls: ■ Tel 1/2: connector for the first phone line (or both lines of a 2-line phone). ■ Tel 2: connector for the second phone line. ■... -
Page 25: Mount The Telephony Modem
Chapter 3: Install and connect your telephony modem Mount the telephony modem You can either mount your telephony modem on a wall or place it on a desktop. For wall- mount applications, you can mount your telephony modem with the indicators facing upward (vertical) or to the side (horizontal). - Page 26 Chapter 3: Install and connect your telephony modem 2. Drill holes through the template in the specified locations for the mounting screws. After drilling holes, remove the template from the service. 3. If using drywall anchors, set them into the wall. Then, drive the screws into the wall leaving a gap of about 1/8”...
-
Page 27: Desktop Mounting Instructions
Chapter 3: Install and connect your telephony modem 5. Proceed to Connecting your telephony modem (page 27) (see below). Desktop mounting instructions 1. Position your telephony modem so that: ■ air flows freely around it ■ the back faces the nearest wall ■... - Page 28 Chapter 3: Install and connect your telephony modem Note: For best performance, use high-quality coax cable and minimize or eliminate splitters between the cable jack and your telephony modem. 3. Insert the plug from the power cord into the Power connector on the back of your telephony modem and insert the power cord into a convenient AC outlet.
-
Page 29: Chapter 4: Using The Telephony Modem
Chapter 4 Using the telephony modem This chapter describes the controls and features available on your telephony modem and covers basic troubleshooting procedures. ■ Indicator lights for your telephony modem (page 29) ■ Indicator lights for your telephony modem (page 29) ■... -
Page 30: Patterns: Normal Operation
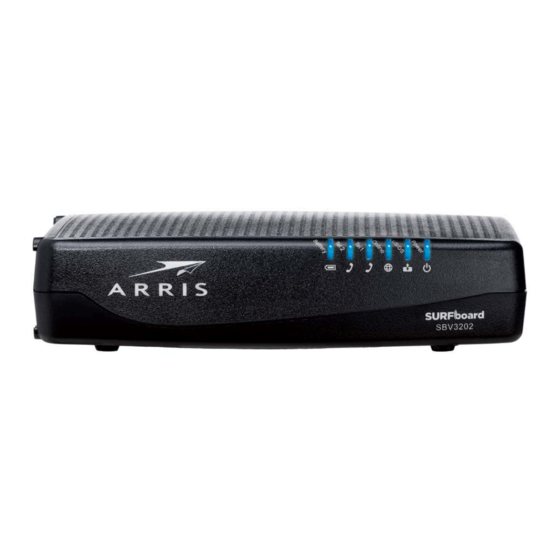
Chapter 4: Using the telephony modem Patterns: normal operation The following table shows light patterns during normal operation. Mode Power US/DS Online Tel 1 / Tel 2 Battery AC power On = Connected to On = Internet On = On- On = Battery the Internet (ultra- available... -
Page 31: Using The Reset Button
Chapter 4: Using the telephony modem Power, US/DS, Telephone 1 Telephone 2 Description Online Normal Operation Cable modem startup sequence DS/US Online Description Flash Downstream or upstream search Flash Downstream and upstream found; retrieving setup information from service provider Ready for service Using the Reset button Use the Reset button, on the back of your telephony modem, to reset the modem and perform initialization as if you power cycled the unit. -
Page 32: Chapter 5: Using The Telephony Modem Web Manager
Chapter 5 Using the telephony modem Web Manager Note: You must use the default user name and password (see step 3) if you are logging on to the telephony modem Web Manager for the first time. For network security purposes, ARRIS recommends that you change the default user name and password after setting up your Wi-Fi network. -
Page 33: Web Manager Menu Links
Chapter 5: Using the telephony modem Web Manager b. Enter your new password in the New Password field. Note: Remember that passwords are case-sensitive and that you can use any combination of the following letters, numbers and special characters: c. Enter your new password again in the Repeat New Password field. d. -
Page 34: Status Screen
Chapter 5: Using the telephony modem Web Manager Status screen The Status screen shows the current status of the upstream and downstream channels for your telephony modem, including the MAC addresses for various ports. HW/FW versions screen The HW/FW versions screen includes serial number, release and model information of your telephony modem hardware and firmware. -
Page 35: Event Log Screen
Chapter 5: Using the telephony modem Web Manager Event Log screen The Event Log screen includes a list of events that have been detected by your telephony modem, including the date and time of the event, the event ID, and the event level. ®... -
Page 36: Registration Status (Cm State)
Chapter 5: Using the telephony modem Web Manager Registration status (CM state) The Registration Status screen shows the current operating status of your telephony modem with regards to DOCSIS and telephony connections. It also indicates the test state of the battery, if present. -
Page 37: Cm Feature Screen
Chapter 5: Using the telephony modem Web Manager CM Feature screen The CM Feature screen shows option to enable or disable the front panel LEDs. There is also an option to enable or disable the energy efficient Ethernet. ® ® SURFboard SBV3202 DOCSIS 3.0 telephony modem for Xfinity customers User Guide STANDARD Revision x.3... -
Page 38: Logging Settings
Chapter 5: Using the telephony modem Web Manager Logging settings The Login settings screen provides option to change your password. To change the default user password 1. On the Login settings screen, enter your current password in the Old Password field. 2. -
Page 39: Logout
Chapter 5: Using the telephony modem Web Manager Logout To login 1. Type the username and password. ■ Username: admin ■ Password: password (this is the default user password and it is case sensitive). Note: If you have changed your password, then type the new password. 2. -
Page 40: Chapter 6: Troubleshooting
Chapter 6 Troubleshooting Your telephony modem is plugged in, but the power light is off Solution: 1. Check all power connections. Is the power cord plugged in firmly at both ends? 2. If you plugged the power cord into a power strip, make sure the strip is switched on. 3. -
Page 41: Cannot Access Internet (Ethernet)
Chapter 6: Troubleshooting Cannot access Internet (Ethernet) Solution: 1. If you are using a hub, is the hub turned on? 2. Are you using the right type of Ethernet cable? Use an Ethernet cable for direct connection to a computer; use a cross-over cable for connection to a hub. 3. - Page 42 Chapter 6: Troubleshooting b. If so, try a different phone. Make sure the new phone is a working phone. c. If a known good phone is used and you still don’t have dial tone, try a different phone cable. If a new phone and cable do not restore dial tone, call your service provider.
-
Page 43: Chapter 7: Glossary
Chapter 7 Glossary Amp-Hour A measure of battery capacity. For example, a 1.0Ah battery can nominally supply one Ampere of current for one hour. Category 5e (Cat5e) A high-quality type of cable, used for gigabit Ethernet (1000BaseT) connections. When purchasing Ethernet cables, always look for Category 5e cable or higher. - Page 44 Chapter 7: Glossary EMTA Embedded Multimedia Terminal Adapter. An MTA device that is integrated with a cable modem. Ethernet A standard method of connecting two or more computers into a Local Area Network (LAN). Event An informational message used for monitoring network status.
- Page 45 Chapter 7: Glossary uses your telephony modem MAC address to authorize access to the Internet. The MAC address is printed on a label affixed to your telephony modem. Protocol A set of rules and formats that determines the communication behavior of network entities at a given layer.
- Page 46 Chapter 7: Glossary TDMA Time Division Multiple Access. A method used by DOCSIS-compliant cable modems for sending upstream data with minimal interference. Upstream The path from a subscriber device to the headend. Some older cable documentation may refer to this as the return path or reverse path. ®...
-
Page 47: Warranty Information
Warranty Information CommScope, Inc. ("ARRIS") Retail Purchasers If you purchased this Product directly from ARRIS or from an authorized ARRIS retail reseller, ARRIS warrants to you, the original end user customer, that (A) the Product, excluding Software, will be free from defects in materials and workmanship under normal use, and (B) - Page 48 : Warranty Information INFRINGEMENT PROVIDED IN THE UNIFORM COMMERCIAL CODE. Some states do not allow for the exclusion of implied warranties, so the above exclusion may not apply to you. What additional provisions should I be aware of? Because it is impossible for ARRIS to know the purposes for which you acquired this Product or the uses to which you will put this Product, you assume full responsibility for the selection of the Product for its installation and use.
- Page 50 Corporate Headquarters CommScope · Hickory · North Carolina · 28602 · USA www.commscope.com...
Need help?
Do you have a question about the SURFboard SBV3202 and is the answer not in the manual?
Questions and answers