
Related Manuals for Kinetico PRO CP 213f OD Carbon


Summary of Contents for Kinetico PRO CP 213f OD Carbon
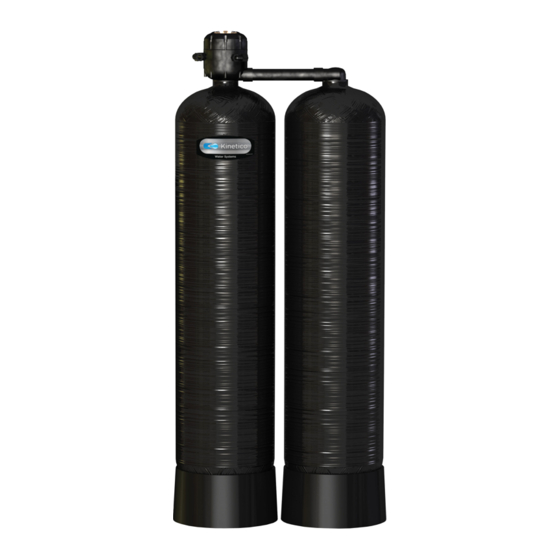
- Page 1 Owner's Manual Commercial Plus Filter Series Models CP 213f OD Carbon CP 213f OD Macrolite® CP 213f, Empty...
-
Page 2: Table Of Contents
Table of Contents eneral nformatIon About this Manual ......................................3 Filtration Technology......................................4 The KineticoPRO Commercial Plus (CP) Product Line ........................4 quIpment pecIfIcatIonS System Configuration ....................................... 5 Component Functionality .................................... 6-7 System Specifications ....................................8-10 nStallatIon Getting Started ........................................11 Pre-installation Review ....................................11-12 KineticoPRO Filter Installation CP213f ..............................12-13 roubleShootInG Eight steps to determine the problem…... -
Page 3: G Eneral I Nformation
eneral nformatIon About this Manual This manual will cover information needed for the proper installation and operation of your KineticoPRO Filtering System. We have also included information regarding the frequently asked questions about filtering systems. This information may be more technical in nature, but provides further insight to the continued operation of this equipment at its highest levels This manual will use various icons to help highlight issues that are relevant to the safe operation of this equipment. -
Page 4: Filtration Technology
1-2 times per week of operation. Macrolite Macrolite is a processed mineral oxide manufactured exclusively by Kinetico, that can be used as a highly efficient filter media for the removal of oxidized iron and suspended matter. 40-70 mesh ceramic media has a tremendous loading capacity and an extremely fast cleanup time when backwashing at 6-7 gpm/ft . -
Page 5: System Configuration
quIpment pecIfIcatIonS System Configuration After determining the flow requirements for the system, the next step is to determine the number of units required in parallel to satisfy flow requirement needs. Multi-System Configuration Single System Configuration A three valve bypass is recommended for each unit. A three valve by-pass is recommended for the unit Each system is plumbed in parallel, using a balanced header (first in/last out) configuration. -
Page 6: Component Functionality
The Kinetico 1250 Valve mounts on top of the Main Tank. Both the Main Tank and the Remote Tank operate identically: the only difference is that one has the Kinetico Valve mounted on it and is supplied directly by the valve (Main); the other is supplied through connecting pipes from the valve (Remote). - Page 7 Kinetico 1250 Control Valve Operation of KineticoPRO's twin tank water filters is controlled by the Kinetico 1250 Valve. Knowledge of the basic functions and components of this valve is key to understanding system operation. Level 1 Operation Level 1 assembly consists of three chambers: inlet, outlet and regeneration chambers.
-
Page 8: System Specifications
Regeneration Control Non-electric Use Meter Service Downflow Backwash Upflow Meter Type - Polypropylene Turbine (Kinetico Full Louver) 0.75 - 40.0 gpm 2.8 - 151.4 Lpm Connections Inlet / Outlet Connection Custom Adapter and E-clip (1 1/2” Sweat Fittings Included) Drain Connection 0.625”... - Page 9 Regeneration Control Non-electric Use Meter Service Downflow Backwash Upflow Meter Type - Polypropylene Turbine (Kinetico Full Louver) 0.75 - 40.0 gpm 2.8 - 151.4 Lpm Connections Inlet / Outlet Connection Custom Adapter and E-clip (1 1/2” Sweat Fittings Included) Drain Connection 0.625”...
- Page 10 Regeneration Control Non-electric Use Meter Service Downflow Backwash Upflow Meter Type - Polypropylene Turbine (Kinetico Full Louver) 0.75 - 40.0 gpm 2.8 - 151.4 Lpm Connections Inlet / Outlet Connection Custom Adapter and E-clip (1 1/2” Sweat Fittings Included) Drain Connection 0.625”...
-
Page 11: I Nstallation
nStallatIon Getting Started The following procedures have been developed to assist during the installation of your KineticoPRO Filter. ALL STATE AND LOCAL PLUMBING CODES MUST BE MET, including, but not limited to: Distances that equipment should be placed from the main panel box and electrical outlets. Air gaps that must be provided for all drain lines. -
Page 12: Kineticopro Filter Installation Cp213F
CP Filter Series Technical Manual When installing a plastic component in line, it is recommended that grounding straps be put in place BEFORE the lines are actually cut to ensure that the ground is never broken. When installation is complete, plumbing lines must be chlorinated for sanitation. Common household bleach may be used. - Page 13 Connect the main tank with filter valve to the inlet/outlet adapter. The inlet/outlet adapter is inserted into the Control Valve and locked in place by the plastic E-clips. It is important that the E-clips are fully inserted into the Control Valve. Check that all three tabs on the E-clips are fully inserted.
-
Page 14: Eight Steps To Determine The Problem
CP Filter Series Technical Manual roubleShootInG Eight steps to determine the problem... Gather Information Ask the customer questions. Any information obtained can reduce your time on the job. Many times, the customer’s response to questions will allow you to skip directly to the next section. 2. - Page 15 3. Place either tank in the backwash portion of cycle. • Did the pressure drop below 25 psi at the brine fitting? The Kinetico valve requires a minimum of 25 psi for the CP 213 to function properly. 7. Measure backwash flow Too little backwash flow can cause problems.
-
Page 16: Unfiltered Water
CP Filter Series Technical Manual Unfiltered Water Problem Reason Solution 1. Water meter disc not q Non-conforming meter drive pawl. n Replace meter drive pawl. turning q Meter drive spring installed wrong. n Reinstall meter drive spring. q No back pawl not installed. n Install no back pawl. -
Page 17: Iron Bleed-Through
Iron Bleed-through Problem Reason Solution 1. Customer plumbing q Previous iron buildup inside existing n Verify that customer plumbing is the plumbing after the filter. problem by testing the water quality at the 1/4” capped fitting on the Level 3 with water running. -
Page 18: Taste, Color & Odor
CP Filter Series Technical Manual Equipment Noise Problem Reason Solution 1. The unit makes a q The control disc is not flat on the ceramic, n Replace the control disc balance piston spring causing the drain valve to flutter. and the balance piston O-ring. You may also squealing noise want to change the drain valves and seals. -
Page 19: Arts Level 1
artS Level 1 Assembly For Part Number 11252A only Meter Disc Part Number 1504 1505 1506 1507 1508 1509 1510 1511 Level 1 Complete Assemblies Part Number 11252A Complete Assembly Part Number 13665 Part numbers can be found on parts page 20... - Page 20 CP Filter Series Technical Manual Notes: Metering Discs are the same for all models and should be chosen from the appropriate disc selection chart. Part numbers for meter discs are on the previous page. Locate the correct part from the exploded drawing on previous page, and use it to find the correct row in the table below.
-
Page 21: Gearing
Notes: Use the model number to locate the correct set of drawings. Use the side (Meter and Regeneration) to locate the correct stack. Use the table to correlate drawing number to part number. Gearing Stacks 213f OD Meter Side Regeneration Side STEM STEM GEAR... -
Page 22: Level 2 & 3
CP Filter Series Technical Manual Level 2 and 3 Assemblies Notes: Locate the correct part from the exploded drawing on the right, and use it to find the correct row in the table below. The standard model number determines the correct column. The drawings are representative of Downflow Fast Rinse (DFFR) units. -
Page 23: Level 4
Level 4 Assembly Notes: Locate the correct part from the exploded drawing on the right, and use it to find the correct row in the table below. The standard model number determines the correct column. The drawings are representative of Downflow Fast Rinse (DFFR) units. -
Page 24: Level 5
CP Filter Series Technical Manual Level 5 Assembly Notes: Locate the correct part from the exploded drawing on the right, and use it to find the correct row in the table below. The standard model number determines the correct column. The drawings are representative of Downflow Fast Rinse (DFFR) units. -
Page 25: Bases, Tanks And Tubes
Bases, Tanks and Tubes Notes: Locate the correct part from the exploded drawing on the right, and use it to find the correct row in the table below. The standard model number determines the correct column. The drawings are representative of Downflow Fast Rinse (DFFR) units. - Page 26 CP Filter Series Technical Manual Notes: ____________________________________________________________________________________________________ ____________________________________________________________________________________________________ ____________________________________________________________________________________________________ ____________________________________________________________________________________________________ ____________________________________________________________________________________________________ ____________________________________________________________________________________________________ ____________________________________________________________________________________________________ ____________________________________________________________________________________________________ ____________________________________________________________________________________________________ ____________________________________________________________________________________________________ ____________________________________________________________________________________________________ ____________________________________________________________________________________________________ ____________________________________________________________________________________________________ ____________________________________________________________________________________________________ ____________________________________________________________________________________________________ ____________________________________________________________________________________________________ ____________________________________________________________________________________________________ ____________________________________________________________________________________________________ ____________________________________________________________________________________________________ ____________________________________________________________________________________________________ ____________________________________________________________________________________________________ ____________________________________________________________________________________________________ ____________________________________________________________________________________________________ ____________________________________________________________________________________________________ ____________________________________________________________________________________________________ ____________________________________________________________________________________________________ ____________________________________________________________________________________________________ ____________________________________________________________________________________________________ ____________________________________________________________________________________________________ ____________________________________________________________________________________________________ ____________________________________________________________________________________________________ ____________________________________________________________________________________________________ ____________________________________________________________________________________________________ ____________________________________________________________________________________________________...
- Page 27 Notes: ____________________________________________________________________________________________________ ____________________________________________________________________________________________________ ____________________________________________________________________________________________________ ____________________________________________________________________________________________________ ____________________________________________________________________________________________________ ____________________________________________________________________________________________________ ____________________________________________________________________________________________________ ____________________________________________________________________________________________________ ____________________________________________________________________________________________________ ____________________________________________________________________________________________________ ____________________________________________________________________________________________________ ____________________________________________________________________________________________________ ____________________________________________________________________________________________________ ____________________________________________________________________________________________________ ____________________________________________________________________________________________________ ____________________________________________________________________________________________________ ____________________________________________________________________________________________________ ____________________________________________________________________________________________________ ____________________________________________________________________________________________________ ____________________________________________________________________________________________________ ____________________________________________________________________________________________________ ____________________________________________________________________________________________________ ____________________________________________________________________________________________________ ____________________________________________________________________________________________________ ____________________________________________________________________________________________________ ____________________________________________________________________________________________________ ____________________________________________________________________________________________________ ____________________________________________________________________________________________________ ____________________________________________________________________________________________________ ____________________________________________________________________________________________________ ____________________________________________________________________________________________________ ____________________________________________________________________________________________________ ____________________________________________________________________________________________________ ____________________________________________________________________________________________________...
- Page 28 Owner's Manual Commercial Plus Filter Series © 2021, Kinetico Incorporated Corporate Headquarters 10845 Kinsman Road Newbury, Ohio 44065 www.KineticoPRO.com Product No. 11248D Rev. 05.11.2021...
Need help?
Do you have a question about the PRO CP 213f OD Carbon and is the answer not in the manual?
Questions and answers