Table of Contents
Advertisement
Advertisement
Table of Contents

Related Manuals for Thermia Calibra Cool


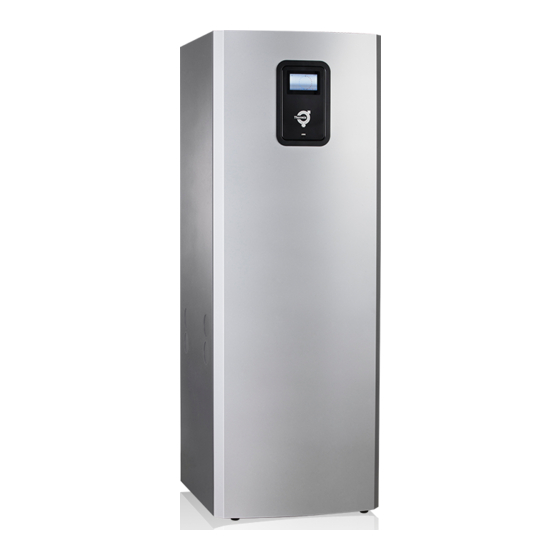
Summary of Contents for Thermia Calibra Cool
- Page 1 Installation Guide Calibra Cool BW & WW models www.thermia.com...
- Page 2 Thermia AB is not liable or bound by warranty if these instructions are not adhered to during installation or service. The English language is used for the original instructions. Other languages are a translation of the original instructions. (Directive 2006/42/EC)
-
Page 3: Table Of Contents
Calibra Cool ........ - Page 4 Electrical connections ............. 10.1 Calibra Cool electrical connections 400V (this label is also fitted on the electrical cabinet of the heat pump) . . .
-
Page 5: About The Document
Manuals with more extensive information and technical information can be found and downloaded here: www.thermia.com under the tab Partner Login. Important information The instructions contain different warning symbols, which, together with text, indicate to the user that there are risks involved with ac- tions to be taken. -
Page 6: Scrapping
Field of application Calibra Cool exists in 2 different versions: Calibra Cool 7 400V BW is equipped with a built in brine pump and is only intended for applications where the cold carrier is protected from freezing. Calibra Cool 7 400V WW is designed for installations where multiple heat pumps share a single heat source in an open well application. -
Page 7: Maximum Length Of Collectors, Bw Model With Inbuilt Brine Pump Only
'T = 3.5 K 'T = 3 K 2,00 3,00 4,00 5,00 6,00 7,00 8,00 Hea ng Capacity kW Hea ng Capacity kW Calibra Cool 7 WW has no inbuilt brine pump, and therefor no collector length can be given. Thermia AB BWCC01IG0102... -
Page 8: Overview Image
Overview image Calibra Cool can produce heating, hot water and passive cooling. Please note that precautions regarding potential condense problems must be taken in each individual installation (condense insulation, drainage and so on) to avoid risk of property damages. Pictures show- ing BW model. -
Page 9: Heat Pump Data, Dimensions And Connections
Cold water line, 22 mm Lead-in for supply, sensor and communication ca- bles Top hood (accessory for Calibra Cool) The brine lines (1) and (2) can be connected on either the left or right-hand sides or to the two knock out holes on the top (top connection not included in delivery) 40 ±10... -
Page 10: Delivery Contents
Installation Guide Calibra Cool Delivery contents Brine pipes (left/right) + couplings Safety Valve 9 bar Safety Valve 3 bar (WW version may require higher pressure, not included in delivery.) Outdoor sensor Filter ball (heating system) Cable inlets Document holder Grommets Ø28... -
Page 11: Transportation, Space Requirement And Recommended Location
Installation Guide Calibra Cool Transportation, space requirement and Recommended location Transportation The heat pump must not be transported lying down! Maximum tilt 45 ° Max 45 Calibra Cool 157-169 kg! Thermia AB BWCC01IG0102... -
Page 12: Space Requirement And Recommended Location
Installation Guide Calibra Cool Space requirement and recommended location Avoid placing the heat pump in a corner or near a bedroom. The surrounding walls can amplify the sound from the heat pump. 300 mm 300 mm 300 mm +30°C 10 mm +5°C... - Page 13 Make sure all parts of the transport safety is removed! (As the transport safety screw is located behind the passive cooling heat exchanger on Calibra Cool, an extension tool will simplify the removal.) ▪ The heat pump should be placed on a stable floor with a floor well (so any condensation may drain from the condensation hole in the bottom of the heat pump), preferably a concrete floor with floor drain.
-
Page 14: Heating Connections
Installation Guide Calibra Cool Heating connections Calibra Cool Heat pump Heating/Cooling system supply pipe Heating/Cooling system return pipe Cold water line Hot water line Mixer valve hot water, with exchange valve Shut-off valve Filling valve (Check for local regulations when installing filling valve) -
Page 15: Connection, Brine
Installation Guide Calibra Cool Connection, brine Brine connection, alternatives 1. Left knock-out 2. Right knock-out 3. Top knock-out Equipment set-up for installing Filler cock If the level vessel cannot be installed at the highest point or the thermic expansion of the brine is expected to exceed the volume of the vessel it should be considered to install a pressure ves- sel instead. -
Page 16: General Information For Brine Connection
Installation Guide Calibra Cool General information for brine connection The quick couplings included are tool-free and pushed in place. The coupling locks automatically. Before mounting, check that there are no sharp edges or irregularities on the pipe that could damage the rubber sealing in the couplings and cause leakage. The coupling can be rotated after mounting on pipes. -
Page 17: Alternative 1 (Left)
Installation Guide Calibra Cool Remove knock-out holes to the left, right or on top. Alternative 1 (left) For connection in to the left hand side "knockout holes". 1, Press the quick couplings (delivered with the heat pump) on to the pipes according to the picture . Make sure the coupling reach the 32 mm mark. -
Page 18: Alternative 2 (Right)
Installation Guide Calibra Cool Alternative 2 (right) For connection in to the right hand side "knockout holes". 1, Press the quick couplings (delivered with the heat pump) on to the pipes . Make sure 32 mm the coupling reach the 32 mm mark. -
Page 19: Alternative 3 (Top)
Installation Guide Calibra Cool Alternative 3 (top) For connection in the top "knockout holes". For this option, pipes are not included in the delivery. 1140 mm 1140 mm 90° 90° 160° 251 mm 420 mm 232 mm Prepare the pipes according to the dimensions in the picture! Suitable choice is CU 28 mm intended for brine pipes. -
Page 20: Sensors And Power Supply
The connection terminals are powered and can cause life hazards due to electrical shock. All power supplies must be disconnected before electrical installation can commence. 400V version Calibra Cool complies with IEC 61000-3-12 without conditional connection. Outdoor sensor 1. Improper placement 2. -
Page 21: Power Supply 400V
Installation Guide Calibra Cool Power supply 400V If the heat pump is connected to ground fault switch RCDs, it should be connected to a separate type B. 12mm L1 L2 L3 ▪ L1, :Control, and circulation pump ▪ L1, L2: Internal immersion heater ▪... -
Page 22: Fuse Sizes 400V
Installation Guide Calibra Cool Fuse sizes 400V The internal immersion heater can be limited in the heat pump control and may be permitted in different steps with/without compres- sor. Maximum operating current of compressor: 12 A at 230V (nominal). The picture below shows the actual current consumption with the recommended fuse size shown in (brackets). -
Page 23: Filling And Bleeding
Installation Guide Calibra Cool Filling and bleeding Filling and bleeding the brine circuit 1. (Point 1-4 does not apply to WW model.) Mix clean water and antifreeze ethanol for BW heat pump use to the correct freezing point in an clean external container. - Page 24 Installation Guide Calibra Cool Filling the brine circuit (BW version) ▪ 80 Shut-off valve ▪ 94 Filling device ▪ 100 Safety valve ▪ 121 Brine in ▪ 122 Brine out ▪ A Shut-off valve (part of 94) ▪ B Shut-off valve (part of 94) ▪...
-
Page 25: Commissioning
Installation Guide Calibra Cool Commissioning Installer access Certain functions will be locked and only accessible with the correct access code. To gain access, the following steps must be made: 1. Press on the Start screen to open the Menu screen. -
Page 26: Floor Heating Or Radiator System
Installation Guide Calibra Cool 8.1.4 Floor heating or radiator system Important: If the system shall be configured to Floor heating or similar, it is a must to set the heat pumps default value to floor heating. If this is not done, the "factory reset" button will reset the heat curve and max/min supply line temperatures to default values for radiator systems, which may cause damages on systems with e.g. -
Page 27: Adjusting The Indoor Temperature
Installation Guide Calibra Cool 1. Press start screen to open Menu screen. 2. Press 3. Press to show heating settings. 4. Make the desired changes. 5. Confirm settings by pressing Important! If your house has under floor heating and heat sensitive floors, the supply line temperature must not exceed certain temper- atures. - Page 28 Installation Guide Calibra Cool Supply line maximum is the max temperature used to limit the heat curve maximum supply line temperature. (Note: For certain floor heating applications, a too high set max supply line temperature may cause damages to the floor.) Seasonal stop is the set outdoor temperature condition where the heat pump will begin to prepare to stop (or start) heating.
-
Page 29: Symbol Description
Installation Guide Calibra Cool 8.1.9 Symbol description Symbol description Symbol description Shows when the curve is comfort-adjusted. The digit shows how much the deviation is from the (+1) default value. (+2 in example) Shows information about the heat curve. Shows that the heat curve window is inactive. Press on the symbol to open heat curve settings. -
Page 30: 10Activate Manual Test
Installation Guide Calibra Cool 8.1.10 Activate manual test Ensure that the main circuit breaker is on. The display will start up within 1 minute. 1. Press on the Start screen to open the Menu screen. 2. Press on Settings 3. Press to go to the menu page for Manual test. -
Page 31: Online
Online The heat pump is factory prepared for monitoring remotely via internet. (Thermia Online) In order to use the Thermia Online service: ▪... -
Page 32: Brine Monitoring
Installation Guide Calibra Cool 8.2.1 Brine monitoring Note: On WW version using water as cold carrier media, the brine monitoring function is used to prevent freezing and can/may therefore not be deactivated/adjusted. In cases where there is a risk that the energy outtake becomes too large for the collector (and the borehole becomes too cold), "Brine in monitoring"... -
Page 33: Cooling (Standard In Calibra Cool Model)
Installation Guide Calibra Cool Cooling (standard in Calibra Cool model) Products with cooling installed can during summer time give you an extra pleasant indoor climate. When cooling is installed, the cooling menu icon is visible in the heat pump display. -
Page 34: Cooling Season Start
Installation Guide Calibra Cool Cooling season start Above the set cooling Seasonal start temperature (outdoor), the Cooling integral will start counting, and eventually go in to Cooling season to allow cooling. Cooling integral The cooling integral value can be viewed in operating data for installer and is used by the controller to set Cooling season ( =the heat pump is allowed to produce cooling). - Page 35 Installation Guide Calibra Cool Symbol Description Home. Back to start screen. Information. Shows information about the respective page. This symbol indicates that the text that follows can be pressed to open a new view. Alarm. Press on the symbol to go to the alarm window.
- Page 36 Installation Guide Calibra Cool Internet connection. Visible in the top of the display when the heat pump has an internet connection. Network connection. Visible in the top of the display when the heat pump has a network connection. Pool heating mode. Visible in the top of the display when the heat pump is in pool heating mode.
-
Page 37: Additional Functionality
▪ The table below is created with the functionality available from soft ware 10.0. Additional functionality may be added later. Note: not valid does not support all functionality as normal Calibra and vice versa. (e.g. Active cooling is not supported on Calibra Cool with soft ware 10.01, only inbuilt passive cooling.) Buffer tank is not supported in soft ware 10.01... - Page 38 Installation Guide Calibra Cool How to set up additional accessories, functions etc. For more detailed information and system solutions see separate instruction or system solution generator on the web. Note: Functions not activated/enabled from factory must be enabled and activated in the control system before they can be used.
- Page 39 Installation Guide Calibra Cool Electrical connections 10.1 Calibra Cool electrical connections 400V (this label is also fitted on the electrical cabinet of the heat pump) Outdoor sensor Room sensor Start signal Installation connections (PT1000 Type) cooling (optional) EVU/Smart grid 1...
- Page 40 Installation Guide Calibra Cool BWCC01IG0102 Thermia AB...
- Page 41 Installation Guide Calibra Cool Thermia AB BWCC01IG0102...
- Page 42 Installation Guide Calibra Cool BWCC01IG0102 Thermia AB...
- Page 43 Installation Guide Calibra Cool Thermia AB BWCC01IG0102...
- Page 44 Internet: www.thermia.com Thermia can accept no responsibility for possible errors in catalogues, brochures and other printed material. Thermia reserves the right to alter its products without notice. This also applies to products already on order provided that such alterations can be made without subsequential changes being necessary in specifications already agreed. All trademarks in this material are property of the respective companies.
Need help?
Do you have a question about the Calibra Cool and is the answer not in the manual?
Questions and answers