
Subscribe to Our Youtube Channel
Related Manuals for HighPoint RocketStor 6314X


Summary of Contents for HighPoint RocketStor 6314X
- Page 1 RocketStor 6314X User Manual Mar.31, 2020 Revision v1.04 HighPoint Technologies, Inc.
- Page 2 Backup your important data before using HighPoint's products and use at your own risk. In no event shall HighPoint be liable for any loss of profits, or for direct, indirect, special, incidental or consequential damages arising from any defect or error in HighPoint's products or manuals.
-
Page 3: Table Of Contents
Install and Update Drivers ........................14 Install/Update Drivers on existing operating systems ..............16 Installing HighPoint WebGUI ........................22 Navigating the WebGUI ..........................23 Logging In HighPoint WebGUI ........................ 24 Global Tab ..............................26 Viewing HBA Properties ........................27 Viewing Storage Properties ......................... 27 Physical Tab ............................... - Page 4 Critical array disabled when you removed wrong disk ..............56 Disabled Condition ........................... 56 Help .................................. 57 WebGUI Icon Guide ........................... 58 RAID Level Reference Table ........................60 HighPoint Recommended List of Hard Drives ..................61 Contacting Technical Support ........................ 61...
-
Page 5: Kit Contents
Thunderbolt™ Cable ⚫ UL Power Cord ⚫ Quick Installation Guide for RS6314X ⚫ Thunderbolt™ 3 to Thunderbolt 2 adapter (only for RocketStor 6314X) ⚫ For any damaged or missing items contact your reseller or submit a support ticket online at www.highpoint-tech.com/websupport/... - Page 6 Product Information RocketStor 6314X Port Technology Thunderbolt™ 2 Onboard Storage processor RAID-On-Chip Onboard Onboard Cache Memory 512MB DDR 3 Cache Memory with ECC Protection Port Type 2x Thunderbolt™ Port RAID Level 0, 1, 5, 6, 10 and JBOD Max. Capacity...
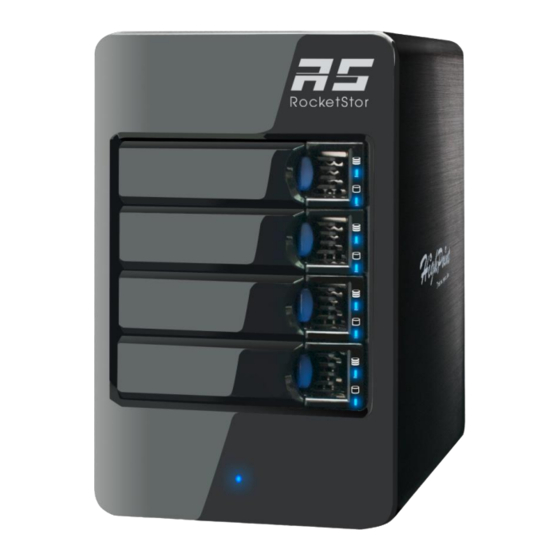
- Page 7 Operating Environment (operating) 5° C – 45° C Temperature (non-operating) -40° C – 65° C (operating) 8% – 90% RH (Non-condensing) Relative Humidity (non-operating) 5% – 95% RH (Non-condensing) Figure 1. RS6314X Front Panel Figure 2. RS6314X Back Panel Figure 3. Isometric view of disk tray with physical drive installed (drive not included) Figure 4.
-
Page 8: Getting Started
The technical support may ask for the S/N of the enclosure unit. Please record the S/N of the unit. The S/N is located on the sticker on the bottom of the enclosure unit as below. The S/N has 13 characters and the S/N format for the RocketStor 6314X is “****M3M******”... - Page 9 Setup the hardware Step 1. Plug in the power cord for your RS6314X. Note: To prevent physical drive damage, keep the RS6314X oriented upright when in use. Figure 5. Power Cord plugged into back panel Step 2. Plug one end of the Thunderbolt™ cable to either of the RS6314X ports and the other end to your computer’s Thunderbolt™...
- Page 10 Figure 9. Power Button located on Back Panel (figure shows enclosure switched ON) Step 7. Make sure the power LED on the front of the enclosure is LIT. Step 8. (For Windows) Install RS6314X drivers and the HighPoint WebGUI Management Utility to access and manage your arrays.
- Page 11 ⚫ When array is Disk Tray Bottom When disk has a normal status, problem, LED LED will be will be SOLID UNLIT When disk is under Rebuilding, LED will be Blinking ⚫ When enclosure Power LED is powered on LED will be SOLID BLUE ⚫...
- Page 12 ⚫ Unit is powered ⚫ Disk tray is empty UNLIT Shutting Down the RS6314X The 6314X enclosure will automatically power down when your computer is turned off. For turning off the 6314X safely without shutting down your PC, take the following steps: 1.
-
Page 14: Install And Update Drivers
Figure 8. Navigate to Apple Icon > About this Mac > System Report > PCI The RS6314X should be listed as RocketRAID 4520 SAS Controller, and Driver Installed should say Yes. (HighPoint Mac drivers are embedded for OSX 10.9 and later.) For Windows users: 1. - Page 15 Note: Alternatively, you can search Device Manager in your start menu search bar. 6. Click the Storage controllers tab If driver is installed it will show RocketRAID 4520 SAS Controller, ⚫ If driver is not installed it will be located in Other devices as RAID Controller ⚫...
-
Page 16: Install/Update Drivers On Existing Operating Systems
If you previously uninstalled the drivers, or wish to update your current drivers, follow the instructions below. HighPoint Mac Drivers have file extension .dmg; make sure the file extension for the files you downloaded are the same. - Page 17 Navigate to your specific HBA controller page (Refer to How to View HBA Properties to ⚫ find model name) 2. Once downloaded, locate the folder you downloaded the driver to and double click on the file named “HighPointIOP_Mac_###.dmg” Note: File name varies, but extension is .dmg. 3.
- Page 19 4. After reboot, check drivers are installed properly using device manager Alternate Install Method: 1. Obtain latest driver software for RocketRAID 4520 SAS Controller from our website http://www.hptmac.com/series-rs6314a-resources.php 2. Take note the location you downloaded the driver file to, then open Windows Device Manager.
- Page 20 5. When prompted, select Browse my computer for driver software 6. Locate the driver files you downloaded and select them. 7. Press next and follow the on-screen instructions 8. Reboot...
- Page 21 Uninstall Drivers To uninstall the drivers, take the following steps For Mac Platform: 1. Double click on “HighPointIOP_Mac_106_####.dmg” Note: File name subject to change, make sure extension is .dmg. 2. Double click on uninstall.command 3. A terminal window will pop up prompting you to type in your administrator password. Type in your administrator password to allow uninstall.
-
Page 22: Installing Highpoint Webgui
Installing HighPoint WebGUI HighPoint Web RAID Management Software (WebGUI) is used to monitor and configure your hard disks and RAID arrays attached to HighPoint RocketRAID controllers. The software package must be installed on system with supported HighPoint RocketRAID controllers installed, and the device driver must be loaded to run the service. A web browser with XML support is required on the client side, e.g. -
Page 23: Navigating The Webgui
Navigating the WebGUI The HighPoint WebGUI management utility allows you to do several key things: ⚫ Create and remove arrays ⚫ Monitor disk health ⚫ Update firmware and BIOS ⚫ Change enclosure settings ⚫ Troubleshoot faulty drives ⚫ View general system overview... -
Page 24: Logging In Highpoint Webgui
Logging In HighPoint WebGUI You can reach the HighPoint WebGUI log in page either by: Double clicking on the HighPoint RAID Management icon created on your desktop ⚫ Opening your preferred web browser and typing http://localhost:7402 in the address bar. - Page 25 Remote Login A user connected to a local network can remotely access the WebGUI using the IP address of the host device. To obtain your IP address For Mac users: 1. Open a terminal window on the host computer (computer that is connected to the RS6314X enclosure) 2.
-
Page 26: Global Tab
Note: Make sure Restrict to localhost access is disabled in WebGUI Setting (Refer to setting) You can then remotely access the WebGUI using any other computer that is in your local network by opening any web browser and typing http://{IP address of host computer}:7402 (default port is 7402) Global Tab... -
Page 27: Viewing Hba Properties
The GUI Global view provides an overview of what each HighPoint controller card connected to your computer detects. It is also the first page you see when logging in. Host Bus Adapter Properties ⚫ Storage Properties ⚫ On the top left of the page is a drop down menu that allows you to select which controller you want to manage (if you have multiple HighPoint controllers connected). -
Page 28: Physical Tab
⚫ Update Firmware ⚫ Physical Devices Information ⚫ Controller Information: Lists the controller model name, BIOS version, and vendor. Model Name: RocketRAID 4520 SAS Controller (for RS6314X) ⚫ EFI Version: v1.1 (as of 5/5/2015) ⚫ Vendor: HighPoint Technologies, Inc. ⚫... -
Page 29: Updating Bios/Firmware
CPU Temperature: Displays computer temperature in Celsius (° C). ⚫ Board Temperature: Displays the board temperature in Celsius (° C). ⚫ SDRAM Size: SDRAM size of the HighPoint controller card ⚫ Battery Installed: Battery Backup Unit (Not Applicable for RS6314X) ⚫... - Page 30 The following properties are part of the Physical Devices Information box under the physical tab. Model – Model number of the physical drive ⚫ Capacity – Total capacity of the physical drive ⚫ Revision – HDD device firmware revision number ⚫...
- Page 31 * Disk properties that can be adjusted. Read Ahead Enabling disk read ahead will speed up read operations by pre-fetching data and loading it into RAM. Write Cache Enabling write cache will speed up write operations. NCQ (Native Command Queuing) A setting that allows disks to queue up and reorder I/O commands for maximum efficiency.
-
Page 32: Logical Tab
Logical Tab The Logical tab is where you are edit, delete, and maintain your RAID configurations, as well as, adding drives to your spare pool. The logical tab has the following settings: Create Array ⚫ Spare Pool ⚫ Logical Device ⚫... - Page 33 An array is a collection of physical disks that will be seen as one virtual drive by your Operating System (OS). The RS6314X has a RocketRAID 4520 SATA/SAS controller capable of creating the following array types...
- Page 34 Array Type: JBOD – Just a Bunch of Disks ⚫ RAID 0 - Striping ⚫ RAID 1 - Mirroring ⚫ RAID 5 – Rotating Parity bit ⚫ RAID 1/0 – Striping of Mirrored Drives ⚫ RAID 6 – Double Parity Bit ⚫...
- Page 35 Block Size (default: 64K) [16K, 32K, 64K, 128K, 256K, 512K, 1024K are the supported block sizes] Adjusting the block size towards your disk usage can give some performance gain. In a typical RAID configuration, data of the virtual drive is striped (or spread across) the physical drives.
- Page 36 DV Mode This mode is specifically designed for video applications. The default firmware cache policy provides balanced performance for standard applications such as workstations, file servers, and web servers. But for DV mode, a special cache firmware is implemented specifically for large sequential writing (large I/O requests such as video files).
-
Page 37: Adding Spare Disks
Margin [5% - 25%] When DV mode is enabled, you have the option to set the margin. This percentage represents the amount of space the designated cache will hold before flushing the data onto the drive. Increasing the margin % will result in more stable performance, but decrease the maximum write performance. -
Page 38: Obtaining Logical Device Information
To add spare disks: 1. Log in WebGUI 2. Click Logical 3. Click Spare Pool 4. Check the box for the disk you want as a spare from Available Disks 5. Click Add Spare Disks added to the spare pool will show under Spare Pool and can be removed by checking the disk checkbox from Spare Pool >... - Page 39 A Normal Status Array has the following options Delete ⚫ Unplug ⚫ Verify ⚫ Change Cache Policy ⚫ Change Margin ⚫ Rename ⚫ ORLM ⚫ Delete – deletes the selected RAID array Unplug – powers off the selected RAID array Verify –...
-
Page 40: Expanding An Existing Array
Reinserting the same disk should trigger rebuilding status, since data on the disk would be recognized. If you insert a new disk, clicking add disk will give you the option to select that disk and add it to the array. Disabled Status A disabled status array means that your RAID level does not have enough disks to function. - Page 41 2. Select desired controller from drop down menu on top left 3. Click Logical 4. Click Maintenance for the array you want to change Select a different RAID level to Migrate ⚫ Select the same RAID level to Expand ⚫ 5.
- Page 42 Physical Device Information Location – which controller and port the drive is located in ⚫ Model – model number of the drive connected ⚫ Capacity – total capacity of the drive ⚫ Max Free – total capacity that is not configured ⚫...
-
Page 43: Setting Tab
If device is currently beeping, clicking Beeper Mute will mute the sound immediately. Note: This button does not permanently mute the alarm. In order to permanently mute the alarm, go to Setting > Enable audible alarm > Disabled. Setting Tab Under this tab, user can Enable auto-rebuilding Enable rebuilding on error... -
Page 44: System Settings
You can specify the amount of system resources you want to dedicate to rebuilding the array. There are 5 levels of priority [Lowest, Low, Medium, High, Highest] Port Number (default: 7402) The default port that the HighPoint WebGUI listens on is 7402. You may change it to any open port. Password Setting... -
Page 45: Changing Your Webgui Password
Changing your WebGUI password Under Password Setting type your new password and confirm it, then click submit Recovering your WebGUI password If you wish to revert to the default password: hpt, delete the file hptuser.dat. For Mac Users: 1. Open Terminal 2. - Page 46 3. Type in the email address of the sender (email account that is going to send the alert) 4. Type in the account name and password of the sender 5. Type in the SMTP port (default: 25) 6. Check support SSL box if SSL is supported by your ISP (port value will change to 465, refer to your ISP if you have a specific SMTP port.
-
Page 47: Recover Tab
Recover Tab Previously created arrays will be stored under this tab. Recovering an array from here will attempt to recover a ‘disabled’ array and make it ‘normal’. The Recover List will list all your previous and current created arrays. Each entry will list the following properties: Array name ⚫... -
Page 48: Reloading Your Backup Recover List
Note: loading a back up recover list will completely replace the current recover list. 5. Click Submit Event Tab In the event tab, you can see log entries associated with the HighPoint device. The event log provides useful information when troubleshooting your set up. In the event tab, there are four options available: Download –... -
Page 49: Shi (Storage Health Inspector)
Verification errors Hardware related problems Error Hard disk failure Broken errors Memory failure The event view is a basic error logging tool built into the HighPoint WebGUI. SHI (Storage Health Inspector) S.M.A.R.T. Attributes ⚫ HDD Temperature Threshold ⚫ Storage Health Inspector Scheduling ⚫... -
Page 50: Changing Hdd Temperature Threshold
2. Select the proper controller using the dropdown menu on the top left 3. Click the SHI tab 4. Click SMART on the desired disk 5. Click Enable to enable SMART monitoring Disabling SMART monitoring You have the option the disable SMART monitoring on each individual disk. -
Page 51: Utilizing The Health Inspector Scheduler
Utilizing the Health Inspector Scheduler The Health Inspector Scheduler (HIS) enables you to schedule disk/array checkups to ensure disks/array are functioning optimally. Creating a New Verify Task All arrays will appear under New Verify Task 1. Log in to WebGUI 2. -
Page 52: Initializing Your Disks
Initializing your Disks After your array is created, the logical drive will be detected by your operating system (OS). But the drive is not accessible until after you initialize and format it to your corresponding OS file system. For Mac Users: When you insert a new drive or a drive with a different filesystem, Mac OSX will prompt that the disk is not readable and that you must initialize it. -
Page 53: Replacing A Failed Disk
1. Click Start 2. Go to Control Panel 3. Click System and Security 4. Under Administrative Tools click Create and format hard disk partitions. Alternatively you can search Disk Management in the start search bar ⚫ 5. Find the disk you wish to format 6. -
Page 54: Critical Condition
Critical Condition When your disk is critical, that means your array as a whole is still accessible, but a disk or two is faulty (depending on your RAID level) is in danger of failing. Unplugging disk that is part of an array ⚫... -
Page 55: Disabled Condition
Online Array Roaming One of the features of all HighPoint RAID controllers is online array roaming. Information about the RAID configuration is stored on the physical drives. So if a card fails or you wish to switch... -
Page 56: Help
Online Help redirects you to additional documentation concerning the HighPoint WebGUI. Register Product takes you to HighPoint’s web support. On this page you can create a new customer profile where you can register your product or post an online support ticket. -
Page 57: Webgui Icon Guide
WebGUI Icon Guide Critical – missing disk A disk is missing from the array bringing it to ‘critical’ status. The array is still accessible but another disk failure could result in data loss. Verifying The array is currently running a disk integrity check. Rebuilding The array is currently rebuilding meaning you replaced a failed disk or added a new disk to a ‘critical’... - Page 58 Normal The array status is normal Initializing The array is initializing, either foreground or background initialization Initialization Stopped The initialization has been stopped. Current status is uninitialized. Critical – Inconsistency Data in the array is inconsistent and needs to be rebuilt. Critical –...
- Page 59 Table 3. RAID Level Reference Table Type Descriptio Min. Usable Advantage Disadvantage Application disks space JBOD Just a bunch of 100% Each drive can be accessed as a No fault tolerance - failure Backup disk single volume of one drive results in complete data loss RAID 0 No fault tolerance –...
-
Page 60: Highpoint Recommended List Of Hard Drives
HighPoint Recommended List of Hard Drives HighPoint maintains a list of tested hard drives suitable for RAID applications. Since not every hard drive in the market can be tested, this list is meant to be a general guideline for selecting hard drives operating in a RAID environment.
Need help?
Do you have a question about the RocketStor 6314X and is the answer not in the manual?
Questions and answers