Table of Contents
Advertisement
Quick Links
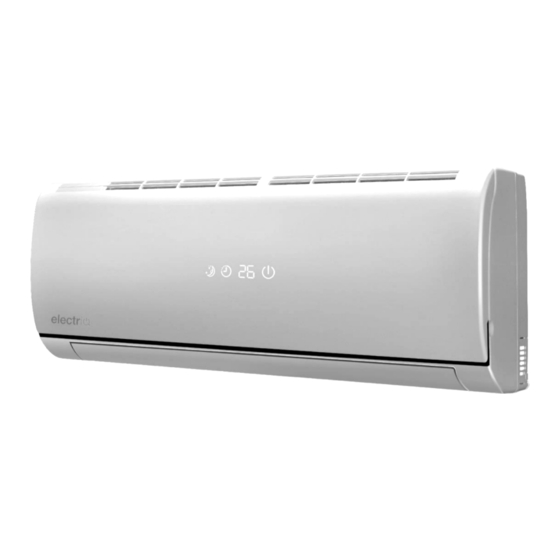
Wall Mounted Inverter Multi Split Air Conditioner with Heat Pump
User and Installation Manual
eiQ-9K9KC18KWMINV
eiQ-12K12KC24KWMINV
Thank you for choosing ElectrIQ
Please read this user manual before using this innovative
Air Conditioner and keep it safe for future reference.
Visit our page www.electrIQ.co.uk for our entire range of Intelligent Electricals
Advertisement
Table of Contents

Related Manuals for ElectrIQ eiQ-12K12KC24KWMINV


Summary of Contents for ElectrIQ eiQ-12K12KC24KWMINV
- Page 1 User and Installation Manual eiQ-9K9KC18KWMINV eiQ-12K12KC24KWMINV Thank you for choosing ElectrIQ Please read this user manual before using this innovative Air Conditioner and keep it safe for future reference. Visit our page www.electrIQ.co.uk for our entire range of Intelligent Electricals...
-
Page 2: Table Of Contents
CONTENTS CONTENTS SAFETY INSTRUCTIONS OPERATION REMOTE CONTROL FILTERS END OF SEASON START OF SEASON REPLACING THE BATTERIES INSTALLATION GUIDE INSTALLATION OF THE OUTDOOR UNIT PIPELINES CONNECTION & AIR PURGING ELECTRICAL WIRING DIAGRAMS TROUBLESHOOTING AND SELF DIAGNOSIS TECHNICAL SPECIFICATIONS APPENDIX... -
Page 3: Safety Instructions
SAFETY INSTRUCTIONS Important! • Carefully read the instructions before operating the unit • This appliance comprise of an indoor and an outdoor unit. The indoor slim evaporator is designed exclusively for indoor installations while the external condenser should be installed outside while still away from flood water or snow line. •... -
Page 4: Operation
Energy Saving and Unit Safety Protection Tips Do not cover or restrict the airflow from the outlet or inlet grills. For maximum performance the minimum distance from a wall or objects should be 50cm. Keep the filters clean. Under normal conditions, filters should only need cleaning once every four weeks (approximately). -
Page 5: Remote Control
REMOTE CONTROL The remote control has a range of up to 8m. Point the remote control at the receiver in the interior unit. A beep confirms that the remote control signal has been received. NOTE: LAMP button and CLEAN button may not available in every models REMOTE OPERATION Turn the appliance on with the ON/OFF button. - Page 6 Heat 1. Press the MODE button until the HEAT indicator appears 2. Set the desired temperature. 3. Use the FAN button to set the fan speed. Fan mode 1. Press MODE button until the FAN indicator appears. 2. The temperature settings will not control fan operation 3.
-
Page 7: Filters
IMPORTANT Auto restart. The air conditioner will automatically restart when electricity is restored after a power cut. If in doubt, check the settings. Range of internal thermostat the internal thermostat can be set at a desired temperature between 16 and 32°C. Note that whether the desired value is achieved depends on size, temperature and insulation of the room. -
Page 8: End Of Season
Hold the front panel open (or put it in horizontal position) and remove the filter(s). Use a vacuum cleaner to remove dirt. If the dust filter is very dirty, it may be washed in lukewarm water with a very small amount of neutral detergent. Rinse well and allow to dry completely (not in direct sunlight or near a source of heat). -
Page 9: Installation Guide
For your convenience you can download the latest version of the user / installation manual on www.electriq.co.uk Indoor Unit Position The air inlet and outlet vent should be away from any obstruction, ensuring that there is a good airflow through the whole air-conditioned space. - Page 10 NOTES: Only use correct power voltage making sure the correct sized power cables are used The appliance shall be installed in accordance with standard wiring regulations by qualified personnel Only replace fuses according to their printed rating or corresponding pcb boards RECOMMENDED INSTALLATION SPACING DIAGRAM...
- Page 11 TOOLS RECOMMENDED FOR INSTALLATION Electric drill Hammer Screwdrivers Tape measure Spirit level Core hole cutter Number 14 (7mm) Pencil and masonry drill chalk 1.5 inch number Small 10 screws stepladder roundhead slotted Protective glasses and mask 7 mm wallplugs Pipe&cable detector 4 inch plastic ties...
- Page 12 Also the following 2 inch Pipe clips Circuit breaker when drilling inside and out Garden gloves when lifting the outdoor unit Dustsheets Foam Filler Silicone sealer and gun...
- Page 14 1. Always install the rear bracket horizontally. The pipes in the unit can be installed to the left (default) or can be channeled to the right side. If the drain pipe needs to be changed from left to right then the rubber bung on the right side needs to be moved to the left outlet to avoid leakage. The outlet of the water tray needs adjusting down so the water follows the gravity fall.
-
Page 15: Installation Of The Outdoor Unit
The piping can be lead out both on the right or the left of the indoor unit as seen in fig. 1. Please cut off the pipe hole guards if you are changing the pipe position. The unit also features alternative guards for more pipe positioning. Make sure that the drain pipe is underneath the pipelines. -
Page 16: Pipelines Connection & Air Purging
PIPELINES CONNECTION & AIR PURGING No dust or any other particles, air or moisture should be allowed to enter the air conditioning system. Careful attention should be paid when pipeline connection for outdoor unit is made. Try to avoid repeated curves as much as possible; otherwise damage to the copper pipes may occur. Suitable wrenches should be used when the pipeline connection is done so as to ensure appropriate torque (refer to following torque table). - Page 17 Adding refrigerant Additional refrigerant amount Refrigerant must be added if the piping measures more than 5 metres (16'5") in length. This operation can only Liquid pipe diameter 6.35 (1/4") Liquid pipe diameter: 9.52 (3/8") be performed by a professional F-Gas engineer, for the (piping length-5)mx30g (piping length-5)mx65g additional gas amount, see the below...
- Page 18 To keep the allowed bending radius please make the Please do not extend only one side of packed soft pipes vertical before extending Please make use of semicircle pulley to keep the allowed bending angle Please use a twisting wheel to avoid improper bending.
-
Page 19: Electrical Wiring Diagrams
ELECTRICAL WIRING AND DIAGRAMS Remove the protective plastic drawer case from the outdoor unit to gain access to the electrical connections. Connect the indoor power and control wires with the matching outdoor wire as per electrical diagram provided (Fig.1) If your unit is provided with quick electrical connectors (Fig. 2) please use the guides provided as per Fig. - Page 20 Outdoor Unit...
-
Page 21: Troubleshooting And Self Diagnosis
TROUBLESHOOTING AND SELF DIAGNOSIS ElectriQ air conditioners have an advanced self-diagnosis system allowing them to display the service information Protection and Fault Codes for Indoor Unit Board Fault/Protection Fault cause Indoor Display Zero passage fault of PG motor Abnormal zero passage of PG motor... - Page 22 Outdoor Board Fault Codes Displayed Fault Definition Fault Cause Content EEPROM fault Fault of EEPROM on coordination board EEPROM fault Fault of EEPROM on outdoor board Fault of communication between coordination No communication or communication fault between board and driver board coordination board and driver board Fault of communication between variable Communication fault between the outdoor unit power...
-
Page 23: Technical Specifications
Technical specifications Model eiQ-9K9KC18KWMINV eiQ-12K12KC24KWMINV Rated volt and frequency(Ph-V-Hz) 220-240V~50Hz,1Ph 220-240V~50Hz,1Ph Mode Cooling Heating Cooling Heating Single 1240W~3840W 1400W~4000W 1240W~3840W 1400W~4000W Rated capacity (W) Double 1800W~6400W 1200W~7000W 2400W~6800W 2500W~8100W Cooling power input Single 320W~1470W 300W~1420W 320W~1470W 300W~1420W (W) Double 550W~2600W... - Page 24 30-38 30-38 level(dB/A) Sound power noise 40-48 40-48 OUTDOOR UNIT Model eiQ-18wminMSOUT eiQ-24wminMSOUT Type Rotary Rotary (Rotary,Piston,scroll) Brand electriQ electriQ Capacity(W) 4515 4515 Compressor Power input (W) 1135 1135 RLA(A) 4.05 4.05 Refrigerant oil ESTER OIL VG74/500ml ESTER OIL VG74/500ml Dimension 870×310×700...
-
Page 25: Appendix
Please contact the local council for details of your local household waste recycling centres. WARRANTY INFORMATION ElectriQ guarantee provides cover against material or manufacturing faults. This means that if your air conditioner develops a fault during the guarantee period, we will arrange for it to be repaired or replaced. - Page 26 ElectrIQ UK SUPPORT www.ElectrIQ.co.uk/support Please, for your own convenience, check the troubleshooting guide before calling the service line. If the unit still fails to operate call: 0871 620 1057 or complete the online form Office hours: 9AM - 5PM Monday to Friday www.ElectrIQ.co.uk...
Need help?
Do you have a question about the eiQ-12K12KC24KWMINV and is the answer not in the manual?
Questions and answers