Table of Contents
Advertisement
Quick Links
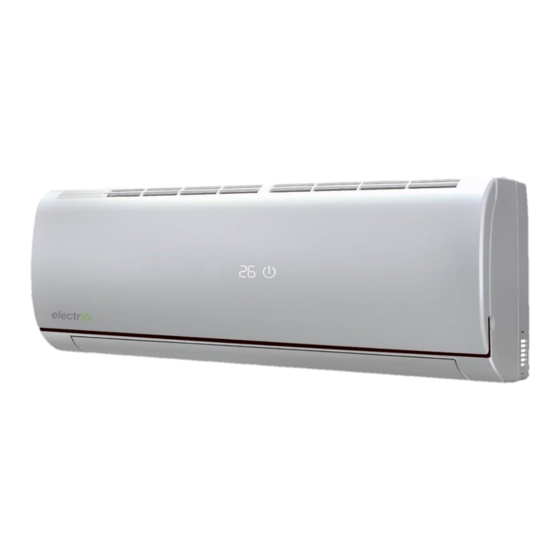
Wall Mounted Inverter Multi Split Air Conditioner with Heat Pump
User and Installation Manual
eiQ-3MS9K9K9K
Thank you for choosing ElectrIQ
Please read this user manual before using this innovative
Air Conditioner and keep it safe for future reference.
Visit our page www.electrIQ.co.uk for our entire range of Intelligent Electricals
Advertisement
Table of Contents

Related Manuals for ElectrIQ eiQ-3MS9K9K9K


Summary of Contents for ElectrIQ eiQ-3MS9K9K9K
- Page 1 Wall Mounted Inverter Multi Split Air Conditioner with Heat Pump User and Installation Manual eiQ-3MS9K9K9K Thank you for choosing ElectrIQ Please read this user manual before using this innovative Air Conditioner and keep it safe for future reference. Visit our page www.electrIQ.co.uk for our entire range of Intelligent Electricals...
-
Page 2: Table Of Contents
Pipekit Model Outdoor Indoor eiq- Eiq- eiQ-3MS9K9K9K eiq-9wminv3MSIN 3MSC2XWINSOUT 9wminvIN5m* The retailer and manufacturer will not be liable for failed installation, or problems occurring due to the above not been checked prior to arranging installation. *PIPEKIT12K-5M may also be supplied, which is the same specification. A range of pipe kits and pipes are available from the retailer. -
Page 3: Safety Instructions
SAFETY INSTRUCTIONS Important! • Carefully read the instructions before operating the unit • This appliance comprises of three indoor units and an outdoor unit. The slim wall mounted evaporators are designed exclusively for indoor installations while the external condenser should be installed outside, ensuring it is kept away from flood water or snow lines. •... -
Page 4: Operation
Energy Saving and Unit Safety Protection Tips Do not cover or restrict the airflow from the outlet or inlet grills. For maximum performance the minimum distance from a wall or other objects should be 50cm. Keep the filters clean. Under normal conditions, filters should only need cleaning once every four weeks (approximately). -
Page 5: Remote Control
REMOTE CONTROL Indicates the fan speed selected Press to turn On / Off the air conditioner To change between Low, Medium, high and AUTO fan speeds. This button turns on and off the vertical swing function This button turns on and off the horizontal swing function This button is used to turn on and off the timer... - Page 6 FAN SPEED Use this button to set the fan speed between low, medium, high and automatic (the corresponding symbol on the display will flash). The fan speed in the automatic setting is determined by the difference between the desired temperature set and the room temperature. COOLING MODE 1.
- Page 7 TURBO (Not available on all models) When pressed the unit will operate at maximum fan speed and maximum cooling for 15 minutes. 1. Set the air conditioner to run with the settings required after Turbo has completed. 2. Press the TURBO button. TIMER OFF FUNCTION (While the air conditioner is on) 1.
-
Page 8: Filters
FILTERS Turn off the appliance from the consumer unit before attempting to service the filters. Opening the front panel: at the A recesses, pull the front part up with both hands. The front panel will stay horizontal (at around 90°). Closing the front panel: press the front part down at the sides at B and in the middle at. -
Page 9: Installation Guide
For your convenience you can download the latest version of the user / installation manual from www.electriq.co.uk INDOOR UNIT POSITION The air inlet and outlet vents should be away from any obstruction, ensuring that there is a good airflow through the whole air-conditioned space. - Page 10 OUTDOOR UNIT POSITION A convenient position, dry and well ventilated, outside of direct sunlight or strong winds, which is not on flood line and where noise and airflow does not cause interference or inconvenience. Select a location where there should be no obstructions to the inlet and outlet vents. ...
- Page 11 TOOLS RECOMMENDED FOR INSTALLATION Electric drill Hammer Screwdrivers Tape measure Spirit level Core hole cutter Number 14 (7mm) Pencil and chalk Masonry drill bit 1.5 inch number Small Step ladder 10 screws (Roundhead slotted) Protective glasses and mask 7 mm Wall plugs Pipe &...
- Page 12 Also the following 2 inch Pipe clips Circuit breaker when drilling inside and out Garden gloves when lifting the outdoor unit Dustsheets Foam Filler Silicone sealant and gun...
- Page 14 1. Always install the rear bracket horizontally. The pipes in the unit can be installed to the left (default) or can be changes to exit on the right side. If the drain pipe needs to be changed from left to right then the rubber bung on the right side needs to be moved to the left outlet to avoid leakage.
-
Page 15: Installation Of The Outdoor Unit
The pipework can be fed out of either the right or the left of the indoor unit as seen in fig. 1. Please cut off the pipe hole guards if you are changing the pipe position. The unit also features alternative guards for more pipe positioning. -
Page 16: Pipelines Connection & Air Purging
PIPELINES CONNECTION & AIR PURGING No dust or any other particles, air or moisture should be allowed to enter the air conditioning system. Careful attention should be paid when the pipeline connection of the units are made. Try to avoid repeated curves as much as possible;... - Page 17 ADDING REFRIGERANT ADDITIONAL REFRIGERANT AMOUNT Liquid pipe diameter Refrigerant must be added if the pipework 6.35 (1/4") measures more than 5 metres (16'5") in length. This operation can only be performed by a (pipework length - 5)m x 30g professional F-Gas engineer, for the additional refrigerant quantity, please refer to the table.
- Page 18 To avoid damaging the Please do not extend only pipework during unrolling. one side of the pipework, Ensure the packed soft pipes as this could kink or are vertical before extending damage the pipework Ensure the bends are not too severe, as this could Please make use of a restrict refrigerant flow, semicircle pulley to keep the...
-
Page 19: Electrical Connection Of The Air Conditioner
ELECTRICAL CONNECTION OF THE AIR CONDITIONER The electrical connections can be found under the protective plastic cover. Remove this from the side of the outdoor unit to gain access to the electrical connections. Connect the indoor power and control wires with the matching outdoor wire as per the electrical diagram. -
Page 20: Troubleshooting And Self Diagnosis
TROUBLESHOOTING AND SELF DIAGNOSIS ElectriQ air conditioners have an advanced self-diagnosis system allowing them to display the service information Protection and Fault Codes for Indoor Unit Board Fault/Protection Fault cause Indoor Display Zero passage fault of PG motor Abnormal zero passage of PG motor... - Page 21 OUTDOOR BOARD FAULT CODES Displayed Fault Definition Fault Cause Content EEPROM fault Fault of EEPROM on coordination board EEPROM fault Fault of EEPROM on outdoor board Fault of communication between No communication or communication fault between coordination board and driver board coordination board and driver board Fault of communication between Communication fault between the outdoor unit power...
-
Page 22: Technical Specifications
TECHNICAL SPECIFICATION Model 9K+9K+9K 220-240V~50Hz,1Ph (Ph-V-Hz)Rated volt and frequency Recommended Circuit Breaker Size Mode Cooling Heating Single 1240W~3840W 1400W~4000W Rated capacity (W) Triple 3000W~8500W 2500W~9000W Single 320W~1470W 300W~1420W Cooling power input (W) Triple 620W~3950W 580W~3900W Single 1.4~6.4A 1.3~6.2A Heating current input (A) Triple 2.8~18A 2.7~17.7A... -
Page 23: Appendix
WARRANTY INFORMATION The ElectriQ guarantee provides cover against material or manufacturing faults. This means that if your air conditioner develops a fault during the guarantee period, we will arrange for it to be repaired or replaced. - Page 24 ElectrIQ UK SUPPORT www.ElectrIQ.co.uk/support Please, for your own convenience, check the troubleshooting guide before calling the service line. If the unit still fails to operate call: 0871 620 1057 or complete the online form Office hours: 9AM - 5PM Monday to Friday www.ElectrIQ.co.uk...
Need help?
Do you have a question about the eiQ-3MS9K9K9K and is the answer not in the manual?
Questions and answers