Epson PictureMate Using Manual
Epson picturemate: user guide
Hide thumbs
Also See for PictureMate:
- Using manual (19 pages) ,
- Product information (11 pages) ,
- Start here manual (7 pages)
Table of Contents
Advertisement
Advertisement
Table of Contents

Related Manuals for Epson PictureMate


Summary of Contents for Epson PictureMate
- Page 1 Using PictureMate Without a Computer...
-
Page 2: Table Of Contents
Take Your PictureMate With You ........ -
Page 3: Welcome
Just insert a digital camera memory card and you’re ready to print brilliant, long- lasting photos. Because PictureMate is light and portable, you can print whenever and wherever you take pictures. Plus, your PictureMate photos are archival;... - Page 4 (See page 14.) If you have a PictBridge (USB Direct Print)-enabled camera, you can connect the camera to PictureMate and control printing right from your camera. (See page 31.) If you have a Bluetooth phone, or computer, you can send photos wirelessly to PictureMate for printing.
- Page 5 JPEG files or uncompressed TIFF files only Resolutions ranging from 80 × 80 to 4600 × 4600 pixels PictureMate recognizes and prints the first 999 photos on your memory card. Where to Find Information See your Start Here poster to unpack, set up, and use your PictureMate.
-
Page 6: Prepare To Print
Before you can print, you need to load paper and insert your memory card in PictureMate. Loading Paper Follow these steps to load PictureMate Photo Paper: Caution: Don’t load plain paper; this may damage PictureMate. Move the handle to the back and down. Then tilt up the photo viewer screen. -
Page 7: Inserting Your Memory Card
Slide the left edge guide against the paper. Make sure it is snug, but not so tight that paper can’t move. Note: When you need more paper, order a PictureMate Print Pack. See page 34 for more information. Inserting Your Memory Card Press the Open the memory card door. -
Page 8: Saving Power
Caution: you may lose photos on your card. Saving Power If you are not using PictureMate, the screen goes dark miniSD card ** after 13 minutes. Press any button to turn it back on. (MultiMediaCard... -
Page 9: Choose Photos To Print
If your camera supports DPOF (Digital Print Order Format), you can use it to pre-select which photos and how many copies you want to print. PictureMate will read the information on the card and automatically print the selected photos. See page 16 for more information. -
Page 10: Printing All Photos
Printing All Photos When you turn on PictureMate, you see the photo selection menu on the photo viewer screen. The red or orange bar at the top of the screen indicates the currently selected option. Make sure Print All is highlighted, then press OK. - Page 11 Note: If your card has more than 20 photos, you will need to reload paper while printing. Load a maximum of 20 sheets at a time. When you see a message that paper is out, load more paper and press OK to continue printing. If you need to cancel printing, press Cancel .
- Page 12 The blue box indicates the area that will print. If you want to adjust this area, press the Then press to move the box. Press OK, then press OK again. If you want to adjust the brightness, saturation, or sharpness of the photo, press the Menu button. See page 23 for more information.
- Page 13 Press the OK button. You see small thumbnail images of your photos: Press to choose the first photo you want to print. Then press OK. The photo outline changes from orange to blue. Press to choose the last photo you want to print.
-
Page 14: Printing Photos By Date
Printing Photos by Date You can print photos taken on specific dates. If you have a lot of photos on your memory card, this makes it easier to find the ones you want. At the photo selection menu, press the button to highlight Print by Date. - Page 15 Make sure you have enough paper loaded, then press Print again to start printing. Adding Fun Disney Frames to Your Photos PictureMate includes 15 different Disney character frames and two classic frames to choose from. At the photo selection menu, press the button to highlight Add Frame.
- Page 16 Make sure you have enough paper loaded, then press Print again to start printing. Viewing a Slideshow of Your Photos You can have PictureMate display all the photos on your card one by one. At the photo selection menu, press the button to highlight Play Slideshow.
- Page 17 Print button to print your pre-selected photos. Storing and Displaying Your PictureMate Prints Photos printed on PictureMate Photo Paper are beautiful, long-lasting images. Follow these guidelines to make sure they will look great for generations. Storing Your Prints To avoid scratches or smudging, do not rub the printed side of the photo.
-
Page 18: Do More With Your Photos
Getting Help If you need help with cropping, adjusting colors, or other PictureMate actions, you can get instructions right on the photo viewer screen. Press the Menu button. Press the... - Page 19 Note: You can use the arrow buttons to move the box up or down and select the exact portion of your image that will be printed. Set the area you want to print (or view) as follows: Press the button to zoom in and crop out more of the photo.
-
Page 20: Choosing A Layout
Make sure you have enough paper loaded, then press Print again to start printing. Choosing a Layout By default, your photos are printed at the full 4 x 6 size, without borders. If you want to print pictures with white borders or place several small photos on one sheet of paper, you can use the Layout menu. - Page 21 For example, if you want 3 mini wallet photos of one image and 4 of another, select 3 copies for photo A and 4 copies for photo B. Then choose Mini Wallets as the layout setting. Your photos will be printed on 2 sheets of paper as shown: Press OK again.
- Page 22 Note: The date and time come from your camera, not from the printer. If this information is incorrect, adjust the time and/or date setting on your camera. After selecting the photo(s) and number of copies you want, press the Menu button.
- Page 23 Press to choose one of the following settings: mmm.dd.yyyy (Sep.01.2005) dd.mmm.yyyy (01.Sep.2005) yyyy.mm.dd (2005.09.01) Press OK. To print the time, press to highlight Time Stamp, then press to open the menu. Press to choose one of the following settings: 12-hour system (03:00 for 3 pm) 24-hour system (15:00 for 3 pm) Press OK.
- Page 24 Fixing Photos PictureMate lets you correct the color and improve the image quality of your photos without using a computer. Two types of adjustments are available: Automatic adjustments If your camera supports PRINT Image Matching (P.I.M.) or Exif Print, the printer’s P.I.M./Exif setting automatically adjusts your photos for the best results.
- Page 25 Press to choose one of the options: P.I.M./Exif: This information helps ensure an accurate image reproduction for files that include P.I.M. or Exif Print data. Enhance: This setting improves your photos’ colors and increases contrast and sharpness. It may correct images that are too dark, too bright, or backlit.
- Page 26 Repeat steps 3 and 4 for the other settings if necessary. Press OK again to close the menu. You see your photo with your chosen settings applied. Press the Print button. You see the Print Confirmation: Make sure you have enough paper loaded, then press Print again to start printing.
-
Page 27: Save Your Photos To A Computer Or An External Device
User’s Guide to save your photos. Saving Photos to an External Device You can connect a USB external storage device directly to PictureMate and save your photo files to one of these: CD-R/RW drive (CD-R media only) Iomega ®... - Page 28 Note: If you insert a blank CD-R in the drive before inserting a memory card in PictureMate, you may see an error message. Eject the CD-R from the drive to clear the error, insert your memory card, then re-insert the CD-R.
- Page 29 Each time you save photos on the same disk or drive, they are saved in a new folder. The first folder is named 001, the second folder is named 002, and so on. If you save on a CD-R, PictureMate names the CD-R Photo.
-
Page 30: Print From A Computer Or An External Device
Tip: When you connect PictureMate to your computer, you can insert your memory card in PictureMate and the computer sees the memory card as if it were a hard drive. You can save your photos directly to your computer from the memory card. See the User’s Guide on your computer for details. - Page 31 Connect your CD or Zip drive’s USB cable, or plug your flash memory drive into the EXT/IF port on the back of PictureMate, as shown on the right. For a CD or Zip drive, insert a CD or Zip disk with photos into the drive.
- Page 32 Printing From a PictBridge-Enabled Camera You can connect your PictBridge- or USB DP-enabled digital camera to the back of PictureMate and use the camera to control printing. (Check your camera manual to see if it supports the PictBridge standard or USB DP.)
- Page 33 Connect your camera’s USB cable to your camera and the EXT/IF port on the back of PictureMate. Use your camera’s controls to select and print photos on PictureMate. (See your camera manual.) Printing Wirelessly From a Bluetooth Device You can print photos wirelessly from your Bluetooth- enabled PDA, cell phone, or computer when you use the optional Epson Bluetooth Photo Print Adapter.
- Page 34 Make sure you are within about 30 feet of PictureMate, then select the photo you want to print from your Bluetooth PDA, cell phone, computer, or other device and send it to PictureMate as follows: For Windows, send photos directly to PictureMate with your Bluetooth file sharing program.
-
Page 35: Replace Ink And Paper
PictureMate is sold or from retailers that sell printer supplies. Note: If you are out of PictureMate Photo Paper, but do not see the Replace cartridge message, you can still print. Use Epson Premium photo paper, borderless 4 × 6 inches for optimal print quality and prints that resist water, smudging, and fading. -
Page 36: Removing The Used Photo Cartridge
Removing the Used Photo Cartridge Make sure you have a new PictureMate photo cartridge before you begin. Once you start replacing a cartridge, you must complete all the steps in one session. Caution: Before you replace the cartridge, read the “Photo Cartridge Safety Instructions”... -
Page 37: Inserting The New Photo Cartridge
Carefully pull out the cartridge and dispose of it properly. (For appropriate disposal, check local resources for recycling guidelines.) Warning: Keep ink cartridges out of the reach of children and do not drink the ink. If ink gets on your hands, wash them thoroughly with soap and water. - Page 38 Slide the cartridge straight into the slot, label side up, until it is fully inserted. Push in both sides evenly to make sure it is not crooked. Note: The cartridge won’t go in all the way. You need to use the photo cartridge lever to lock it in place. If either side is sticking out, remove the cartridge and reinsert it so it is straight.
-
Page 39: Ink Level
. You can see the approximate ink level displayed on the photo viewer screen. Note: If the status (ink level) is down to only one bar, you should buy a new PictureMate Print Pack. See page 34 for more information. -
Page 40: Take Your Picturemate With You
Caution: Keep PictureMate out of the sun and don’t leave it in your car or other location where it can get too hot or too cold. If PictureMate is on, press the turn it off. -
Page 41: Using The Optional Battery
Caution: Make sure the photo cartridge is installed. Do not remove the photo cartridge before transporting. Don’t place PictureMate on its side or upside down, or ink may leak. Note: If your prints don’t look as good after PictureMate has been moved, try aligning the print head (see page 51). - Page 42 AC adapter and plugging in the printer. The power light flashes during charging when PictureMate is off. It takes about 2 hours to fully charge the battery when PictureMate is off. It takes longer when you use PictureMate while it is charging.
- Page 43 With a fully charged battery, you can print from 50 to 80 photos. Note: When you run PictureMate on the battery, the printer turns off automatically after 15 minutes if it is not being used. Press the On button to turn it back on.
-
Page 44: Set Picturemate Preferences
Set PictureMate Preferences You can change the way PictureMate works by using the Setup menu. You can set the following preferences: Choose how photo information and photos are displayed (on the right) Adjust the amount of expansion and cropping for... - Page 45 Press to select Display Preference, then press Choose the setting you prefer, then press OK. Continue pressing OK to exit the menu. Adjusting Borderless Expansion and Cropping When you print borderless pictures, your images are automatically expanded and cropped. If your pictures are cut off around the edges, you can adjust the amount of expansion and cropping.
- Page 46 For example, you might see a Print Confirmation like this: When Print Confirmation is Off, PictureMate does not display this screen before printing. You need to press Print just once to start printing. Follow these steps to change the Print Confirmation...
-
Page 47: After Printing
The Print Confirmation setting remains in effect until you change it again or reset the default preferences (see page 48). Determining Whether to Keep Selections After Printing You can decide whether to keep the print settings and photos you selected or return to your personal default settings after you print. - Page 48 OK. Continue pressing OK to exit the menu. Selecting Your Personal Settings You can reset the PictureMate settings to the ones you prefer. The settings you choose will become your “defaults,” but you will still be able to change them when you print.
-
Page 49: Returning To Factory Settings
The Top screen setting determines which selection mode (such as Print All or Print Some) is highlighted when you first turn on PictureMate. Returning to Factory Settings You can return your personal settings to the PictureMate original default settings. At the photo selection menu, press the Menu button. -
Page 50: Printer Care And Troubleshooting
Printer Care and Troubleshooting If you have problems with your PictureMate, or you want to improve print quality, read these sections: Cleaning the print head (on the right) Aligning the print head (on page 51) Error messages and warnings (on page 52) - Page 51 . You see this message: Press the OK button to begin cleaning the print head. Cleaning takes about 40 seconds. PictureMate makes some noise, and you see the following message on the screen: When cleaning is complete, you see a message asking if you want to print a nozzle check pattern.
- Page 52 Aligning the Print Head If you have moved PictureMate and print quality is not as good as it was before—for example, your prints look fuzzy, or have light or dark lines running through them—you may need to align the print head.
-
Page 53: Error Messages And Warnings
Press Back or OK to return to the Maintenance menu. Error Messages and Warnings If your PictureMate has any problems, you can check the screen for a message. If you see one of these messages, here’s what to do: Message Replace cartridge. - Page 54 See and reconnect the page 32. Adapter. A printer error has Turn off PictureMate, wait a few occurred. Try turning the seconds, then turn it on again. printer off, then back on. If the error does not clear, see See your printer manual “Where to Get Help”...
- Page 55 The first time you install the photo cartridge, PictureMate will charge its print head for about three minutes. Wait until charging finishes before you turn it off, or it may charge improperly and use more ink the next time you turn it on.
-
Page 56: Photo Quality Problems
PictureMate can recognize and print the first 999 photos on your memory card. Printing is too slow. If you are using PictureMate in a hot or sunny location, move it to a cooler location, then try printing again. For faster printing, try these tips: Photos with borders print faster than borderless photos. -
Page 57: Problems With Paper Feeding
Make sure the paper support is pulled up, all the way out, and is not leaning on the handle. The handle should be all the way down in back of PictureMate. Make sure the handle is not resting on the paper. See page 5. -
Page 58: Miscellaneous Printout Problems
Load paper glossy side up. Load a maximum of 20 sheets. Don’t load plain paper; this may damage PictureMate. Make sure you are using only PictureMate Photo Paper or Epson Premium photo paper (see page 34). Store paper flat to help prevent curling. -
Page 59: Where To Get Help
Toll or long distance charges may apply. Before you call, please have the following information ready: You can purchase a PictureMate Print Pack, which includes everything you need to print in one box: Express code is PictureMate Photo Paper and a PictureMate Photo Cartridge. -
Page 60: Notices
Notices Important Safety Instructions Before using your PictureMate, read the following safety instructions to make sure you use it safely and effectively: Be sure to follow all warnings and instructions marked on the printer. If you use the printer in places where the use of printers is restricted, such as in airplanes or hospitals, follow all instructions in those places. - Page 61 Place the AC adapter near a wall outlet where the plug can be easily unplugged. Do not place or store the printer, the AC adapter, or the optional battery outdoors. Do not block or cover the vents and openings in the printer.
- Page 62 If you remove the photo cartridge for later use, protect the ink supply ports from dirt and dust and store it in the same environment as the printer. A valve in the ink supply ports makes covers or plugs unnecessary, but the ink may stain items that come into contact with this area of the cartridge.
-
Page 63: Battery Safety Instructions
If a battery is swallowed, seek medical treatment immediately. Use only an Epson Li-ion battery model EU-112 for this printer according to the directions in the user documentation. Replacing the battery with an incorrect model may cause an explosion. - Page 64 Shipments to other locations will be made freight collect. You are responsible for securely packaging the defective unit and returning it to Epson within five (5) working days of receipt of the replacement. Epson requires a debit or a credit card number to secure the cost of the replacement printer in the event that you fail to return the defective one.
- Page 65 Epson, e.g., dealer or user-added boards or components. Epson is not responsible for warranty service should the Epson label or logo or the rating label or serial number be removed or should the product fail to be properly...
- Page 66 6 months of installation. You may be able to print more than the number of sheets of paper included in your PictureMate Print Pack. In this case the cartridge monitor indicates the cartridge can still be used. You...
- Page 67 Declaration of Conformity According to 47CFR, Part 2 and 15 for Class B Personal Computers and Peripherals; and/or CPU Boards and Power Supplies used with Class B Personal Computers: Epson America, Inc. Located at: MS: 3-13 3840 Kilroy Airport Way...
- Page 68 Seiko Epson Corporation. The information contained herein is designed only for use with this Epson product. Epson is not responsible for any use of this information as applied to other printers. Neither Seiko Epson Corporation nor its affiliates shall be...
- Page 69 Card is a trademark of Fuji Photo Film Co., Ltd. General Notice: Other product names used herein are for identification purposes only and may be trademarks of their respective owners. Epson disclaims any and all rights in those marks. The E...
-
Page 70: Index
16 printing from, 31 selected photos (DPOF), 16 Cancelling printing, 10 Card light, 6 Card, memory, 6 Care of PictureMate, 49 to 52 Carrying PictureMate, 39 Cartridge door, 35 to 38 Cartridge Status, 38 Case, optional, 40... - Page 71 Contrast on screen, 46 to 47 Copies, 9, 11 Copying photos, 26 to 28 Cropping, 17 to 19, 44 to 45 Customizing PictureMate, 43 to 48 Cut-off photos, fixing, 44 to 45 Date stamp, 21 to 22 Date, selecting photos by, 13 to 14...
- Page 72 Epson accessories, 32, 34, 40, 58 Store, 32, 34, 40, 58 technical support, 58 Error messages, 52 to 54 Exif Print, 24 EXT/IF port, 26 to 33 External device, 26 to 33 Factory settings, restoring, 48 Faint images, 56 FCC compliance, 66...
- Page 73 Macintosh Bluetooth printing, 33 using with PictureMate, 4 MagicGate Memory Stick, 7 Maintenance, 34 to 38, 49 to 52 Manuals, 4 Margins eliminating, 45 incorrect, 57 selecting, 19 to 20 Memory card adapter, 7 compatibility, 7, 53 inserting, 6 problems, 55...
- Page 74 17 problems, 54 safety instructions, 62 using, 8 to 25 PictBridge, 3, 29, 31 PictureMate customizing, 43 to 48 instructions, 17 messages, 52 to 54 Print Pack, 34 to 38, 58, 65 PIM (PRINT Image Matching), 3, 24...
- Page 75 17 messages, 52 to 54 safety instructions, 62 using, 8 to 25 SD (Secure Digital card), 7 Sepia, 20 to 21 Sequence of photos, 11 to 12 Settings, PictureMate, 43 to 48 Several photos, selecting, 10 to 11...
- Page 76 Wallet-size photos, 19 to 20 Warranty, 63 to 64 Where to get help, 58 Windows Bluetooth printing, 33 using with PictureMate, 4 xD Picture Card, 7 Zip disk printing from, 29 to 31 saving files to, 26 to 28 Zooming in and out, 17 to 19...
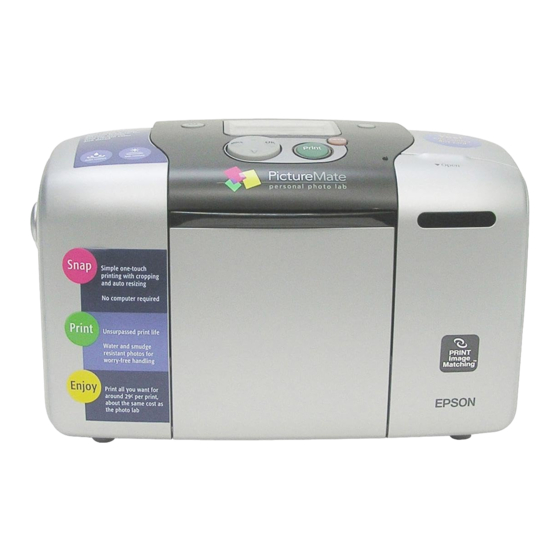
- Page 78 Get to know your PictureMate Power light Turn PictureMate on or off Set print options Return to previous menu Move through menu options Paper support EXT/IF (USB) port for camera or external drive Memory card door Output tray USB port for computer...
- Page 79 Need a new photo cartridge and paper? You can get the PictureMate Print Pack (part# T5570) with everything you need to print in one box: PictureMate Photo Paper and a PictureMate Photo Cartridge. You can also purchase these accessories for PictureMate: •...
Need help?
Do you have a question about the PictureMate and is the answer not in the manual?
Questions and answers
Picturemate keeps reverting to the memory card and I can't print from the computer.
The Epson PictureMate may revert to the memory card instead of printing from the computer if a compatible memory card is inserted. The printer is designed to automatically read and print from a memory card when one is detected. To print from the computer, remove the memory card or ensure the printer is properly set to receive print jobs from the computer.
This answer is automatically generated