airquee Last One Standing Additional Operating Instructions
Hide thumbs
Also See for Last One Standing:
- Additional operating instructions (48 pages) ,
- Operating instructions manual (16 pages) ,
- Additional operating instructions (14 pages)
Table of Contents
Advertisement
Quick Links
1. Site Survey........................................................................................ 2
2. Included with your Last One Standing ............................................... 3
3. Intended use of product .................................................................... 3
4. Operating guidelines ......................................................................... 3
5. Troubleshooting ................................................................................ 4
6. Hazards relating to electrical equipment ........................................... 5
7. Set-up ............................................................................................... 5
7.1 Assembly of the mechanism ..................................................... 6
7.2 Add the sealed arms ................................................................ 9
7.3 The Hand-Held Fan .................................................................. 9
7.4 The Control Panel .................................................................... 11
7.5 The Bed .................................................................................. 12
8. Transporting/Storing the Unit ............................................................ 14
8.1 Routine Inspections ................................................................... 14
8.2 Trial runs ................................................................................... 14
8.3 Thorough examination ............................................................... 14
10. Lubrication ..................................................................................... 15
11. Spare Parts Codes ......................................................................... 15
Contents
Page 1 of 16
Advertisement
Table of Contents

Subscribe to Our Youtube Channel
Related Manuals for airquee Last One Standing


Summary of Contents for airquee Last One Standing
-
Page 1: Table Of Contents
Contents 1. Site Survey..................2 2. Included with your Last One Standing ..........3 3. Intended use of product ..............3 4. Operating guidelines ................. 3 5. Troubleshooting ................4 6. Hazards relating to electrical equipment ........... 5 7. Set-up ....................5 7.1 Assembly of the mechanism ............. -
Page 2: Site Survey
YOUR OWN RISK ASSESSMENT BEFORE ATTEMPTING TO USE THIS PRODUCT. 1. Site survey: 1. Carry out a survey of the area where the Last One Standing will be located, and check for any overhead/underground cables. It’s important that this is carried out to avoid ground anchors penetrating underground services, and the Last One Standing coming into contact with overhead cables when inflated. -
Page 3: Intended Use Of Product
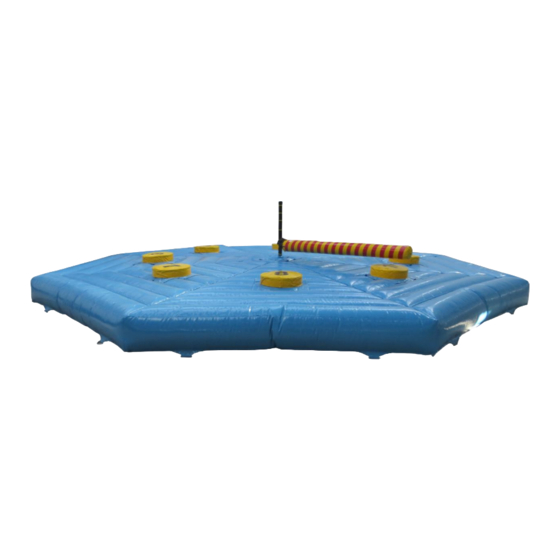
3. Intended use of the product: The Last One Standing is designed to be used by up to eight players and one operator. The players must bounce and duck at the right time to avoid the rotating sealed arms. -
Page 4: Operating Guidelines
No one with ANY PRE-EXISTING INJURIES OR HEALTH CONCERNS may use the “Last One Standing” game. Every time a user falls THE MECHANISM MUST BE STOPPED! The operator must adjust the speed of the arms to the abilities of the players. -
Page 5: Troubleshooting
The motor will give an error code if the input voltage is too high. Overvoltage: Make sure you change the generator to a smaller one. If you still have issues with the mechanism, please contact Airquee customer support on the following number +44 (0)1179 414 918. To avoid getting an error code: Make sure the electric power supply is stable and not fluctuating in any way. -
Page 6: Hazards Relating To Electrical Equipment
In accordance with HSE guidelines, all 240v equipment should be protected with an RCD (Residual Current Device) having a maximum trip current of 30 mA. RCD’s are available from Airquee or your electrical store. When using it with a generator, make sure it has an output of more than 4 kVA (kilo-volt-ampere), and a stable 230 Volts on 50Hz. - Page 7 Please add the Foam Cover to the Drive Motor, then insert the wheels and fix them with the supplied bolts. You may move the Drive Motor to the desired location with the help of the supplied wheels. Exchange the wheels with the legs. MAKE SURE THE SURFACE WHERE YOU PLACE THE MECHANISM IS LEVEL.
- Page 8 Connect the 2 arms: insert the arms into their corresponding hole and use the bolts to tighten them. DO NOT OVER TIGHTEN THE BOLTS OF THE ARMS, SO THEY DO NOT LOSE THEIR FLEXIBILITY. Connect the springs with the supplied bolts. You can adjust the level of the arm by choosing one of the 4 holes.
-
Page 9: Add The Sealed Arms
The springs have a screw thread, which allows them to be tightened manually. It will be easier if you loosen the springs before you add the arms to the Middle Bar. BE AWARE THAT OVERTIGHTENING THE SPRING CAN DAMAGE IT. The highlighted bolt regulates the Metal Arms capability to jump at a certain height. -
Page 10: The Hand-Held Fan
The highlighted PVC loop is for pulling the uninflated sealed arm in its cover. Make sure it is hidden when using the LOS. It may harm users when rotating. AFTER USING THE GAME, DO NOT TAKE THE SEALED ARMS OUT OF THEIR COVERS. The Hand-Held Fan WE SUGGEST TO READ THE USER MANUAL SUPPLIED BY THE MANUFACTURER OF THE FAN BEFORE ATTEMPTING TO USE IT. -
Page 11: The Control Panel
ON/OFF BUTTON Inflation process: 1. Locate the valve and remove the cap. 2. Connect the pipe to the fan using the hole marked with “OUT”. 3. Connect the adaptor to the valve. 4. Switch ON the fan and inflate until firm to touch. 5. -
Page 12: The Bed
The Control Box: 1. 12M Cable electrical output socket. 2. Main On/Off switch. It works only with the supplied keys. 3. Emergency Stop: In case you must stop the mechanism suddenly. 4. This will light up when the Control Panel is under power, and the key is turned to ON. - Page 13 LOWER PART OF THE SANDWICH VELCRO END RESULT WHEN INFLATED Add the Podiums to the inflated bed taking into consideration their numbering. Use the bed square cover sheet to cover up the hole between the mechanism and the bed. Add the 4 protective Arm Foam Covers and the Middle Bar Foam Cover. Page 13 of 16...
-
Page 14: Transporting/Storing The Unit
9. Routine Inspections, Trial Operations and Thorough Examinations Routine inspections (before every use) After every setup or operation, before opening the game to the public, the controller or his nominee SHALL PERSONALLY CHECK that the setup of the Last One Standing is correct. Page 14 of 16... -
Page 15: Trial Runs
NOW ARE THE PLAYERS ALLOWED TO ENTER THE UNIT. Thorough examination Besides the regular checks, the Last One Standing should be thoroughly examined at appropriate intervals by a competent person/institute/organization/company. The intervals between two successive thorough examinations may be governed by existing... -
Page 16: Spare Parts Codes
ENJOY AND HAVE FUN! Airquee reserves the right to change the content of this manual without a prior notice to the customer. The model of your product and the type and number of your inclusions may differ from the one presented in this manual.
Need help?
Do you have a question about the Last One Standing and is the answer not in the manual?
Questions and answers