
Related Manuals for Aqua Lung CORE


Summary of Contents for Aqua Lung CORE
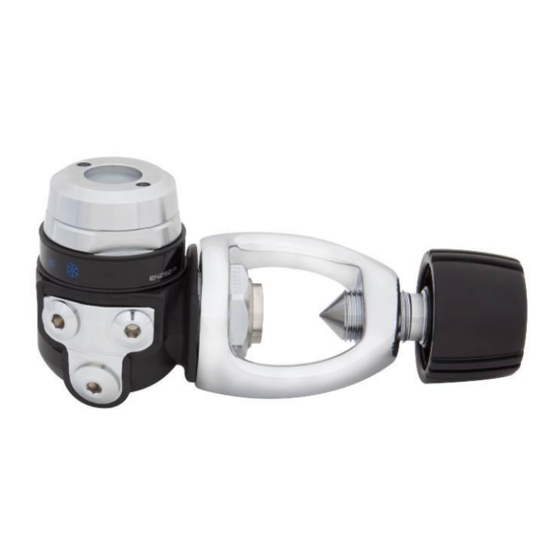
- Page 1 SERVICE MANUAL CORE FIRST STAGE Copyright © 2015 Aqua Lung France Service Manual Core 1 stage Rev. 05/2015...
- Page 2 Service Manual Core 1 stage Date Revision description 02/2015 Document creation Service Manual Core 1 stage Rev. 05/2015...
-
Page 3: Table Of Contents
Service Manual Core 1 stage CONTENT COPYRIGHT ..................................4 INTRODUCTION ................................4 WARNINGS, ATTENTION, NOTES ..........................4 MAINTENANCE ................................4 GENERAL INSTRUCTIONS ............................. 5 GENERAL CONVENTIONS .............................. 5 DISASSEMBLY PROCEDURE ............................6 YOKE CONNECTION ............................... 6 DIN CONNECTION ..............................7 WET CHAMBER ............................... -
Page 4: Copyright
Aqua Lung regulator. This manual is not an instruction manual for unqualified personnel. The procedures described in this manual are intended only for qualified personnel who have been trained in the servicing of Aqua Lung equipment during a specialised course. -
Page 5: General Instructions
Fragile items with seats or crowns with critical sealing surfaces should be separated and protected during servicing in order to prevent any damage. Use only spare parts from Aqua Lung service kits. Never replace an Aqua Lung part with one from another manufacturer, even if it appears similar. -
Page 6: Disassembly Procedure
Service Manual Core 1 stage Remove the filter (129209) and the O-ring (124703) DISASSEMBLY PROCEDURE from the body (129254). NOTE: Before commencing disassembly, consult the exploded view to check the reference numbers of all parts requiring replacement. These parts should all be replaced by new parts... -
Page 7: Din Connection
Service Manual Core 1 stage 12. Remove the DIN hand wheel (129929), then unscrew DIN CONNECTION the DIN union (129241) with a key of 17. Start after point 1 Take a DIN/Yoke adapter (125237) and thread it onto the DIN hand wheel (129929) in order to compress the spring. -
Page 8: Dry Chamber
Service Manual Core 1 stage 17. Place the wet chamber body (129904) on a table, 21. Remove by hand the diaphragm (119159) and the plastic washer (129958) down. Push the washer spring pad (127565) from the dry chamber body down. - Page 9 Service Manual Core 1 stage ATTENTION: Before continuing, make sure that you are working on a soft surface in order to avoid damaging the crown (127585) during disassembly. 25. Insert the plastic side of the extraction tool (116236) into the body’s central hole, wet / dry...
-
Page 10: Reassembly Procedure
Service Manual Core 1 stage Fit a new lubricated O-ring (124704) on the crown REASSEMBLY PROCEDURE (127585). Slide the seat onto the tool (116236), positioning the COMMOM TO ALL MODELS seat lip against the tool plastic part. Move the system... -
Page 11: Yoke Connection
Service Manual Core 1 stage With the thumb, engage the plug 14. Install the dust cap (124555) between the yoke (129120) into the body (129254). (124611) and the yoke shutter crown (129205). Push on the plug to compress the Tighten the yoke screw (128631) so that the spring spring, at the same time screwing (129204) is compressed. -
Page 12: Din Connection
Using a socket and a torque wrench (122154), tighten the DIN screw to 2.5 m.kg (18.08 ft.lb). 24. Thread the dust cap (124555) into the yoke screw (128631), with the Aqua Lung logo outside. Screw the yoke screw into the yoke (124611). Service Manual Core 1 stage Rev. -
Page 13: Wet Chamber
Service Manual Core 1 stage 30. Fit a new lubricated O-ring (473057) into the DIN 35. Fit a new diaphragm (119159) into shutter crown interior groove (129243), using the tool the wet chamber body (129904). (506001). Make sure that the diaphragm is... -
Page 14: Dry Chamber
Service Manual Core 1 stage 44. Fit the spring pad (127565), the MP spring (127567) DRY CHAMBER and the washer (127568) on the diaphragm. Start after points 24 (if yoke) or 33 (if DIN) 40. Insert the pin (127564) into the central hole, wet chamber side. -
Page 15: First Stage Adjusting
Service Manual Core 1 stage FIRST STAGE ADJUSTING FINAL REASSEMBLY FOR SUPREME VERSION Connect the first stage to a MP gauge 0-16 bar. If the gauge is not fitted with an over-pressure valve, then NOTE: The following step should be carried it is vital that the second stage is fitted so that it can out with the regulator under pressure. -
Page 16: Test In Water
Service Manual Core 1 stage TEST IN WATER Check that all the MP and HP plugs are in place and that a correctly adjusted second stage is connected to the first stage. Slowly open the cylinder valve to put the regulator under pressure. -
Page 17: Appendix
Service Manual Core 1 stage APPENDIX Table 1. Troubleshooting Guide SYMPTOM POSSIBLE CAUSE TREATMENT 1. The HP seat (124624) is worn or damaged 1. Replace the HP seat 2. The crown (127585) is damaged 2. Replace the crown 3. The O-ring (124704) is worn or damaged 3. - Page 18 O-ring against plug bottom MP adjusting screw, plug, yoke 8mm Allen key retainer screwing / unscrewing HP Core yoke, HP Core DIN, HP Core supreme 128016 Service kit first stage balanced diaphragm yoke, HP Core supreme DIN Service Manual Core 1 stage Rev.
- Page 19 Service Manual Core 1 stage Table 3. Recommended cleaners and lubricants LUBRICIANT / CLEANER APPLICATION SOURCE Christo-Lube MCG 111 All O-rings Aqua Lung, ref. 480025 ATTENTION: Silicone parts do not require lubrication. Do not grease them. Greasing silicone parts can change their molecular construction and cause premature degradation of the material.
- Page 20 MP at 9.5 bar ± 0.5 bar : Core Medium Pressure 160 bar < Working pressure < 200 bar MP at 8.5 bar ± 0.5 bar : Core supreme After purging the regulator several times, the MP should not MP Variation 160 bar <...
-
Page 21: Procedurea - Cleaning And Lubricating
Service Manual Core 1 stage Procedure A – Cleaning and Lubricating (All Aqua Lung regulators) Cleaning brass and stainless steel parts. Pre-clean by soaking in NETALU diluted to 25%. Cleaning in an ultra-sonic bath filled with a mixture of washing-up liquid + hot water. If some resistant deposits remain then fill the ultrasonic bath with diluted white vinegar and repeat. -
Page 22: Maintenance Notes
Service Manual Core 1 stage Maintenance Notes Service Manual Core 1 stage Rev. 05/2015... - Page 23 Service Manual Core 1 stage 1ere Avenue – 14 rue – BP 148 06513 CARROS cedex – France 00.33.(0)4.92.08.28.88 FAX 00.33.(0)4.92.08.28.99 Service Manual Core 1 stage Rev. 05/2015...
Need help?
Do you have a question about the CORE and is the answer not in the manual?
Questions and answers