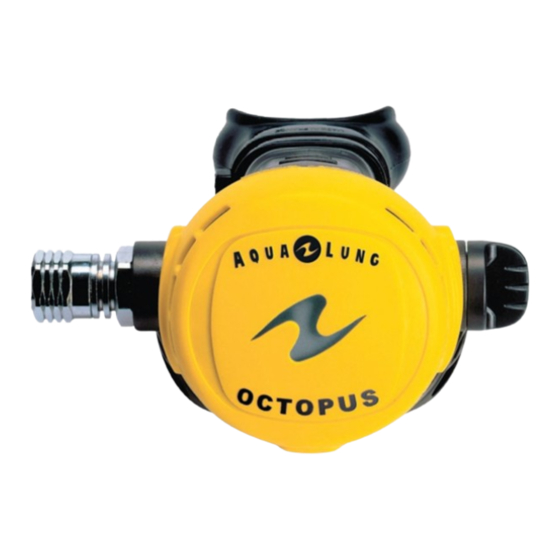
Aqua Lung CALYPSO Maintenance Manual
Second stage
Hide thumbs
Also See for CALYPSO:
- Owner's manual (25 pages) ,
- User manual (20 pages) ,
- Service manual (19 pages)
Summary of Contents for Aqua Lung CALYPSO
- Page 1 Authorized Technician TECHNICAL MAINTENANCE MANUAL CALYPSO/TITAN/OCTOPUS SECOND STAGE...
-
Page 2: Table Of Contents
Contents COPYRIGHT NOTICE...............................3 INTRODUCTION ...............................3 WARNINGS, CAUTIONS, & NOTES.........................3 SCHEDULED SERVICE............................3 GENERAL GUIDELINES ............................3 GENERAL CONVENTIONS............................4 DISASSEMBLY PROCEDURES..........................4 REASSEMBLY PROCEDURES..........................7 FINAL TESTING..............................11 Second Stage Airflow Test................................. 11 Second Stage Opening Effort Test..............................11 Second Stage Purge Flow Test ................................. 11 External Leak Test .................................... -
Page 3: Copyright Notice
Aqua Lung America. It may Checking for smooth operation of the control knob and not be distributed through the internet or computer bulletin board venturi switch. -
Page 4: General Conventions
GENERAL CONVENTIONS While holding the inlet fitting (13) of the second stage secure with a 3⁄4” Unless otherwise instructed, the following terminology and tech- (19mm) open end wrench, niques are assumed: apply 11/16” (17mm) open- When instructed to remove, unscrew, or unscrew, or unscrew loosen a threaded... - Page 5 Calypso/Titan Second Stage Service Manual While holding the second stage secure, firmly grasp the Using your finger, reach collar of the front cover (1) which is seated over the venturi into the box bottom (4) control switch (9), opposite of the inlet side. Stretch the col-...
- Page 6 NOTE: Stand the valve assembly vertical on the head of the poppet Because the crown is o-ring sealed, it will not (22), with the lever (18) facing up, and depress the valve freely exit the valve body after it has been disengaged. body (19) to expose the locknut (16).
-
Page 7: Reassembly Procedures
(4) by feeding the stem of the exhaust valve into the NOTE: Aqua Lung no longer requires mandatory replace- center hole of the valve in ment of the exhaust valves. As long as the valves and their the box bottom. Gently pull... - Page 8 Using tool p/n 125727, engage the slotted head of the Stand the poppet (22) on crown (14) and drive it in clockwise as far as the tool will its head inside the top of allow. If the tool is not available, use a medium flathead the inlet fitting (13) and screwdriver to drive the crown in as far as it will go and then on top of the old LP seat.
- Page 9 LP seat from the inlet fitting. CAUTION: Prior to adjusting and testing the Calypso/Titan second stage regulator, the ac- companying first stage must be correctly ser- Insert the valve and lever assembly (16-23) into the viced, adjusted to a stable intermediate pressure left side of the box bottom of 135-140 psi, and fully tested.
- Page 10 Lever Height Adjustment Install the venturi assem- bly into the right side of Pressurize the regulator the box bottom (4). Lock it in place by inserting the retaining clip (7). You Slide the notch of the ad- should hear it “click” as it justing tool 125727 across locks into place.
-
Page 11: Final Testing
Before performing the following procedure, refer depressurize the system. Remove the regulator. to Table 5, titled Test Bench Specifications – Calypso 2 to Table 5, titled Test Bench Specifications – Calypso 2 to Table 5, titled Test Bench Specifications – Calypso 2 Stage. -
Page 12: Subjective Breathing Test
“fluttering” of the second-stage diaphragm. When exhaling, there should be no fluttering or sticking of the exhalation valve. If any of these problems occur, refer to Table 1 - Troubleshooting. This concludes annual service procedures for the Calypso/Titan Second Stage. - Page 13 6. Replace the o-ring NOTE: This is a partial list of possible problems and recommended treatments. For more information, contact Aqua Lung’s Technical Services Department for assis- tance with problems not described here. CAUTION: Recommended treatments which require disassembly of the regu- lator must be performed during a complete overhaul, according to the pre- scribed procedures for scheduled, annual service.
- Page 14 Table 2 - Recommended Tool List PART NO. DESCRIPTION APPLICATION 111610 I.P. test gauge Intermediate pressure testing 944022 O-ring tools O-ring removal and installation 109437 Seat extraction/installation tool Crown removal and installation 125727 Crown/Lever Adjusting Tool Adjusting crown (14) and lever (18) 0-120 inch/lbs torque wrench Inlet and hose fittings installation Magnifier with illumination...
- Page 15 Calypso/Titan Second Stage Service Manual Table 4 - Recommended Lubricants & Cleaners LUBRICANT / CLEANER APPLICATION SOURCE Christo-Lube MCG-111 All O-rings seals Aqua Lung, PN 820466, or ® Lubrication Technologies 310 Morton Street Jackson, OH 45640 (800) 477-8704 CAUTION: Silicone rubber requires no lubrication or preservative treatment.
-
Page 16: Procedure A - Cleaning And Lubrication
When it comes to issues of nitrox safety and compatibility, the concerns lie primarily with the regulator’s first stage as it is subjected to high inlet pressures. High inlet pressures lead to adiabatic compression or heating of the gas. The Aqua Lung or Apeks regulator product described in this manual, when properly cleaned and assembled, is authorized for use with enriched air nitrox (EAN) that does not exceed 40% (EAN 40). - Page 17 ACCEPTABLE RANGE Leak Test Inlet 2,500-3,000 (±100) psig No leaks allowed Inlet 2,500-3,000 (±100) psig Calypso/Titan: +1.0 - 1.6 in. H Opening Effort Intermediate pressure 135-140 psi Octopus: +1.2 - 1.8 in. H Intermediate pressure 135-140 psi at Flow effort +6 in.
- Page 18 NOTES...
-
Page 19: Exploded Parts Diagram
Calypso/Titan Second Stage Service Manual Titan • Calypso • Octopus (2004 - present) Exploded Parts Diagram Key # Part # Description Key # Part # Description 13 ----- 124506 Inlet fitting n/a ---- 125740 Calypso 2nd Stage only 14 ----- 100128... - Page 20 Authorized Technician TECHNICAL MAINTENANCE MANUAL CALYPSO/TITAN/OCTOPUS SECOND STAGE Aqua Lung America 2340 Cousteau Court, Vista CA 92081 Tel: 760-597-5000 / Web: www.aqualung.com...


Need help?
Do you have a question about the CALYPSO and is the answer not in the manual?
Questions and answers