Epson LQ-680 User Manual
24-pin dot matrix printer
Hide thumbs
Also See for LQ-680:
- User manual (22 pages) ,
- Brochure & specs (24 pages) ,
- Setup manual (2 pages)
Table of Contents
Advertisement
Quick Links
Advertisement
Chapters
Table of Contents

Subscribe to Our Youtube Channel
Related Manuals for Epson LQ-680


Summary of Contents for Epson LQ-680
- Page 1 24-Pin Dot Matrix Printer User's Guide 4013016-01...
-
Page 2: Control Panel Buttons And Lights
When you press both the Font and Condensed buttons simultaneously, the printer clears its buffer and return to its default settings. Tear Off/Bin button (LQ-680) Advances continuous paper to the tear-off position. Feeds continuous paper backward from the tear-off position to the top-of-form position. - Page 3 CORPORATION. The information contained herein is designed only for use with this EPSON printer. EPSON is not responsible for any use of this information as applied to other printers. Neither SEIKO EPSON CORPORATION nor its affiliates shall be liable to the purchaser of...
- Page 4 FCC Compliance Statement For United States Users This equipment has been tested and found to comply with the limits for a Class B digital device, pursuant to Part 15 of the FCC Rules. These limits are designed to provide reasonable protection against harmful interference in a residential installation.
-
Page 5: Declaration Of Conformity
(2) this device must accept any interference received, including interference that may cause undesired operation. Trade Name: Type of Product: Dot Matrix Printer Model: EPSON AMERICA, INC. MS 6-43 3840 Kilroy Airport Way Long Beach, CA 90806-2469 Telephone: (562)290-5254 EPSON... -
Page 7: Table Of Contents
Plugging in the Printer ........1-5... - Page 8 Chapter 3 Using the Printer Software About Your Printer Software ......3-2 Using the Printer Driver With Windows 98 or 95 .
- Page 9 Printer Driver Settings Overview ......3-17 Using the EPSON Remote! Utility ......3-19 Installing EPSON Remote! .
- Page 10 Cleaning the Printer ........
- Page 11 For Users in Singapore ........D-8 For Users in Hong Kong.
-
Page 13: Getting To Know Your Printer
High-speed printing of up to 413 cps (characters per second) at 10 characters per inch Your printer also comes with printer driver software, the EPSON Status Monitor 3 utility for Microsoft NT 4.0, that lets you check the status of your printer quickly and easily, and other software. -
Page 14: Important Safety Instructions
Read all of these instructions and save them for later reference. Follow all warnings and instructions marked on the printer. Do not place the printer on an unstable surface or near a radiator or heat source. Place the printer on a flat surface. The printer will not operate properly if it is tilted or at an angle. - Page 15 Adjust only those controls that are covered by the operating instructions. Printer parts marked with this symbol may be hot. Turn off the printer and let it cool for a few minutes before you touch any printer part marked with this symbol.
-
Page 16: Print Head Caution Symbol
For United Kingdom Users Use of options Epson (UK) Limited shall not be liable against any damages or problems arising from the use of any options or consumable products other than those designated as Original EPSON Products or EPSON Approved Products by Epson (UK) Limited. -
Page 17: Safety Information
The brown wire must be connected to the terminal in the plug marked with the letter L. If damage occurs to the plug, replace the cord set or consult a qualified electrician. Replace fuses only with a fuse of the correct size and rating. Getting to Know Your Printer... -
Page 18: Warnings, Cautions, And Notes
This guide uses the following conventions: Warnings must be followed to avoid bodily injury. Cautions must be observed to avoid damage to your equipment. Notes contain important information and useful tips on the operation of your printer. Getting to Know Your Printer... - Page 19 Plugging in the Printer ........1-5...
-
Page 20: Unpacking The Printer
Unpacking the Printer Besides this guide, your printer box should include an EPSON printer software CD-ROM, a Notice Sheet, and the following items: printer paper guide Note: Depending on your printer model, the power cord may be permanently attached to the printer. Also, the shape of the power cord plug varies depending on the country of purchase;... -
Page 21: Choosing A Place For The Printer
You must remove all protective materials packed around and inside your printer before you set it up and turn on the power. Follow the directions on the Notice Sheet (packed with the printer) to remove these materials. Save all packing and protective materials in case you need to ship the printer in the future. - Page 22 Never use a stand that tilts the printer. The printer should always be kept level. If possible, secure the printer’s power cord and interface cable to a leg of the printer stand so they do not interfere with paper feeding. Setting Up the Printer...
-
Page 23: Assembling The Printer
Plugging in the Printer 1. Make sure the printer is turned off. 2. Check the label on the back of the printer to make sure its voltage matches that of your electrical outlet. Also make sure the plug on your printer’s power cord matches your electrical outlet. -
Page 24: Connecting The Printer To Your Computer
3. If the power cord is not attached to the printer, plug the appropriate end into the AC inlet on the back of the printer. 4. Plug the power cord into a properly grounded electrical outlet. Connecting the Printer to Your Computer Your printer has a standard IEEE-1284 compatible parallel interface connection and an optional interface. - Page 25 3. Squeeze the wire clips together until they lock in place on both sides of the connector. 4. If your cable has a ground wire, connect it to the printer’s ground connector as shown below. 5. Plug the other end of the cable into the computer.
-
Page 26: Installing Or Replacing The Ribbon Cartridge
Installing or Replacing the Ribbon Cartridge EPSON recommends the use of genuine EPSON Ribbon Cartridges (S015016). Warning: You may touch the print head by hand to install or replace the ribbon cartridge. If you have just used the printer, the print head may be hot;... - Page 27 If it is not, close the printer cover and turn the printer on to move the print head to the replacement position. Wait a few seconds, then turn the printer off again and open the printer cover.
- Page 28 4. If a used ribbon cartridge is already installed, squeeze the tabs on each side of the cartridge, and pull the cartridge out of the printer. Properly dispose the used ribbon and cartridge. 5. Turn the ribbon-tightening knob on the new cartridge in the direction of the arrow to take up any slack in the ribbon.
- Page 29 8. Turn the ribbon-tightening knob again to remove any slack in the ribbon and to make sure the ribbon moves freely. 9. Close the printer cover. Note: The printer pauses and cannot print when the printer cover is open. 1-11 Setting Up the Printer...
-
Page 30: Installing The Printer Software
EPSON Status Monitor 3 (for Windows 98, 95, 2000 and NT 4.0) The EPSON Status Monitor 3 notifies you of printer errors and displays printer status information. EPSON Remote! (a DOS-based printer setup utility) The EPSON Remote! utility allows you to easily change the printer’s default settings from the computer screen. -
Page 31: Installing The Printer Software In Windows 98, 95, 2000, Or Nt
Driver disk creation utility button and follow the on-screen instructions. If you are using the diskette version of the EPSON software, make a backup copy of the EPSON printer software disk or disks before you begin installation. -
Page 32: Installing The Printer Software In Windows 3.1 Or Nt 3.5X
When you install the printer driver on Windows 98, 95, 2000 or NT 4.0, EPSON Status Monitor 3 will also be installed. For information on opening and using the software, see Chapter 3, “Using the Printer Software.”... - Page 33 6. When the installation is complete, click OK to exit the installation program. The installation program automatically selects the LQ-680/LQ- 680Pro as the default printer for Windows applications. For information on opening and using the software, see Chapter 3, “Using the Printer Software.”...
-
Page 34: For Dos Programs
Choose the EPSON LQ-680/LQ-680Pro printer at the appropriate step in the setup or installation procedure of your DOS application program. If the list in your application does not... - Page 35 Paper source and paper types......2-3 Setting the paper release lever (LQ-680) ....2-4 Setting the Paper Source button (LQ-680Pro) .
-
Page 36: Selecting A Paper Source
2-3. For LQ-680 users: To select a paper source, use the paper release lever. See “Setting the paper release lever (LQ-680)” on page 2-4. For LQ-680Pro users: To select a paper source, use the Paper Source button on the control panel. -
Page 37: Paper Source And Paper Types
Paper source and paper types The table below shows which paper source to use for each paper type. Tractor Paper type Continuous paper Continuous multipart forms Labels Single sheets – Single-sheet – multipart forms Envelopes – Postcards – Roll paper –... -
Page 38: Setting The Paper Release Lever (Lq-680)
Setting the paper release lever (LQ-680) Set the paper release lever to select the paper-feeding method you want the printer to use. The paper release lever has two positions: for tractor feeding and below. Single-sheet feeding position – to use the paper guide, the optional cut-sheet feeder, or the optional roll paper holder. -
Page 39: Setting The Paper Source Button (Lq-680Pro)
Setting the Paper Source button (LQ-680Pro) Set the Paper Source button on the control panel to select the paper source you want the printer to use. There are three settings: Tractor for tractor feeding, Manual/CSF Bin1 for single-sheet feeding including the cut-sheet feeder bin 1, and Manual/CSF BIN2 for single-sheet feeding including cut-sheet feeder bin 2, as explained below. -
Page 40: Adjusting The Paper Thickness Lever
There are nine lever positions, from -1 to 7. The Auto position is also available on the LQ-680Pro. For LQ-680 users: Set the paper thickness lever manually to the appropriate position from -1 to 7, as described in the table below. - Page 41 The following table provides guidelines for selecting the appropriate lever position for the type of paper you are using. Paper type Ordinary paper (single sheets or continuous paper) Multipart forms (single sheets or continuous paper) 2 parts (original plus + 1 copy) 3 parts (original plus + 2 copies) 4 parts (original plus + 3 copies) 5 parts (original plus + 4 copies)
-
Page 42: Using Continuous Paper
Using Continuous Paper You can load continuous paper from the built-in tractor unit located on the back of the printer. Note: See Appendix C for detailed specifications on continuous paper. Positioning your continuous paper supply When you load continuous paper, make sure you align your paper supply with the tractor so the paper feeds smoothly into the printer, as shown below. -
Page 43: Loading Continuous Paper With The Tractor
Loading continuous paper with the tractor 1. Make sure the printer is turned off. 2. For LQ-680 users: Select tractor feeding with the paper release lever, and make sure the paper thickness lever is set to 0 if you are using ordinary continuous paper. - Page 44 Then push down the lock lever to lock the sprocket in place. Note: Printing starts at the arrow mark on the printer and the “0” mark on the scale. The unprintable area is to the left of the arrow mark and the “0”.
- Page 45 6. Slide the right sprocket unit to roughly match the width of your paper, but do not lock it. 7. Slide the paper support midway between the two sprocket units. 2-11 Paper Handling...
- Page 46 Be sure to load your paper printable side up. Caution: Make sure the first sheet of your continuous paper has a clean, straight edge so that it can feed smoothly into the printer. 2-12 Paper Handling...
- Page 47 10. Close the sprocket covers. If necessary, unlock and reposition the left sprocket unit so that the perforation aligns with the arrow mark on the printer. Then lock the sprocket in place. 11. Slide the right sprocket unit to remove any slack in the paper.
-
Page 48: Using The Tear-Off Function
You can use the tear-off function in two ways: by pressing the button on the control panel, or by using the control panel’s default-setting mode or the EPSON Remote! utility to select auto tear-off. (See “About Your Printer’s Default Settings” on page 4-3 for information on the printer’s default-setting mode.) - Page 49 Using the Tear Off button You can use the Tear Off button (the Tear Off/Bin button on the LQ-680 or the Tear Off/Special Paper button on the LQ-680Pro) to advance continuous paper to the tear-off position by following the steps below: 1.
- Page 50 Using auto tear-off mode When you turn on the auto tear-off function in the printer’s default-setting mode or the EPSON Remote! utility, the printer advances continuous paper to the tear-off position when you finish printing.
-
Page 51: Removing Continuous Paper
For instructions on how to activate the auto tear-off function, see “About Your Printer’s Default Settings” on page 4-3 or open the EPSON Remote! utility as described in Chapter 3 and follow the on-screen instructions. While using the default-setting mode or the utility, also make sure the page length is set correctly for your continuous paper. -
Page 52: Using Overlapping Multipart Forms
Before printing, set the paper thickness lever to the correct position for your multipart forms. LQ-680 users should set the lever as described in the table on page 2-7. LQ-680Pro users should make sure the lever is set to the Auto position. -
Page 53: Using Labels
Labels are loaded in the same way as you load ordinary continuous paper, except for the paper thickness lever setting. LQ-680 users should set the lever to 2. LQ-680Pro users are recommended to use the Auto setting, or set it manually to 2 for faster throughput. -
Page 54: Using Single Sheets
Using Single Sheets You can load one sheet of paper at a time into the paper guide at the front of the printer, or you can load a stack of paper in the optional cut-sheet feeder. (See Appendix A for more information on the optional cut-sheet feeder.) - Page 55 Follow these steps to load single sheets from the paper guide: 1. Make sure that the printer is off and the paper guide is attached as described in Chapter 1. Then close the sprocket covers and push down the sprocket lock levers to lock the sprocket units in place.
- Page 56 The printer is ready to accept data from your computer and print. Note: If the rollers rotate but the printer does not load the paper, remove the paper completely and reinsert it. 2-22 Paper Handling...
-
Page 57: Using Single-Sheet Multipart Forms
If the printer does not eject the printed sheet, press the Load/Eject button. Caution: Use the knob on the right side of the printer only to clear paper jams when the printer is off. Otherwise, you may damage the printer. -
Page 58: Using Envelopes
“Using Single Sheets” earlier in this chapter or Appendix A, “Loading paper from the cut-sheet feeder.” For LQ-680 users: Before printing, set the paper thickness lever to the correct position for your envelopes as described in the table on page 2-7. -
Page 59: Using Postcards
“Using Single Sheets” on page 2-20 or “Loading paper from the cut-sheet feeder” on page A-6. For LQ-680 users: Before printing, set the paper thickness lever to 2. Then select Card by pressing the Tear Off/Bin button on the control panel. -
Page 60: Switching Between Continuous Paper And Single Sheets
When using continuous paper with labels, never follow the steps to feed labels backward. Labels can easily peel off their backing and jam the printer. For information on removing labels from the paper path, see “Using Labels” earlier this chapter. - Page 61 1. When you have finished printing on continuous paper, press the Tear Off/Bin button (LQ-680) or the Tear Off/Special Paper button (LQ-680Pro) to advance the paper to the tear-off position. (If you selected auto tear-off in the printer’s default-setting mode or the EPSON Remote! utility, the printer advances the paper perforation to the tear-off position automatically.)
-
Page 62: Switching To Continuous Paper
2. Make sure continuous paper is loaded in the printer as described in “Loading continuous paper with the tractor” on page 2-9. 3. Select tractor feeding with the paper release lever (LQ-680) or with the Paper Source button (LQ-680Pro) as described in “Paper source and paper types” on page 2-3. - Page 63 1. Make sure the printer is turned on. If necessary, lift up the printer cover so you can see the paper position. 2. Load either continuous or single-sheet paper. (Press the Load/Eject button to load continuous paper from the tractor or a single sheet from the optional cut-sheet feeder.)
- Page 64 (from the cut-sheet feeders or the tractor). The printer has a minimum and a maximum loading position. If you try to adjust the loading position beyond these limits, the printer beeps and stops moving the paper.
-
Page 65: Adjusting The Tear-Off Position
Load/Eject [U] button to feed paper backward, until the paper perforation is aligned with the tear-off edge. Note: The printer has a minimum and a maximum tear-off position. If you try to adjust the tear-off position beyond these limits, the printer beeps and stops moving the paper. -
Page 66: Adjusting The Printing Position
Your printing position setting is in effect only until the next time you load paper or turn off the printer. 1. Make sure that the printer is not printing. If it is, press the Pause button to stop printing. 2. Hold down the Pause button for about three seconds. The Pause light begins flashing and the printer enters the micro- adjust mode. - Page 67 Printer Driver Settings Overview ......3-17 Using the EPSON Remote! Utility ......3-19 Installing EPSON Remote! .
-
Page 68: About Your Printer Software
The EPSON printer software that comes with your printer includes the printer driver software, the EPSON Remote! utility, and the EPSON Status Monitor 3 utility for Windows 98, 95, 2000 and NT 4.0. A printer driver is software that allows your computer to control the printer. -
Page 69: Using The Printer Driver With Windows 98 Or 95
“Changing the printer driver settings” on page 3-5. Note: While many Windows applications override the settings made with the printer driver, some do not, so you must verify that the printer driver settings match your requirements. Accessing the printer driver from Windows applications To access the printer driver from a Windows application, follow the steps on the next page. - Page 70 1. Select Print Setup or Print from the File menu of your application software. The Print or Print Setup dialog box appears. 2. Make sure that your printer is selected and then click Printer, Setup, Properties, or Options. (You may need to click a combination of these buttons.) The Properties window appears, and you see the Paper, Graphics, and Device Options menu.
-
Page 71: Accessing The Printer Driver From The Start Menu
See “Changing the printer driver settings” below to change the settings. Accessing the printer driver from the Start menu To access the printer driver from the Start menu, follow these steps: 1. Click the Start button, and then point to Settings. -
Page 72: Using The Printer Driver With Windows 3.1
3-8. Note: While many Windows applications override the settings made with the printer driver, some do not, so you must verify that the printer driver settings match your requirements. Accessing the printer driver from Windows applications To access the printer driver from a Windows application, follow the steps on the next page. - Page 73 3-8 for detailed information about the settings in this dialog box. 2. Make sure that your printer is selected and then click Printer, Setup, or Options. (You may need to click a combination of these buttons.) The Options dialog box appears. See “Changing the Printer driver settings”...
-
Page 74: Accessing The Printer Driver From The Control Panel
Options. See the next section to change the settings. Changing the Printer driver settings You can change printer driver settings in the Print (or Print Setup) dialog box and the Options dialog box. For an overview of the available settings, see “Printer Driver Settings Overview” on page 3-17. -
Page 75: Using The Printer Driver With Windows 2000 And Nt 4.0
“Changing the printer driver settings” on page 3-12. Note: While many Windows applications override the settings made with the printer driver, some do not, so you must verify that the printer driver settings match your requirements. Accessing the printer driver from Windows applications To access the printer driver from a Windows application, follow the steps on the next page. - Page 76 1. Select Print Setup or Print from the File menu of your application software. The Print or Print Setup dialog box appears. 2. Make sure that your printer is selected and then click Printer, Setup, Properties, or Options. (You may need to click a combination of these buttons.) The Document Properties window appears, and you see the Page Setup and Advanced menus.
-
Page 77: Accessing The Printer Driver From The Start Menu
See “Changing the printer driver settings” below to change the settings. Accessing the printer driver from the Start menu To access the printer driver from the Start menu, follow these steps: Note: The screen shots in the following section are from the Windows NT 4.0 operating system. -
Page 78: Changing The Printer Driver Settings
See the next section to change the settings. Changing the printer driver settings Your printer driver has two menus from which you can change the printer driver settings, Page Setup and Advanced. You can also change settings on the Utility menu in the printer software. -
Page 79: Using The Printer Driver With Windows Nt 3.5X
Printer driver settings” on page 3-16. Note: While many Windows applications override the settings made with the printer driver, some do not, so you must verify that the printer driver settings match your requirements. Accessing the printer driver from Windows... - Page 80 The Print or Print Setup dialog box appears. 2. Make sure that your printer is selected and then click Printer, Setup, Properties, or Options. (You may need to click a combination of these buttons.) The screen displays the Document Properties dialog box, which contains the Form and Orientation printer driver settings.
-
Page 81: Accessing The Printer Driver From The Control Panel
3-16 to change the settings. Accessing the printer driver from the Control Panel To access the printer driver from the Control Panel, follow these steps: 1. In the Main window, double-click the Print Manager icon. The Print Manager window opens. -
Page 82: Changing The Printer Driver Settings
You can change printer driver settings in the Document Properties dialog box and the Advanced Document Properties dialog box. For an overview of the available settings, see “Printer Driver Settings Overview” on page 3-17. To open these dialog boxes, see the previous sections on accessing the printer driver. -
Page 83: Printer Driver Settings Overview
Default printing uses the settings stored in the printer. You can access EPSON Status Monitor 3 when you click this button. To monitor the printer, make sure the Monitor the printing status check box is selected. - Page 84 Halftone Color Adjustment dialog box appears. For details, click Help in this dialog box. Explanations You can access EPSON Status Monitor 3 when you click this button. To monitor the printer, make sure the Monitor the printing status check box is selected.
-
Page 85: Using The Epson Remote! Utility
Then press Enter. 3. Select your printer’s name in the Printer Model window and press Enter. C:\EPUTIL appears as the default directory. 4. Press Enter again. The EPSON Remote! utility is copied to the C:\EPUTIL directory. Accessing EPSON Remote! To access EPSON Remote!, type C:\PRNSET at the DOS prompt and press Enter. -
Page 86: Using The Epson Status Monitor 3 Utility
If you install the driver using Add Printer in the Printers folder, or using the “Point and Print” method, EPSON Status Monitor 3 may not function properly. If you want to use EPSON Status Monitor 3, reinstall the driver as described in Chapter 1. - Page 87 By clicking the shortcut icon, you can access the Monitoring Preferences dialog easily. Error notification for a shared printer can be received when this check box is turned on. When this check box is turned on, a shared printer can be monitored by other PCs.
-
Page 88: Accessing Epson Status Monitor 3
Printer Driver With Windows 98 or 95” on page 3-3 or “Using the Printer Driver With Windows 2000 and NT 4.0” on page 3-9. When you access EPSON Status Monitor 3 as described above, the following printer status window appears. You can view printer status information in the window. - Page 89 Selecting a Built-In Font and Pitch ......4-2 About Your Printer’s Default Settings ..... . 4-3 Changing default settings .
-
Page 90: Selecting A Built-In Font And Pitch
Follow these steps to select a built-in font or pitch using the buttons on the printer’s control panel: 1. Make sure that the printer is not printing. If it is, wait until printing has finished. 2. To select a font, press the Font button until the three Font lights indicate the font you want with a pattern shown on the control panel. -
Page 91: About Your Printer's Default Settings
About Your Printer’s Default Settings The default settings control many printer functions. While you can often set these functions through your software or printer driver, you may sometimes need to change a default setting from the printer’s control panel using the default-setting mode. -
Page 92: Changing Printer Settings From The Printer's Control Panel
* The options available vary depending on the country of purchase. ** These settings take effect only when IBM 2390 Plus emulation is selected. ***This option is available with the LQ-680Pro only. Changing Printer Settings From the Printer’s Control Panel Options Standard model:... - Page 93 When auto line feed is on, the printer accompanies each carriage return (CR) code received with a line feed code, and the print position moves to the next line. If the printer adds an extra line after every carriage return, select Off.
- Page 94 When set to Auto, the printer analyzes the data and uses unidirectional printing only for any lines which require vertical printing alignment. Software When you select ESC/P2, the printer operates in the EPSON ESC/P2 mode. When you select IBM 2390 Plus, the printer emulates an IBM printer. 0 slash The zero character has a slash ( ) when this feature is on.
- Page 95 This setting takes effect only if an optional interface is installed and the auto interface mode is selected. This setting determines how long the printer waits when it no longer receives data from an interface before it checks whether a print job is being sent through the other interface.
- Page 96 When auto carriage return is on, each line feed (LF) code or ESC J code is accompanied by a carriage return code. This moves the print position to the beginning of the next line. If the printer adds an extra line after every carriage return, select Off.
-
Page 97: Changing Default Settings
(11 inches) long and 210 mm (8.27 inches) wide. If you use single sheets without an optional cut-sheet feeder, you need to feed a new sheet of paper each time the printer ejects a printed sheet. Changing Printer Settings From the Printer’s Control Panel... - Page 98 3. Press the Font button until the Font lights indicate the language you want, as described in the language selection instructions. 4. Press the Tear Off/Bin button (LQ-680) or Tear Off/Special Paper button (LQ-680Pro) to print the default-setting mode instructions (four pages) in the language you selected.
- Page 99 Chapter 5 Troubleshooting Using the Error Indicators ....... . 5-2 Problems and Solutions .
-
Page 100: Using The Error Indicators
Using the Error Indicators You can identify many common printer problems using the lights on the control panel. If your printer stops working and one or more control panel lights are on or flashing or the printer beeps, use the following table to diagnose and fix the problem. If you can’t fix your problem using this table, go to the next section. -
Page 101: Troubleshooting
= short series of beeps (three beeps) • • • • • = long series of beeps (five beeps) Note: The printer beeps once if you press a control panel button when the corresponding function is not available. Problem Solution Continuous paper is not fed back to the standby position. -
Page 102: Problems And Solutions
Problems and Solutions Most printer problems are easy to solve. Use the information in this section to find the cause and solution to any printer problems that occur. Determine what type of problem occurred, and see the appropriate page listed below: Power supply problems. -
Page 103: Power Supply Problems
Warning: Do not reconnect the power cord to an electrical outlet that has the wrong voltage for your printer. The printer does not work and the control panel lights are off even though you turned on the printer. Cause The power cord is not... -
Page 104: Single-Sheet Paper Loading Or Feeding Problems
Single-sheet paper loading or feeding problems The printer does not load single-sheet paper or does not feed it properly. Cause Tractor feeding is selected. The paper on the paper guide is positioned too far to the left or right for the paper sensor to detect that it is there. - Page 105 The optional cut-sheet feeder does not feed your single-sheet paper properly. Cause The cut-sheet feeder is not installed properly. Too many sheets are loaded in the cut-sheet feeder. You may have loaded the wrong type of paper in bin 2 of the double-bin cut-sheet feeder.
-
Page 106: Continuous Paper Loading Or Feeding Problems
Continuous paper loading or feeding problems The printer does not load continuous paper or does not feed it properly. Cause Single-sheet feeding is selected. Continuous paper is not loaded properly. The paper has come off the tractor. The paper thickness lever is not set correctly. -
Page 107: Printing Position Problems
Check the page length settings for the tractor using the printer’s default- setting mode or the EPSON Remote! utility. See “About Your Printer’s Default Settings” on page 4-3 or “Using the EPSON Remote! Utility” on page 3-19. - Page 108 The printer prints on or too far away from the perforation of your continuous paper. Cause The printer you want to use is not selected in your software. The paper size setting in your application or printer driver does not match the size of the paper you are using.
-
Page 109: Printing Or Printout Quality Problems
Printing or printout quality problems The printer does not print when the computer sends data. Cause The printer is paused. The interface cable is not plugged in securely. Your interface cable does not meet the printer and/or computer specifications. Your software is not properly set up for your printer. - Page 110 The printout is faint. Cause The paper thickness lever is not set correctly. The ribbon is worn out. The printout has gaps. Cause The paper thickness lever is not set correctly. Part of the printout is missing, or dots are missing in random positions.
- Page 111 The print head is damaged. Caution: Never replace the print head yourself; you may damage the printer. Other parts of the printer must also be checked when the print head is replaced. All the text is printed on the same line. Cause...
- Page 112 Troubleshooting What to do Turn off the auto line feed setting using the printer’s default-setting mode or the EPSON Remote! utility. See “About Your Printer’s Default Settings” on page 4-3 or “Using the EPSON Remote! Utility” on page 3-19. Adjust the line space setting in your application software.
- Page 113 Your application software is not configured correctly for your printer. Software settings override settings you make using the default-setting mode, EPSON Remote!, or the control panel buttons. Vertical printed lines are not aligned. Cause Bidirectional printing, which is the printer’s standard printing mode, is out of alignment.
-
Page 114: Clearing Paper Jams
3. If continuous paper is loaded in the printer, remove it or tear off the supply at the back of the printer. 4. Turn the knob on the right side of the printer toward you to eject the paper in the printer. Remove any remaining pieces of paper. -
Page 115: Aligning Vertical Lines In Your Printout
279 mm (11 inches) long and 241 mm (9.5 inches) wide. If you use single sheets without an optional cut-sheet feeder, you need to load a new sheet of paper each time the printer ejects a printed sheet onto the paper guide. -
Page 116: Printing A Self Test
297 mm (11.6 inches) wide, such as an A3-size sheet. To perform a self test, follow these steps: 1. Make sure paper is loaded and the printer is turned off. Caution: Whenever you turn off the printer, wait at least five seconds before turning it back on;... -
Page 117: Printing A Hex Dump
2. To run the test using the Draft font, hold down the LF/FF button while you turn on the printer. To run the test using the printer’s letter-quality fonts, hold down the Load/Eject button while you turn on the printer. - Page 118 2. To enter hex dump mode, hold down both the LF/FF and Load/Eject buttons while you turn on the printer. 3. Open a software program and send a print job to the printer. Your printer prints all the codes it receives in hexadecimal format.
- Page 119 Appendix A Enhancing Your Printer With Options Cut-Sheet Feeders ........A-2 Installing the cut-sheet feeder.
-
Page 120: Cut-Sheet Feeders
C80687 The asterisk ( ) is a substitute for the last digit, which varies by country. Contact your local EPSON dealer for the part number in your country. You can install the high-capacity cut-sheet feeder by itself, or you can assemble and install a double-bin cut-sheet feeder by combining the high-capacity and second-bin feeders. -
Page 121: Installing The Cut-Sheet Feeder
1. Make sure the printer is turned off. 2. Close the sprocket covers if they are open, and lock the sprocket units by pushing down the lock levers if necessary. - Page 122 Lower the cut-sheet feeder until it rests on the printer. 4. Remove the paper guide from the front of the printer. Then slide the paper guide for the cut-sheet feeder all the way onto the mounting pegs.
- Page 123 6. Fully extend the paper guide extension. (If you do not plan to stack the printed sheets, you do not need to perform this step.) 7. If you are printing on long paper, pull out the extension flap located in the center of the paper guide. Enhancing Your Printer With Options...
-
Page 124: Loading Paper From The Cut-Sheet Feeder
For single-sheet multipart forms, use only the type that are glued at the top of the forms. To avoid paper jams, do not allow the printer to stack more than 40 printed sheets on the paper guide at one time. - Page 125 Load paper in the high-capacity cut-sheet feeder (bin 1 of the double-bin feeder) as follows: 1. Pull both paper set levers forward until the paper guides retract to allow paper loading. 2. Release the paper guide lock levers by pulling them forward. Enhancing Your Printer With Options...
- Page 126 Next, slide the left paper guide to roughly match the width of your paper. 4. Slide the center support midway between the paper guides. Enhancing Your Printer With Options guide mark...
- Page 127 Make sure the position of the guide allows the paper to move up and down freely. Then lock the left guide in place. Note: Load paper with the printable side up. If you are using pre-printed forms, load the forms top-down. Enhancing Your Printer With Options...
- Page 128 Paper Size list, and select Sheet Feeder Bin-1 from the Paper Source list. (If you are printing from a DOS application, select the bin number using the Tear Off/Bin button (LQ-680) or the Paper Source button (LQ-680Pro) on the control panel.
- Page 129 1. Pull both paper set levers forward, and slide the right paper guide to the guide mark and the left paper guide all the way to the left. Enhancing Your Printer With Options guide mark A-11...
- Page 130 Paper Size list, and select Sheet Feeder Bin-2 from the Paper Source list. (If you are printing from a DOS application, select the bin number using the Tear Off/Bin button (LQ-680) or the Paper Source button (LQ-680Pro) on the control panel.)
-
Page 131: Switching Between The Tractor And The Cut-Sheet Feeder
To switch back to single sheets loaded from the cut-sheet feeder, follow these steps: 1. If any continuous paper remains in the printer, press the Tear Off/Bin button (LQ-680) or the Tear Off/Special Paper button (LQ-680Pro) to advance the paper to the tear-off position. -
Page 132: Loading Paper Manually From The Paper Guide
2. Adjust the thickness setting to your paper as described in Chapter 2, “Adjusting the Paper Thickness Lever.” 3. Return the paper guide’s extension flap to its original position, if necessary, and push the paper guide extension all the way in. A-14 Enhancing Your Printer With Options... -
Page 133: Roll Paper Holder
Be sure to load your paper printable side up. After a few seconds, the printer automatically advances the paper to the loading position. The printer is ready to accept data from your computer and print. After printing a sheet, the printer ejects the printed sheet onto the paper guide and the Paper Out and Pause lights come on. - Page 134 2. Facing the back of the printer, slide both sprocket units all the way to the right, and slide the edge guide all the way to the right. 3. Position the roll paper holder beneath the printer as shown below. Fit the two holes in the roll paper holder base under the two positioning pegs on the bottom of the printer.
-
Page 135: Loading A Roll Of Paper
2. Set the shaft and paper roll onto the roll paper holder. Load the roll so the paper feeds from the top of the roll and the edge of the roll paper passes under the tension lever. Enhancing Your Printer With Options A-17... -
Page 136: Removing Roll Paper
3. Turn on the printer and make sure that the single-sheet feeding is selected as described in Chapter 2, “Selecting a Paper Source.” 4. Bring the leading edge of the paper up over the paper path guide and insert it into the printer until you feel resistance. -
Page 137: Optional Interface Cards
You can install an optional interface card to supplement your printer’s built-in parallel interface and provide added network compatibility. The EPSON interface cards in the table below are compatible with your printer. (Not all the interfaces in the table are available worldwide.) -
Page 138: Installing An Interface Card
Installing an interface card Follow the steps below to install an optional interface card. 1. Make sure the printer is turned off. Unplug the printer’s power cord and disconnect the interface cable. 2. Remove the screws securing the shield plate to the back of the printer and remove the plate. - Page 139 Store the detached shield plate in a safe place; you will need to reattach it if you remove the interface card. To remove the interface card, reverse the steps above. Enhancing Your Printer With Options A-21...
- Page 140 A-22 Enhancing Your Printer With Options...
-
Page 141: Cleaning The Printer
Cleaning the Printer ........ -
Page 142: Transporting The Printer
Do not use a hard or abrasive brush. Do not spray the inside of the printer with lubricants; unsuitable lubricants can damage the printer mechanism. Contact your EPSON dealer if you think lubrication is needed. Cleaning and Transporting the Printer... -
Page 143: Transporting The Printer
Warning: You need to move the print head by hand to remove the ribbon cartridge. If you have just used the printer, the print head may be hot; let it cool for a few minutes before touching it. 1. Remove any paper loaded in the printer. - Page 144 Cleaning and Transporting the Printer...
-
Page 145: Specifications
Specifications Printer Specifications ........C-2 Mechanical. -
Page 146: Printer Specifications
Printer Specifications Mechanical Printing method: Printing speed: Printing direction: Line spacing: Printable columns: Resolution: Paper feed methods: Friction (front paper entry) Paper feed speed: Specifications 24-pin impact dot matrix High-speed draft Draft Draft condensed LQ condensed Bidirectional logic seeking for text and graphics printing. - Page 147 (25% duty) 400 million strokes per wire 230 mm (9 inches) 497 mm (19.6 inches) 387 mm (15.2 inches) LQ-680 approx. 9.0 kg (19.8 lb) LQ-680Pro approx. 9.4 kg (20.7 lb) 2 million characters (LQ, 10 cpi, 48 dots/ character)
-
Page 148: Electronic
EPSON Script C Scalable fonts EPSON Roman EPSON Sans Serif EPSON Roman T EPSON Sans Serif H 10.5, 8-32 pt Barcode fonts EAN-13, EAN-8, Interleaved 2 of 5, UPC- A, UPC-E, Code 39, Code 128, POSTNET 10, 12, 15 cpi... - Page 149 Character tables: One Italic and 12 graphical character tables: Following 23 graphical character tables are also available in some countries: Character sets: 14 international character sets and one legal character set: Latter 7 sets can be selected only with the ESC R command.
-
Page 150: Electrical
Input voltage range Rated frequency range Input frequency range Rated current Power consumption Note: Check the label on the back of the printer for the voltage of your printer. Environmental Operation Storage Paper Note: Use recycled paper, postcards, envelopes, and labels only under... - Page 151 Ordinary single sheets: front and cut-sheet feeder entry Width Length Thickness Weight Single-sheet multipart forms: front and high-capacity cut-sheet feeder entry Width Length Copies Front: 90 to 304.8 mm (3.5 to 12 inches) Cut-sheet feeders: 100 to 297 mm (3.9 to 11.6 inches) Front: 70 to 420 mm (2.8 to 16.5 inches) High-capacity cut-sheet feeder:...
- Page 152 Thickness Weight Binding Envelopes: front and high-capacity cut-sheet feeder entry Size Thickness Weight Postcards: front and high-capacity cut-sheet feeder entry Width Length Thickness Weight Roll paper: rear entry with optional roll paper holder Width Thickness Weight Specifications 0.12 to 0.46 mm (0.0047 to 0.018 inch) 40 to 58 g/m²...
- Page 153 Continuous paper (standard and multipart): rear entry Width Length (one page) Copies Thickness Weight (not multipart) Weight (one sheet of multipart) Binding Note: The ratio of the cut/uncut length at the perforation should be between 3:1 and 5:1. The thickness of the perforation part when extended should be 2 mm or less.
-
Page 154: Printable Area
Continuous paper with overlapping multipart forms (LQ-680Pro only): rear entry Width and length of the backing sheet Copies Thickness other measurements Labels: rear entry Label size Backing sheet width Backing sheet length (one page) Backing sheet thickness 0.07 to 0.09 mm (0.0028 to 0.0035 inch) Total thickness Label weight C-10... -
Page 155: Printable Area
Printable area Single sheets, envelopes, postcards, and roll paper: printable area The minimum top margin is 0 mm (0 inch). For envelopes and postcards loaded from cut-sheet feeder, it is 4.2 mm (0.17 inch). The minimum left and right margins are 3.0 mm (0.12 inch) each. - Page 156 Continuous paper (standard and multipart): The minimum top and bottom margins above and below the perforation are 4.2 mm (0.17 inch) each. The minimum left and right margins are 13 mm (0.51 inch) each. The maximum printable width is 269.2 mm (10.6 inches). For continuous paper wider than 295.2 mm (11.6 inches), the side margins increase proportionally to match the width of the paper.
- Page 157 Continuous paper with overlapping multipart forms: The minimum top margin from the perforation down to the printable area is 21.2 mm (0.83 inch). The minimum left and right margins are 19 mm (0.75 inch) each. The maximum printable width is 266.8 mm (10.5 inches). The minimum bottom margin from the printable area down to the perforation is 4.2 mm (0.17 inch) each.
-
Page 158: Safety Approvals
Safety approvals 120 V model: Safety standards 230 V model: Safety standards CE marking 230 V model: Low Voltage Directive 73/23/EEC EMC Directive 89/336/EEC C-14 Specifications UL1950 CSA C22.2 No. 950 FCC part 15 subpart B class B CSA C108.8 class B EN 60950 EN 55022 (CISPR pub. -
Page 159: Command Lists
Your printer supports the following EPSON ESC/P2 control codes and IBM 2390 Plus emulation control codes: EPSON ESC/P2 control codes Selecting an EPSON ESC/P2 printer in your software allows you to use advanced fonts and graphics. General operation: ESC @, ESC U, ESC EM... -
Page 160: Ibm 2390 Plus Emulation Control Codes
IBM 2390 Plus emulation control codes This printer emulates the IBM Proprinter using the commands below. For detailed information, see the IBM 2390 Plus reference manual. General operation: NUL, DC3, ESC j, BEL, CAN, DC1, ESC Q, ESC [ K, ESC U,... - Page 161 Appendix D Customer Support Information Contacting Customer Support......D-2 For Users in North America....... D-3 For Users in the United Kingdom and the Republic of Ireland .
-
Page 162: Contacting Customer Support
Contacting Customer Support If your EPSON product is not operating properly and you cannot solve the problem using the troubleshooting information in your product documentation, contact customer support services for assistance. If customer support for your area is not listed below, contact the dealer where you purchased your product. -
Page 163: For Users In North America
For Users in North America If you purchased your printer in the United States or Canada, EPSON provides technical assistance 24 hours a day through the electronic support services and automated telephone services listed in the following table: Service World Wide Web... -
Page 164: For Users In The United Kingdom And The Republic Of Ireland
You can purchase ink cartridges, ribbon cartridges, paper, manuals, and accessories from EPSON at (800) 873-7766 or visit our web site at www.epsonsupplies.com (U.S. sales only). In Canada, please call (800) 873-7766 for dealer referral. - Page 165 UK or 1 800 409132 from the Republic of Ireland, by faxing 01442 227271 in the UK or 0044 1442 227271 from the Republic of Ireland, and via e-mail at info@epson.co.uk. They can provide the following information: Pre-sales information and literature on new EPSON products (also available via our world wide web site at http://www.epson.co.uk)
-
Page 166: For Users In Australia
EPSON Helpdesk EPSON Helpdesk is provided as a final backup to make sure our clients have access to advice. Operators on the Helpdesk can aid you in installing, configuring and operating your EPSON product. -
Page 167: For Users In India
We encourage you to have all the relevant information on hand when you ring. The more information you prepare, the faster we can help solve the problem. This information includes your EPSON product documentation, type of computer, operating system, application programs, and any information you feel is required. -
Page 168: For Users In Malaysia
World Wide Web (www.epson.com.my) Information on product specifications, drivers for download, Frequently Asked Questions (FAQ), and Email Enquiries are available. Epson Trading Shah Alam Head Office Phone: Fax: For Users in Singapore Sources of information, support, and services available from Epson Singapore are: World Wide Web (www.epson.com.sg) -
Page 169: For Users In Hong Kong
To obtain technical support as well as other after-sales services, users are welcome to contact EPSON Hong Kong Limited. Internet home page EPSON Hong Kong has established a local home page in both Chinese and English on the Internet to provide users with the following information:... -
Page 170: For Users In The Philippines
For Users in the Philippines To obtain technical support as well as other after sales services, users are welcome to contact the EPSON Philippines Representative Office at the telephone and fax numbers below: Phone: Fax: BBS: D-10 Customer Support Information... - Page 171 Glossary auto line feed When this option is turned on in the default-setting mode or the EPSON Remote! utility, each carriage return (CR) code is automatically followed by a line feed (LF) code. bidirectional printing Printing in which the print head prints in both directions (bidirectionally), from left to right and then right to left.
- Page 172 See printer driver. ESC/P Abbreviation for EPSON Standard Code for Printers, the system of commands your computer uses to control your printer. It is standard for all EPSON printers and supported by most application software for personal computers. ESC/P2 The enhanced version of the ESC/P printer command language.
- Page 173 Printing in which the print head prints in one direction only. Unidirectional printing is useful for printing graphics because it provides precise vertical alignment. You can select unidirectional printing using the printer’s default- setting mode or the EPSON Remote! utility. See also bidirectional printing. Glossary...
- Page 174 Glossary...
- Page 175 4-3 to 4-4 Driver. See Printer driver Edge guide, 2-22 Electrical, C-6 Emulation. See IBM 2390 Plus emulation ENERGY STAR compliance, 4 Envelopes, 2-24 to 2-25 EPSON Remote! utility, 1-12, 3-2, 3-19 EPSON Status Monitor 3 utility, 1-12, 3-2, 3-20 to 3-22...
- Page 176 Paper specifications, C-6 to C-10 Paper thickness lever, 2-6 to 2-7 Parallel I/F (interface) bidirectional mode, 4-7 Pitch. See Condensed Plugging in the printer, 1-5 to 1-6 Postcards, 2-25 to 2-26 Printable area, C-11 to C-13 Print direction, 4-6 Printer driver...
- Page 177 C-2 to C-3 paper, C-6 to C-10 paper capacity, C-3 printable area, C-11 to C-13 safety approvals, C-14 Status Monitor 3 utility. See EPSON Status Monitor 3 utility Switching between continuous paper and single sheets, 2-26 to 2-28, A- 13 to A-14...
- Page 178 IN-4...
-
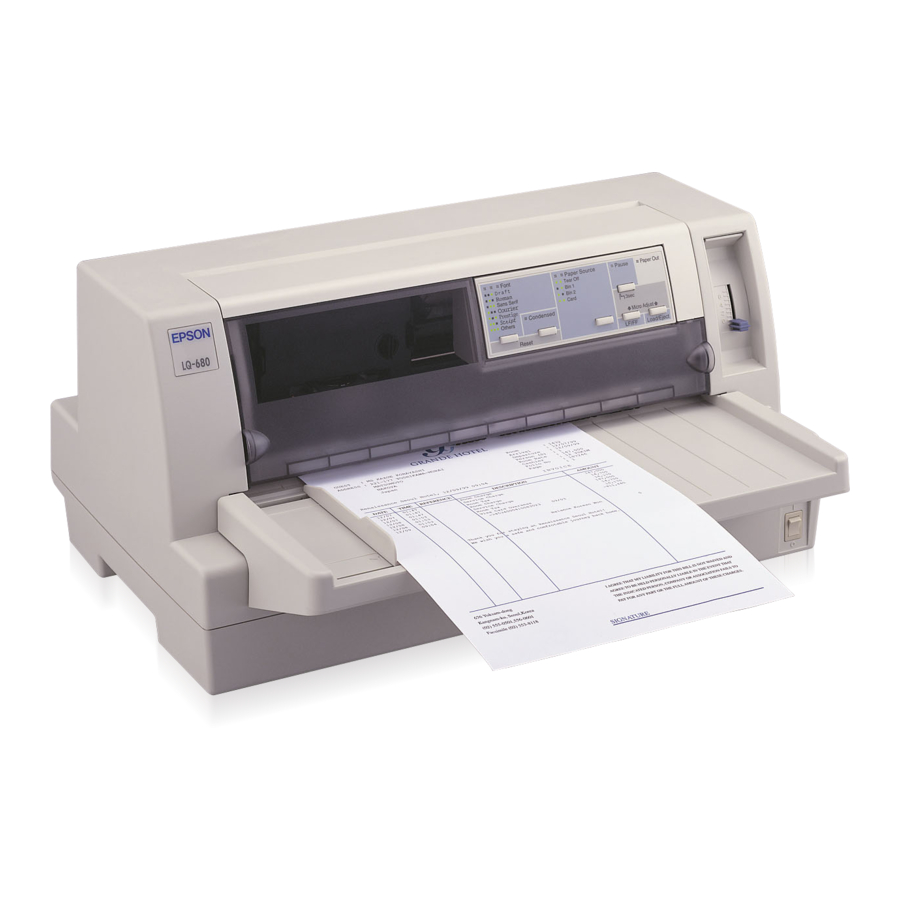
Page 179: Printer Parts
Printer Parts control panel printer cover ribbon cartridge print head edge guide knob paper guide paper release lever (LQ-680 only) paper thickness lever power switch paper support sprocket units parallel interface... - Page 180 EPSON OVERSEAS MARKETING LOCATIONS EPSON AMERICA, INC. 20770 Madrona Ave. P.O. Box 2842 Torrance, CA 90509-2842 Phone: (800) 922-8911 Fax: (310) 782-5220 EPSON DEUTSCHLAND GmbH Zülpicher Straße 6, 40549 Düsseldorf Germany Phone: (0211) 56030 Fax: (0211) 5047787 EPSON AUSTRALIA PTY. LTD.
- Page 181 24-Pin Dot Matrix Printer User's Guide Printed in Japan 00.XX-XX...
Need help?
Do you have a question about the LQ-680 and is the answer not in the manual?
Questions and answers