Table of Contents
Advertisement
Quick Links
Advertisement
Table of Contents

Subscribe to Our Youtube Channel
Related Manuals for treesse Zen Pro


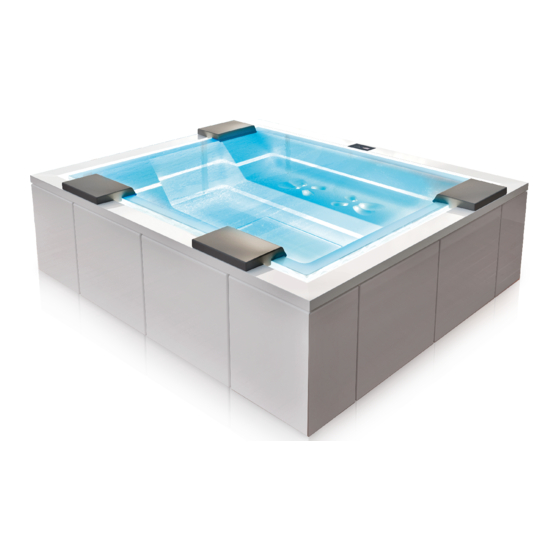
Summary of Contents for treesse Zen Pro
- Page 1 Zen Pro Installation manual...
- Page 2 The installation of this minipool is simple and immediate, however we advise you to read this manual carefully before installing it. The Treesse team is always available for any information or request for assistance that may be required during installation.
-
Page 3: Table Of Contents
Contents Safety instructions __________________________________________4 EXPLANATION OF PICTOGRAMS _________________________________________________________________ 4 Preliminary operations ______________________________________5 PREPARATIONS AND CHOICE OF POSITION _________________________________________ 5 CHECKING MINIPOOL INTEGRITY __________________________________________________ 5 OUTDOOR INSTALLATION __________________________________________________________________ 5 INDOOR INSTALLATION ____________________________________________________________________ 5 Transport and position ______________________________________6 MOVING _________________________________________________________________________ 6 POSITIONING _____________________________________________________________________ 7 TEMPORARY POSITIONING _________________________________________________________________ 7 POSITIONING IN THE PLANNED LOCATION __________________________________________________ 7 Preliminary operations ______________________________________8... -
Page 4: Safety Instructions
Unauthorised actions, tampering or modifications that do not follow the Treesse invites you to protect the environment information provided in this manual can cause by disposing of the material in recycling bins. damages, injuries or fatal accidents and null and void the warranty. -
Page 5: Preliminary Operations
Preliminary operations Zen Pro minipool PREPARATIONS AND CHOICE More information OF POSITION OUTDOOR INSTALLATION The pre-installation sheet supplied at the time of purchase provides all the information Preparations: in cold areas, to avoid possible damage necessary for a correct preparation of the due to freezing, it is recommended to provide valves installation environments. -
Page 6: Transport And Position
Transport and position Zen Pro minipool MOVING To move the minipool to the place of installation a suitable lifting device (e.g., pallet jack) is required. As an alternative, provide for the availability of eight people. If the installation is indoor, before moving the minipool make sure that it can easily pass through the doors and hallways to reach the desired place of installation. -
Page 7: Positioning
Transport and position Zen Pro minipool POSITIONING TEMPORARY POSITIONING The installation of the minipool should be done immediately upon receipt. In any case, once unpacked, if it is necessary to temporarily place it on a surface awaiting the installation, it will be necessary to place level concrete slabs having a minimum thickness of 5 cm under the entire bottom of the minipool. -
Page 8: Preliminary Operations
Preliminary operations Zen Pro minipool PREPARATION OF THE SAND More information FILTER WHAT IS THE SAND FILTER? The minipools have an empty filter and so it has to be filled. The sand filter is an effective minipool filter connected to the recirculation pump's feed line. It consists of a HOW TO FILL THE SAND FILTER large container that is two-thirds filled with quartz sand. - Page 9 Preliminary operations Zen Pro minipool ø 0,5-1mm ø 1-3mm INTERIOR - top view Caution! Make sure that the six internal filters are correctly positioned and secured (see figure). Caution! Do not inhale Carefully clean and verify that the gaskets are still in place ø...
-
Page 10: Installation
Installation Zen Pro minipool DESCRIPTION OF MAIN COMPONENTS Control Panel Compensation tank Sand filter Electric pump 1 Electric pump 2 (optional) Electronic control units 2 x Blowers (of which 1 is optional) Heater Drain valve 10 Ozone Compensation tank inspection... -
Page 11: Connections Required
Installation Zen Pro minipool CONNECTIONS REQUIRED To be used, the minipool requires only two connections: Room for plumbing connections the electrical (incoming and outgoing water) connections electrical connection (power supply) electrical and plumbing connection to an exchanger (optional - if present) - see following page. - Page 12 Installation Zen Pro minipool CONNECTION TO AN OPTIONAL EXTERNAL EXCHANGER (NOT SUPPLIED) Room for the electrical connections Drain incoming hot domestic water OUT: outgoing cold Technical water inspection port BL 1 EVclv Cromo 230V~ 230V 230V heater/exchanger control cable circulator (not supplied)
-
Page 13: Plumbing Connections
Installation Zen Pro minipool PLUMBING CONNECTIONS More information WATER HARDNESS All water connection operations must be performed after making sure that the minipool's Water hardness (TH) is determined by the total content water supply valve is CLOSED. of calcium and magnesium present in the water, coming The connection must be made by an experienced, from their soluble salts. - Page 14 Installation Zen Pro minipool EXAMPLE OF PRE-INSTALLATION PLUMBING FOR A MINIPOOL Connection to the minipool using the 1/2 inch female hose Connect the drain of the floor minipool. The provided. plumber is responsible for the choice and type If the minipool is installed outdoors provide an adequate thermal of materials to be used and the verification of insulation of the pipes.
-
Page 15: Electrical Connections
ELECTRICAL CONNECTIONS The Treesse minipools are built in compliance with European laws (EN 60 335-2-60) and are tested during production to ensure the safety of the installer and user. The connection must be made by an experienced, qualified electrician. -
Page 16: Safety Zone
Installation Zen Pro minipool SAFETY ZONE Local regulations prohibit any electrical installation (plug sockets, switches, lamps, etc.) in the area surrounding the minipool for a distance of at least 60 cm and a height of 230 cm. TESTING AFTER INSTALLATION √... -
Page 17: First Run
AUTOMATIC FILLING USING THE KEYPAD Once the pool is powered, the display will show the word "treesse" and after a few seconds the display will show the current ambient temperature, and the various sym- bols on the keypad will be illuminated with white light. -
Page 18: First Run
Zen Pro First run minipool FIRST RUN Main page With the bathtub full, recirculation active and ozone active, start in sequence all the functions of the bathtub in the presence of the owner to verify proper operation: BLOWER The minipool can be equipped with: A single blower motor (standard) activates the nozzles on the bottom. - Page 19 Zen Pro First run minipool “OK” Main page If pressed for more than three seconds you access a submenu page where other system functions are available (empty, manual backwash, keypad lock, SILENCE mode). When accessing special functions, the "KEYPAD LOCK"...
-
Page 20: Partial Minipool Empty Test
How to set the SILENCE function: MANUAL BACKWASHING A Press the "OK" 6 key for at least three seconds. In Treesse minipools the backwashing is automatic, B this provides access to a submenu page. running automatically every 48 hours of use of the minipool, but can be forced manually: + and - keys until the “SILENCE”... - Page 21 Zen Pro Alarms minipool If any alarms appear during initial startup, read the instructions provided in the following table. If the solution is not possible, immediately contact the Manufacturer to request technical support. In the meantime, do not try to repair or use the minipool but rather disconnect it from the electricity and water supplies.
-
Page 22: Alarms
Zen Pro Alarms minipool ALARMS Screen DESCRIPTION OF THE PROBLEM NOTIFICATIONS displayed POSSIBLE SOLUTIONS Problem description: the notification is activated if the water level inside the compensation tank is below the minimum for more than three seconds. The display will show the message "LL" alternating with the... -
Page 23: Troubleshooting
Zen Pro Troubleshooting minipool PROBLEM POSSIBLE CAUSE SOLUTION Replace the sand as indicated, The sand of the sand filter is very dirty f o l l o w i n g t h e i n s t r u c t i o n s o n or the water supply is excessively hard granularity. -
Page 24: Decorative Panels
Decorative panels Zen Pro minipool Mount the wood or laminate resin panels as shown in the figures below. -
Page 25: Covering
Under these conditions or when not used, advise the owner to use a fixed or mobile cover to protect the minipool (we recommend the optional Treesse covers). In addition to preserving the surfaces, the cover will keep the water hot and protected against falling leaves and other outdoor debris. - Page 26 Notes Notes...
- Page 27 Maximum care has been paid to guarantee the accuracy of this manual. The Manufacturer reserves the right to modify the equipment or the documentation at any time, without notice. Therefore there might be small differences between this manual and the product you have received: we apologise in advance for any inconvenience. The total or partial reproduction of this manual without the Manufacturer's consent is prohibited.
- Page 28 www.gruppotreesse.it GRUPPO TRE S s.p.a. 01036 Nepi (VT) - Italy S.S. Cassia km. 36.400 Settevene industrial area tel. (+39) 0761 527242 fax (+39) 0761 527223 info@gruppotres.it...
Need help?
Do you have a question about the Zen Pro and is the answer not in the manual?
Questions and answers