BBB DIGIBOARD BCP-51W Complete Manual
Hide thumbs
Also See for DIGIBOARD BCP-51W:
- Quick start manual (19 pages) ,
- Complete manual (34 pages)

Subscribe to Our Youtube Channel
Related Manuals for BBB DIGIBOARD BCP-51W


Summary of Contents for BBB DIGIBOARD BCP-51W
- Page 1 All manuals and user guides at all-guides.com ENGLISH Cycling Computer COMPLETE MANUAL BCP-51W BCP-51WH BCP-52WA BCP-52WAH...
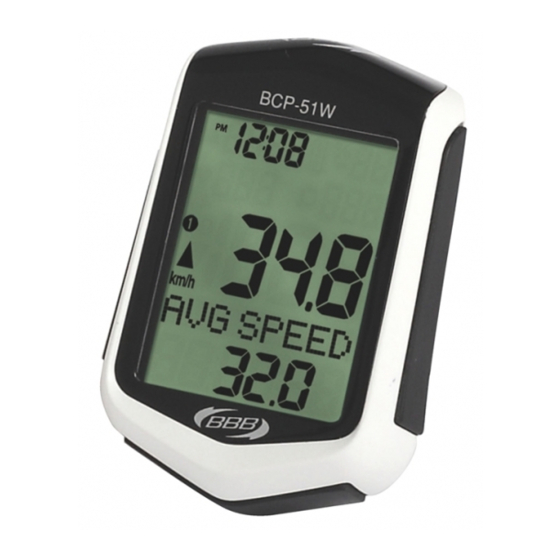
- Page 2 All manuals and user guides at all-guides.com SCREEN ELEMENTS SCREEN ELEMENTS » BCP-52WA / BCP-52WAH » BCP-51W / BCP-51WH...
- Page 3 All manuals and user guides at all-guides.com OPERATIONS BUTTON OPER ATIONS BUTTON...
-
Page 4: Table Of Contents
All manuals and user guides at all-guides.com CONTENTS SEC TION 1 : INSTALLATION A Hardware: M ounting bracket, wheel magnet and speed sensor B. Hear t rate: Hear t rate sensor set C. Cadence: Cadence magnet and cadence sensor SEC TION 2 : FIRST TIME SE T-UP A. -
Page 5: Sec Tion 1 : Installation
All manuals and user guides at all-guides.com SECTION 1 INSTALLATION... -
Page 6: A Hardware: M Ounting Bracket, Wheel Magnet And Speed Sensor
7. Pass t wo zip -ties through the bracket and around the stem/handlebar. Cut off the excess length of the zip -ties. 8. Place the BBB computer in the bracket and rotate clock wise till you hear a “click ” sound. -
Page 7: Hear T Rate: Hear T Rate Sensor Set
All manuals and user guides at all-guides.com SECTION 1B : INSTALLATION - HEART RATE INSTALLING THE HE ART R ATE SENSOR The hear t rate sensors are integrated in the sof t elastic belt. For a cor rec t hear t rate measurement, the belt must be positioned slightly below your chest, direc tly on your sk in. -
Page 8: Cadence: Cadence Magnet And Cadence Sensor
All manuals and user guides at all-guides.com SECTION 1C : INSTALLATION - CADENCE INSTALLING THE C ADENCE M AGNET AND C ADENCE SENSOR 1. I nstall the cadence magnet on the non dr ive train side of the crank . 2. - Page 9 All manuals and user guides at all-guides.com SECTION 2 FIRST TIME SET-UP...
-
Page 10: Batter Y Installation
All manuals and user guides at all-guides.com SECTION 2A : FIRST TIME SET-UP : BATTERY INSTALLING BATTERY INTO THE COMPUTER 1. Open the batter y cover by tur ning the cover counter clock wise. 2. I nser t the batter y (CR 2032) with the positive side (+) facing up. Close the batter y cover by tur ning it clock wise Af ter the batter y installation the first time setup menu will star t automatically. -
Page 11: Setting Clock
All manuals and user guides at all-guides.com SECTION 2B : FIRST TIME SET-UP : SETTINGS SETTING CLOCK To change 24HR clock or 12HR clock , press + or -. 2. To selec t, press M. 3. To set the TIME press + or -. 4. -
Page 12: S Etting Hear T Rate Values
All manuals and user guides at all-guides.com SECTION 2B : FIRST TIME SET-UP : SETTINGS SETTING HE ART R ATE VALUES H igh Limit / Low Limit For a healthy and effec tive training your hear t rate should not be too high or too low. Your com- puter will war n you when you are training too hard or not hard enough. -
Page 13: Setting Gender
All manuals and user guides at all-guides.com SECTION 2B : FIRST TIME SET-UP : SETTINGS SETTING GENDER To set the SEX press + or -. (M = M ale, F = Female). 2. To selec t, press M. -
Page 14: Setting Weight
All manuals and user guides at all-guides.com SECTION 2B : FIRST TIME SET-UP : SETTINGS SETTING WEIGHT 1. To change KG or LB, press + or -. 2. To selec t, press M. 3. To set the WEIGHT press + or -. 4. -
Page 15: Setting Wheel Size
All manuals and user guides at all-guides.com SECTION 2B : FIRST TIME SET-UP : SETTINGS SETTING WHEEL SIZE This computer has wheel size presets for easy wheel size selec tion. 1. To set the cor rec t wheel size press + or -. To selec t, press M. PRESET 700 - 2096... -
Page 16: Setting Km/H Or M/H
All manuals and user guides at all-guides.com SECTION 2B : FIRST TIME SET-UP : SETTINGS SETTING KM/H OR M/H 1. To change the SPEED UNIT to KM/H or M/H, press + or -. 2. To selec t, press M. SETTING ODOMETER 1 1. -
Page 17: Setting Total Time 1
All manuals and user guides at all-guides.com SECTION 2B : FIRST TIME SET-UP : SETTINGS SETTING TOTAL TIME 1 1. I t is possible to set the TOTAL TIME data into your new bic ycle computer. To selec t the first digit, press + or - 2. -
Page 18: Setting Home Altitude
All manuals and user guides at all-guides.com SECTION 2C : FIRST TIME SET-UP : HOME ALTITUDE SETTING ALTITUDE (BCP-52WA / BCP-52WAH ONLY ) The altitude in this computer is measured by a pressure sensitive barometer. Not only altitude, but also changing weather will influence the height showed on your computer. B efore each r ide you have to calibrate the altitude to let the computer compare your home altitude with the cur rent weather situation. -
Page 19: Sec Tion 3 : Before Each Ride
All manuals and user guides at all-guides.com SECTION 3 : BEFORE EACH RIDE SECTION 3 BEFORE EACH RIDE... -
Page 20: Tr Ip Data Reset
All manuals and user guides at all-guides.com SECTION 3 : BEFORE EACH RIDE : TRIP DATA RESET TRIP DATA RESET (BCP-52WA / BCP-52WAH ONLY ) 1. The TRIP data can be reset in any menu by pressing + and – button for 3 seconds. Please note: Ever y tr ip related data is reset including C ADENCE, HEAR T R ATE and ALTITUDE. -
Page 21: Home Altitude Calibration
All manuals and user guides at all-guides.com SECTION 3 : BEFORE EACH RIDE : HOME ALTITUDE CALIBRATION HOME ALTITUDE C ALIBR ATION (BCP-52WA / BCP-52WAH ONLY ) 1. Star t with the ALTITUDE menu (ALTI GAIN shown in display). Press + button for 3 seconds. 2. -
Page 22: Section 4 : Advanced Settings
All manuals and user guides at all-guides.com SECTION 4 : ADVANCED SETTINGS SECTION 4 ADVANCED SETTINGS... -
Page 23: Second Bike Set-Up
All manuals and user guides at all-guides.com SECTION 4A : ADVANCED SETTINGS : SECOND BIKE SET-UP SECOND BIKE SET-UP M ount the bracket on your second bic ycle as instruc ted on page 5. M ount the wheel magnet and speed sensor on your second bic ycle as instruc ted on page 5. M ount the cadence magnet and sensor on your second bic ycle as instruc ted on page 7. -
Page 24: Advanced Time Settings
All manuals and user guides at all-guides.com SECTION 4B : ADVANCED SETTINGS : ADVANCED TIME SETTINGS TIME SET-UP The Time is set dur ing the First-Time S et-Up, page 10. 1. To change the clock star t with the TIME menu ( TIME shown in display). Press M button for 3 seconds. -
Page 25: Advanced Tr Ip Distance Settings
All manuals and user guides at all-guides.com SECTION 4C : ADVANCED SETTINGS : ADVANCED TRIP DISTANCE SETTINGS ODOMETER SET-UP The O dometer is set dur ing the First-Time S et-Up, page 15. 1. To change this data star t with the DISTANCE menu (ODOME TER1 shown in display). Press M button for 3 seconds. -
Page 26: Advanced Hear T Rate Settings
All manuals and user guides at all-guides.com SECTION 4D : ADVANCED SETTINGS : ADVANCED HEART RATE SETTINGS HE ART R ATE LIMIT SET-UP The user ’s Hear t R ate HI LIMIT and LO LIMIT are set dur ing the First-Time S et-Up, page 11. 1. -
Page 27: Advanced Cadence Settings
All manuals and user guides at all-guides.com SECTION 4E : ADVANCED SETTINGS : ADVANCED CADENCE SETTINGS DISTANCE OR COUNTDOWN TIMER SET-UP 1. To set up the distance countdown func tion star t with the C ADENCE menu ( TIMER or DIST. CD shown in display). -
Page 28: Advanced Altitude Settings
All manuals and user guides at all-guides.com SECTION 4F : ADVANCED SETTINGS : ADVANCED ALTITUDE SETTINGS HOME ALTITUDE OR CURRENT ALTITUDE (BCP-52WA / BCP-52WAH ONLY ) Page 17 shows how to set the home altitude. The home altitude can be descr ibed as preset star t altitude. -
Page 29: Temperature And Back Light
All manuals and user guides at all-guides.com SECTION 4F : ADVANCED SETTINGS : TEMPERATURE SETTINGS AND BACKLIGHT SETTING °C or °F (BCP-52WA / BCP-52WAH ONLY ) 1. To change bet ween °C or °F star t with the ALTITUDE menu ( TEMP shown in display). Press M button for 3 seconds. -
Page 30: Sec Tion 5 : Additional Information
All manuals and user guides at all-guides.com SECTION 5 : ADDITIONAL INFORMATION SECTION 5 ADDITIONAL INFORMATION... -
Page 31: Menu Structure
All manuals and user guides at all-guides.com SECTION 5 : ADDITIONAL INFORMATION A . MENU STRUCTURE To change bet ween the different menu’s press M. To check different func tions within a menu press F. B. DISPL AY ELEMENTS SPEED PACER The SPEED PACER compares your cur rent speed with your average speed. -
Page 32: Functions Overvie W
All manuals and user guides at all-guides.com SECTION 5 : ADDITIONAL INFORMATION C . FUNCTIONS OVERVIE W BCP-52WAH BCP-52WA BCP-51WH BCP-51W (30 func tions) (25 func tions) (22 func tions) (17 func tions) Cur rent speed Average speed M aximum speed R iding time Tr ip distance O dometer 1... -
Page 33: Troubleshooting
All manuals and user guides at all-guides.com SECTION 5 : ADDITIONAL INFORMATION D. TROUBLESHOOTING Check the following before tak ing the BBB DigiB oard in for repairs. PROBLEM POSSIBLE CAUSES No speed or • Magnet is not aligned or distance between incorrect speed. - Page 34 All manuals and user guides at all-guides.com Augusta B enelux B V R ooseveltstraat 46 2321 BM Leiden, The Nether lands Tel (31)71 - 57 91 580 Fax (31)71 - 53 23 201 Email: info@augustabenelux.nl BBBCYCLING.COM...
Need help?
Do you have a question about the DIGIBOARD BCP-51W and is the answer not in the manual?
Questions and answers