Advertisement
Quick Links
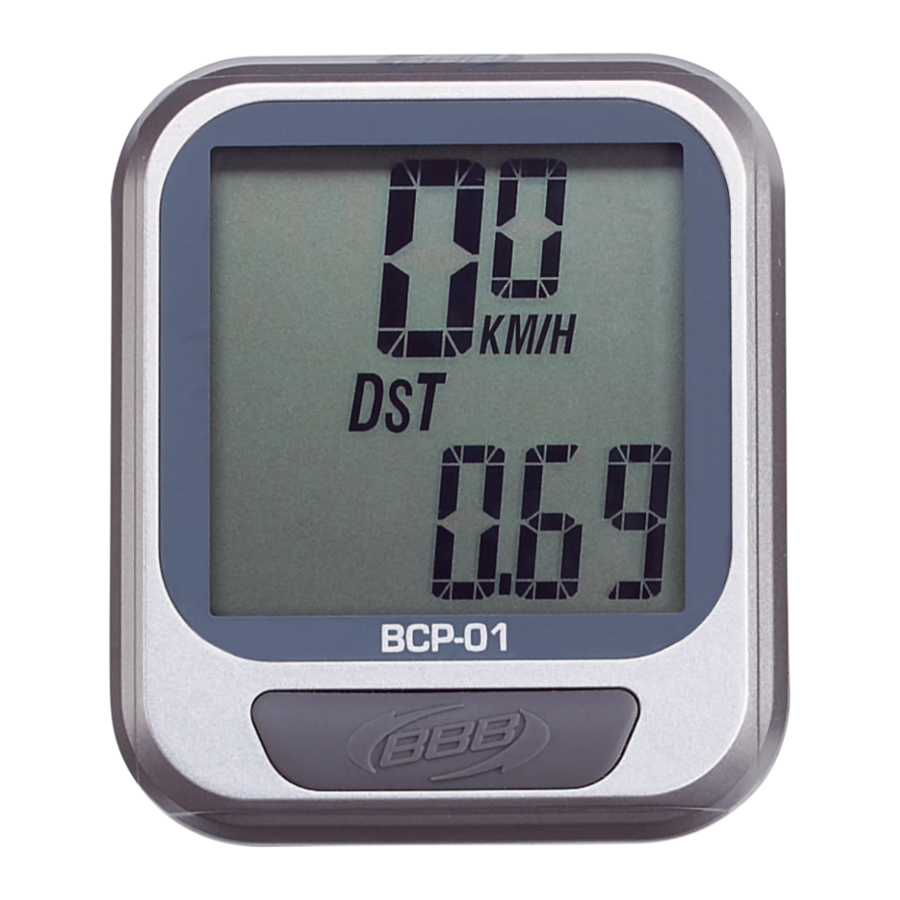
Bicycle computer
BCP-01, BCP-02, BCP-03
MODE
AC
MAIN UNIT MOUNTING
BATTERY CHANGE
S
CLICK
CLICK
1.5V LR44
Lock lever
Lock lever
BCP-01 has 6 FUNCTIONS: SPD,CLK,DS,ODO,SCAN,AS/S
BCP-02 has 9 FUNCTIONS: SPD,CLK,DS,RT,AS,MS,ODO,SCAN,AS/S
BCP-03 has 11 FUNCTIONS: SPD,CLK,DS,RT,AS,MS,TRT,ODO,SCAN
PACER, AS/S
FUNCTIONS
SPD : Current Speed
0.0 - 199.9 Km/h or 120.0 Mile/h +/- 1%
The current speed is always displayed on the 4 digits set when riding.
CLK: 12HR Clock
It displays the current time on a 12HR clock.
DS: Trip Distance
0.00 - 999.99 Km or Miles +/- 0.1%
The DS function accumulates the distance data from the last RESET operation as long as
the bicycle is being ridden.
RT: Riding Time
The RT totals the riding time from the last RESET operation.
AS: Average Speed
0.0 - 199.9 Km/h or 120.0 Mile/h +/- 0.1%
1. It is calculated from the DS divided by the RT; the average data counted is from the last
RESET to current points.
2. It displays an "Err" symbol when either the RT is over 100 hours or the DS is over
1,000 km (or miles). Reset the unit in order to restart.
MS: Maximum Speed
0.0 - 199.9 Km/h or 120.0 Mile/h +/- 1%
It shows the highest speed from the last RESET operation.
TRT: Total Riding Time
The TRT totals the riding time from the last ALL CLEAR operation.
ODO: Odometer
0.0 - 19999.9 Km or Miles +/- 0.1%
The ODO accumulates the total distance as long as the bike is running. The ODO data
can be cleared by the ALL CLEAR operation only.
: SCAN
1. Auto-Scanning Display Mode
Press the MODE button till the "
" symbol is displayed. The computer will
change the DS, CLK, RT, AS, MS, TRT and ODO display modes in a loop
sequence automatically every 6 seconds.
2. Fixed Display Mode
Press the MODE button to turn off the "
" symbol and select a desired display
mode; the computer will stop the auto-scanning display operation and the display
mode is set.
/
: Speed Pacer
It flashes the "
" speed pacer arrow while the current speed is higher than the
average speed and the down arrow "
" flickers conversely.
BCP-01 ha 6 funzioni: SPD,CLK,DS,ODO,SCAN,AS/S
BCP-02 ha 9 funzioni:
SPD,CLK,DS,RT,AS,MS,ODO,SCAN.
BCP-03 ha 11 funzioni:
SPD,CLK,DS,RT,AS,MS,TRT,ODO,SCAN
PACER,AS/S.
FUNZIONI
SPD: velocità di corsa o istantanea
La velocità di corsa viene sempre visualizzata con quattro cifre durante la corsa.
CLK: Orologio a 12 ore
Visualizza l'ora esatta in un orologio a 12 ore.
DS: distanza del percorso
0.00 - 999.99 km o miglia +/- 0.1%
La funzione DS calcola la distanza dall'ultima operazione di RESET(azzeramento) fino
a quando la bicicletta non si ferma.
RT: Durata del percorso
La funzione RT calcola la durata del percorso dall'ultima operazione di RESET
(azzeramento).
AS: Velocità media
0.0 - 199.9 km/h o 120.0 miglia/h +/- 0.1%
1. La velocità media viene calcolata dividendo la DS (distanza del percorso) per RT
(durata del percorso). La media viene quindi calcolata dall'ultima operazione di RESET
(azzeramento) fino al punto attuale.
2. Quando RT è superiore alle 100 ore oppure DS è superiore a 1.000 km (o miglia), sul
display compare il simbolo "Err" (che significa Errore). Azzerare l'unità per ricominciare
il conteggio.
MS: velocità massima
0.0 - 199.9 km/h o 120.0 miglia/h +/-1%
La funzione MS visualizza la velocità più elevata raggiunta dopo l'ultima operazione di
RESET (azzeramento).
TRT: Durata del percorso totale
La funzione totalizza la durata del percorso totale dall'ultima operazione ALL CLEAR (AC).
ODO: contachilometri
0.0 - 19999.9 km o miglia +/- 0.1%
La funzione ODO totalizza la distanza totale percorsa dalla bicicletta. Questi dati
possono essere cancellati solo con la funzione ALL CLEAR (AC).
: SCAN
1. Auto-scanning display Mode (display con scansione automatica)
Tenere premuto il pulsante "MODE" finché sullo schermo a cristalli liquidi non
compare il simbolo "
". Il computer visualizzerà le funzioni DS, CLK, RT, AS, MS,
TRT e ODO automaticamente in successione ogni 6 secondi.
2. Fixed display mode (display fisso)
Premere il pulsante MODE per eliminare il simbolo "
display desiderata. Il computer interromperà la scansione automatica, mostrando
solamente la funzione selezionata.
/
: Speed Pacer (Indicatore di velocità)
Se la velocità istantanea è superiore rispetto alla velocità media, lampeggerà il
simbolo "
". Se invece è inferiore, lampeggerà il simbolo "
BOP-01 hat 6 Funktionen: SPD,CLK,DS,ODO,SCAN,AS/S.
BOP-02 hat 9 Funktionen:
SPD,CLK,DS,RT,AS,MS,ODO,SCAN.
BOP-03 hat 11 Funktionen:
SPD,CLK,DS,RT,AS,MS,TRT,ODO,SCAN
PACER,AS/S.
FUNKTIONEN
SPD: aktuelle Geschwindigkeit
0.0 - 199.9 Km/h oder 120.0 Meilen/h +/- 1%
Die aktuelle Geschwindigkeit wird immer, während Sie fahren, auf der 4-stelligen
Anzeige angezeigt.
CLK: 12 HR Uhr
Zeigt die aktuelle Uhrzeit im 12-Stunden Modus an.
DS: Fahrstrecke
0.00 - 999.99 Km oder Meilen +/- 0.1%
Die DS-Funktion akkumuliert die Daten der Fahrstrecke, die mit dem Fahrrad seit dem
letzten Reset-Vorgang gefahren wurden.
RT: Fahrzeit
Die RT-Funkltion gibt die akkumulierte Fahrzeit seit dem letzten Rest-Vorgang an.
AS: Durchschnittsgeschwindigkeit
0.0 - 199.9 Km/h oder 120.0 Meilen/h+/- 0.1%
1. Die Durchschnittsgeschwindigkeit wird aus der DST geteilt durch die RT berechnet; der
Durchschnittswert wird vom letzten Reset-Vorgang bis zum aktuellen Standort gezählt.
2. Das Symbol "Err" erscheint, wenn RT über 100 Stunden oder DS mehr als 100 km
oder Meilen beträgt. Wenn diese erscheint, drücken Sie Reset, um neu zu starten.
MS: Höchstgeschwindigkeit
0.0 - 199.9 Km/h oder 120.0 Meilen/h +/- 1%
Zeigt die höchste Geschwindigkeit an, die seit dem letzten Resest-Vorgang gefahren
wurde.
TRT: Gesamtfahrzeit
Die TRT-Funktion akkumuliert die Fahrzeit, die seit dem letzten
"Alles-Lösch"-Vorgang gefahren wurde an.
ODO: Kilometerzähler
0.0 - 19999.9 Km oder Meilen +/- 0.1%
Der Kilometerzähler akkumuliert die Gesamtstrecke, die Sie mit Ihrem Fahrrad gefahren
sind. Der Kilometerzähler kann nur durch den "Alles-Lösch"-Vorgang gelöscht werden.
: SCAN
1. Einstellung der Auto-Scan-Anzeige
Halten Sie den "Mode-Knopf" gedrückt, bis das "
Computer wechselt nun alle 6 Sekunden automatisch in einem Kreislauf die Anzeigen
von DS, CLK, RT, AS, MS, TRT und ODO.
2. Einstellung der Festen-Anzeige
Drücken Sie den Mode-Knopf, um das "
" -Symbol auszustellen und wählen Sie
den gewünschten Anzeige Modus; der Computer wird den automatischen
Scan-Vorgang beenden und die Auswahleinstellung anzeigen.
/
: Geschwindigkeits-Anzeiger:
Es wird der flackernde "
" - Geschwindigkeits-Anzeiger angezeigt, solange die
gefahrene Geschwindigkeit höher als die Durchschnittsgeschwindigkeit ist und der
flackernde "
"- Geschwindigkeits Anzeiger im entgegengesetzten Fall.
Calibration (unit selection & circumference setting)
Fig.1
Main unit setup
LCD
SEGMENTS
AUTO TEST
DS
Fig.2
CLK
Fig.3
Recalibrations
2s
4s
Total 6 sec
English
MAIN UNIT SETUP (Fig. 1)
INITIATE THE COMPUTER
1. Be sure to press the All Clear (AC) key to clear all stored data and initiate the computer
,SPEED
before using it or when replacing battery otherwise the unit may malfunction.
2. The LCD segments will be tested automatically after the All Clear key is pressed.
3. Press the "MODE" button to stop the LCD test, then the flicking "KM/h" and "c2155" will be displayed.
CALIBRATION
●
1. UNIT SELECTION
1:00:00 - 12:59:59 +/-0.003%
1). Press the "MODE" button to select "KM/h" or "M/h"(Mile/h).
2). Hold the "MODE" button till the flickering digit is changed to the digit "2" of the
c2155 to recognize either KM/h or Mile/h as desired.
2. CIRCUMFERENCE DATA SETTING
1). The default is set at 2155mm. Measure the value for your wheel (Fig. 5) or refer to
the quick table providedin the manual for your bicycle. (Fig. 6)
0H00M00S - 19H59M59S
2). A quick press of the "MODE" button advances the flickering digit by 1.
3). To change the flickering digit, hold down the "MODE" button till the flickering digit
moves to the next digit.
BUTTON and OPERATIONS
AUTOMATIC START/STOP [AS/S]
1. The computer will automatically begin counting SPD, ODO, DS, MS, TRT, RT and AS data
upon riding and stop counting data when riding is stopped.
2. The flickering symbol "
POWER AUTO ON/OFF
0H00M - 1999H59M
To preserve battery, this computer will automatically switch off when it has not been used for
about 10 minutes. The power will be turned on automatically by riding the bicycle or by
pressing the button.
MODE BUTTON
Quickly press this button to move in a loop sequence from one basic function screen to another.
ALL CLEAR OPERATIONS (Initiate the Computer)
Press the ALL CLEAR (AC) key to initiate the computer or use ALL CLEAR if any irregular
data appears. It will clear all stored data.
RESET OPERATION
1. Hold down the "MODE" button till the LCD digit is blanked, then release it. The computer
will RESET the DS, RT, AS, MS.
2. It cannot reset CLK, TRT and ODO data.
RECALIBRATIONS (Fig. 3)
1. Change the LCD display to ODO screen, hold down the "MODE" button till (about 6
seconds) it jumps into the calibrating screen.
2. Refer to the main unit setup process to adjust the circumference.
3. Hold down the "MODE" button till (about 6 seconds) it jumps out the recalibration mode
to store the desired data and complete recalibrations.
Italiano
PREPARAZIONE DEL COMPUTER (Fig. I)
AVVIO DEL COMPUTER (azzeramento)
,SPEED
1. Accertarsi che venga premuto il pulsante AC (All clear) per cancellare tutti i dati e che
vengano effettuate tutte le operazioni di avviamento del computer prima di utilizzarlo o
quando si sostituisce la batteria, altrimenti l'unità potrà fornire risultati errati.
2. Quando si preme il pulsante AC, il computer effettua una scansione automatica dei
0.0 - 199.9 km/h o 120.0 miglia/h +/- 1%
segmenti del display a cristalli liquidi.
3. Premere il pulsante "MODE" per interrompere la scansione. Di seguito compaiono le scritte
lampeggianti "KM/h" e "c2155".
1:00:00 - 12:59:59 +/-0.003%
CALIBRATURA
●
1. SCELTA DELL'UNITA' DI MISURA
1). Premere il pulsante "MODE" per selezionare "KM/h" (chilometri all'ora) o "M/h"
(miglia all'ora).
2). Tenere premuto il pulsante MODE finchÈ a lampeggiare è la cifra "2" della scritta
0H00M00S - 19H59M59S
c2155, quindi verificare la selezione desiderata (km/h o miglia/h).
2. IMPOSTAZIONE DELLA CIRCONFERENZA
1). Il valore standard della circonferenza è fissato a 2155 mm. Misurare la circonferenza
della vostra ruota (Fig. 5) o consultare la tabella fornita dal manuale d'istruzioni
della vostra bicicletta. (Fig. 6)
2). Una rapida pressione del pulsante "MODE" fa avanzare di 1 unità la cifra
lampeggiante.
3). Per cambiare la cifra lampeggiante, tenere premuto il pulsante "MODE" finchÈ non
compare la cifra successiva.
PULSANTI E OPERAZIONI NORMALI
START / STOP AUTOMATICO
1. Il computer comincerà automaticamente il suo conteggio di SPD, ODO, DS, MS, TRT, RT e AS
nel momento in cui si inizia la corsa, mentre smetterà di conteggiare appena ci si ferma.
2. Il simbolo "
0H00M - 1999H59M
ACCENSIONE / SPEGNIMENTO AUTOMATICO [AS/S]
Per non consumare la batteria, il computer si spegne quando non viene utilizzato per circa 10
minuti. Si accenderà automaticamente quando si riprende la corsa o si preme il pulsante.
PULSANTE MODE
Premere questo pulsante per spostarsi in sequenza dal display di una funzione a un altro.
OPERAZIONI AC (ALL CLEAR) (per avviare il computer)
Premere il pulsante AC per avviare il computer oppure per cancellare qualsiasi dato
irregolare, se dovessero comparirne.
OPERAZIONE RESET (azzeramento)
1. Tenere premuto il pulsante "MODE" finché sullo schermo a cristalli liquidi non sarà visualizzato
alcun dato, quindi lasciare il pulsante. Il computer azzererà i dati memorizzati di DS, RT, AS,
MS.
" e selezionare la funzione
2. Il pulsante RESET non può azzerare i dati CLK, RT e ODO.
RICALIBRATURE (Fig. 3)
1. Modificare lo schermo di visualizzazione a cristalli liquidi fino a posizionarsi sulla funzione
ODO, tenere premuto il pulsante "MODE" (per circa 6 secondi), finché non compare lo
schermo di calibratura.
".
2. Fare riferimento alla sezione D (Preparazione del computer) per regolare la circonferenza.
Deutsch
Einstellung des Hauptteiles (Abb. I)
Starten des Computers
1. Drücken Sie den Alles-Lösch-Knopf (AC) , um alle gespeicherten Daten zu löschen und starten
,SPEED
Sie den Computer neu, bevor Sie ihn das erste Mal benutzen oder die Batterien wechseln.
Andernfalls können Fehlfunktionen auftreten.
2. Die LCD-Segmente werden automatisch nach dem drücken des Alles-Lösch-Knopf getestet.
3. Drücken Sie den Mode-Knopf , um den LCD-Test zu stoppen. Anschlieflend wird das flackernde
"km/h" und "c2155" angezeigt.
Kalibrierung
●
1. Einheitsauswahl
1). Drücken Sie den Mode-Knopf, um zwischen km/h und M/h (Meilen/h) auszuwählen.
1:00:00 - 12:59:59 +/-0.003%
2). Halten Sie den Mode-Knopf gedrückt, bis die flackernde Ziffer auf die Zahl "2" bei der
Anzeige "c2155" gewechselt ist, um zu erkennen ob wie gewünscht km/h oder Mile/h
ausgewählt ist.
2. Einstellung der Umfangsdaten
1). Die Standardeinstellung ist auf 2155 mm eingestellt. Messen Sie den Umfang Ihres
0H00M00S - 19H59M59S
Reifens (Abb. 5) oder entnehmen Sie ihn aus der Referenztabelle, welche bei den
Unterlagen Ihres Fahrrades beigefügt war (Abb. 6).
2). Schnelles drücken des Mode-Knopfes erhöht den Wert der blinkenden Ziffer um eine Einheit.
3). Um die flackernde Ziffer zu wechseln, halten Sie den Mode-Knopf gedrückt bis die nächste
Ziffer flackert.
Knöpfe und normale Vorgange
Start/Stop ñ Automatik
1. Der Computer beginnt automatisch bei Fahrtbeginn die Werte für SPD, ODO, DS, MS, TRT, TM
und AS zu zählen und stoppt den Zählvorgang, sobald die Fahrt beendet wird.
2. Das flackernde "
Automatisches Ein-/Ausschalten [AS/S]
0H00M - 1999H59M
Um die Batterie zu schonen, schaltet sich der Computer automatisch aus, wenn er für länger als
10 Minuten nicht benutzt wurde. Die Stromzufuhr wird bei Fahrtbeginn oder durch drücken eines
Knopfes wieder eingeschaltet.
Mode-Knopf
Schnelles drücken dieses Knopfes bringt Sie in einem Kreislauf in dem Sie alle wichtigen
Sequenzen der Funktionsbildschirme nacheinander durchlaufen.
"Alles-Lösch"-Knopf (Neustarten des Computers)
Drücken Sie den ÑAlles-Lösch"-Knopf (AC), um den Computer neu zu starten oder benutzen
Sie den ÑAlles-Lösch"-Knopf wenn unregelmässige Daten angezeigt werden. Es werden alle
"-Symbol angezeigt wird. Der
gespeicherten Daten gelöscht.
Reset-Vorgang
1. Halten Sie den Mode-Knopf solange gedrückt, bis die LCD-Anzeige leer ist und lassen Sie ihn
dann los. Der Computer wird nun die bisher gespeicherten Werte von DS, RT, AS, MS mit Null
ersetzen.
2. Es können nicht die Werte für CLK, TRT und ODO mit Null ersetzt werden.
Neueinstellung der Umfangsdaten (Abb.3)
1. Wechseln Sie von der LCD-Anzeige zu der ODO-Anzeige und halten Sie den Mode-Knopf
solange (ca. 6 Sekunden) gedrückt, bis Sie in das Einstellungsmenü der Umfangsdaten gelangen.
2. Sehen Sie in den Einstellungsanweisungen des Hauptteils nach und passen Sie entsprechend
den dort aufgeführten Beschreibungen die Umfangsdaten an.
3. Zum Beenden der Neueeinstellungen, halten Sie den Mode-Knopf solange (ca. 6 Sekunden)
2s
2s
AS
RT
MS
Clock setting
Fig.4
6s
calibration
2s
complete
setting
Total 6 sec
" indicates that the computer is at START status.
" lampeggiante significa che il computer si trova nello stato di START (avvio).
" Symbol zeigt an, dafl der Computer im Startmodus ist.
Fig.5
End setting
TRT
ODO
Fig.6
Tire Size
6s
calibration
4s
complete
setting
12HR CLOCK SETTING (Fig. 4)
1. Change the LCD display to "
" screen.
2. Press the "MODE" button till (about 6 seconds) it jumps into the clock adjusting screen to
set the clock.
3. A quick press of the "MODE" button advances the flickering digit by 1.
4. To change the flickering digit, hold down the "MODE" button till the flickering digit moves to
the next digit.
5. Hold down the "MODE" button till (about 6 seconds) it jumps out the setting to store the
desired data and complete clock setting.
BATTERY CHANGE
1. When the brightness of the LCD display is dim, it means that the battery is nearly exhausted.
2. Replace with a new LR44 (Cross reference type A76, AG13 or V13GA) battery in the
compartment on the back of the computer with the positive (+) pole toward the battery cap.
TROUBLE SHOOTING
●
Check the following before taking unit in for repairs.
PROBLEM
CHECK ITEMS
1. Is the battery dead?
No display
2. Is there incorrect battery
installation?
1. Is it at the recalibrating or 12HR
No current
clock setting screen?
Speed or
2. Are the contacts between the main
incorrect data
unit and the bracket poor?
3. Are the relative positions and gap of
sensor and magnet correct?
4. Is the wire broken?
5. Is the circumference correct?
Irregular
display
Did you leave main unit under direct
LCD is black
sunlight when not riding the bike for
a long time?
Is the temperature below 0ºC (32ºF)?
Display is slow
●
PRECAUTIONS
1. This computer can be used in the rain but should not be used under water.
2. Don't leave the main unit exposed to direct sunlight when not riding the bike.
3. Don't disassemble the main unit or it's accessories.
4. Check relative position and gap of sensor and magnet periodically.
5. Clean the contacts of the bracket and the bottom of the main unit periodically.
6. Don't use thinner, alcohol or benzine to clean the main unit or its accessories when they become dirty.
7. Remember to pay attention to the road while riding.
3. Tenere premuto il pulsante "MODE" (per circa 6 secondi) per uscire dallo schermo di
calibratura, memorizzare i dati desiderati e completare le calibrature.
12HR CLOCK SETTING (Fig. 4)
1. Change the LCD display to "
" screen.
2. Press the "MODE" button till (about 6 seconds) it jumps into the clock adjusting screen to
set the clock.
3. A quick press of the "MODE" button advances the flickering digit by 1.
4. To change the flickering digit, hold down the "MODE" button till the flickering digit moves to
the next digit.
5. Hold down the "MODE" button till (about 6 seconds) it jumps out the setting to store the
desired data and complete clock setting.
SOSTITUZIONE DELLA BATTERIA
1. Quando i caratteri del display LCD sono deboli, allora la batteria è quasi esaurita.
2. Sostituire la batteria vecchia con una nuova batteria LR44 (tipo A76, AG13 o V13GA) e
collocarla nel vano situato nella parte posteriore del computer con il polo positivo (+) verso il
coperchio del vano.
IDENTIFICAZIONE DEI GUASTI
●
Prima di portare l'unità a riparare, effettuare i seguenti controlli:
PROBLEMA
COSA CONTROLLARE
Nessuna
1. La batteria è scarica?
indicazione
2. La batteria è stata installata in modo
sul display
corretto?
Non compare
1. Si è allo schermo di regolazione dell'unità
la velocità di
principale o dell'orologio?
corsa o i dati
2. I contatti tra l'unità principale e il supporto
non sono
sono deboli?
corretti
3. Le posizioni del magnete e del sensore e
la loro distanza sono corrette?
4. Il cavo è rotto?
5. La circonferenza impostata è corretta?
Visualizzazio
ne irregolare
L'unità principale è stata esposta ai raggi
Il display è
diretti del sole per un periodo in cui la
scuro
bicicletta non era in movimento?
La
La temperatura è inferiore agli 0ºC (32ºF)?
visualizzazione
è troppo lenta
PRECAUZIONI
●
1. Questo computer può essere usato in caso di pioggia ma non dovrebbe essere utilizzato sott'acqua.
2. Non lasciare l'unità principale sotto l'esposizione diretta dei raggi solari a meno che non si stia
utilizzando la bicicletta.
3. Non smontare l'unità principale o i suoi accessori.
4. Controllare periodicamente la posizione e la distanza del sensore e del magnete.
5. Pulire periodicamente i contatti del supporto e la parte inferiore dell'unità principale.
6. Non fare uso di diluenti, alcool o benzina per pulire l'unità principale o i suoi accessori quando sono sporchi.
7. Ricordarsi di prestare attenzione alla strada durante la corsa.
gedrückt, bis Sie das Menü zur Neueinstellung der Umfangsdaten verlassen haben. Es werden
die neu eingegebenen Daten gespeichert.
Wechseln der Batterie (Abb. 3)
1. Wenn die Helligkeit der LCD-Anzeige schwächer wird zeigt es an, dafl die Batterie bald leer ist.
2. Ersetzen Sie die alte Batterie mit einer neuen LR44 (oder vergleichbaren Typen wie A 76, AG 13
oder V13GA). Setzen Sie die neue Batterie an die vorgesehene Stelle an der Rückseite des
Computers mit den Pluspol (+) zum Batteriedeckel hin ein.
Einstellung der 12-HR Uhr (Abb. 4)
1.Wechseln Sie von der LCD-Anzeige in das "
2.Drücken Sie den Mode-Knopf solange (ca. 6 Sekunden), bis Sie in das Einstellungsmenü der
Uhrzeit gewechselt sind.
3.Durch schnelles drücken des Mode-Knopfes erhöhen Sie den Wert der flackernden Ziffer um eine Einheit.
4.Um die flackernde Ziffer zu wechseln, halten Sie den Mode-Knopf solange gedrückt, bis die
nächste Ziffer flackert.
5.Zum beenden der Uhrzeiteinstellung halten Sie den Mode-Knopf solange (ca. 6 Sekunden)
gedrückt, bis Sie das Einstellungsmenü der Uhrzeit verlassen haben. Es werden die neu
eingegebenen Daten gespeichert.
●
Fehlerbeseitigung
Lesen Sie erst das folgende, bevor Sie den Fahrradcomputer zum reparieren bringen.
Problem
Zu überprüfende Teile
keine Anzeige
1. Ist die Batterie leer?
2. Ist die Batterie falsch eingelegt?
1. Befinden Sie sich im Einstellungsmenü
Keine aktuelle
der Umfangsdaten oder der
Geschwindig-
Uhrzeiteinstellung?
keitsanzeige
2. Sind die Kontakte zwischen dem
oder falsche
Hauptteil und der Halterung schlecht?
Daten
3. Ist die Position des Sensor und der
Abstand zwischen dem Magneten und
dem Sensor ordnungsgemäfl?
4. Ist das Kabel gebrochen?
5. Ist der Radumfang korrekt eingestellt?
Irreguläre
Anzeige
Schwarze
Hatten Sie das Hauptteil in der prallen Sonne
LCD-Anzeige
gelassen, während Sie nicht gefahren sind?
Ist die Temperatur unter 0ºC (32ºF)?
Die Darstellung
ist langsam
Vorsichtsmaflnahme
●
1. Der Computer kann im Regen benutzt werden, sollte aber nicht unter Wasser benutzt werden.
2. Lassen Sie, wenn Sie nicht am fahren sind, das Hauptteil nicht in der prallen Sonne liegen.
3. Bauen Sie nicht das Hauptteil oder anderes Zubehör auseinander.
4. ‹berprüfen Sie in regelmäfligen Zeitabständen die relevante Position und
Gröfle der Lücke zwischen Magnet, Haupteinheit und Sensor.
5. Reinigen Sie die Kontakte auf der Halterung und die unterhalb des Hauptteils von Zeit zu Zeit.
6. Benutzen Sie keine Lösungsmittel, Alkohol oder Benzin zum reinigen
des Hauptteiles, falls es verschmutzt ist.
7. Denken Sie daran, auf den Straflenverkehr zu achten, während Sie Fahrrad fahren.
WHEEL CIRCUMFERENCE MEASUREMENT
2nd
1st
POPULAR TIRES CIRCUMFERENCE REFERENCE TABLE
Circumference
Circumference
Tire Size
Number
Number
SOLUTION
1. Replace the battery.
2. Be sure that the positive pole of the
battery is facing the battery cap.
1. Refer to the adjusting procedure
and complete the adjustment.
2. Wipe contacts clean.
3. Refer to Installation Fig. D1 readjust
data correctly.
4. Repair or replace wire.
5. Refer to "CALIBRATION" and enter
correct value.
Refer to the "MAIN UNIT SETUP" and
initiate the computer again.
Place main unit in the shade to return to
normal state. No adverse effect on data.
Unit will return to normal state when the
Temperature rises.
RIMEDIO
1. Sostituire la batteria.
2. Assicurarsi che il polo positivo della batteria
sia rivolto verso il coperchio della batteria.
1. Fare riferimento alle istruzioni di regola-zione
ed effettuare le operazioni in modo corretto.
2. Pulire i contatti.
3. Fare riferimento alle (Installazioni fig. D1 )
impostare i dati correttamente.
4. Riparare o sostituire il cavo.
5. Fare riferimento al paragrafo "CALIBRA-
TURA" ed inserire il dato corretto.
Fare riferimento al paragrafo riparazione del
"Computer" e riavviare il computer.
Riporre l'unità principale all'ombra per riportarla
allo stato di normalità. Questo fenomeno non
compromette in alcun modo i dati.
L'unità tornerà allo stato di normalità quando
la temperatura aumenta.
" -Menü.
Lösung
1. Ersetzen Sie die Batterie.
2. Versichern Sie sich, dafl der Pluspol der
Batterie zum Verschlufldeckel zeigt.
1. Lesen Sie in der Einstellungsanleitung
die zu vervollständigen Schritte nach.
2. Reinigen Sie die Kontakte.
3. Sehen Sie in der (ANBAU Abb. D1) nach und
machen Sie die
entsprechenden Korrekturen.
4. Reparieren oder ersetzen Sie das Kabel.
5. Sehen Sie unter der Radumfang-
Einstellung nach und geben Sie die
korrekten Daten ein.
Sehen Sie in den Einstellungen für das Hauptteil
nach und starten Sie den Computer entsprechend
neu.
Legen Sie das Hauptteil in den Schatten, bis die
normale Anzeige wieder erscheint. Die Daten
werden hiervon nicht beeinfluflt.
Die Haupteinheit kehrt in den normalen Betrieb
zurück, sobald die Temperatur steigt.
Advertisement

Related Manuals for BBB BCP-01


Summary of Contents for BBB BCP-01
- Page 1 Total 6 sec Total 6 sec English MAIN UNIT SETUP (Fig. 1) 12HR CLOCK SETTING (Fig. 4) BCP-01 has 6 FUNCTIONS: SPD,CLK,DS,ODO,SCAN,AS/S 1. Change the LCD display to " " screen. INITIATE THE COMPUTER BCP-02 has 9 FUNCTIONS: SPD,CLK,DS,RT,AS,MS,ODO,SCAN,AS/S 2. Press the "MODE" button till (about 6 seconds) it jumps into the clock adjusting screen to BCP-03 has 11 FUNCTIONS: SPD,CLK,DS,RT,AS,MS,TRT,ODO,SCAN 1.
- Page 2 Calibration (unit selection & circumference setting) Fig.5 Fig.1 End setting WHEEL CIRCUMFERENCE MEASUREMENT Bicycle computer Main unit setup BCP-01, BCP-02, BCP-03 SEGMENTS AUTO TEST Fig.2 Fig.6 POPULAR TIRES CIRCUMFERENCE REFERENCE TABLE MODE Circumference Circumference Tire Size Tire Size Nunber Nunber...
Need help?
Do you have a question about the BCP-01 and is the answer not in the manual?
Questions and answers