
Related Manuals for iDPRT SP310


Summary of Contents for iDPRT SP310
- Page 1 SP310 User Manual Website: www.idprt.com Call Center: 18554983499 After Service: https://idprt.afterservice.vip Customer Service Email: support@idprt.com...
-
Page 2: Table Of Contents
Contents Important Safety Instructions ....................4 Chapter1 Introduction ......................8 1.1 Packing List ..........................8 1.2 Appearances and Components ..................... 9 1.3 Dimension ..........................10 Chapter 2 Specification ......................11 Chapter 3 Installation & Usage ..................... 13 3.1 Media Loading ........................13 3.2 Power/USB Connection ....................... - Page 3 Chapter 10 BarTender Ultralite Installation ................60 10.1 Introduction ........................60 10.2 Installation Preparation ..................... 60 10.3 Installation ......................... 61 10.4 Usage ..........................65 Chapter 11 iDPRT Label Designer Installation................ 73 11.1 Installation Preparation ..................... 73 11.2 Installation ......................... 73 11.3 Label Edit ........................... 76...
-
Page 4: Important Safety Instructions
User Manual SP310 Important Safety Instructions Before using the present appliance, please carefully read the following safety regulations in order to prevent any hazard or material damage. 1. Safety Warning Warning: The print head will become very hot during printing, avoid contact with the print head after printing has finished. - Page 5 User Manual SP310 Caution: Violating following instructions can cause a slight wound or damage to the appliance. 1) If you observe a strange smoke, odour or noise from the printer, unplug it before taking following measures. • Switch off the printer and unplug the set from the mains.
- Page 6 Corporation. is not legally liable for any damages and/or issues resulting from the use of options and/or parts that are not authentic iDPRT products or authorized products.
- Page 7 User Manual SP310 5. FCC This device complies with part 15 of the FCC Rules. Operation is subject to the following two conditions: (1) this device may not cause harmful interference, and (2) this device must accept any interference received, including interference that may cause undesired operation.
-
Page 8: Chapter1 Introduction
User Manual SP310 Chapter1 Introduction 1.1 Packing List Notes: 1. Unpack the printer and keep the packing material in case you need to ship the printer in the future. 2. Make sure you own all parts as follows, if not, do contact the seller. -
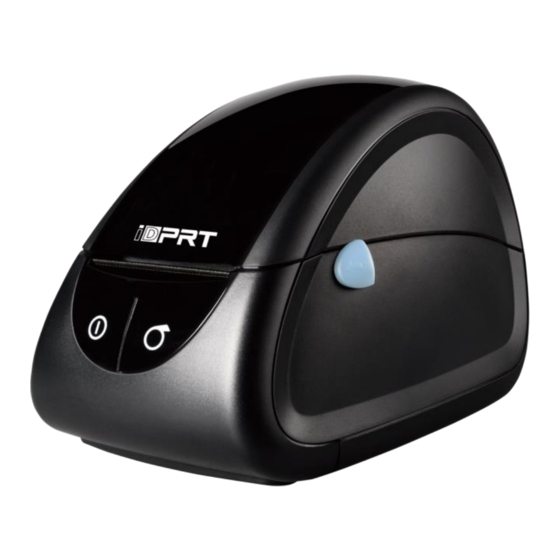
Page 9: Appearances And Components
User Manual SP310 1.2 Appearances and Components Rev.1.0... -
Page 10: Dimension
User Manual SP310 1.3 Dimension Rev.1.0... -
Page 11: Chapter 2 Specification
User Manual SP310 Chapter 2 Specification Table 2-1 General Specifications (1/2) Items Parameters Printing method Direct Thermal Line Printing Resolution 203dpi(8dots/mm) Printing width Max. 3.54 inches (80mm) Printing Printing speed 75mm/s Printing Length 0.59 inch (15mm) ~ 11.8 inches (300mm) - Page 12 User Manual SP310 Table 2-1 General Specifications (Continued) (2/2) Items Parameter Cover open detection,out of paper detection, label Detection Sensors gap detection and black mark detection [POWER] indicator Blue Normal working Green indicator indicator paper/Error indicator Input AC 100~240V, 50/60Hz, 1.5A...
-
Page 13: Chapter 3 Installation & Usage
User Manual SP310 Chapter 3 Installation & Usage 3.1 Media Loading 3.1.1 Paper Roll Loading 1. Use fingers to push the buttons towards front to open the top cover. 2. Pull out the paper roll holder, 0.5/1.0/1.5 inch of core is accessible. - Page 14 User Manual SP310 4. Pull some paper out, adjust the paper guide to fix the paper. 5. Close the cover and tear off the excess paper. Note: When the printer is not printing on black mark label, please position the sensor in the middle.
-
Page 15: Power/Usb Connection
User Manual SP310 3.2 Power/USB Connection 1. Make sure the printer is in the “Off”. 2. Connect the AC adapter to the cable connector. 3. Connect the AC power cord to the outlet. 4. Connect the other end of the AC power cord into the socket outlet. -
Page 16: Operation Panel
User Manual SP310 3.3 Operation Panel ● Power Button This button is used to turn the printer on/off. If you want to power on the printer, please hold and press the power button for approx. 1.25s and the LED indicator turns blue. If you want to power off the printer, please press and hold the power button for approx. -
Page 17: Led Indicators
User Manual SP310 3.4 LED indicators: LED Indicators Remarks Color Status The printer is ready BLUE FLASH Do not pass the RAM test GREEN The paper is feeding/under printing Limit switch not in place The printer is ready to print with continuous media... -
Page 18: Chapter 4 Interface
User Manual SP310 Chapter 4 Interface 4.1 USB Interface Figure 4-1 PIN No. Signal name VBUS 4.2 Cashdrawer Pin No. Signal Function Frame Ground Drawer kick-out drive signal 1 DRAWER1 DRSW Drawer open/close signal Drawer driving source DRAWER2 Drawer kick-out drive signal 2 Voltage: 9V DC Current:2A max. -
Page 19: Serial Interface
User Manual SP310 4.3 Serial Interface PIN No. Signal name Rev.1.0... -
Page 20: Chapter 5 Cleaning
User Manual SP310 Chapter 5 Cleaning Adhesives and coatings of the media can transfer onto the printer parts over time along the media path including the thermal print head and media sensor. This build-up can accumulate dust and debris. Failure to clean the print head, media path, and media sensor could result in print quality, worst more of inadvertent loss of labels, label jams and possible damage to the printer. -
Page 21: Chapter 6 Label Printer Utility Installation
Download the Label Printer Utility application program in CD. 6.2 Usage Note: The screen has a slightly different by operating systems and models. Following takes SP310 (Windows 7) for an example. 1.Install “SP310 Label Printer Utility.exe” and then open the “SP310 Label Printer Utility”. Rev.1.0... - Page 22 User Manual SP310 (2) Select Add/Modify/Delete Printer/Connect Test. ●Click “Add Printer” to select the printer and the port type (take USB as an example), click “OK”, check in “Printer List”. Rev.1.0...
- Page 23 User Manual SP310 ●Click “Modify Printer” to select the printer and the port type (take COM1 as an example), click “OK”, check in “Printer List”. Rev.1.0...
- Page 24 User Manual SP310 ●Click “Delete Printer”, click “Yes” to delete the printer, click “No” to cancel delete printer. ●Select the printer you currently use and connect it to the computer; Click “Connect Test” to test if the is connected. If connection is OK, the icon below will come out.
- Page 25 User Manual SP310 (3) Function. ● Click “Print Test Text”, edit the text→ Set up the printing range (printable width & height) →Click “Print” printer start to print printer test text. Rev.1.0...
- Page 26 User Manual SP310 ●Click “Parameter Setting” to set the interface, language, and print according to your needs. ●Click “Set” save all the above settings, then click “ok” back to the main menu. (5) Click “Restore Factory Settings”, click “OK” to restore factory settings, click “Cancel” to cancel restore factory settings.
-
Page 27: Chapter 7 Windows Driver Installation
7.2 Installation Note: Under different operating systems, the screen has a slight difference. Please operate it according to the tips. Take SP310 (Windows 7) for an example. Recommend to close the security software before installation in case of preventing installation. - Page 28 User Manual SP310 5.Click “Next”. 6. Select the default installation port name of the printer driver, then click “Next”. Rev.1.0...
- Page 29 User Manual SP310 7.Click “Finish”. 8.After installation, view the icon in “Start” → “Devices and Printers”. Note: 1) If you have already installed the driver (No matter what kind of ports), it will generate a USB port automatically when connecting the printer to the computer.
-
Page 30: Usage
User Manual SP310 7.4 Usage 7.4.1 Printing Preferences 1.Click “Start” → “Devices and Printers”. Right-click the icon and select “Printing preferences”. Rev.1.0... - Page 31 User Manual SP310 2.According to different needs, set the page. ●Click “Paper Name”, then select the paper type. Rev.1.0...
- Page 32 User Manual SP310 ●Click “Custom” to add a new stock. ●Select “Rotate” or “Effect”, it will be shown in the “Preview”. Rev.1.0...
- Page 33 User Manual SP310 ●Click “Advanced” to set “Save Paper”, “Density”, “Speed”, “Test”, “Media Handling” and “Media Type”. 1) Save Paper 2) Density Rev.1.0...
- Page 34 User Manual SP310 3) Speed 4) Test Rev.1.0...
- Page 35 User Manual SP310 5) Media Handling 6) Media Type Rev.1.0...
- Page 36 User Manual SP310 3.Click “Watermark”, it recommends to use BMP format. Rev.1.0...
- Page 37 User Manual SP310 4.Click “Halftone”. Click “Brightness” to adjust the brightness. ● Rev.1.0...
- Page 38 User Manual SP310 7.4.2 Printer Properties 1.Click “Start” → “Devices and Printers”. Right-click the icon and select “Printer properties”. Rev.1.0...
- Page 39 User Manual SP310 2.Click “General” → “Print Test Page”, and the printer will print label with current settings. Rev.1.0...
- Page 40 User Manual SP310 3.Click “Ports”, then select the port according to your needs. Rev.1.0...
- Page 41 User Manual SP310 4.Click “Advanced” to set the available time for the printer. Rev.1.0...
-
Page 42: Removing
User Manual SP310 7.5 Removing Note: Please turn off the printer or unplug the USB cable before removing the driver. 1.Double-click Windows Driver. 2.Select “Uninstall printer driver”, then click “Next”. Rev.1.0... - Page 43 User Manual SP310 3.Select the name of the printer driver needed to be uninstalled, then click “Next”. 4.Click"Yes" → “OK”. Rev.1.0...
-
Page 44: Chapter 8 Mac Driver Installation
The driver of the installation file name is “iDPRT-SP310-printer-driver-v1.3.4” 8.3 Driver Installation for macOS Warning: Under different operating system, the screen has a slight difference. Please operate it according to the tips. Take SP310 (macOS 10.15) as an example. 1.Double-click the Driver, click “Continue”. Rev.1.0... - Page 45 User Manual SP310 2.Select a destination and click “Continue”. 3.Select “Installation Type” and click “Continue”-> “Install”. Rev.1.0...
- Page 46 User Manual SP310 4.Type in the password of your computer. Rev.1.0...
- Page 47 User Manual SP310 5.The installation was successful. 6.Turn on the printer (for example: SP310) and connect it to your computer (for example: via USB cable). 7.Click: Launchpad -> System Preferences -> Printers & Scanners. Rev.1.0...
- Page 48 User Manual SP310 8.Under “Printer & Scanner”, printer SP310 is available. Rev.1.0...
-
Page 49: Chapter 9 Linux Driver Installation
User Manual SP310 Chapter 9 Linux Driver Installation 9.1 Manual Information This Linux Driver Installation Manual provides information on installation and usage of the printer’s Linux Driver according to PC operating system (OS). We maintain ongoing efforts to enhance and upgrade the functions and quality of all our products. - Page 50 User Manual SP310 2.Double-click the file. 3.Right-click in the blank, select the “Open in Terminal”. 4.Open the terminal and Input: press Enter key. Then input sudo ./install and chmod +x install and press Enter key. Rev.1.0...
- Page 51 User Manual SP310 5.Input the password for test and press the Enter key. 6. Installation completed; the terminal shows the following information: Rev.1.0...
- Page 52 User Manual SP310 7.Input “system-config-printer” to open the printer. 8.Connect the printer to the PC, the printer will be generated automatically. Rev.1.0...
-
Page 53: Detailed Linux Driver Settings
User Manual SP310 9.4 Detailed Linux Driver Settings 1.Add the printer and select the port of the device, then click “Forward” SP320(XXXXXXXXX) Rev.1.0... - Page 54 User Manual SP310 2.Describe printer, then click “Apply”. 3.Select whether to print a test page. Rev.1.0...
- Page 55 User Manual SP310 4.Right-click the “SP310”, select the “Properties”. ⚫ Settings Select the item for detailed setting, then click “Apply”. Rev.1.0...
- Page 56 User Manual SP310 ⚫ Access Control Select the item for detailed setting. Rev.1.0...
- Page 57 User Manual SP310 ⚫ Printer Options Select “General”, “Printer Options”, “Effectives” for detailed setting, then the printer will execute appropriate action according to the settings. Rev.1.0...
- Page 58 User Manual SP310 ⚫ Job Options Select the item and the printer will execute appropriate action. Rev.1.0...
- Page 59 User Manual SP310 ⚫ Ink/Toner Levels Rev.1.0...
-
Page 60: Chapter 10 Bartender Ultralite Installation
User Manual SP310 Chapter 10 BarTender Ultralite Installation 10.1 Introduction This chapter provides instructions on BarTender Ultralite program according to the PC operating systems (OS). The followings are supported. ⚫ Windows 10, 8.1, 8, 7 and Vista. ⚫ Windows Server 2016,Server 2012 and 2012 R2,Server 2008 and 2008 R2. -
Page 61: Installation
User Manual SP310 10.3 Installation : Note Under different operating systems, the screen has a slightly different. Take Windows 7 as an example. To avoid the prevention, recommend to close the security software before installation. 1.Double-click the application program 2.Select language, then click "OK". - Page 62 User Manual SP310 4.Click “Next”. 5.Read and accept the license agreement, then click "Next". Rev.1.0...
- Page 63 User Manual SP310 6.Select "Features" and installation location, then click "Next". 7.Click "Install". Rev.1.0...
- Page 64 User Manual SP310 8.Click "Finish". Rev.1.0...
-
Page 65: Usage
User Manual SP310 9.Back to desktop, and you will see the icon of BarTender Ultralite. Double-click it and get down to use. 10.4 Usage 10.4.1 Page Settings 1.Double-click the icon, then select the edition. Click “OK”. (The edition may be changed according to different needs.) - Page 66 User Manual SP310 3.Select “Blank Template”, then click “Next”. 4.If the predefined stocks don’t meet your need, tick “Specify Custom Settings”. Then click “Next”. Rev.1.0...
- Page 67 User Manual SP310 5.Tick “Single item per page”, then click “Next”. (If you print multiple labels, tick “Multiple columns and/or rows of items per page”.) 6.Edit the side edges, then click “Next”. Rev.1.0...
- Page 68 User Manual SP310 7.Select the item shape, then click “Next”. 8.Edit the template size, then click “Next”. Rev.1.0...
- Page 69 User Manual SP310 9.Based on your need, edit the template background. Then click “Next”. 10.Finish the settings, showed in the “Review” and “Preview”. Then click “Finish”. Rev.1.0...
- Page 70 User Manual SP310 10.4.2 label Edit 1.Click the icon of code 2.Select the code, then click “Select”. 3.Click the blank, showing the code. Rev.1.0...
- Page 71 User Manual SP310 4.Double-click the code and edit it. User can set up the size, font, border and so on. Finishing the change, click “Close”. Rev.1.0...
- Page 72 User Manual SP310 5.Click the icon of character , then enter the text. 6.Click the icon of picture , then edit the pictures. Finish all the settings. Click “Print” and a new label will be printed. Rev.1.0...
-
Page 73: Chapter 11 Idprt Label Designer Installation
User Manual SP310 Chapter 11 iDPRT Label Designer Installation 11.1 Installation Preparation Download iDPRT Label Designer application program in CD. 11.2 Installation : Note Under different operating systems, the screen has a slightly different. Take Windows 7 as an example. To avoid the prevention, recommend to close the security software before installation. - Page 74 User Manual SP310 4.Click "Next". 5.Click “Install”. Rev.1.0...
- Page 75 User Manual SP310 6.Click "Finish". 7. Back to desktop, and you will see the icon of Label Designer. Double-click it and get down to use. Rev.1.0...
-
Page 76: Label Edit
User Manual SP310 11.3 Label Edit 1. Double-click the icon. 2.Click “New” to create a new template. Rev.1.0... - Page 77 User Manual SP310 3.Set up the page according to your needs, then click “Next”. Rev.1.0...
- Page 78 User Manual SP310 4.Select “Barcode”, then click the blank space to place the Barcode. 5.Double-click the code and edit it. User can set up the size, font, border and so on. Rev.1.0...
- Page 79 User Manual SP310 6.Click the icon of “Text”, then enter the text. 7.Click the icon of “Image”, then edit the pictures. Finish all the settings. Click “Print” and a new label will be printed. Rev.1.0...
Need help?
Do you have a question about the SP310 and is the answer not in the manual?
Questions and answers