Table of Contents
Advertisement
Advertisement
Table of Contents

Related Manuals for AEG BPK55632PM


Summary of Contents for AEG BPK55632PM
- Page 1 BPK55632PM User Manual Oven BPS356020M USER MANUAL...
-
Page 2: Table Of Contents
14. ENVIRONMENTAL CONCERNS..............43 FOR PERFECT RESULTS Thank you for choosing this AEG product. We have created it to give you impeccable performance for many years, with innovative technologies that help make life simpler – features you might not find on ordinary appliances. Please spend a few minutes reading to get the very best from it. - Page 3 ENGLISH responsible for any injuries or damage that are the result of incorrect installation or usage. Always keep the instructions in a safe and accessible location for future reference. 1.1 Children and vulnerable people safety This appliance can be used by children aged from 8 •...
-
Page 4: Safety Instructions
Service Centre or similarly qualified persons to avoid an electrical hazard. The means for disconnection must be incorporated in • the fixed wiring in accordance with the wiring rules. WARNING: Ensure that the appliance is switched off • before replacing the lamp to avoid the possibility of electric shock. - Page 5 ENGLISH be replaced, this must be carried out by our Authorised Service Centre. Cabinet minimum 578 (600) mm • Do not let mains cables touch or height (Cabinet under come near the appliance door or the the worktop minimum niche below the appliance, especially height) when it operates or the door is hot.
- Page 6 • Do not operate the appliance with wet furniture panel until the appliance has hands or when it has contact with cooled down completely after use. water. 2.4 Care and cleaning • Do not apply pressure on the open door.
- Page 7 ENGLISH 2.6 Internal lighting • Keep children away from the appliance while the Pyrolytic cleaning operates. WARNING! The appliance becomes very hot and Risk of electric shock. hot air is released from the front • Concerning the lamp(s) inside this cooling vents.
-
Page 8: Product Description
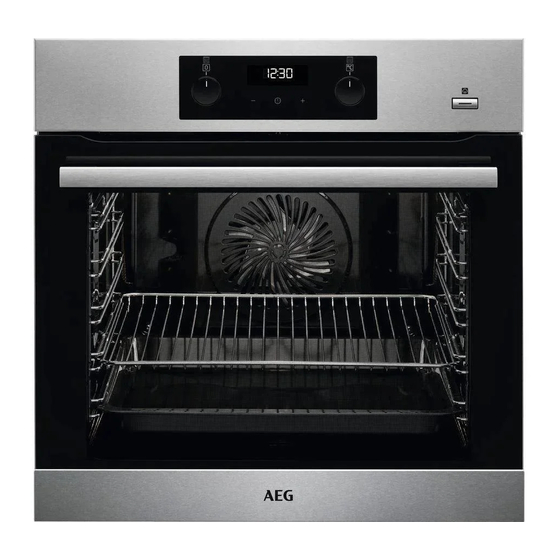
3. PRODUCT DESCRIPTION 3.1 General overview Control panel Knob for the heating functions Power lamp / symbol Display Control knob (for the temperature) Temperature indicator / symbol Plus Steam Socket for the food sensor Heating element Lamp Shelf support, removable... -
Page 9: Control Panel
ENGLISH 4. CONTROL PANEL 4.1 Retractable knobs To use the appliance press the knob. The knob comes out. 4.2 Sensor fields / Buttons To set the MINUTE MINDER. Hold it for more than 3 sec‐ onds to turn on or turn off the oven lamp. To set a clock function. -
Page 10: Daily Use
5.2 Initial preheating Preheat the empty oven before the first use. Step 1 Remove all accessories and removable shelf supports from the oven. Step 2 Set the maximum temperature for the function: Let the oven operate for 1 h. - Page 11 ENGLISH Step 5 Preheat the empty oven for 10 min to create humidity. Step 6 Put food in the oven. Refer to "Hints and tips" chapter. Do not open the oven door during cooking. Step 7 Turn the knob for the heating functions to the off position to turn off the oven. - press to turn off the oven.
-
Page 12: Clock Functions
Heating func‐ Application Heating func‐ Application tion tion This function is designed To turn on the pyrolytic to save energy during cleaning of the oven. cooking. When you use Moist Fan Pyrolysis this function, the temper‐ Baking ature in the cavity may The lamp may turn off differ from the set tem‐... - Page 13 ENGLISH Clock function Application To set a countdown time. This function has no effect on the operation of the oven. Minute Minder Minute Minder - can be set at any time, also if the oven is off. 7.2 How to set: Time of day After the first connection to the mains, wait until the display shows: hr, 12:00.
- Page 14 Step 3 Turn the knob for the temperature to set the hour. - press to confirm. Step 4 Turn the knob for the temperature to set the minutes. - press to confirm. At the set end time the signal sounds for 2 min. The time setting flashes in the display.
-
Page 15: Using The Accessories
ENGLISH Step 1 - press repeatedly. , 00 - flash. Step 2 Turn the knob for the temperature to set the seconds and then the minutes. When the time you set is longer than 60 min, hr flashes. Step 3 Set the hours. - Page 16 The display shows the 5. Put the plug of the core temperature symbol of the core temperature sensor sensor into the socket located in the and the default core temperature. front frame of the appliance. 4. Press...
- Page 17 ENGLISH 8.2 Inserting accessories changes every 10 seconds to the set oven temperature. A small indentation at the top increases • three times - the display shows safety. The indentations are also anti-tip the set oven temperature. devices. The high rim around the shelf 2.
-
Page 18: Additional Functions
Make sure the supports of the wire shelf Make sure the supports of the wire shelf point up. point down. 9. ADDITIONAL FUNCTIONS 9.1 How to use: Child lock when the Function lock is on. When you turn the knob for the oven functions, the When the function is on the oven cannot oven stops. -
Page 19: Hints And Tips
ENGLISH The Automatic switch-off does not work surfaces of the oven cool. If you turn off with the functions: Light, Food Sensor, the oven, the cooling fan can continue to Duration, End Time. operate until the oven cools down. 9.5 Cooling fan When the oven operates, the cooling fan turns on automatically to keep the 10. - Page 20 CAKES / PASTRIES / BREADS (°C) (min) Plum cake / Apple pie / Cinna‐ 160 - 180 30 - 60 mon rolls, baked in a cake mould Use 200 ml of water. FROZEN READY MEALS (°C) (min) Pizza 200 - 210...
- Page 21 ENGLISH 10.4 Baking need to change the temperature setting if an unequal browning occurs. The For the first baking, use the lower differences equalize during baking. temperature. Trays in the oven can distort during You can extend the baking time by 10 – baking.
- Page 22 BAKING IN (°C) (min) TINS Flan base - True Fan Cooking 150 - 170 20 - 25 sponge cake mixture Ring cake / True Fan Cooking 150 - 160 50 - 70 Brioche Madeira cake / True Fan Cooking...
- Page 23 ENGLISH CAKES / PASTRIES / (°C) (min) BREADS Plaited bread / Bread 170 - 190 30 - 40 crown Fruit flans (made of 35 - 55 yeast dough / sponge cake mix‐ ture), use a deep Yeast cakes with del‐ 160 - 180 40 - 80 icate toppings (e.g.
- Page 24 (°C) (min) Baguettes topped with True Fan Cooking 160 - 170 15 - 30 melted cheese Vegetables au gratin, Turbo Grilling 160 - 170 15 - 30 preheat the empty oven Lasagne Conventional Cooking 180 - 200 25 - 40...
- Page 25 ENGLISH BIS‐ CUITS / SMALL (°C) (min) 2 positions 3 positions CAKES / PAS‐ TRIES / ROLLS Puff pastries, 170 - 180 30 - 50 1 / 4 preheat the empty oven Biscuits made of 160 - 170 30 - 60 1 / 4 yeast dough Macaroons...
- Page 26 PORK Use the function: Turbo Grilling. (kg) (°C) (min) Shoulder / Neck / Ham 1 - 1.5 160 - 180 90 - 120 joint Chops / Spare rib 1 - 1.5 170 - 180 60 - 90 Meatloaf 0.75 - 1...
- Page 27 ENGLISH GAME Use the function: Conventional Cooking. (kg) (°C) (min) Saddle / Hare leg, up to 1 30 - 40 preheat the empty oven Venison saddle 1.5 - 2 210 - 220 35 - 40 Haunch of venison 1.5 - 2 180 - 200 60 - 90 POULTRY...
- Page 28 10.11 Crispy baking with: Pizza Function PIZZA PIZZA Preheat the empty oven before cooking. Use the first shelf position. Use the second shelf position. (°C) (min) Tarts 180 - 200 40 - 55 (°C) (min) Spinach flan 160 - 180...
- Page 29 ENGLISH GRILL Use the function: Grill (°C) (min) (min) 1st side 2nd side Roast beef 210 - 230 30 - 40 30 - 40 Beef fillet 20 - 30 20 - 30 Pork loin 210 - 230 30 - 40 30 - 40 Veal loin 210 - 230...
- Page 30 DEFROSTING Use the function: True Fan Cooking. (°C) (min) Lasagne / Cannelloni, fro‐ 160 - 180 40 - 60 Baked cheese 170 - 190 20 - 30 Chicken wings 190 - 210 20 - 30 10.14 Defrost the oven cavity. Put the food in a deep...
- Page 31 ENGLISH Do not use jars with twist-off and bayonet type lids or metal tins. Use the first shelf position. VEGETA‐ (min) (min) Put no more than six one-litre preserve BLES Cooking Continue to jars on the baking tray. time until cook at Fill the jars equally and close with a simmering...
- Page 32 10.17 Food Sensor BEEF Food core temperature (°C) Rare Medium Well done Roast beef Sirloin BEEF Food core temperature (°C) Less Medium More Meatloaf PORK Food core temperature (°C) Less Medium More Ham / Roast Saddle chop / Pork loin, smoked /...
- Page 33 ENGLISH GAME Food core temperature (°C) Less Medium More Hare saddle / Venison saddle Hare leg / Hare, whole / Venison POULTRY Food core temperature (°C) Less Medium More Chicken Duck, whole / half / Turkey, whole / breast Duck, breast FISH (SALMON, TROUT, Food core temperature (°C) ZANDER)
- Page 34 CASSEROLES - SWEET Food core temperature (°C) Less Medium More White bread casserole with / with‐ out fruit / Rice porridge casserole with / without fruit / Sweet noodle casserole 10.18 Moist Fan Baking - recommended accessories Use the dark and non-reflective tins and containers. They have better heat absorption than the light colour and reflective dishes.
- Page 35 ENGLISH 10.20 Information for test institutes Tests according to: EN 60350, IEC 60350. BAKING ON ONE LEVEL. Baking in tins (°C) (min) Fatless sponge cake True Fan Cooking 140 - 150 35 - 50 Fatless sponge cake Conventional Cook‐ 35 - 50 Apple pie, 2 tins Ø20 True Fan Cooking 60 - 90...
-
Page 36: Care And Cleaning
MULTILEVEL BAKING. Biscuits (°C) (min) Short bread / Pastry True Fan Cooking 25 - 45 1 / 4 strips Small cakes, 20 per tray, True Fan Cooking 23 - 40 1 / 4 preheat the empty oven Fatless sponge cake... - Page 37 ENGLISH Clean the cavity after each use. Fat accumulation or other residue may cause fire. Do not store the food in the oven for longer than 20 minutes. Dry the cavi‐ ty with a soft cloth after each use. Everyday Use Clean all accessories after each use and let them dry.
- Page 38 Step 3 Pull the rear end of the shelf support away from the side wall and remove it. Step 4 Install the shelf supports in the opposite sequence. 11.4 How to use: Pyrolysis CAUTION! If there are other appliances Clean the oven with Pyrolysis.
- Page 39 ENGLISH 11.5 Cleaning reminder number of glass panels is different for different models. The oven reminds you when to clean the WARNING! oven with: pyrolytic cleaning. The door is heavy. PYR - flashes in the display for 10 sec after each activation and deactivation of CAUTION! the oven.
-
Page 40: Troubleshooting
Step 7 Clean the glass panel with water and soap. Dry the glass panel carefully. Do not clean the glass panels in the dishwasher. Step 8 After cleaning, do the above steps in the opposite se‐ quence. Step 9 Install the smaller panel first, then the larger and the door. - Page 41 ENGLISH The oven does not turn on or Error codes does not heat up F102 The oven door is Problem Check if... closed. You cannot activate The oven is correct‐ F102 The door lock is not or operate the oven. ly connected to an broken.
-
Page 42: Energy Efficiency
Model (MOD.) ......... Product number (PNC) ......... Serial number (S.N.) ......... 13. ENERGY EFFICIENCY 13.1 Product Information Sheet according to UK Ecodesign and Energy Labelling Regulations Supplier's name BPK55632PM 944188166 Model identification BPS356020M 944188250 Energy Efficiency Index 81.2 Energy efficiency class... -
Page 43: Environmental Concerns
Heat source Electricity Volume 71 l Type of oven Built-In Oven BPK55632PM 37.0 kg Mass BPS356020M 36.5 kg BS EN 60350-1 - Household electric cooking appliances - Part 1: Ranges, ovens, steam ovens and grills - Methods for measuring performance. - Page 44 Return the...
- Page 48 www.aeg.com/shop...
Need help?
Do you have a question about the BPK55632PM and is the answer not in the manual?
Questions and answers