Table of Contents
Advertisement
Quick Links
DOREL ASIA
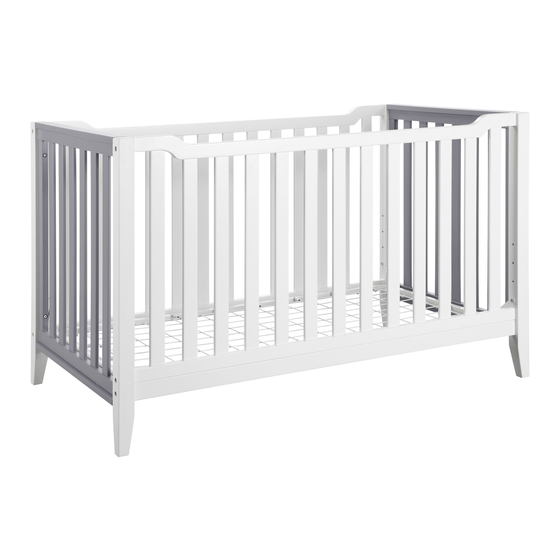
3 IN 1 CRIB
DO NOT RETURN PRODUCT TO THE STORE.
If a part is missing or damaged, contact our customer service
department. We will replace the part FREE of charge.
DA6564 (WHITE & GRAY)
THIS INSTRUCTION BOOKLET
CONTAINS IMPORTANT SAFETY
INFORMATION. PLEASE READ AND
KEEP FOR FUTURE REFERENCE.
(TAKEN FROM CARTON)
_____________________________________
Date of purchase:
_______ / _______ / _______
Tel #: 1-800-295-1980
NEED HELP!
E-Mail: das@dorel.com
CALL US FOR ASSISTAN
1-800-295-1980
DO NOT RETURN PRODU
E-MAIL:DAS@DOREL.CO
Model No:
UPC CODE:
0-65857-16619-4
NOTE:
Lot number:
Fax #: 514-353-7819
Advertisement
Table of Contents

Related Manuals for Dorel Baby Relax DA6564


Summary of Contents for Dorel Baby Relax DA6564
- Page 1 DOREL ASIA Model No: DA6564 (WHITE & GRAY) UPC CODE: 3 IN 1 CRIB 0-65857-16619-4 NOTE: THIS INSTRUCTION BOOKLET CONTAINS IMPORTANT SAFETY INFORMATION. PLEASE READ AND KEEP FOR FUTURE REFERENCE. Lot number: (TAKEN FROM CARTON) _____________________________________ Date of purchase: _______ / _______ / _______ DO NOT RETURN PRODUCT TO THE STORE.
- Page 2 12345 Albert-Hudon Boulevard, Suite 100 Montreal, Quebec Canada, H1G 3L1 E-MAIL: das@dorel.com WARNING * Failure to follow these warnings and assembly instructions could result in serious injury or death. * Read all instructions before assembling crib. KEEP INSTRUCTIONS FOR FUTURE USE.
-
Page 3: Care And Cleaning
Check bolts/screws periodically and tighten them if necessary. LIMITED WARRANTY Dorel Asia warrants its product to be free from defects in material and workmanship and agrees to remedy any such defect. This warranty covers 1 year from the date of original purchase. This warranty is valid only upon presentation of proof of purchase. -
Page 4: Hardware List
3 IN 1 CRIB DA6564 HARDWARE LIST Ø1/4" X 13mm X 44mm Ø1/4" X 13mm X 78mm BOLT BOLT 8 PCS 8 PCS Ø1/4" X 13mm X 18mm Ø1/4" X 13mm X 55mm MATTRESS SUPPORT BOLT BOLT 16 PCS 2 PCS Ø1/4"... -
Page 5: Parts List
3 IN 1 CRIB DA6564 PARTS LIST LEFT FRONT POST RIGHT FRONT POST LEFT BACK POST 1 PC 1 PC 1 PC RIGHT BACK POST BACK PANEL LEFT SIDE PANEL 1 PC 1 PC 1 PC RIGHT SIDE PANEL FRONT PANEL FRONT RAIL 1 PC 1 PC... - Page 6 3 IN 1 CRIB DA6564 CRIB ASSEMBLY INSTRUCTION NOTE: When inserting bolts, turn clockwise until tight. Then loosen 1/2 - 3/4 of a turn. After crib is completely assembled, return to each bolt and tighten. Use wax or soap on all bolts to facilitate assembly.
- Page 7 3 IN 1 CRIB DA6564 STEP 1 Attach left front post (A1) & left back post (B1) to left side panel (D) with bolts (1) as shown. Use Allen Key (5) to tighten all bolts (1). ①...
- Page 8 3 IN 1 CRIB DA6564 STEP 2 Attach right front post (A2) & right back post (B2) to right side panel (E) with bolts (1) as shown. Use Allen Key (5) to tighten all bolts (1). ①...
- Page 9 3 IN 1 CRIB DA6564 STEP 3 Attach the back panel (C) to left back post (B1) of left side panel (D) with bolts (2) and barrel nuts (6) as shown. Use Allen Key (5) to tighten all bolts (2). Repeat this step to attach back panel (C) to right back post (B2) of right side panel (E).
- Page 10 3 IN 1 CRIB DA6564 STEP 4 Attach mattress support (H) to the posts with mattress support bolts (3). Use Allen key (5) to tighten the bolts (3). ③ INCORRECT- Raised edge should face down -this photo shows mattress support is upside down.
- Page 11 3 IN 1 CRIB DA6564 STEP 5 Attach front rail (G) to left front post (A1) of left side panel (D) with bolt (2) and barrel nut (6). Use Allen key (5) to tighten the bolt (2). Repeat this step to attach front rail (G) to right front post (A2) of right side panel (E). ②...
- Page 12 3 IN 1 CRIB DA6564 STEP 6 Attach front panel (F) to left front post (A1) of left side panel (D) with bolts (2)(4) and barrel nut (6). Use Allen key (5) to tighten the bolts (2)(4). Repeat this step to attach front panel (F) to right front post (A2) of right side panel (E). ⑥...
- Page 13 3 IN 1 CRIB DA6564 STEP 7 Fasten the front panel (F) and front rail (G) with bolts (7). NOTE: Use Allen key (5) to tighten the bolts (7). DO NOT throw away this instruction manual. Use the crib pouch attached to the mattress support to store this manual for future use.
- Page 14 3 IN 1 CRIB DA6564 WARNINGS: * ANY MATTRESS USED IN THIS CRIB MUST BE AT LEAST 27-1/4 INCHES BY 51-5/8 INCHES (69CM BY 131CM) WITH A MINIMUM THICKNESS OF 4 INCHES (10CM) BUT NOT EXCEEDING 6 INCHES (15CM). * The day bed is not intended for children under 15 months of age or over 50 lbs (22.7 kgs). DAY BED ASSEMBLY: STARTING FROM CRIB STEP 1: Unscrew the bolts (7) underneath the front rail (G) with Allen Key (5).
- Page 15 3 IN 1 CRIB DA6564 FULL SIZE BED ASSEMBLY INSTRUCTION (HEADBOARD ONLY) NOTE: FULL SIZE CONVERSION RAILS ARE NOT INCLUDED. DIAGRAMS ARE FOR REFERENCE ONLY. BED RAILS MAY DIFFER FROM ILLUSTRATION. STEP 1 Attach the full size conversion rails (not included) to the assembled headboard (B1,B2 & C). DIAGRAM 1 DIAGRAM 2 IMPORTANT: STORE ALL EXTRA PARTS THAT YOU ARE NOT USING FOR POSSIBLE...
- Page 16 DO NOT RETURN PRODUCT TO THE STORE. If a part is missing or damaged, contact our customer service department. We will replace the part FREE of charge. Tel #: 1-800-295-1980 NEED HELP! E-Mail: das@dorel.com CALL US FOR ASSISTAN Fax #: 514-353-7819 1-800-295-1980 DO NOT RETURN PRODU...
-
Page 17: Customer Service
PLEASE DO NOT RETURN THIS PRODUCT TO THE STORE PLEASE CONTACT CUSTOMER SERVICE REPRESENTATIVES AT THE FOLLOWING NUMBERS SHOULD THERE BE ANY MISSING OR DEFECTIVE PART(S). Customer Service Phone Number 1-800-295-1980 Email: das@dorel.com Customer Service Fax Number 514-353-7819 Request Date: Name: Shipping Address: Street &...
Need help?
Do you have a question about the Baby Relax DA6564 and is the answer not in the manual?
Questions and answers