Advertisement
Table of Contents
OPERATOR MANUAL
IMPORTANT INFORMATION, KEEP FOR OPERATOR
This manual provides information for:
MODELS BPM-15/30/40G(C,A)
& BPP-30/40G(C,A)
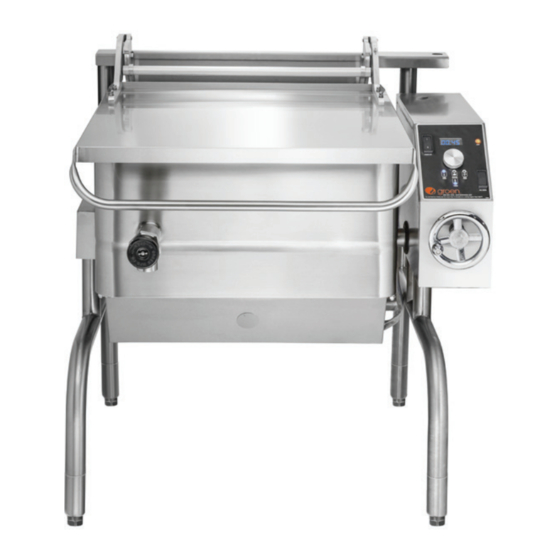
ERGONOMIC TILTING
BRAISING PAN
· Stainless Steel
· Manual or Power Tilt
· Gas Heated
THIS MANUAL MUST BE RETAINED FOR FUTURE REFERENCE.
READ, UNDERSTAND AND FOLLOW THE INSTRUCTIONS AND
WARNINGS CONTAINED IN THIS MANUAL.
FOR YOUR SAFETY
Do not store or use gasoline or other flammable vapors
and liquids in the vicinity of this or any other appliance.
POST IN A PROMINENT LOCATION
Instructions to be followed in the event user smells
gas. This information shall be obtained by consulting
your local gas supplier. As a minimum, turn off the gas
and call your gas company and your authorized service
agent. Evacuate all personnel from the area.
WARNING
Improper installation, adjustment, alteration, service
or maintenance can cause property damage, injury or
death. Read the installation, operating and maintenance
instructions thoroughly before installing or servicing this
equipment.
NOTIFY CARRIER OF DAMAGE AT ONCE
It is the responsibility of the consignee to inspect the container upon receipt of
same and to determine the possibility of any damage, including concealed dam-
age. Unified Brands suggests that if you are suspicious of damage to make a
notation on the delivery receipt. It will be the responsibility of the consignee to file
a claim with the carrier. We recommend that you do so at once.
Manufacture Service/Questions 888-994-7636.
Information contained in this document is known to be current and accurate at the time
of printing/creation. Unified Brands recommends referencing our product line websites,
unifiedbrands.net, for the most updated product information and specifications.
PART NUMBER 174839, REV. D (12/17)
Domestic
1055 Mendell Davis Drive
Jackson, MS 39272
888-994-7636, fax 888-864-7636
unifiedbrands.net
Advertisement
Table of Contents

Related Manuals for Groen BPM-15G


Summary of Contents for Groen BPM-15G
- Page 1 OPERATOR MANUAL IMPORTANT INFORMATION, KEEP FOR OPERATOR This manual provides information for: MODELS BPM-15/30/40G(C,A) & BPP-30/40G(C,A) Domestic ERGONOMIC TILTING BRAISING PAN · Stainless Steel · Manual or Power Tilt · Gas Heated THIS MANUAL MUST BE RETAINED FOR FUTURE REFERENCE. READ, UNDERSTAND AND FOLLOW THE INSTRUCTIONS AND WARNINGS CONTAINED IN THIS MANUAL.
-
Page 2: Important Operator Warnings
USE OF ANY REPLACEMENT PARTS OTHER THAN THOSE SUPPLIED BY AUTHORIZED DISTRIBUTORS CAN CAUSE INJURY TO THE OPERATOR AND DAMAGE TO THE EQUIPMENT AND WILL VOID ALL WARRANTIES. IMPORTANT: SERVICE PERFORMED BY OTHER THAN GROEN AUTHORIZED SERVICE AGENT WILL VOID ALL WARRANTIES. OM-BPM/BPP-G... -
Page 3: Table Of Contents
Table of Contents Important Operator Warnings ............page 2 References..................page 3 Equipment Description............... page 4-5 Inspection and Unpacking ............page 6 Installation .................. page 7-8 Initial Start-Up................page 8 Operation ................page 9-12 Sequence of Operation ..............page 13 Cleaning..................page 14 Maintenance................. -
Page 4: Equipment Description
Equipment Description Groen gas-heated Tilting Braising Pans provide a stainless steel pan equipped with patented heat transfer fins, burner/combustion chamber, hand-operated or electric powered tilting mechanism, electronic ignition, electronic controls, and hinged cover. The appliance serves as braising pan, griddle, fry pan, oven, kettle, bainmarie and food warmer/server, can be adapted for use as a non-pressure steamer and can be used to stir-fry, reheat and saute foods. - Page 5 Quick gas disconnect with restraining cable Pouring Lip Strainer 10. Strainer for 2” TDO valve Optional Tangent Draw-off PERFORMANCE DATA Model Firing Rate BPM-15G, -15GC, -15GA 65,000 BTU/hr BPM-15GS BPM-30G, -30GC, -30GA BPM-30GS 104,000 BTU/hr BPP-30G, -30GC, -30GA BPM-40G, -40GC, -40GA...
-
Page 6: Inspection And Unpacking
Inspection & Unpacking CAUTION The unit will arrive completely assembled, wrapped in protective plastic on a heavy skid, SHIPPING STRAPS ARE UNDER TENSION in a heavy wooden crate. Immediately upon receipt, inspect the crate for damage. Report AND CAN SNAP BACK WHEN CUT. any apparent shipping damage or an incorrect shipment to the delivery agent. -
Page 7: Installation
Installation CAUTION Install the braising pan in a well ventilated room for efficient performance. Remove INSTALLER MUST VERIFY THAT THE any items which might obstruct or restrict the flow of air for combustion and INSTALLATION COMPLIES WITH THE ventilation. Clear all combustible material from the area directly around the unit. APPLICABLE LOCAL CODES AND REGULATIONS. -
Page 8: Initial Start-Up
Installation Adequate space for proper service and operation is required. DO NOT block any air intake spacings to the combustion chamber or obstruct air flow. 10. After the pan has been connected to the gas supply, check all gas joints for leaks. -
Page 9: Operation
Operation Operator Controls Classic Control (-GC) Models Lighted Power ON switch located on the control console. It controls main power to the unit. The temperature knob, located on the control console, is used to set the pan temperatures between 175 and 425F Heating indicator light is located on the control console, it illuminates when the controller calls for the main gas valve to open. - Page 10 Operation CAUTION The set temperature will automatically change to the LOW DO NOT HEAT AN EMPTY PAN FOR TEMP setting and will continue at this setting until the MORE THAN FIVE MINUTES AT A user changes the temperature via MANUAL or HIGH TEMP SETTING HIGHER THAN 300°F.
- Page 11 Operation WARNING To Turn Off Pan - WHEN TILTING BRAISING PAN Set the temperature dial to “OFF”. FOR PRODUCT TRANSFER: Set Power Switch to “OFF.” iii. For a prolonged shut-off period: 1) USE CONTAINERS DEEP ENOUGH Turn the main gas valve OFF (handle at right angles to the TO CONTAIN AND MINIMIZE gas pipe).
- Page 12 Operation Cooking To simmer or slowly heat an item, set the dial at 210°F (99°C) or lower. Put the cover down to minimize moisture loss, or leave it up to help dry or reduce the product. Set the thermostat higher to cook or drive off moisture faster. You may adjust the thermostat to any setting to cook the item exactly as required.
-
Page 13: Sequence Of Operation
Sequence of Operation The following “action-reaction” outline is provided to help understand how the braising pan works. When the power switch is turned on, it starts the spark igniter and opens the automatic valve for the pilot burner. The spark ignites a pilot flame, which heats the sensor. -
Page 14: Cleaning
Rinse off the sanitizer thoroughly. If there is difficulty removing mineral deposits or a film left by hard water or food residues, clean the pan thoroughly and then use a deliming agent, such as Groen De-limer/De-scaler (PN 140513), in accordance with the manufacturer’s direc- tions. -
Page 15: Maintenance
Maintenance WARNING Your braising pan is designed to require minimum maintenance, but certain parts ELECTRIC POWER ALWAYS SHOULD BE may need replacement after prolonged use. After installation, no user adjustment SHUT OFF BEFORE WORK IS DONE ON should be necessary. If a service need arises, only authorized personnel should INTERNAL COMPONENTS. -
Page 16: Troubleshooting
Troubleshooting Your braising pan will operate smoothly and efficiently if properly maintained. However, the following is a list of checks to make in the event of a problem. If the actions suggested do not solve the problem, call your qualified Service Representative. If an item on the list is followed by X, the work should only be performed by a qualified service representative. - Page 17 Troubleshooting SYMPTOM WHAT TO CHECK (X indicates work that should only be performed by a qualified service representative) Pilot lights, but main burner Authorized a. Check controller to see that it is closed at temperature setting higher than that of will not come on and spark Service Rep Only the current pan temperature.
- Page 18 Parts List Stand & Foot Assembly Description Part # CASTER KIT (SET OF 2 WITH 146354 BRAKE AND 2 W/O BRAKE) CASTER WITH BRAKE (W/O 146513 FOOT ADAPTER) CASTER WITHOUT BRAKE 146515 (W/O FOOT ADAPTER) NOT SHOWN FOOT ADAPTER 146516 FLANGED FOOT 146521 (W/O FOOT ADAPTER)
- Page 19 Parts List Cover & Counterbalance Assemblies Key Qty Description Part # COVER ASSEMBLY, 162232 15 GALLON COVER ASSEMBLY, 144812 30 GALLON COVER ASSEMBLY, 144453 40 GALLON COUNTERBALANCE 162235 ASSEMBLY, 15 GALLON COUNTERBALANCE 145480 ASSEMBLY, 30 GALLON COUNTERBALANCE 144790 ASSEMBLY, 40 GALLON STUD WELD, 012589 1/4”-20 X 1-1/4”...
- Page 20 Parts List Gas Piping Assemblies Key Qty Description Part # Key Qty Description Part # U BOLT 1/2” PIPE N70636 HIGH LIMIT 013481 THERMOSTAT (GAS) WASHER PLAIN 1/4 005472 ELBOW FEMALE 90 NUT HEXAGON KEPS NT1101 DEG , 1/8 NPT TO 1/4 050500 1/4-20 WITH TUBE (NOT SHOWN)
- Page 21 Parts List Combustion Chamber & Gas Manifold Assemblies Key Qty Description Part # Key Qty Description Part # COMBUSTION CHAMBER BURNER ORIFICE, 15 155707 146148 ASSY, 15 GAL. GAL.-PROPANE COMBUSTION CHAMBER BURNER ORIFICE, 30 145941 128158 ASSY, 30 GAL. GAL.-NATURAL GAS COMBUSTION CHAMBER BURNER ORIFICE, 30 144843...
- Page 22 Parts List For Classic Control (-GC) Models Electrical Components & Advanced Control (-GA) Models Trunnion Cover Key Qty Description Part # Key Qty Description Part # COVER, TERMINAL FUSE HOLDER TYPE 3 AG 077854 175043 BLOCK BOX FUSE -24VAC CONTROL, 077853 3A, TYPE AG TERMINAL BLOCK BOX...
- Page 23 Parts List For Classic Control (-GC) Models Electrical Components & Advanced Control (-GA) Models Trunnion Cover OM-BPM/BPP-G...
- Page 24 Parts List Manual Tilt Assembly Key Qty Description Part # GEAR CARRIER 002624 SHAFT, HANDWHEEL 144834 GEAR, WORM 128001 GEAR SECTOR 009829 KEY GIB 012031 HANDWHEEL 012061 PIN ROLL 012614 SCREW SET SOCKET 012060 BEARING ROLLER 002790 BEARING SLEEVE 137239 PLUG PIPE 010286 FITTING GREASE 90...
- Page 25 Parts List Power Tilt Components Gas-Electronic Ignition Key Qty Description Part # ELECTRIC TILT SHAFT 144791 POWER LIFT MOTOR 144792 [120VDC] POWER LIFT MOTOR 144794 [230VDC] SHAFT COUPLING 144615 GEAR CARRIER ASSY 137880 CARRIER GEAR 002624 BEARING ROLLER 002790 BEARING SLEEVE 137239 PLUG PIPE 010286...
- Page 26 Parts List Fuel Gas Conversion (For 0-2000 foot conversion of a natural gas unit to propane or a propane model to natural gas; for other elevations above 2000 feet, contact the factory.) BPM, BPP WITH ELECTRONIC IGNITION BURNER ORIFICE “QUANTITY” CHART Description Natural Gas LP Gas...
-
Page 27: Schematics/Wiring Diagram
Schematics Electronic Ignition System For Classic Control (-GC) Models Manual Tilt, 120/230VAC OM-BPM/BPP-G... - Page 28 Schematics Electronic Ignition System For Classic Control (-GC) Models Power Tilt, 120/230VAC OM-BPM/BPP-G...
- Page 29 Schematics Electronic Ignition System For Advanced Control (-GA) Models Manual Tilt, 120/230VAC OM-BPM/BPP-G...
- Page 30 Schematics Electronic Ignition System For Advanced Control (-GA) Models Power Tilt, 120/230VAC OM-BPM/BPP-G...
- Page 31 Diagrams & Schematics Standing Pilot Ignition System OM-BPM/BPP-G...
-
Page 32: Service Log
Service Log Model No: Purchased From: Serial No: Location: Date Purchased: Date Installed: Purchase Order No: For Service Call: Date Maintenance Performed Performed By OM-BPM/BPP-G... - Page 36 1055 Mendell Davis Drive • Jackson MS 39272 888-994-7636 • 601-372-3903 • Fax 888-864-7636 unifiedbrands.net © 2017 Unified Brands. All Rights Reserved. Unified Brands is a wholly-owned subsidiary of Dover Corporation. PART NUMBER 174839, REV. D (12/17)
Need help?
Do you have a question about the BPM-15G and is the answer not in the manual?
Questions and answers