
Subscribe to Our Youtube Channel
Related Manuals for Trox Technik X-CUBE X2


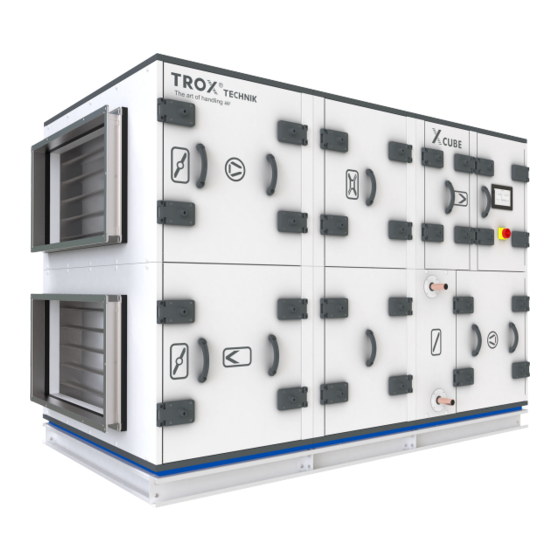
Summary of Contents for Trox Technik X-CUBE X2
- Page 1 Operating instructions GB/en Air handling unit X-CUBE X2 / X-CUBE X2 compact mit X-CUBE Control Read the instructions prior to performing any task!
- Page 2 TROX GmbH Heinrich-Trox-Platz 47504 Neukirchen-Vluyn, Germany Germany Phone: +49 (0) 2845 2020 Fax: +49 2845 202-265 E-mail: trox@trox.de Internet: http://www.troxtechnik.com A00000079640, 3, GB/en 10/2021 © TROX GmbH 2019 Air handling unit X-CUBE X2 / X-CUBE X2 compact...
- Page 3 This applies in particular to: Publishing content Copying content Translating content Microcopying content Saving content to electronic systems and editing it Air handling unit X-CUBE X2 / X-CUBE X2 compact...
- Page 4 Operating elements (e.g. push but- Tips and recommendations tons, switches), display elements (e.g. LEDs) ‘Display’ Screen elements (e.g. buttons or Useful tips and recommendations as well as informa- menus) tion for efficient and fault-free operation. Air handling unit X-CUBE X2 / X-CUBE X2 compact...
-
Page 5: Table Of Contents
3.7 Tips for operation ........26 3.8 Switching the AHU off ......26 3.9 After shutdown ........3.10 Using X-CUBE Control ......27 3.10.1 Login on the user interface ....27 3.10.2 System settings ........29 Air handling unit X-CUBE X2 / X-CUBE X2 compact... -
Page 6: Safety
The mains cable between the utility grid and the Earthing mains isolator carries a hazardous electrical voltage. Defective or disabled safeguards can cause serious or even fatal injuries. – Do not disable or bypass any safeguards. Air handling unit X-CUBE X2 / X-CUBE X2 compact... - Page 7 A skilled qualified electrician has to connect the AHU to the local earth bar; this is done as part of installation. Equipotential bonding prevents electrostatic ignition hazards. Fig. 5: Safety catch Air handling unit X-CUBE X2 / X-CUBE X2 compact...
- Page 8 Do not reach between the door and door frame. – Wear protective gloves and a hard hat when you open an inspection access door. Fig. 7: Inside door handle with safety catch Air handling unit X-CUBE X2 / X-CUBE X2 compact...
-
Page 9: Securing The Unit Against Being Switched On Accidentally
Secure the mains isolator with a padlock ( Fig. 9 ). Keep the key in a safe place. Cover the mains isolator with a notice informing people that work is in progress. Air handling unit X-CUBE X2 / X-CUBE X2 compact... -
Page 10: Work Areas And Hazardous Areas
Start working only if the components you have to work on are easily accessible. – Stop materials or objects from falling. – Wear safety shoes, protective clothing and a hard hat. Air handling unit X-CUBE X2 / X-CUBE X2 compact... -
Page 11: Electric Shock Hazards
Prevent access to crush points: Either install dampers on ducts or use fixed guards. – Before you open an inspection access door, switch off the air handling unit and secure it against being switched on accidentally. Air handling unit X-CUBE X2 / X-CUBE X2 compact... -
Page 12: Hazards From The Hydraulic System
Be careful when carrying out any work. surface. – Wear protective gloves, safety shoes and a hard – Before you start working, make sure that all sur- hat. faces have cooled down to ambient temperature. Air handling unit X-CUBE X2 / X-CUBE X2 compact... -
Page 13: Hazardous Substances And Operating Fluids
Wear protective clothing and gloves that protect you from the cold when you work near a poten- tially cold surface. – Before you start working, make sure that all sur- faces have warmed up to ambient temperature. Air handling unit X-CUBE X2 / X-CUBE X2 compact... -
Page 14: Fire Hazards
If you have come into contact with compressor oil, follow the first aid instructions given on the manufacturer's safety data sheet for the oil. Ä Appendix B.1 ‘Compressor oil’ on page 106 Air handling unit X-CUBE X2 / X-CUBE X2 compact... -
Page 15: Risk Of Entrapment In Units With Whole Body Access
This includes compliance with environmental protection must also be complied with. specific maintenance and inspection intervals for AHUs specifications for connected ducts and air terminal devices Air handling unit X-CUBE X2 / X-CUBE X2 compact... -
Page 16: Personnel Requirements
– Instruct these persons to leave the hazardous area or work area. – Stop work while unauthorised persons are present in the hazardous area or work area. Air handling unit X-CUBE X2 / X-CUBE X2 compact... -
Page 17: Personal Protective Equipment
A safety harness protects people from a fall when they are working at height. You are at risk from a fall if the task is at height and if there is no railing in place. Air handling unit X-CUBE X2 / X-CUBE X2 compact... -
Page 18: Measures To Take If A Harmful Substance Has Been Released
Comply with the safety data sheet provided by the man- ardous waste and must be taken to a hazardous waste Ä Appendix B.2 ‘Freezing agent’ ufacturer, collection point or disposed of by a specialist company. on page 116 . Air handling unit X-CUBE X2 / X-CUBE X2 compact... -
Page 19: Functional Description
Condenser, Outdoor air (ODA) extract air Electric duct air heater, Ä ‘ Electric air heater’ (ETA) on page 21 Ä ‘ High- High-pressure spray humidifier, pressure spray humidifier’ on page 21 Air handling unit X-CUBE X2 / X-CUBE X2 compact... -
Page 20: Function Of The Air Handling Unit
Filter chamber the fluid to be heated and the fluid to be cooled flow through alternating spaces between each two plates. Filter frame Filter element Air handling unit X-CUBE X2 / X-CUBE X2 compact... - Page 21 The high-pressure spray humidifier is used to humidify the supply air without heat exchange. A grid of spray nozzles atomise fresh water, thereby creating a fine mist in the humidification chamber. Air handling unit X-CUBE X2 / X-CUBE X2 compact...
-
Page 22: Operating And Display Elements
PC (by others). To do so, first con- nect the AHU controller to the PC or network (Ethernet interface in the switch cabinet). Fig. 11: Inspection access door Lock with operating lever Inspection access door Air handling unit X-CUBE X2 / X-CUBE X2 compact... -
Page 23: Filter Monitoring
DPC-24 digital pressure monitor’ on page 83 . Condensate drains Used to discharge condensate. Humidifier connections Used to transport the humidifying fluid to the distribution system. Air handling unit X-CUBE X2 / X-CUBE X2 compact... - Page 24 Cable glands The casing panels of components that need supply voltage or a control cable (such as fans, actuators, anti- frost thermostats) are fitted with cable glands. Air handling unit X-CUBE X2 / X-CUBE X2 compact...
-
Page 25: Software Use
ð The AHU starts up and is then ready for oper- Notify the emergency services. ation. The touch panel is switched on and dis- plays the user interface. Air handling unit X-CUBE X2 / X-CUBE X2 compact... -
Page 26: Checks During Operation
Cooling coil mode. Humidifier Condensate drip trays Drain traps Demand-based control Run around coil system Demand-based control ensures optimum operation and prevents excessive energy consumption. Air handling unit X-CUBE X2 / X-CUBE X2 compact... -
Page 27: Using X-Cube Control
Alternatively, you can use a PC with keyboard and mouse to navigate X-CUBE Control. In this case you have to establish a connection between the unit and a PC (by others) or a network (by others). Air handling unit X-CUBE X2 / X-CUBE X2 compact... - Page 28 Fig. 19: Opening the system overview (variant 2) Press ( Fig. 19 ) on the starting screen or press the button in the navigation area ( Fig. 19 ). ð This displays the system overview. Air handling unit X-CUBE X2 / X-CUBE X2 compact...
-
Page 29: System Settings
The unit is running. The control functions are active. Manual The unit is in manual mode. All control elements can be con- trolled manually. Press ‘apply’ . ð The system mode has been selected. Air handling unit X-CUBE X2 / X-CUBE X2 compact... - Page 30 Changes must only be made by experienced users and after consultation with the owner of the ventilation and air conditioning system. Alternatively, you can have the Ä TROX Technical Service change settings if neces- sary. Air handling unit X-CUBE X2 / X-CUBE X2 compact...
-
Page 31: Setting A Setpoint Schedule
You have been logged in. Fig. 28: Editing a profile Press ‘edit profile’ . ð This displays the ‘Profile’ screen. Fig. 26: 'System overview' screen (example) Press ð This displays the ‘setpoint schedule’ screen. Air handling unit X-CUBE X2 / X-CUBE X2 compact... - Page 32 Repeat steps 4 to 6 to set additional periods. Press ‘apply’ and ‘close’ ( Fig. 29 ). ð This saves the profile and exits the screen. Repeat steps 1 to 8 to set additional profiles. Air handling unit X-CUBE X2 / X-CUBE X2 compact...
- Page 33 Date Month Year Profile Press ‘active’ to activate the 'official day off' (public holiday). Press ‘apply’ . ð The 'official days off' (public holidays) have been set. Air handling unit X-CUBE X2 / X-CUBE X2 compact...
- Page 34 (additional holiday). Press ‘active’ to activate the 'holiday' (annual Setting 'holidays' (annual leave) leave) period. Personnel: Press ‘apply’ . Instructed person ð The 'holiday' (annual leave) period has been set. Air handling unit X-CUBE X2 / X-CUBE X2 compact...
- Page 35 Select the ‘duration’ ( Fig. 40 ) field, then enter the number of minutes by which you want to extend the operating time. Press ‘apply’ ( Fig. 40 ). ð The operating time has been extended. Air handling unit X-CUBE X2 / X-CUBE X2 compact...
-
Page 36: Connecting The Ahu To A Pc Or Network (By Others)
Select ‘Set up a new connection or network’ Select ‘Properties’ ( Fig. 44 ). ( Fig. 42 ). ð The ‘Local Area Connection Properties’ ð The ‘Set Up a Connection or Network’ window window opens. opens. Air handling unit X-CUBE X2 / X-CUBE X2 compact... - Page 37 Select ‘Internet Protocol Version 4 (TCP/IPv4)’ , then select ‘Properties’ ( Fig. 45 ). ð The ‘Internet Protocol Version 4 (TCP/IPv4) Properties’ window opens. Fig. 46: Internet protocol version 4 (TCP/IPv4) proper- ties Air handling unit X-CUBE X2 / X-CUBE X2 compact...
-
Page 38: Reading The Differential Pressure On The Filter
Replacing a filter element’ on page 54 . The maximum final differential pressure (∆P ) for a filter is given on a sticker on the inspection access door to the filter chamber. Air handling unit X-CUBE X2 / X-CUBE X2 compact... -
Page 39: Maintenance
‘Securing the unit against being switched on – All safeguards have been installed and func- accidentally’ on page 9 . Wait until all parts have tion correctly. come to a standstill. Air handling unit X-CUBE X2 / X-CUBE X2 compact... -
Page 40: Securing The Unit Against Restart
Be careful when carrying out any work. – Wear protective gloves, safety shoes and a hard hat. 4.2 Securing the unit against restart Ä Securing the unit against being switched on See: accidentally. Air handling unit X-CUBE X2 / X-CUBE X2 compact... - Page 41 Instructed person Check casing for condensation build-up. Instructed person Check panel seals. Instructed person Check panel seals and fasteners for firm fit and function. Instructed person Check the equipotential bonding. Instructed person Air handling unit X-CUBE X2 / X-CUBE X2 compact...
- Page 42 Check steam installation for leakages and damage. Instructed person Every 6 months Check heat exchanger for contamination, damage, corrosion and HVAC technician leakage. Every 12 months Check function of feed and return pipes. HVAC technician Air handling unit X-CUBE X2 / X-CUBE X2 compact...
- Page 43 Visually check high-pressure spray humidifier for contamination, damage Instructed person and corrosion. Electric motors Interval Maintenance work Personnel Every 6 months Visually check for contamination, damage and corrosion. Instructed person Check motors for bearing noise. Instructed person Air handling unit X-CUBE X2 / X-CUBE X2 compact...
- Page 44 Every 6 months Visually check for contamination, damage and corrosion. Clean if neces- Instructed person sary. Check connections and free movement. Instructed person Every 12 months Check function of control valves. HVAC technician Air handling unit X-CUBE X2 / X-CUBE X2 compact...
- Page 45 Clean if necessary. Every 6 months Visually check plate heat exchanger for contamination, damage and corro- Instructed person sion. Clean if necessary. Check heat exchanger for leakages. Instructed person Air handling unit X-CUBE X2 / X-CUBE X2 compact...
- Page 46 Skilled qualified refrigeration technician Refrigeration system – condenser Interval Maintenance work Personnel Every 6 months Visually check for contamination, damage, corrosion and leakage. Clean if Instructed person necessary. Check condenser function. Instructed person Air handling unit X-CUBE X2 / X-CUBE X2 compact...
- Page 47 Check circuits and control signals. Skilled qualified electrician Check parameters. Instructed person Evaporative humidifier Interval Maintenance work Personnel Every 6 months Check for contamination, damage and corrosion. Clean and repair if nec- Instructed person essary. Air handling unit X-CUBE X2 / X-CUBE X2 compact...
- Page 48 Remove and clean steam cylinder. HVAC technician Clean unit interior. HVAC technician Visually check components (heating cable connector on steam cylinder, HVAC technician level unit, etc.) inside the unit for damage. Air handling unit X-CUBE X2 / X-CUBE X2 compact...
-
Page 49: Maintenance
( Fig. 49 ). ð This unlocks the door; it can now be opened. Fig. 48: Inspection access door with lock Turn the door handle anti-clockwise by 90° ( Fig. 48 ). Air handling unit X-CUBE X2 / X-CUBE X2 compact... - Page 50 Lock with operating lever (with/without lock) Lock for TROX special key Fig. 51: Safety catch Carefully open the inspection access door until it is caught by the safety catch ( Fig. 51 /1). Air handling unit X-CUBE X2 / X-CUBE X2 compact...
-
Page 51: Checking Filters For Contamination
Special regulations or guidelines may apply to the cleaning of AHUs in the pharmaceutical and food indus- tries and in hospitals; be sure to comply with them. Air handling unit X-CUBE X2 / X-CUBE X2 compact... - Page 52 and 9. Prevent dirt and dust from getting into adjacent parts of the system. Carefully remove dirt and dirty water. Dispose correctly of dirt and dirty water. Air handling unit X-CUBE X2 / X-CUBE X2 compact...
- Page 53 and 9. Prevent dirt and dust from getting into adjacent parts of the system. Carefully remove dirt and dirty water. Dispose correctly of dirt and dirty water. Air handling unit X-CUBE X2 / X-CUBE X2 compact...
-
Page 54: Replacing A Filter Element
Push the new filter element ( Fig. 56 /1) in and ( Fig. 53 /1 to 4). over the quick release fasteners ( Fig. 56 /2) until ð The filter element can now be removed. it locks into place. Air handling unit X-CUBE X2 / X-CUBE X2 compact... - Page 55 ð The filter element has been released. Open the filter inspection access doors, . Fig. 59: Removing the filter element Pull out the filter element ( Fig. 59 /1) sideways. Fig. 57: Inserting the special key Air handling unit X-CUBE X2 / X-CUBE X2 compact...
-
Page 56: After Maintenance
Ä ‘Switching the Restart the air handling unit, mains isolator on’ on page 25 . Go to the X-CUBE control user interface and enter the new filter element (see software documenta- tion). Air handling unit X-CUBE X2 / X-CUBE X2 compact... -
Page 57: Faults
– Do not reach between the door and door frame. – Wear protective gloves and a hard hat when you open an inspection access door. Air handling unit X-CUBE X2 / X-CUBE X2 compact... -
Page 58: Faults Displayed With X-Cube Control
The maximum final differential pressure (∆P ) for a filter is given on a sticker on the inspection access door to the filter chamber. Air handling unit X-CUBE X2 / X-CUBE X2 compact... -
Page 59: List Of Faults
Secure the AHU against being is active. coils. switched on accidentally, Ä Chapter 1.4 ‘Securing the unit against being switched on accidentally’ on page 9 . Air handling unit X-CUBE X2 / X-CUBE X2 compact... - Page 60 1.4 ‘Securing the unit against being switched on accidentally’ on page 9 . Commission a skilled qualified electri- cian to rectify the fault. Air handling unit X-CUBE X2 / X-CUBE X2 compact...
- Page 61 Fault with The communication cable to the compo- In this order: Instructed pump. nent has become detached or cut. person Air handling unit X-CUBE X2 / X-CUBE X2 compact...
- Page 62 Switch off the air handling unit and secure it against being switched on accidentally, Ä Chapter 1.4 ‘Securing the unit against being switched on accidentally’ on page 9 . Air handling unit X-CUBE X2 / X-CUBE X2 compact...
- Page 63 9 . Commission a skilled qualified electri- cian to rectify the fault. No voltage is supplied to the component. In this order: Instructed person Air handling unit X-CUBE X2 / X-CUBE X2 compact...
- Page 64 Switch off the air handling unit and secure it against being switched on accidentally, Ä Chapter 1.4 ‘Securing the unit against being switched on accidentally’ on page 9 . Air handling unit X-CUBE X2 / X-CUBE X2 compact...
- Page 65 Ä Chapter 1.4 accidentally, ‘Securing the unit against being switched on accidentally’ on page 9 . Commission a skilled qualified electri- cian to rectify the fault. Air handling unit X-CUBE X2 / X-CUBE X2 compact...
- Page 66 Commission a skilled qualified electri- cian to rectify the fault. Fault with The communication cable to the compo- In this order: Instructed Modbus RAC nent has become detached or cut. person system pump. Air handling unit X-CUBE X2 / X-CUBE X2 compact...
- Page 67 Switch off the air handling unit and sensor. secure it against being switched on accidentally, Ä Chapter 1.4 ‘Securing the unit against being switched on accidentally’ on page 9 . Air handling unit X-CUBE X2 / X-CUBE X2 compact...
- Page 68 Switch off the air handling unit and electric heater secure it against being switched on has been trig- Ä Chapter 1.4 accidentally, gered. ‘Securing the unit against being switched on accidentally’ on page 9 . Air handling unit X-CUBE X2 / X-CUBE X2 compact...
- Page 69 Ä Chapter 1.4 accidentally, ‘Securing the unit against being switched on accidentally’ on page 9 . Commission a skilled qualified electri- cian to rectify the fault. Air handling unit X-CUBE X2 / X-CUBE X2 compact...
-
Page 70: Troubleshooting
Ä ‘Before you start the AHU’ Prepare restart, on page 25 . Remove the padlock from the mains isolator. Ä ‘Switching the Restart the air handling unit, mains isolator on’ on page 25 . Air handling unit X-CUBE X2 / X-CUBE X2 compact... -
Page 71: Replacement Parts
Replacement parts can be ordered from the TROX Technical Service, Ä ‘TROX Technical Service’ on page 3 . Air handling unit X-CUBE X2 / X-CUBE X2 compact... -
Page 72: Accessories
Accessories Accessories Accessories TROX special key Air handling unit X-CUBE X2 / X-CUBE X2 compact... -
Page 73: Removal And Disposal
– Lift any load carefully and keep an eye on it to see whether it will stay in place. If required, change the lashing point(s). Air handling unit X-CUBE X2 / X-CUBE X2 compact... -
Page 74: Disassembly
Incorrect disposal can harm the environment. – Have electronic waste, electronic components and operating fluids (refrigerant, compressor oil, lubricants etc.) disposed of by an approved spe- cialist disposal company. Air handling unit X-CUBE X2 / X-CUBE X2 compact... - Page 75 Compressor oil Compressor oil must not enter sewerage systems or bodies of water. Commission a specialist disposal com- pany to dispose of hazardous substances and mate- rials. Air handling unit X-CUBE X2 / X-CUBE X2 compact...
-
Page 76: Technical Data
9.1 Technical data sheet An illustration and the technical data should already have been provided to you for information and accept- ance. We recommend that you keep those documents with this manual. Air handling unit X-CUBE X2 / X-CUBE X2 compact... -
Page 77: Operating Conditions
The objectives of Directive 2014/35/EU have been met (see Appendix I, no. 1.5.1 of Directive 2006/42/EC). The declaration of conformity can be found in the appendix to this manual. Air handling unit X-CUBE X2 / X-CUBE X2 compact... -
Page 78: Glossary
Air handling unit X-CUBE X2 / X-CUBE X2 compact... -
Page 79: Index
Instruction..............16 Faults Jet of liquid..............12 After troubleshooting..........70 Faults displayed on the AHU........ 58 Limitation of liability............. 3 Faults displayed on the user interface....Local isolator............... 7 Troubleshooting........... Lubricants..............18 Air handling unit X-CUBE X2 / X-CUBE X2 compact... - Page 80 Opening inspection access doors Residual risks............10 Inspection access doors on the discharge side... Rotary heat exchanger, cleaning....... 52 Inspection access doors with safety locks... Standard inspection access doors....... 49 Operating conditions..........77 Air handling unit X-CUBE X2 / X-CUBE X2 compact...
- Page 81 Safety catch............Safety lock.............. 7 Warranty claims............3 Securing the unit against being switched on acci- Work areas..............10 dentally................ 9 Service................ 3 X-CUBE Control............27 Signs................6 Specific hazards............10 Air handling unit X-CUBE X2 / X-CUBE X2 compact...
-
Page 82: Appendix
Appendix Appendix Air handling unit X-CUBE X2 / X-CUBE X2 compact... -
Page 83: A Supplier Documents
Supplier documents Supplier documents TROX MD-DPC-24 digital pressure monitor Name Data Designation Pressure monitor Type MD-DPC-24 Number Type of manual Technical data sheet Manufacturer TROX GmbH Air handling unit X-CUBE X2 / X-CUBE X2 compact... - Page 84 I N S T R U C T I O N S MD-DPC-24 67677 10/16 - (KPA) flow setpoint. Cable connection The output from the MD is either voltage or cur- Relay - Invert relay rent controlled. The MD must be provided with Use Relay menu 3 to invert the default output a 24 VAC/DC power supply, see figure 4.
- Page 85 Environment data TROUBLESHOOTING Ambient temperature Symptom Cause Action Display * ........0ºC / +50°C Relay and front LED toggles Hysteresis set to low Raise the value at the hysteresis Constant operation ....-20ºC / +40ºC menu Transient <2 hours ....-30ºC / +50ºC Storage ........
- Page 86 Maximum 50 % des Luftdruck-/Luftstromsoll- auftrat. Siehe Fehlerbehebung für weitere MD enthält keine Komponenten, die Service werts festlegen. Informationen. oder Wartung erfordern. Bei Problemen bitte mit dem Zulieferer Kontakt aufnehmen. Relais – Relais umkehren Innen im Gerät Mit Relaismenü 3, den standardmäßigen Eine weitere LED befindet sich innen im Gerät.
- Page 87 d'activation du relais. Le délai minimum est que la plage de fonctionnement a été atteinte. Pour obtenir les meilleurs résultats possible, 0 seconde et le maximum est 3600 secondes. la pression doit être mesurée où il y a le moins DEL inversée : Une lumière verte signifie que la de risque de turbulence, c.-à-d.
- Page 88 * Note: Pour des températures inférieures à 0 °C, l'écran perdra graduellement de l'intensité. L'affichage peut également être plus lent pour les mises à jour. SERVICE ET ENTRETIEN Le MD ne comporte aucun composant qui requiert un entretien ou une maintenance. Veuillez communiquer avec votre fournisseur si un défaut apparaît.
- Page 89 Fig. 1 Menu scheme EXIT Leave the menu Return to parent menu [ Factory reset Confirm by selecting [ Select [ ] to go back to menu [ Zero pressure calibration Confirm by selecting [ Select [ ] to go back to menu [ Return to parent menu [ Invert LED ] Value <...
- Page 90 K-factor conversion table (Flow only) The k-factor given by the equipment (k₁) is entered into the equation and the result (k₂) is entered into the MD. Example of calculation: The k-factor data for the equipment is declared to be 5.6 based on liter per seconds [l/s]. You want the MD to handle flow in cubicmeters per hours [m³/h]. On the second row you will find the equations for k₁...
- Page 91 Fig. 3 Position of transmitter in relation to bends and branches Fig. 2 Dimensioned drawing BR1032A002a BR956B02b © 2015 OJ Electronics A/S Fig. 4 Wiring diagram Fig. 5 Relay operation diagram © 2016 OJ Electronics A/S MD-DPC-24 24 VAC/VDC +hysteresis setpoint -hysteresis 0-10 V...
- Page 92 Supplier documents Rotor controller OJ DRHX Name Data Designation Rotor controller Type DRHX Number Type of manual Technical data sheet Manufacturer OJ Electronics A/S Air handling unit X-CUBE X2 / X-CUBE X2 compact...
- Page 93 Q U I C K G U I D E DRHX 67747 12/17 - (PDJ) OJ-DRHX kan kun anvendes til styring af step- repareres af OJ Electronics A/S, inden produk- permotorer som leveres fra OJ Electronics A/S. tet installeres, tilsluttes forsyningsspænding og Forsøg aldrig at tilslutte eller styre andre typer idriftsættes.
- Page 94 PRODUKTLABEL Testkørsel MODBUS OJ-DRHX drevet er forsynet med et OJ-DRHX-serien er forsynet med en testfunk- Generelt mærkeskilt (sølvskilt). tion i form af en indbygget test-trykknap. • OJ-DRHX kan styres via Modbus RTU i h.t. Se eksempel fig. 1.1 samt tabel 1.2 Testknappen er placeret inde i drevet, øverst i Modbus protokol.
- Page 95 EMC - Electromagnetic Compatibility OJ-DRHX has built-in stepper motor protection. • In accordance with EN-61800-3 (C1 and OJ-DRHX can be used in residential and C2) Adjustable Speed Electrical Power Drive industrial environments and has built-in EMC Systems - Part 3: EMC requirements and filters.
- Page 96 OPENING OF THE DRIVE Displays • Check that the power supply has been Tabel 2 disconnected from OJ-DRHX before the cover is opened. Actual stepper motor speed is shown when the stepper motor is • Wait approx. 3 minutes after the mains power operating and there is no given rotor and pulley diameter via OJ- has been disconnected before the cover is DRHX PC Tool or the respective corresponding Modbus register...
- Page 97 keinen Fall versucht werden, einen anderen Wird OJ-DRHX in Maschinen mit Schrittmotortyp anzuschließen oder zu steuern. rotierenden Teilen eingebaut, z. B. in einer Je nach Anwendung eignet sich OJ-DRHX Luftaufbereitungsanlage, einer Förderanlage sowohl für Stand-alone-Anwendungen als auch oder dergleichen, muss die gesamte Anlage der als Teil von größeren Anlagen/Maschinen.
- Page 98 TYPENSCHILD EINSTELLUNGEN UND FUNKTIONEN Display Der OJ-DRHX-Antrieb verfügt über ein DIP-Schalter – Einstellungen und Funktionen Das Display ist mit geöffneten und metallenes Typenschild. Die OJ-DRHX-Baureihe ist mit einem DIP- geschlossenen Abdeckungen sichtbar. Siehe Beispiel in Abb. 1.1 und Tabelle 1.2. Schalter (4 Positionen) u. a.
- Page 99 Selon l’application, le OJ-DRHX peut être utilisé Si le OJ-DRHX est intégré au sein d’un système dans des applications individuelles ou faire de machines possédant des pièces rotatives, partie d’un système ou d’une machine plus comme un ventilateur, une unité de transport, grande.
- Page 100 ÉTIQUETTE DU PRODUIT PARAMÈTRES ET FONCTIONS Écran L’écran est visible avec les caches ouverts ou Le système d’entraînement du OJ-DRHX est Commutateur DIP - paramètres et fonctions livré avec une plaque en métal de marquage La série OJ-DRHX dispose de 4 commutateurs fermés.
- Page 101 Steppermotorprogram /GB /DE /FR Tabel 3 / Table 3 / Tabelle 3 / Tableau 3 OJ-MRHX-3P02N-03C5 OJ-MRHX-3P04N-03C5 OJ-MRHX-3P08N-03C5 Effekt (W) 55W @250rpm 110W @250rpm 220W @250rpm Power (W) 55W @250rpm 110W @250rpm 220W @250rpm Leistung (W) 55 W bei 250 U/min 110 W bei 250 U/min 220 W bei 250 U/min Puissance (W)
- Page 102 Tabel 4.1 DK Table 4.1 GB Tabelle 4.1 DE Tableau 4.1 FR Beskrivelse Description Beschreibung Description Testknap Test button Testtaste Bouton de test 4-pol DIP switch 4-pole DIP switch 4-poliger DIP-Schalter Commutateur DIP à 4 pôles 3 x 7-segment display– 3 x 7 segment display - 3x7-Segmentanzeige –...
- Page 103 Fig. 6 / Fig. 6 / Abb. 6 / Fig. 6 OJ-DRHX-1055-MAD5, OJ-DRHX-1220-MAD5 Tabel 6.1 / DK Tilstand Ingen spænding Grøn ON Spænding på Grøn blink Valid Modbus kommunikation Rød ON Rotor stoppet pga. en kritisk alarm Rød blink I drift med Reduceret ydelse Orange ON Test-funktion aktiveret Orange blink...
- Page 104 OJ ELECTRONICS A/S Stenager 13B • DK-6400 Sønderborg Tél. : +45 73 12 13 14 • Fax +45 73 12 13 13 oj@ojelectronics.com • www.ojelectronics.com © 2017 OJ Electronics A/S · ® The OJ trademark is a registered trademark belonging to OJ Electronics A/S...
- Page 105 Supplier documents Air handling unit X-CUBE X2 / X-CUBE X2 compact...
-
Page 106: B Safety Data Sheets
Safety data sheets Safety data sheets Compressor oil Air handling unit X-CUBE X2 / X-CUBE X2 compact... - Page 107 EMKARATE RL 32-3MAF Material Safety Data Sheet Date(s): : 2005-09-12 15:50:00 Version 3 MSDS#: 808802 1. CHEMICAL PRODUCT AND COMPANY IDENTIFICATION Product Name EMKARATE RL 32-3MAF Product Use Lubricant Uniqema Address/Telephone number Uniqema Corporate Center 1000 Uniqema Boulevard New Castle, DE 19720-2790 Uniqema Operator (Mon.-Fri., 8:15 AM - 4:30 PM Eastern): (302) 574-5000 Medical Emergency (24 hr.): (888) 456-6218...
- Page 108 EMKARATE RL 32-3MAF Material Safety Data Sheet Date(s): : 2005-09-12 15:50:00 Version 3 MSDS#: 808802 Emergency Overview Color clear yellow Form Liquid No data. Odor INHALATION OR INGESTION MAY CAUSE MUCOUS MEMBRANE IRRITATION. MAY CAUSE EYE IRRITATION REPEATED/PROLONGED CONTACT MAY CAUSE SKIN IRRITATION. Routes of Exposure Eye contact Skin contact Inhalation May cause eye irritation in man.
- Page 109 EMKARATE RL 32-3MAF Material Safety Data Sheet Date(s): : 2005-09-12 15:50:00 Version 3 MSDS#: 808802 Eye contact Immediately flush with plenty of water for at least 15 minutes. If redness, itching, or a burning sensation develops, have eyes examined and treated by medical personnel.
- Page 110 EMKARATE RL 32-3MAF Material Safety Data Sheet Date(s): : 2005-09-12 15:50:00 Version 3 MSDS#: 808802 Steps to be taken in case material is Contain spill. released or spilled Soak up material with absorbent and shovel into a chemical waste container. Wash residue from spill area with water containing detergent and flush to a sewer serviced by a permitted wastewater treatment...
- Page 111 EMKARATE RL 32-3MAF Material Safety Data Sheet Date(s): : 2005-09-12 15:50:00 Version 3 MSDS#: 808802 Respiratory protection Respiratory protection is not normally needed if controls are adequate. Other Eyewash and safety shower easily accessible to the work area. 9. PHYSICAL AND CHEMICAL PROPERTIES clear Color yellow...
- Page 112 EMKARATE RL 32-3MAF Material Safety Data Sheet Date(s): : 2005-09-12 15:50:00 Version 3 MSDS#: 808802 Toxicologically synergistic products None known. 12. ECOLOGICAL INFORMATION No data is available on this product. 13. DISPOSAL CONSIDERATIONS RCRA (Resource Conservation and Recovery Act) Classification: Specifically Listed Not applicable.
- Page 113 EMKARATE RL 32-3MAF Material Safety Data Sheet Date(s): : 2005-09-12 15:50:00 Version 3 MSDS#: 808802 14. TRANSPORT INFORMATION Department of Transportation: Not regulated. TDG (Transportation of Dangerous Goods): Not regulated. Not classified in RID/ADR - ADNR - IMDG - ICAO/IATA-DGR. 15.
- Page 114 EMKARATE RL 32-3MAF Material Safety Data Sheet Date(s): : 2005-09-12 15:50:00 Version 3 MSDS#: 808802 Immediate Delayed Fire Pressure Reactivity 16. OTHER INFORMATION We assigned NFPA ratings and HMIS ratings to this product based on the hazards of its ingredient(s). Because the customer is most aware of the application of the product, he must ensure that the proper personal protective equipment (PPE) is provided consistent with information contained in the product MSDS.
- Page 115 EMKARATE RL 32-3MAF Material Safety Data Sheet Date(s): : 2005-09-12 15:50:00 Version 3 MSDS#: 808802 The following sections contain revisions or new statements: The information herein is given in good faith but no warranty, expressed or implied, is made. (R) is a Registered Trademark of ICI Americas.
- Page 116 Safety data sheets Freezing agent Air handling unit X-CUBE X2 / X-CUBE X2 compact...
- Page 117 Safety Data Sheet ™ ® DuPont Suva 410A Refrigerant Version 2.0 Revision Date 03/23/2015 Ref. 130000050990 This SDS adheres to the standards and regulatory requirements of the United States and may not meet the regulatory requirements in other countries. SECTION 1. PRODUCT AND COMPANY IDENTIFICATION ™...
- Page 118 Safety Data Sheet ™ ® DuPont Suva 410A Refrigerant Version 2.0 Revision Date 03/23/2015 Ref. 130000050990 Label content Pictogram Signal word : Warning Hazardous warnings : Contains gas under pressure; may explode if heated. Hazardous prevention : Protect from sunlight. Store in a well-ventilated place. measures Other hazards Misuse or intentional inhalation abuse may lead to death without warning.
- Page 119 Safety Data Sheet ™ ® DuPont Suva 410A Refrigerant Version 2.0 Revision Date 03/23/2015 Ref. 130000050990 SECTION 4. FIRST AID MEASURES General advice : Never give anything by mouth to an unconscious person. When symptoms persist or in all cases of doubt seek medical advice. Inhalation : Remove from exposure, lie down.
- Page 120 Safety Data Sheet ™ ® DuPont Suva 410A Refrigerant Version 2.0 Revision Date 03/23/2015 Ref. 130000050990 Specific hazards : Cylinders are equipped with pressure and temperature relief devices, but may still rupture under fire conditions. Decomposition may occur. Contact of welding or soldering torch flame with high concentrations of refrigerant can result in visible changes in the size and colour of the torch flame.
- Page 121 Safety Data Sheet ™ ® DuPont Suva 410A Refrigerant Version 2.0 Revision Date 03/23/2015 Ref. 130000050990 Environmental precautions : Should not be released into the environment. In accordance with local and national regulations. Spill Cleanup : Evaporates. Ventilate area using forced ventilation, especially low or enclosed places where heavy vapors might collect.
- Page 122 Safety Data Sheet ™ ® DuPont Suva 410A Refrigerant Version 2.0 Revision Date 03/23/2015 Ref. 130000050990 Engineering controls : Use sufficient ventilation to keep employee exposure below recommended limits. Local exhaust should be used when large amounts are released. Mechanical ventilation should be used in low or enclosed places. Refrigerant Concentration monitors may be necessary to determine vapor concentrations in work areas prior to use of torches or other open flames, or if employees are entering enclosed areas.
- Page 123 Safety Data Sheet ™ ® DuPont Suva 410A Refrigerant Version 2.0 Revision Date 03/23/2015 Ref. 130000050990 Odor : slight, ether-like Odor threshold : No applicable data available. : neutral Melting point/range : No applicable data available. Boiling point/boiling range : Boiling point -51.4 °C (-60.5 °F) Flash point does not flash...
- Page 124 Safety Data Sheet ™ ® DuPont Suva 410A Refrigerant Version 2.0 Revision Date 03/23/2015 Ref. 130000050990 Viscosity, kinematic No applicable data available. Viscosity No applicable data available. % Volatile : 100 % SECTION 10. STABILITY AND REACTIVITY Reactivity Stable at normal ambient temperature and pressure. Chemical stability Stable under recommended storage conditions.
- Page 125 Safety Data Sheet ™ ® DuPont Suva 410A Refrigerant Version 2.0 Revision Date 03/23/2015 Ref. 130000050990 Carcinogenicity Not classifiable as a human carcinogen. Overall weight of evidence indicates that the substance is not carcinogenic. Mutagenicity Animal testing did not show any mutagenic effects. Evidence suggests this substance does not cause genetic damage in cultured mammalian cells.
- Page 126 Safety Data Sheet ™ ® DuPont Suva 410A Refrigerant Version 2.0 Revision Date 03/23/2015 Ref. 130000050990 Mutagenicity Animal testing did not show any mutagenic effects. Tests on bacterial or mammalian cell cultures did not show mutagenic effects. Reproductive toxicity No toxicity to reproduction Animal testing showed no reproductive toxicity.
- Page 127 Safety Data Sheet ™ ® DuPont Suva 410A Refrigerant Version 2.0 Revision Date 03/23/2015 Ref. 130000050990 96 h EC50 Algae 142 mg/l 48 h EC50 Daphnia (water flea) 652 mg/l 30 d NOEC Fish (unspecified species) 65.8 mg/l Environmental Fate Difluoromethane (HFC-32) Biodegradability 5 % OECD Test Guideline 301D...
- Page 128 Safety Data Sheet ™ ® DuPont Suva 410A Refrigerant Version 2.0 Revision Date 03/23/2015 Ref. 130000050990 SECTION 15. REGULATORY INFORMATION TSCA : On the inventory, or in compliance with the inventory SARA 313 Regulated : This material does not contain any chemical components with known CAS Chemical(s) numbers that exceed the threshold (De Minimis) reporting levels established by SARA Title III, Section 313.
- Page 129 Safety Data Sheet ™ ® DuPont Suva 410A Refrigerant Version 2.0 Revision Date 03/23/2015 Ref. 130000050990 13 / 13...
- Page 130 Safety data sheets Air handling unit X-CUBE X2 / X-CUBE X2 compact...
- Page 131 Germany TROX GmbH Phone: +49 (0) 2845 2020 Heinrich-Trox-Platz +49 2845 202-265 47504 Neukirchen-Vluyn, Ger- E-mail: trox@trox.de many http://www.troxtechnik.com © TROX GmbH 2019...
Need help?
Do you have a question about the X-CUBE X2 and is the answer not in the manual?
Questions and answers