Advertisement
INDEX
Page Contents
2
Safety Information
3
Unpacking and preparation
4
Installation and start-up
5
Control panel
7
Maintenance
13
Technical information
14
Cause and solution of problems
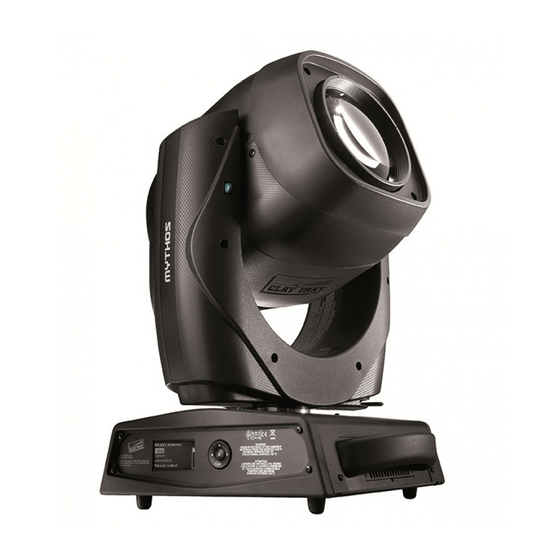
MYTHOS
MYTHOS
INSTRUCTION MANUAL
Congratulations on choosing a Claypaky product
We thank you for your custom.
Please note that this product, as all the others in the rich
Claypaky range, has been designed and made with total
quality to ensure excellent performance and best meet your
expectations and requirements.
1
2
C61391
C61396
Advertisement
Table of Contents

Related Manuals for Clay Paky MYTHOS2


Summary of Contents for Clay Paky MYTHOS2
- Page 1 MYTHOS C61391 MYTHOS C61396 INSTRUCTION MANUAL INDEX Congratulations on choosing a Claypaky product Page Contents We thank you for your custom. Please note that this product, as all the others in the rich Safety Information Claypaky range, has been designed and made with total quality to ensure excellent performance and best meet your Unpacking and preparation expectations and requirements.
-
Page 2: Safety Information
SAFETY INFORMATION SAFETY INFORMATION IMPORTANT: Claypaky recommends you carefully read and keep the safety information on this product, also available in digital format at the following link: http://www.claypaky.it/en Ref: [FIS00H – Safety Information Mythos - Supersharpy] INFORMAZIONI DI SICUREZZA IMPORTANTE: Claypaky raccomanda di leggere accuratamente e conservare le informazioni di sicurezza relative a questo prodotto, sempre reperibili in versione digitale al seguente link: http://www.claypaky.it/en/download Rif: [FIS00H –... -
Page 3: Unpacking And Preparation
UNPACKING AND PREPARATION 2 x 183102/805 Packing contents - Fig. 1 UNLOCKED LOCKED LOCKED UNLOCKED PAN Mechanism Lock and Release (every 90°) - Fig. 2 TILT Mechanism Lock and Release (every 45°) - Fig. 3 MYTHOS MYTHOS... -
Page 4: Installation And Start-Up
INSTALLATION AND START-UP Installing the projector - Fig. 4 WARNING: with the exception of when the projector is positioned on the floor, the safety cable must be fitted. (Cod. 105041/003 available on request). The projector can be installed on the floor resting on special rubber feet, on a truss or on the ceiling or wall. This must be securely fixed to the support structure of the projector and then connected to the fixing point at the centre of the base. -
Page 5: Control Panel
CONTROL PANEL Mains Connecting to the mains supply - Fig. 6 Connecting to the control signal line (DMX) - Fig. 7 Use a cable conforming to specifications EIA RS-485: 2-pole twisted, shielded, 120Ohm characteristic impedance, 22-24 AWG, low capacity. Do not use microphone cable or other cable with characteristics differing from those specified. - Page 6 Reversal of the display - Fig. 9 To activate this function, press UP and DOWN keys simultaneously while the display is in the rest mode. This status will be memorised and maintained even for the next time it will be switched on. To return to the initial state, repeat the operation all over again. Setting the projector starting address On each projector, the starting address must be set for the control signal (addresses from 1 to 512).
-
Page 7: Maintenance
MAINTENANCE 1/4 Turn 1/4 Turn Locking and releasing Pan and Tilt movements - Refer to the instructions in the UNPACKING AND PREPARATION section. Opening the head covers - Fig. 10. Closing the head covers - Fig. 11. Continue MYTHOS MYTHOS... - Page 8 Lower Side Lower Side NOTE: keep a careful Lower Side cleaning of the ''CMY/colour Upper Side filters assembly'' to prevent rapid deterioration. Periodical cleaning - Fig. 12 To ensure optimal operation and performance for a long time it is essential to periodically clean the parts subject to dust and grease deposits. The frequency with which the following operations are to be carried out depends on various factors, such as the amount of the effects and the quality of the working environment (air humidity, presence of dust, salinity, etc.).
- Page 9 Cleaning of the filters - Fig. 13. Continue MYTHOS MYTHOS...
- Page 10 Lower Side remove the lamp contacts protection remove the fan unscrew a bit the 4 nuts to facilitate the lamp replacement pay attention to the right position of the lamp contacts (see pictures) 45° pay attention to the right position of the lamp contacts (see pictures) Lamp change - Fig 14.
- Page 11 GOD007-002 GOD007-001 GOD007-003 GOD007-004 GOD007-005 GOD007-006 Rotating gobo wheel - Fig. 15. ATTENTION: - Before use custom gobos contact Claypaky - The original gobos have a special coating designed specifically to resist to the high temperatures - The rotating gobo wheel only use dichroic glass gobos (it is not possible to use metal gobos) - For more information contact Claypaky Static gobo wheel cod.
- Page 12 Battery removal - Fig. 17 This product contains a rechargeable lithium iron tetraphosphate battery. To preserve the environment, please dispose the battery at the end of its life according to the regulation in force. LiFePO4 MYTHOS MYTHOS...
-
Page 13: Technical Information
• IP20 • 2 indexable and interchangeable rotating • Protected against the entry of solid bodies prisms (8-facet and linear prism) Light source Mythos2 larger than 12mm (0.47”). • Frost unit to soften the beam edge 440W discharge lamp • No protection against the entry of liquids. -
Page 14: Cause And Solution Of Problems
CAUSE AND SOLUTION OF PROBLEMS THE PROJECTOR WILL NOT SWITCH ON PROBLEMS ELECTRONICS NON-OPERATIONAL DEFECTIVE PROJECTION POSSIBLE CAUSES CHECKS AND REMEDIES REDUCED LUMINOSITY No mains supply. Check the power supply voltage. Lamp exhausted or defective. Replace the lamp. (See instructions). Signal transmission cable faulty or disconnected. - Page 16 CLAYPAKY - Via Pastrengo, 3/b - 24068 Seriate (BG) Italy - Tel. +39-035-654311 - Fax +39-035-301876 - www.claypaky.it S.p.A.
Need help?
Do you have a question about the MYTHOS2 and is the answer not in the manual?
Questions and answers