Advertisement
Quick Links
Advertisement

Related Manuals for Elation CHORUS LINE 16


Summary of Contents for Elation CHORUS LINE 16
- Page 1 CHORUS LINE 16™ user manual...
- Page 2 +31 45 546 85 66 | +31 45 546 85 96 fax | www.elationlighting.eu | info@elationlighting.eu Elation Professional Mexico | AV Santa Ana 30 | Parque Industrial Lerma, Lerma, Mexico 52000 +52 (728) 282-7070 D O C U M E N T V E R S I O N Due to additional product features and/or enhancements, an updated version of this document may be available online.
-
Page 3: Table Of Contents
C O N T E N T S General Information Limited Warranty (USA Only) Safety Guidelines Maintenance Guidelines Fixture Overview Installation Guidelines System Menu DMX Channel Functions and Values Color Macro Chart Pixel Control Technical Specifications Optional Accessories... -
Page 4: General Information
Please recycle whenever possible. CUSTOMER SUPPORT Elation Professional provides a customer support line to provide set up help and answer any set up or operation questions. You may also visit us on the web at www.elationlighting.com... -
Page 5: Limited Warranty (Usa Only)
B. For warranty service, send the product only to the Elation Professional factory. All shipping charges must be pre-paid. If the requested repairs or service (including parts replacement) are within the terms of this warranty, Elation Professional will pay return shipping charges only to a designated point within the United States. -
Page 6: Safety Guidelines
This fixture is a sophisticated piece of electronic equipment. To guarantee a smooth operation, it is important to follow all instructions and guidelines in this manual. Elation Professional is not responsible for injury and/or damages resulting from the misuse of this fixture due to the disregard of the information printed in this manual. - Page 7 S A F E T Y G U I D E L I N E S DO NOT TOUCH the fixture housing during operation. Turn OFF the power and allow approximately 15 minutes for the fixture to cool down before serving. DO NOT shake fixture, avoid brute force when installing and/or operating fixture.
-
Page 8: Maintenance Guidelines
Regular inspections are recommended to insure proper function and extended life. There are no user serviceable parts inside this fixture, please refer all other service issues to an authorized Elation service technician. Should you need any spare parts, please order genuine parts from your local Elation dealer. -
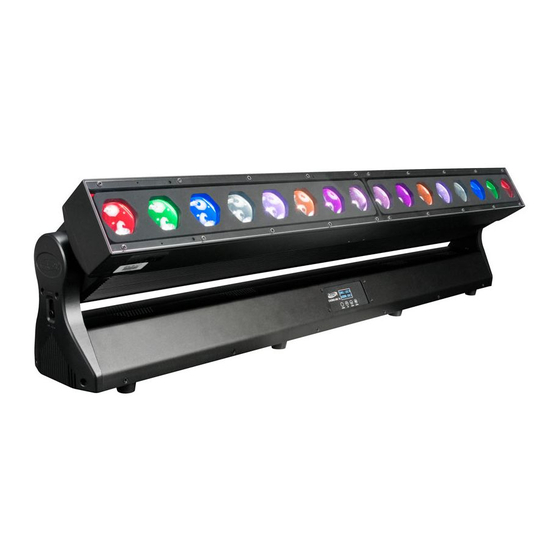
Page 9: Fixture Overview
F I X T U R E O V E R V I E W 1. LCD Menu Display, MENU, UP, DOWN, ENTER Buttons 2. Tilt Lock 3. Fuse 4. Power IN/OUT 5. 5pin DMX IN/OUT 6. RJ45 Ethernet IN/OUT INCLUDED ITEMS (2) Replacement Lens Covers (2) Omega Brackets... - Page 10 I N S T A L L A T I O N I N S T R U C T I O N S FLAMMABLE MATERIAL WARNING Keep fixture minimum 5.0 feet (1.5m) away from flammable materials and/or pyrotechnics. ELECTRICAL CONNECTIONS A qualified electrician should be used for all electrical connections and/or installations.
- Page 11 I N S T A L L A T I O N I N S T R U C T I O N S CLAMP MOUNTING The fixture can be placed on the flat surface or truss mounted. When mounting this fixture to truss be sure to secure (2) appropriately rated clamps (not included) to the (2) Omega Brackets (included) Be sure to attach the Safety Cable (included) to the fixture using the safety cable rigging points integrated into the bottom of the fixture.
- Page 12 I N S T A L L A T I O N I N S T R U C T I O N S OVERHEAD RIGGING Overhead rigging requires extensive experience, including amongst others calculating working load limits, installation material being used, and periodic safety inspection of all installation material and the fixture.
-
Page 13: System Menu
S Y S T E M M E N U The fixture comes with an easy to navigate system menu. The control panel (see image below) located on the back of the fixture provides access to the main system menu and is where all necessary system adjustments are made to the fixture. - Page 14 SYSTEM MENU Supports Software Version: ≥ V1.12 Features are subject to change without any prior written notice. MAIN MENU SUB MENU OPTIONS / VALUES DESCRIPTION (Default Settings in BOLD) Address Set DMX Address 001 ~ XXX DMX Address Setting Standard 18CH (16bit) UserMode Basic...
- Page 15 D M X C H A N N E L F U N C T I O N S A N D V A L U E S Supports Software Versions: ≥ V1.12 Features are subject to change without any prior written notice. *Direction of effects and Pixel Control depends on orientation of the fixture head and Tilt/Pixel Flip settings.
- Page 16 Supports Software Versions: ≥ V1.12 Features are subject to change without any prior written notice. *Direction of effects and Pixel Control depends on orientation of the fixture head and Tilt/Pixel Flip settings. MODE / CHANNEL VALUE FUNCTION DEFAULT SNAP BASIC STANDARD EXTEND CH: 16...
- Page 17 Supports Software Versions: ≥ V1.12 Features are subject to change without any prior written notice. *Direction of effects and Pixel Control depends on orientation of the fixture head and Tilt/Pixel Flip settings. MODE / CHANNEL VALUE FUNCTION DEFAULT SNAP BASIC STANDARD EXTEND CH: 16...
- Page 18 Supports Software Versions: ≥ V1.12 Features are subject to change without any prior written notice. *Direction of effects and Pixel Control depends on orientation of the fixture head and Tilt/Pixel Flip settings. MODE / CHANNEL VALUE FUNCTION DEFAULT SNAP BASIC STANDARD EXTEND CH: 16...
- Page 19 Supports Software Versions: ≥ V1.12 Features are subject to change without any prior written notice. *Direction of effects and Pixel Control depends on orientation of the fixture head and Tilt/Pixel Flip settings. MODE / CHANNEL VALUE FUNCTION DEFAULT SNAP BASIC STANDARD EXTEND CH: 16...
- Page 20 Supports Software Versions: ≥ V1.12 Features are subject to change without any prior written notice. *Direction of effects and Pixel Control depends on orientation of the fixture head and Tilt/Pixel Flip settings. MODE / CHANNEL VALUE FUNCTION DEFAULT SNAP BASIC STANDARD EXTEND CH: 16...
- Page 21 COLOR MACRO CHART VALUES 1-4 DMX VALUES 53-56 DMX VALUES 105-108 DMX VALUES 157-160 DMX VALUES 209-212 Red= Red= Red= Red= Red= Green= Green= Green= Green= Green= Blue= Blue= Blue= Blue= Blue= DMX VALUES 5-8 DMX VALUES 57-60 DMX VALUES 109-112 DMX VALUES 161-164 DMX VALUES 213-216 Red=...
- Page 22 P I X E L C O N T R O L The starting pixel position can be flipped to the opposite side of the fixture by selecting FLIP mode in the FUNCTION / PIXEL sub menu from the control panel. The fixture features full pixel control in Extended DMX channel mode.
- Page 23 T E C H N I C A L S P E C I F I C A T I O N S SOURCE (16) 40W 4-in-1 RGBW LEDs 50,000 Hour Average LED Life* *May vary depending on several factors including but not limited to: Environmental Conditions, Power/Voltage, Usage Patterns (On-Off Cycling), Control and Dimming.
- Page 24 DIMENSIONAL DRAWINGS Specifications and improvements in the design of this unit and this manual are subject to change without any prior written notice.
- Page 25 O P T I O N A L A C C E S S O R I E S ORDER CODE ITEM DRCCL16 9-Pack Road Case for Chorus Line 16 NARROW CLAMP Heavy Duty Wrap Around Hook Style Clamp SCABLE 60 60 lbs.
Need help?
Do you have a question about the CHORUS LINE 16 and is the answer not in the manual?
Questions and answers