Advertisement
Quick Links
Advertisement

Related Manuals for BROSA Kaneko Console Table


Summary of Contents for BROSA Kaneko Console Table
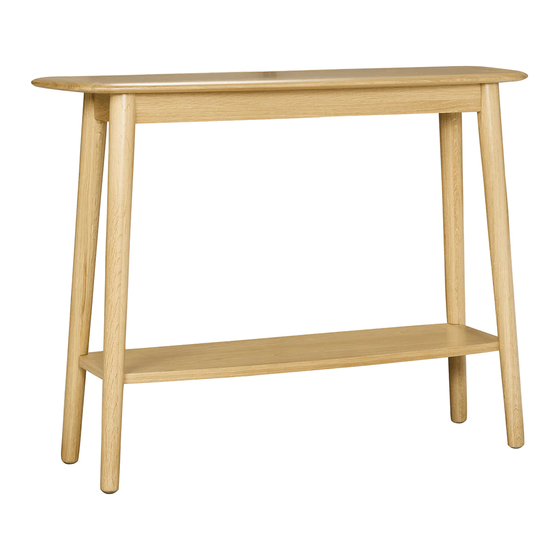
- Page 1 ASSEMBLY GUIDE Kaneko Console Table...
- Page 2 Components Upon unpacking your table from it’s delivery box, you should have the separate pieces shown below. Follow the steps on the next pages to assemble your new table. Leg x 4 Table top x 1 Shelf x 1 Hardware A x 4 B x 4 C x 4...
- Page 3 Insert the cross dowel into the top hole of the leg Step 1 so that the mark faces the bolt hole. Repeat for all four legs. A x 4 Screw the threaded rod into the corner hole. Step 2 Screw the steel dowel into the lower hole of the leg.
- Page 4 Place the table top on a at surface with underside Step 3 facing up. Fit a leg into a corner with the rod pro- truding from the metal connector. Fit a washer (C), a lock washer then a hex nut to the threaded bold and tighten with the spanner (F).
- Page 5 With the help of a partner attach the shelf to the leg. Step 4 While holding the shelf parallel to the table top, screw a grub screw into the hole to x it. Keep holding the shelf. H x 1...
- Page 6 While holding the shelf parallel to the table top, t a Step 5 leg into the diagonal corner with the rod protruding from the metal connector. Fit a at washer (C), a lock washer then a hex nut to the threaded bold and tighten with the spanner (F).
- Page 7 Attach the remaining legs and x them the same Step 6 way as in previous step. C x 2 D x 2 E x 2 F x 1 H x 2...
- Page 8 Fix a mounting plate (aa) to the back corner of the Step 7 table using at head screws (cc). aa x 1 cc x 2 Fix another mounting plate (aa) to the wall. Connect Step 8 two plates with the restraint strap (bb). Tighten the strap to prevent the table from tipping.
- Page 9 Enjoy your new table! Step 9...
Need help?
Do you have a question about the Kaneko Console Table and is the answer not in the manual?
Questions and answers