Advertisement
Quick Links
Advertisement

Related Manuals for Laser Dollhouse Designs Little Ann Assembly Instruction


Summary of Contents for Laser Dollhouse Designs Little Ann Assembly Instruction
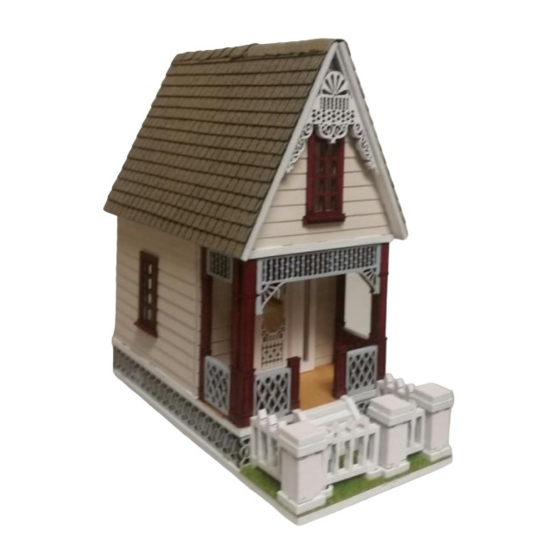
- Page 1 The Little Ann Assembly Instruction By Laser Dollhouse Designs...
- Page 2 Parts for assembly Floor and 2 Floors Assembly 2A, 2B & Fretwork Subfloor Door Assembly Assembly Roof Assembly S1 thru S4 Fence Assembly Stairs Plexiglas Window Frames Floor Walls 1A , 1E, & 1F Base Floor Porch rails 1A, 1B & 1C...
- Page 3 Step 1. locate the Base floor and position as seen in Figure 1 Figure 1 Step 2. Locate Subfloor Assembly S1 thru S4 and insert S1 thru S4 tabs into Base floor matching Slots S1-S4 as seen in Figure 2 Figure 2...
- Page 4 Step 3. Take the First floor marked 1A thru 1F and insert on top of assembled subfloor by aligning open slots to tabs. Refer to figure 3. Step 4. Take 1A Wall and insert into slot 1A on first floor. Then insert door assembly thru cutout for the door opening.
- Page 5 Step 5. Take the two rectangle and one half circle Plexiglas cutouts and insert into openings from the interior side of wall. Finally secure by placing the interior door frame in place. Refer to figure 6, 7 and 8. Figure 6 Figure 7 Figure 8...
- Page 6 Step 6. Take the porch rail 1A, 1B and 1C and insert into slots 1A-1C. Also place walls 1E and 1F into respective slots on first floor. Refer to figure 9. Figure 9...
- Page 7 Step 7. Place window frame on exterior of walls 1E and 1F Refer to figure 10. Figure 10 Step 8. Place window Plexiglas cutouts into cutouts of walls 1E and 1F from the interior side and then place interior frames to secure. See figures 11 and 12. Figure12 Figure11...
- Page 8 Step 9. Secure first floor by inserting second floor on top and aligning cutout tabs to slots on top of first floor rails and walls. See figures 13 Figure13 Step 10. Place second floor walls 2A and 2b into slots provided.
- Page 9 Step 12. Align and place one side of the roof making sure the cut slots closest to the top are up as in figure 16 Figure16 Note: Two front cutout, The most forward cutouts closest to the top is right side up facing.
- Page 10 Step 14. Now add the other side of the roof by matching the tabs and slots. Refer to figure 18 Figure18 Step 15. Locate the post as seen in figure 19. This post fits to the front right forward corner. Place fence rail as seen in figure 20 into the side of post and into base.
- Page 11 Step 16. Locate the fence rail as seen in figure 22 and add to opening in post. Next locate post as seen in figure 23 and insert fence and post to base. The circle to hold functioning gate should be at bottom. Figure23 Figure22 Step 17.
- Page 12 Step 18. Take stairs assembly and place within fence as seen in figure 25 Figure25 Step 19. Install shingles to house. Shingles align first set to bottom of roof panel. Next shingle aligns to the top line of lower shingles as seen in figure 26. Figure26...
- Page 13 Laser Dollhouse Designs www.laserdollhouses.com Email: laserdollhouses@aol.com...