Advertisement
Quick Links
Advertisement

Related Manuals for Spirit Commercial CR800ENT


Summary of Contents for Spirit Commercial CR800ENT
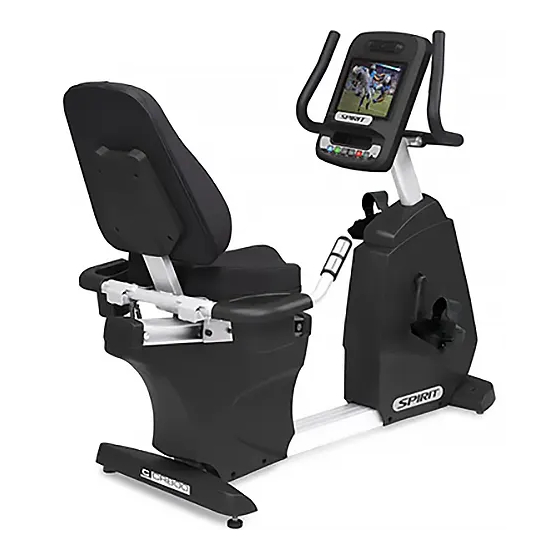
- Page 1 CR800ENT FITNESS BIKE OWNER’S MANUAL...
- Page 2 Spirit Fitness...
-
Page 3: Table Of Contents
TABLE OF CONTENTS IMPORTANT SAFETY INSTRUCTIONS IMPORTANT ELECTRICAL INSTRUCTIONS IMPORTANT OPERATION INSTRUCTIONS PRODUCT REGISTRATION CR800ENT ASSEMBLY INSTRUCTIONS CONSOLE OPERATION TOUCHSCREEN OPERATION PROGRAMMING THE CONSOLE GENERAL MAINTENANCE MANUFACTURER’S LIMITED WARRANTY Thank you for purchasing our product, please save these instructions. Please do not perform or attempt any customizing, adjustments, repair or maintenance that is not described in this manual. - Page 4 Congratulations on your new fitness bike and welcome to the Spirit Fitness family! Thank you for your purchase of this quality fitness bike from Spirit Fitness. Your new fitness bike was manufactured by one of the leading fitness manufacturers in the world and is backed by one of the most comprehensive warranties available.
-
Page 5: Important Safety Instructions
IMPORTANT SAFETY Maximum User Weight: 450 lbs • This appliance is not intended for use by persons with • INSTRUCTIONS reduced physical, sensory or mental capabilities, or lack of experience and knowledge, unless they have been WARNING given supervision or instruction concerning use of the appliance by a person responsible for their safety. -
Page 6: Important Operation Instructions
IMPORTANT OPERATION INSTRUCTIONS NEVER operate this fitness bike without reading and completely understanding the results of any operational • change you request from the computer. Understand that changes in resistance do not occur immediately. Set your desired resistance level on the computer •... - Page 7 REGISTER YOUR PURCHASE The self-addressed product registration card must be completed in full and returned to Spirit Fitness. You can also go to http://www.spiritfitness.com/commercialwarrantyregistration.html under the Support tab to register online. www.spiritfitness.com...
- Page 8 CR800ENT PRE-ASSEMBLY UNPACKING TOOLS INCLUDED: 1. Cut the straps, then along the dotted line on the bottom of the box; lift the box over ‰ 14/15mm Wrench the unit and unpack. ‰ 12/14mm Wrench ‰ Phillips Screwdriver 2. Locate the hardware package. The hardware is separated into four steps. Remove the tools first.
- Page 9 CR800ENT STEP ONE HARDWARE FOR STEP 1 PART TYPE DESCRIPTION 3/8”X2-1/4” BOLT BOLT 3/8”X2” FLAT WASHER 3/8”X19 FLAT WASHER 3/8”X1” NYLON NUT 3/8” BOLT 3/8X2-3/4” 1. Install the REAR STABILIZER (7) onto the MAIN FRAME with 4 BOLTS (65) and 4 WASHERS (84).
- Page 10 CR800ENT STEP TWO HARDWARE FOR STEP 2 PART TYPE DESCRIPTION 3/8”X19 MM FLAT WASHER SCREW M5X15 BOLT 3/8”X3/4” 1. Install the SEAT BACK FRAME (5) onto the SEAT CARRIAGE (4) with 6 BOLTS (176) and FLAT WASHERS (77). 2. Install the SEAT BACK COVER (128) onto the Seat Back with 4 PHILLIPS HEAD SCREWS (136).
- Page 11 CR800ENT STEP THREE HARDWARE FOR STEP 3 PART TYPE DESCRIPTION 5/16”X5/8” BOLT WASHER 5/16”X18 MM SPLIT WASHER 5/16” CURVED WASHER 5/16”X3/4” 1. Install the CONSOLE MAST COVER (31) onto the CONSOLE MAST (2), making sure it is facing the correct direction as in the picture below. Run the...
- Page 12 CR800ENT STEP FOUR HARDWARE FOR STEP 4 PART TYPE DESCRIPTION M6X18MM SCREW SCREW M5X12MM SCREW 4MMX16MM 1. Install the front and rear STABILIZER COVERS (32 & 37) and secure to the frame with 4 SCREWS (99). 2. Install the left and right CUP HOLDERS (39 &...
-
Page 13: Console Operation
CR800ENT CONSOLE OPERATION www.spiritfitness.com... - Page 14 Fan to keep you cool Large touchscreen LCD Ten innovative programs offer a variety of workouts Convenient cargo compartment for keys, phone, or MP3 player Easy-touch control buttons Spirit Fitness...
- Page 15 STARTING OPERATION Plug in the power cord located at the front base of the unit. When the power is turned on, the screen will show the initial image and then enter the Home screen. Home screen: Begin operation by touching the Quick operating buttons are convenient for basic bike functions.
- Page 16 SETTINGS Press the “Home” button ten consecutive repetitions to enter the Maintenance suite. The two most commonly used menus for setting up the exercise machine are described below; the TV Setup and Maintenance menus. For information on other sections of the Maintenance suite refer to the technical service manual or call Spirit service.
- Page 17 TV SETUP 1. Begin by selecting either TV or HDMI as the tuner source. 2. Press OSD Menu. The first highlighted item on the menu is Air/Cable and then Cable or Air afterward. Press the OSD Enter to change the selection between Cable and Air Signal source (usually Cable).
- Page 18 MAINTENANCE MENU The Default language setup allows you to select the main • language that will be shown when the console is turned on. You are able to select the language in the Home menu, but once the user finishes using the machine the console will return to this default language.
- Page 19 INTERNET MANAGER 1. Remove a link by pressing the button of the site you want to remove for two seconds. A pop-up window will ask you to confirm the removal. 2. To add a website press the dotted outline box. A pop-up window will ask you to enter the web address and upload a picture for the final button if you wish.
- Page 20 WIFI/ETHERNET SETUP Press the desired button for setting up Wifi or Ethernet. WIFI SETUP Turn Wifi on and press scan for available Wifi connections. Press desired connection and follow the on-screen directions. ETHERNET SETUP Press Ethernet Configuration to set Select DHCP to search for connection up a new connection.
- Page 21 BLUETOOTH PAIRING PROCEDURE 1. Press the Blue Tooth (BT) button on the bottom left of the screen. 2. The BT pop-up screen will appear. Turn on Phone/tablet BT and then press Pair Mode on ENT Menu. 3. The menu with show Entering Pairing mode and the phone will show A2DP as an available device.
-
Page 22: Touchscreen Operation
TOUCHSCREEN OPERATION LANGUAGE When you press the Language button on Home screen, it enters the menu with all language options. There are 12 languages to choose from. Touch the desired language and the system will return to the Home screen which will now be in the chosen language. - Page 23 When the TV button on the Home screen is pressed, it directly enters TV interface. Now you can enjoy TV programs. If you want to enjoy TV while exercising, press Start button at front of the bike to initiate Quick Start or press Programs to select a workout. You can change the TV channels by pressing the channel up/ down buttons on the right side of the screen.
- Page 24 INTERNET When the Internet button on the Home page is pressed, you are directed to Internet interface. There are 6 basic internet sites to choose from. You may change or add other sites through the Maintenance program (more on this later in the manual in the System Maintenance Suite section).
- Page 25 FUNCTIONS OF THIS BIKE The Touchscreen is used for operating all functions of the bike. You can directly touch any button on the screen or through quick button on the bottom to control functions. On the lower portion of the console there is the Start button to begin the workout, Stop button to pause/stop programs, Level button to change workload and a Fan button to turn the fan on or off.
- Page 26 DISPLAY OPTIONS SIMPLE The default display at the start of a program is a Simple display. The profile window shows the work level graphically. All your workout values are displayed on the bottom of the screen. Some of the data windows have a + sign at the top indication more data available.
- Page 27 DASHBOARD The Dashboard display shows a larger display area of button information. STOP BUTTON When using the Stop button to end the program, it enters the summary screen. On the summary screen, all accumulated values concerning the workout are displayed. You can touch the Home button at left top or press Stop button to return to the home screen.
- Page 28 HEART RATE FEATURE The pulse (Heart Rate) on the screen shows the current value of your heart rate in beats per minute. You must use both left and right stainless steel sensors to pick up your pulse. Pulse values are displayed anytime the computer is receiving a Grip Pulse signal.
-
Page 29: Programming The Console
PROGRAMMING THE CONSOLE Each of the programs can be customized with your personal information and changed to suit your needs. Some of the information asked for is necessary to ensure the readouts are correct. You will be asked for your Age and Weight. Entering your Age ensures that the Heart Rate bar graph shows the correct number. Your Age is also necessary during the Heart Rate control program to ensure the correct settings are in the program for your Age. - Page 30 Message Window. If you start a program without changing the settings, the default, or pre-saved settings will be used. The Spirit Fitness CR800ENT offers ten preset programs: Manual, Hills, Fat Burn, Cardio, Strength, Interval, HR, Custom, Fitness Test, and Constant Power.
- Page 31 MANUAL The level of resistance is controlled by the user. Increase or decrease levels at any time during your workout. HILL This program follows a triangle or pyramid type of gradual progression from approximately 10% of maximum effort (the level that you chose before starting this program) up to a maximum effort which lasts for 10% of the total workout time, then a gradual regression of resistance back to approximately 10% of maximum effort.
- Page 32 STRENGTH This program has a gradual progression of resistance up to 100% of maximum effort that is sustained for 25% of the workout duration. This will help build strength and endurance in the lower body and glutes. Cool down follows. INTERVAL This program takes you through high levels of intensity followed by recovery periods of low intensity.
- Page 33 CUSTOM You will create the desired resistance for each of the 20 segments of the program using the pop-out keyboard on this screen After the program has started, you still have the ability of changing the resistance levels whenever you desire. 1.
- Page 34 FIT TEST PROGRAM The Fit Test is based on the YMCA protocol, which is a sub-maximal VO2 test based on your heart rate. The test consists of up to 4 stages. The resistance level increases at the end of each stage until you reach 85% of the projected maximum heart rate or 2 consecutive stages over 110 beats per minute.
- Page 35 After The Test: Cool down for about one to three minutes. • Take note of your score because the console will automatically return to the start-up mode after a few minutes. • What Your Score Means: VO2MAX CHART FOR MALES AND VERY FIT FEMALES VO2MAX CHART FOR FEMALES AND DECONDITIONED MALES www.spiritfitness.com...
-
Page 36: General Maintenance
CONSTANT POWER A watts program is a controllable constant power whose level adjusts when the speed is changed. Choose either faster pedalling at a lower resistance level or slower pedaling at a higher resistance level. GENERAL MAINTENANCE Wipe down all areas in the sweat path with a damp cloth after each workout. If a squeak, thump, clicking or rough feeling develops the main cause is most likely one of two reasons: 1. - Page 37 FITNESS BIKE WARRANTY EFFECTIVE JANUARY 1, 2017 Spirit Fitness warrants this fitness bike for a period of time listed below from the date of sale, as determined by sale receipt, or in the absence of a sales receipt eighteen (18) months from the original factory shipping date. Spirit Fitness’ responsibilities include providing new or remanufactured parts, at Spirit Fitness’...
- Page 38 EXCLUSIONS This warranty does not cover the following: 1. CONSEQUENTIAL, COLLATERAL, OR INCIDENTAL DAMAGES SUCH AS PROPERTY DAMAGE AND INCIDENTAL EXPENSES RESULTING FROM ANY BREACH OF THIS WRITTEN OR ANY IMPLIED WARRANTY. NOTE: Some states do not allow the exclusion or limitation of incidental or consequential damages, so this limitation or exclusion may not apply to you.
- Page 39 SERVICE Keep your bill of sale. Twelve (12) months from the date on the bill of sale or eighteen (18) months from the date of factory shipping as determined by the serial number establishes the labor warranty period should service be required. If service is performed, it is in your best interest to obtain and keep all receipts. This written warranty gives you specific legal rights.
- Page 40 800.258.4555 Spirit Fitness spiritservice@spiritfitness.com 3000 Nestle Road www.spiritfitness.com Jonesboro, AR 72401 CR800ENT Owners Manual © 2018 All Rights Reserved Revision: 02.22.2018...
Need help?
Do you have a question about the CR800ENT and is the answer not in the manual?
Questions and answers